EUTECH INSTRUMENTS ALPHA CON 190 18 DIN CONDUCTIVITY CONTROLLERTRANSMITTER, Instruction Manual
The EUTECH INSTRUMENTS ALPHA CON 190 18 DIN CONDUCTIVITY CONTROLLER/TRANSMITTER is a high-quality device for monitoring conductivity levels. Users can easily set up and operate the device with the help of the Instruction Manual available for free download from manualshive.com. Stay informed and optimize your processes with this user-friendly tool.
Share
Download


Reviews:
No comments
Related manuals for ALPHA CON 190 18 DIN CONDUCTIVITY CONTROLLERTRANSMITTER

ACS355 series
Brand: ABB Pages: 30

2800 Series
Brand: W.E. Anderson Pages: 4

JT220M
Brand: JETStream Pages: 19

ZME U UZB1
Brand: Z-Wave Pages: 2

HEX31WP-TX
Brand: BluStream Pages: 4

LTHZ
Brand: M-system Pages: 2

CCR24PNA
Brand: Toughbook Arbitrator Pages: 8

M3SXR
Brand: M-system Pages: 3

MONARCH 318DOPW2K-C
Brand: Transmitter Solutions Pages: 2

IP-HE950
Brand: Fujitsu Pages: 93

ATT-20
Brand: Hitachi Pages: 42

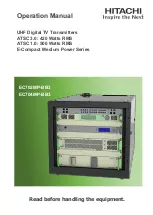
E-Compact Medium Power Series
Brand: Hitachi Pages: 106
EC702MP-BB3
Brand: Hitachi Pages: 108

EC701HP
Brand: Hitachi Pages: 138

EC702HP
Brand: Hitachi Pages: 150

A20-Mini
Brand: Sound Devices Pages: 45

SENTRON T 7KG966
Brand: Siemens Pages: 88

Echomax XPS-10
Brand: Siemens Pages: 116


