EuroLite LED PAR-64 Spot, User Manual
The EuroLite LED PAR-64 Spot is an exceptional lighting fixture that will elevate any event. You can easily get the most out of this product by accessing the comprehensive User Manual available for download, free of charge, from our website. Unlock the full potential of this PAR-64 Spot and create an unforgettable atmosphere.
Share
Download


Reviews:
No comments
Related manuals for LED PAR-64 Spot

PKC0PN
Brand: Peak Pages: 2

DLED4R
Brand: RAB Lighting Pages: 4

LED Strip Light Slim 300 Daylight
Brand: Walimex Pro Pages: 14

779.UVT
Brand: Facom Pages: 2

StarCluster 3270
Brand: Kaiser Pages: 18
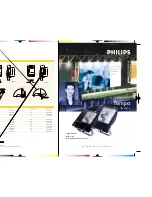
Tempo Flood Light
Brand: Philips Pages: 2

Tempo 3 RVP351 Series
Brand: Philips Pages: 2

SmartBright BVP173
Brand: Philips Pages: 2

Showline SL PAR 150 ZOOM
Brand: Philips Pages: 2

Selecon
Brand: Philips Pages: 13

SL ParBlazer 100 UV
Brand: Philips Pages: 24

selecon plcyc1 MKII
Brand: Philips Pages: 32

SL WASH 180 RGBW
Brand: Philips Pages: 40

Vari-Lite VL500
Brand: Philips Pages: 220

LEV112318M840TE
Brand: Toshiba Pages: 18

SY8979
Brand: Sycamore Pages: 2

Wattstopper Vantage Miro MRP6
Brand: LEGRAND Pages: 8

9502LED
Brand: GNBLAB Pages: 2


