


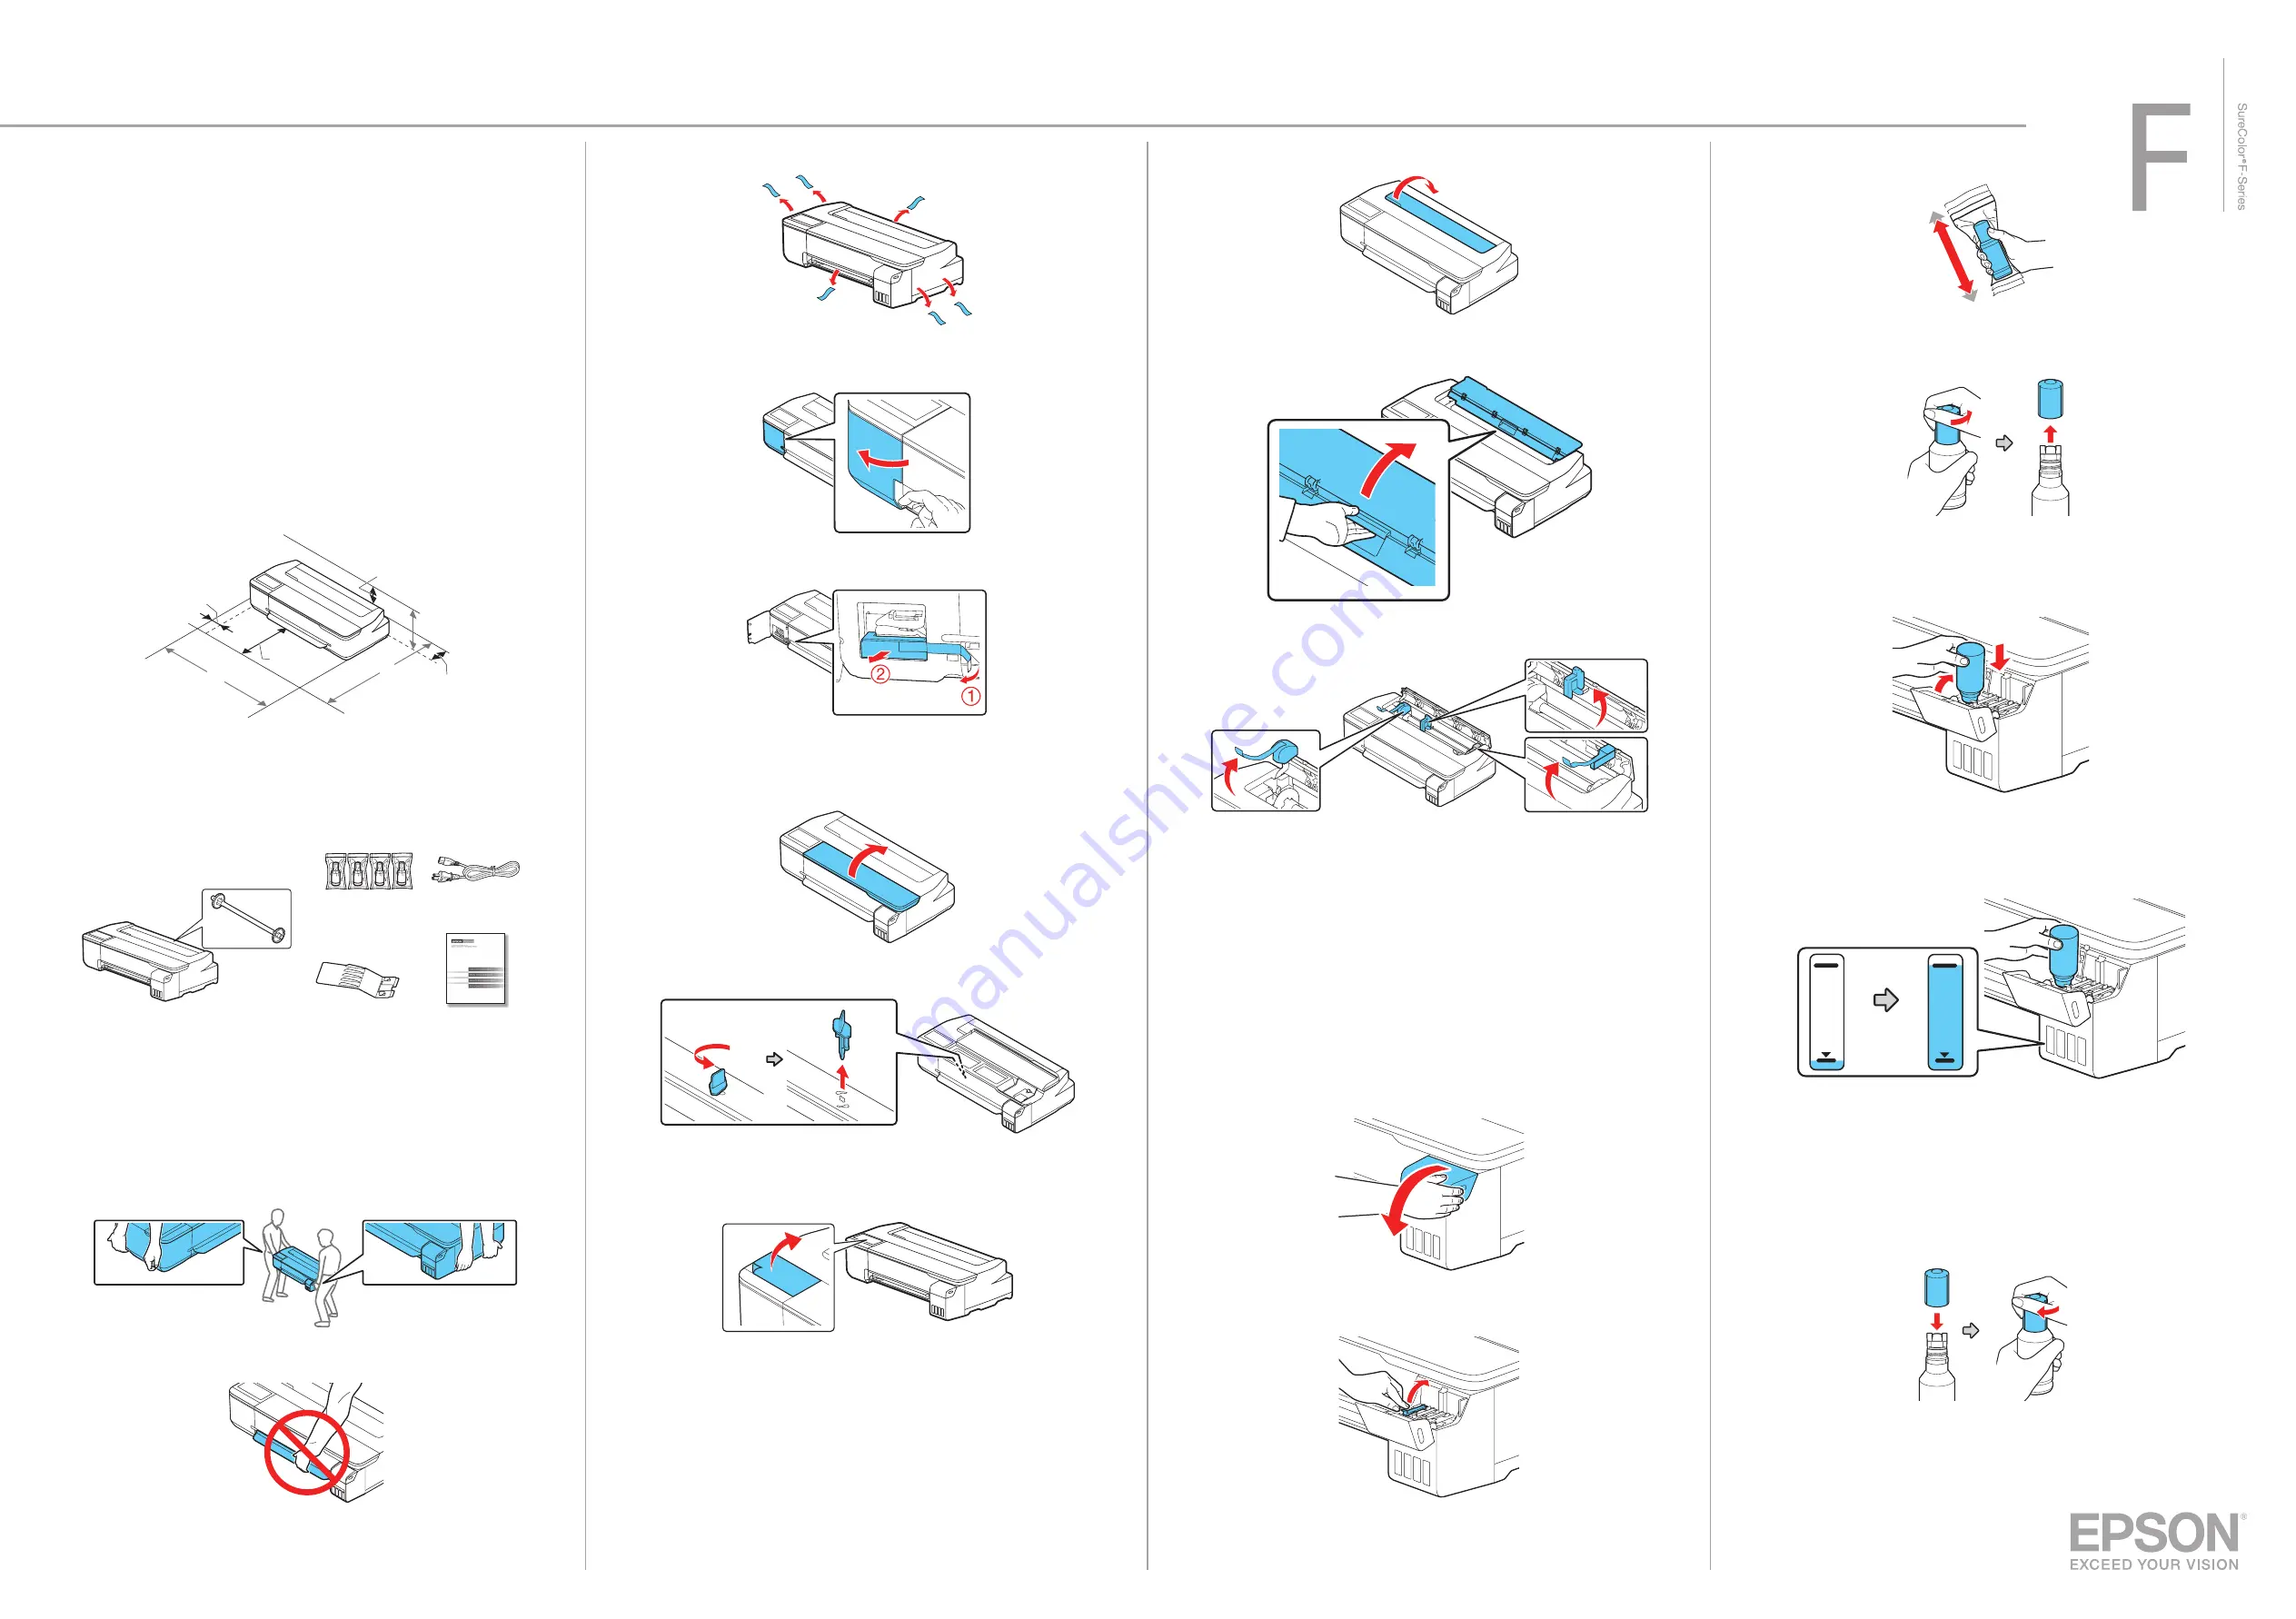
10
Open the cut sheet cover and remove the tape inside the printer.
11
Open and fold back the roll paper cover.
12
Remove the tape and the protective pieces.
13
Close the roll paper cover and the cut sheet cover.
14
Dispose of all the tape and the protective pieces.
Fill Ink Tanks
Note:
• Epson cannot guarantee the quality or reliability of third-party ink.
• Use the ink bottles included with the printer to set up the product. Part of the
ink will be used to charge the print head. These bottles may print fewer pages
compared with replacement ink bottles.
1
Open the ink tank cover.
2
Open the cap for the black ink.
Epson
®
SureColor
®
F570
Start Here
IMPORTANT: Before using this product, make sure you read these instructions
and the safety instructions in the online User’s Guide.
Choose a Location for the Printer
Choose a location for the printer that is near a wall outlet where the power cord
can be easily unplugged. Avoid places subject to rapid changes in temperature
and humidity. Also keep the printer away from direct sunlight, strong light, or
heat sources.
Make sure to place the printer on a flat, stable surface with enough space on all
sides (see illustration below). The surface supporting the printer should be wider
than the space between the rubber feet on the bottom of the printer and capable
of supporting the weights shown below.
5.9 in.
(150 mm)
Weight: 63.93 lbs (29 kg)
1.97 in.
(50 mm)
12.20 in.
(310 mm)
1.57 in.
(40 mm)
H
D
W
Unpack
1
Make sure you have these items:
Printer and roll spindle
Output tray
Ink bottles
Limited warranty
Power cord
Note:
• See the online
User's Guide
for instructions on using the output tray and
assembling the optional stand and paper basket.
• Do not open the ink bottles until you are ready to fill the ink tanks. The ink
bottles are vacuum packed to maintain reliability.
WARNING:
The printer requires two people to lift and move it. Make sure to
grip the printer as shown in the illustration.
Caution:
Do not hold the printer by its paper support.
2
Remove the plastic sheet and all tape from the outside of the printer.
3
Open the left cover.
4
Remove the tape and the protective piece.
5
Close the left cover.
6
Open the front cover.
7
Turn and remove the protective piece.
8
Close the front cover.
9
Remove the protective film from the control panel.
Note:
The touch screen will not operate if you do not remove the
protective film.
3
Gently shake the black (BK) ink bottle for about
5 seconds.
4
Unpack the black (BK) ink bottle. Hold the ink bottle upright and
slowly turn the bottle cap to remove it.
Caution:
Do not squeeze the ink bottle. Do not touch the top of the ink bottle
after its cap is removed.
5
Insert the ink bottle into the filling port, as shown below.
6
Wait for the ink to fill the tank. Do not squeeze the bottle. Ink flows
into the tank and stops automatically when the ink tank is filled to the
upper line.
Note:
If ink does not flow from the bottle, lift and reinsert the bottle.
Caution:
After setup, periodically inspect the ink level to ensure it is not
below the lowest line on the tank. Prolonged use when ink is below the lowest
line could damage the product. See the online
User's Guide
for refilling
instructions.
7
When the ink tank is full, remove the ink bottle and replace the bottle
cap. Place the remaining ink aside; you will need it later.
Note:
Do not leave the ink bottle inserted; otherwise the bottle may be
damaged or ink may leak.


