


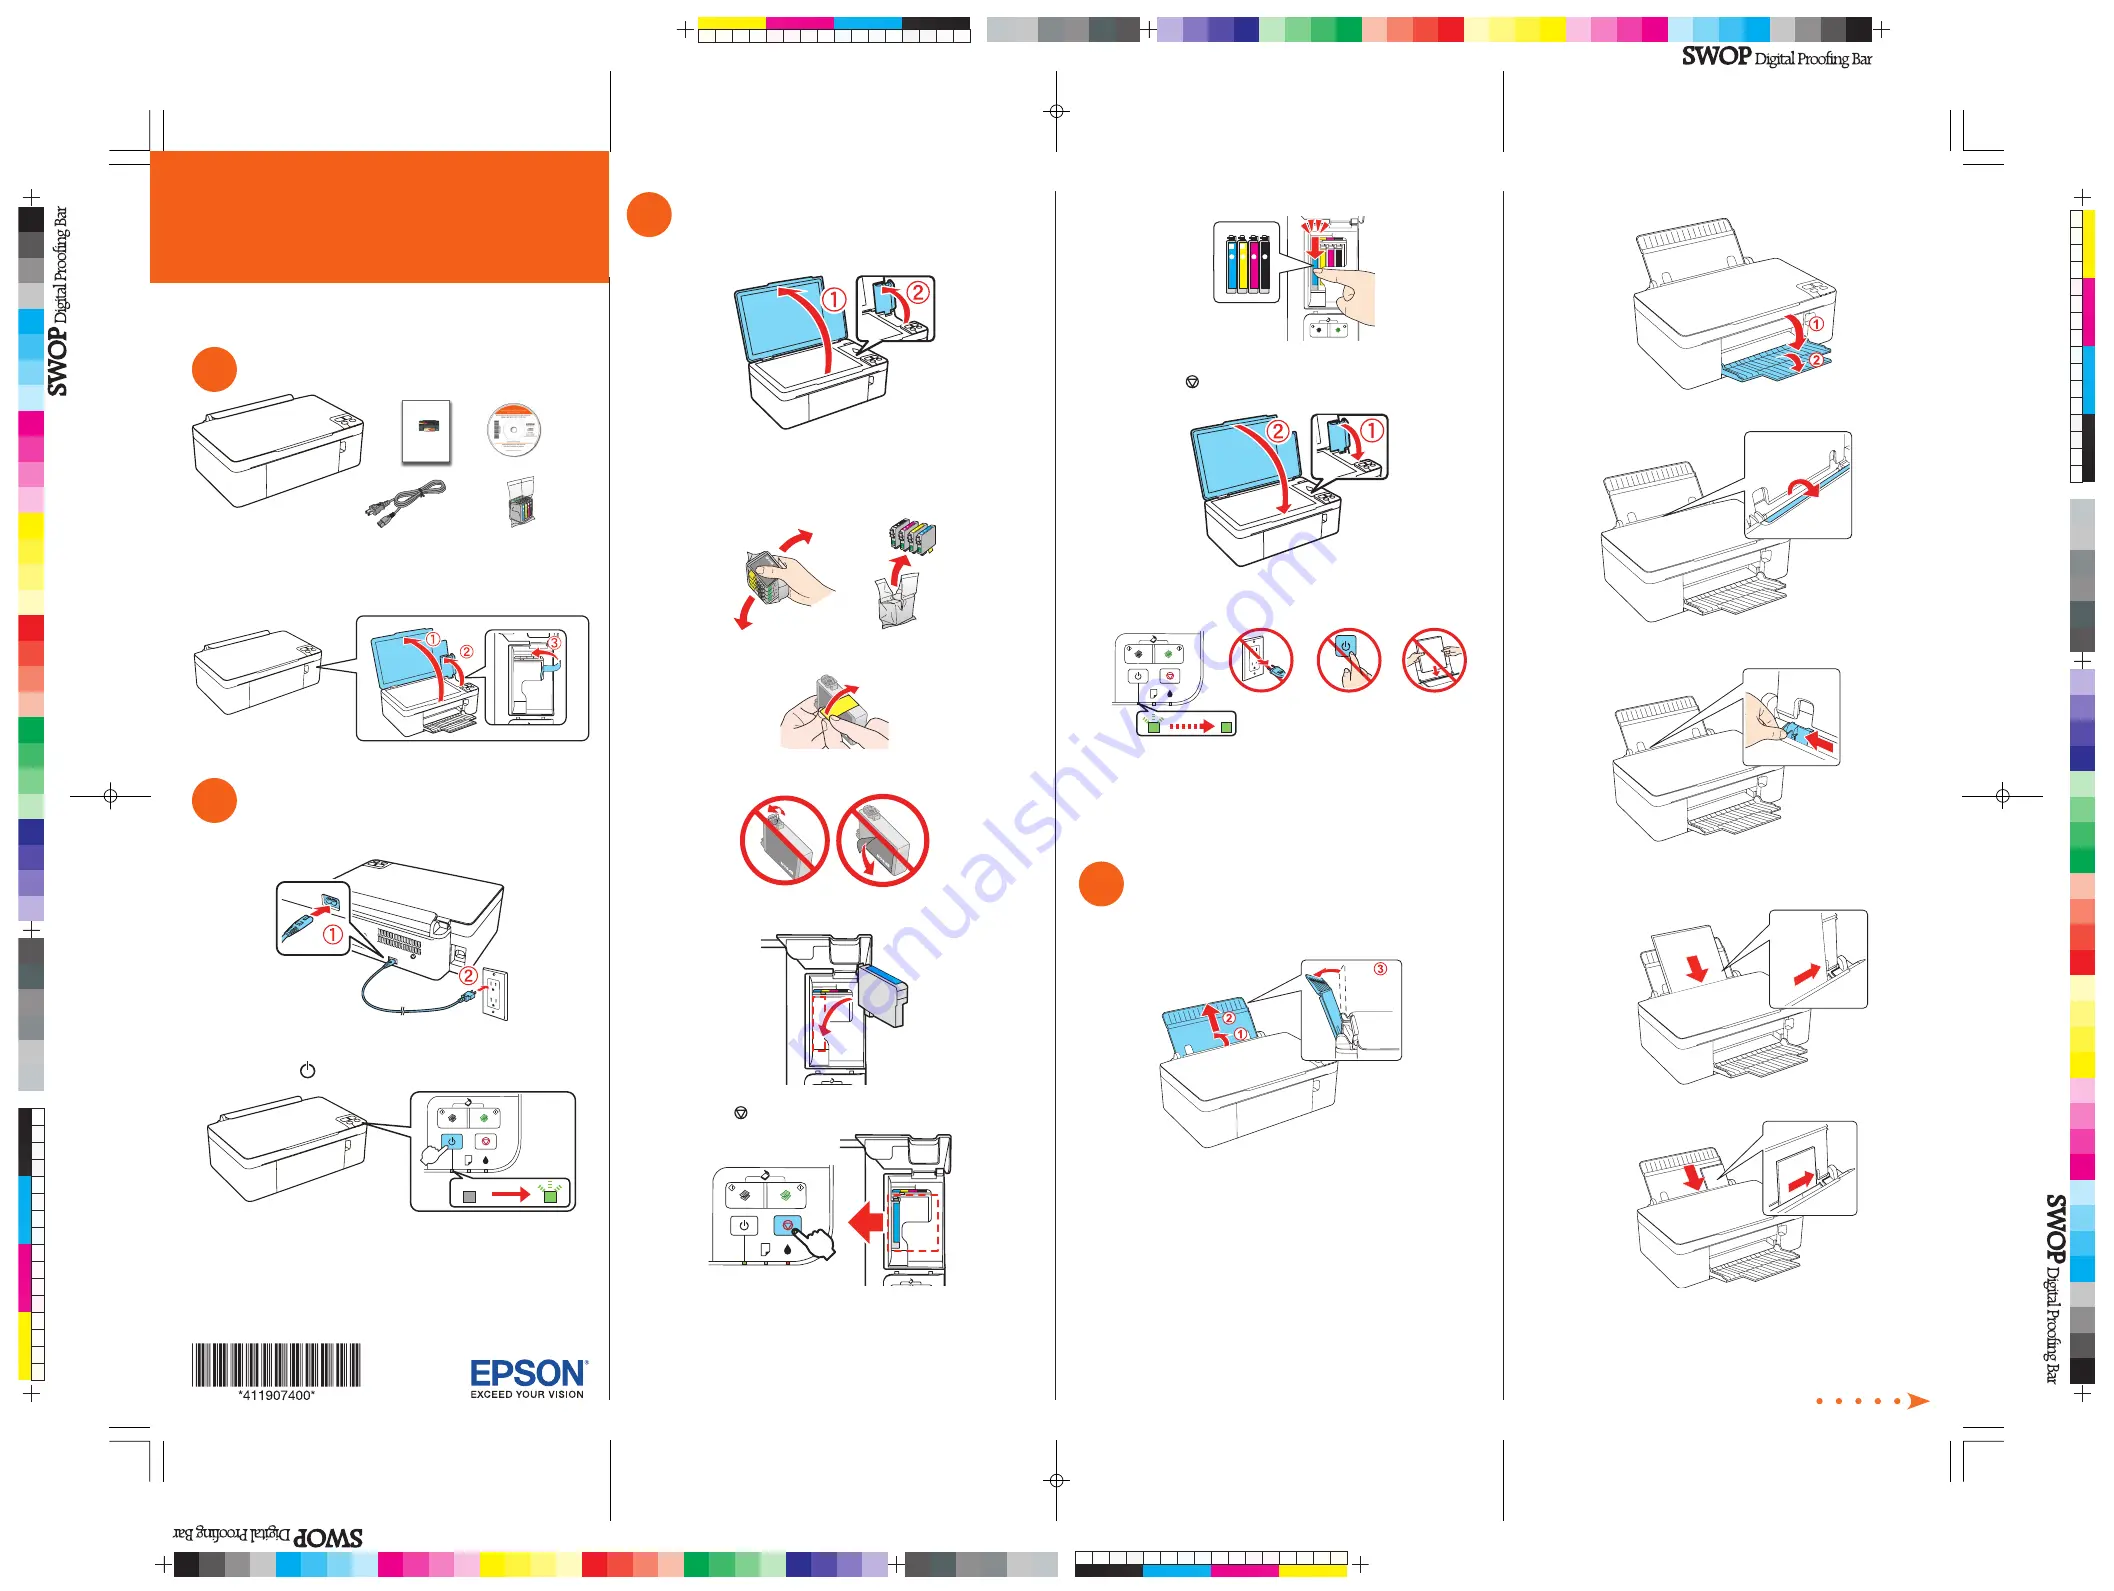
Start Here
2
Lower the output tray, then open the extension.
3
Flip the feeder guard forward.
4
Squeeze the edge guide and slide it to the left.
5
Load paper against the right edge guide and behind the
tab, with the printable side face up.
4 x 6
8½ x 11
Read these instructions before using your printer.
1
Unpack
Power cord
Epson Stylus NX125/127
Series
Quick Guide
Basic Copying, Printing, and Scanning
Maintenance
Solving Problems
®
Caution:
Do not open the ink cartridge package until you are ready to
install the ink. Cartridges are vacuum packed to maintain reliability.
Remove all protective materials.
2
Turn on
1
Connect the power cable.
Caution:
Do not connect to your computer yet.
2
Press
the
power button.
3
Install ink cartridges
1
Open the document cover, then open the ink cover.
Caution:
Don’t try to remove the ink cartridge guard or you may
damage the printer.
2
Shake the ink cartridges, then unpack them.
3
Remove only the yellow tape from each cartridge.
Caution:
Don’t remove any other seals from the cartridges.
4
Insert the cyan ink cartridge, and press it down until it clicks.
5
Press the
stop button. The cartridge holder moves.
6
Repeat steps 4 and 5 for other cartridges.
7
Close the ink cover, then close the document cover and
press the
stop button again.
8
Ink priming takes about 2 minutes. When the green power
light stops blinking, priming is complete.
Note:
Your printer ships with full cartridges and part of the ink
from the first cartridges is used for priming the printer.
Caution:
Don’t turn off the printer while it is priming or you’ll
waste ink.
4
Load paper
1
Open the paper support, then pull up the extension and tilt
it back slightly.
Epson Stylus
®
NX125/127 Series
4119074 Rev.0
1-F
C
4119074 Rev.0
1-F
M
4119074 Rev.0
1-F
Y
4119074 Rev.0
1-F
K


