


Choosing a location
The easiest way to set up your projector is to place it on a table
in front of your screen or wall, or on a high shelf behind you.
See the
User’s Guide
for other ways of setting up the projector.
Table
Shelf
The projector does not have to be aligned with the middle of the
screen. Just make sure it faces straight ahead (at a 90-degree angle
to the screen), and then use the horizontal lens shift dial to position
the image (see “Adjust the image” on the back of this sheet).
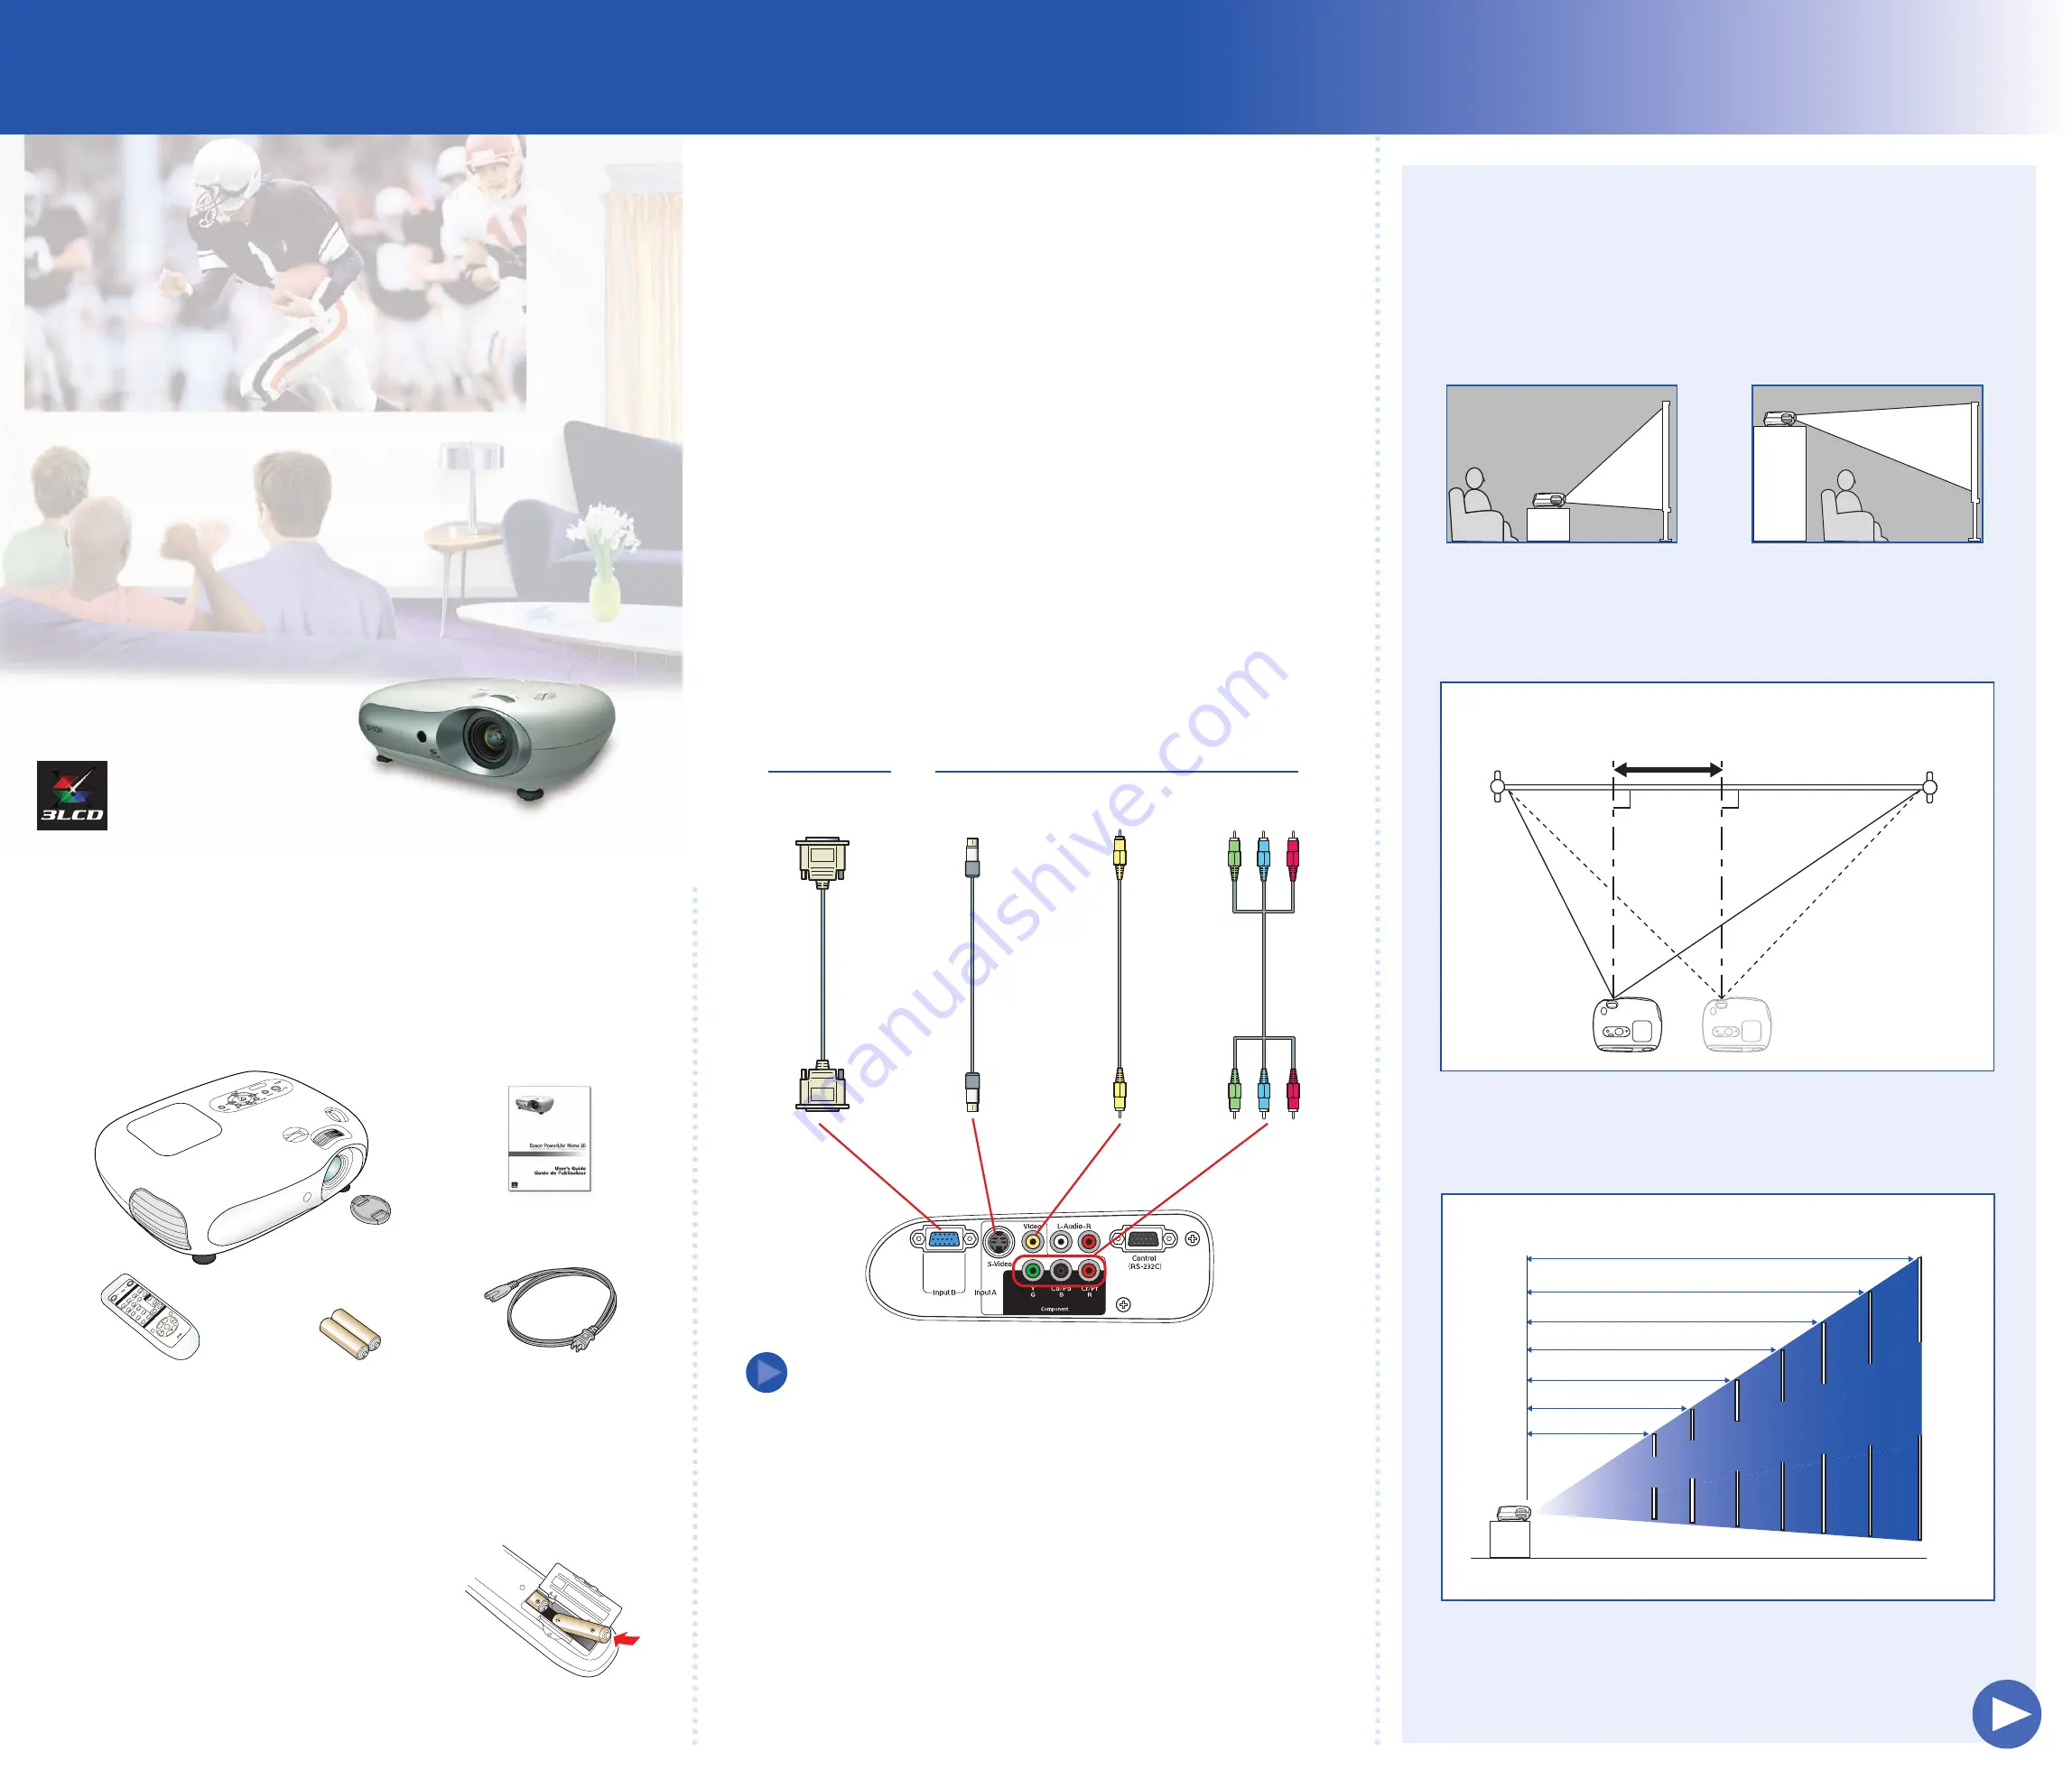
The distance between the projector and the screen determines the
size of the image. The diagram below shows approximately how big
your image will be, based on where you set up the projector.
Turn over
300"
300"
30"
30"
40"
40"
60"
60"
80"
80"
100"
100"
200"
200"
300"
Distance from projector to screen
Screen size (diagonal)
30"
40"
60"
80"
100"
200"
2.5-4'
3-5'
5-7.5'
6.5-10'
8-12'
16.5-25'
25-37'
1
Unpack the projector
Your projector comes with the following items:
Quick Setup
3
Connect your equipment
You can connect the projector to a computer or video source such as a DVD
player, VCR, HDTV tuner, cable or satellite box, camcorder, or video game
console. Check the specifications in the projector
User’s Guide
for compatible
video formats.
The projector has four types of connections, as shown below. Each one is color-
coded and requires a different type of cable (not included). You can connect up
to four video sources and use the remote control to switch from one to the other.
Check the connectors on your video equipment. If more than one
connection is available, choose the one that provides the best quality.
For example, component video produces higher quality images than
S-video or composite video.
Make sure you have the right cable for the connection you want to use,
and the cable is long enough for your setup. For longer cable lengths,
use a high quality cable to minimize signal degradation and
interference, or consider using a distribution amplifier.
Connect your video equipment to the projector using any of the
available connections shown below.
Projector
User’s Guide
Power cord
Batteries
Epson
®
PowerLite
®
Home 20
2
Set up the remote control
Open the cover on the back of the remote control
and insert two AA batteries (included). Make sure
their positive (+) ends point down in the remote.
Remote control
To play audio through the projector, you can connect an audio
cable from your video device to the audio-in ports on the projector.
NOTE
Video equipment
Computer
RCA video cable
(composite video)
Component
video cable
S-video cable
VGA computer cable
Projector can be offset from
center by up to 25 percent of
the image’s width
90º


