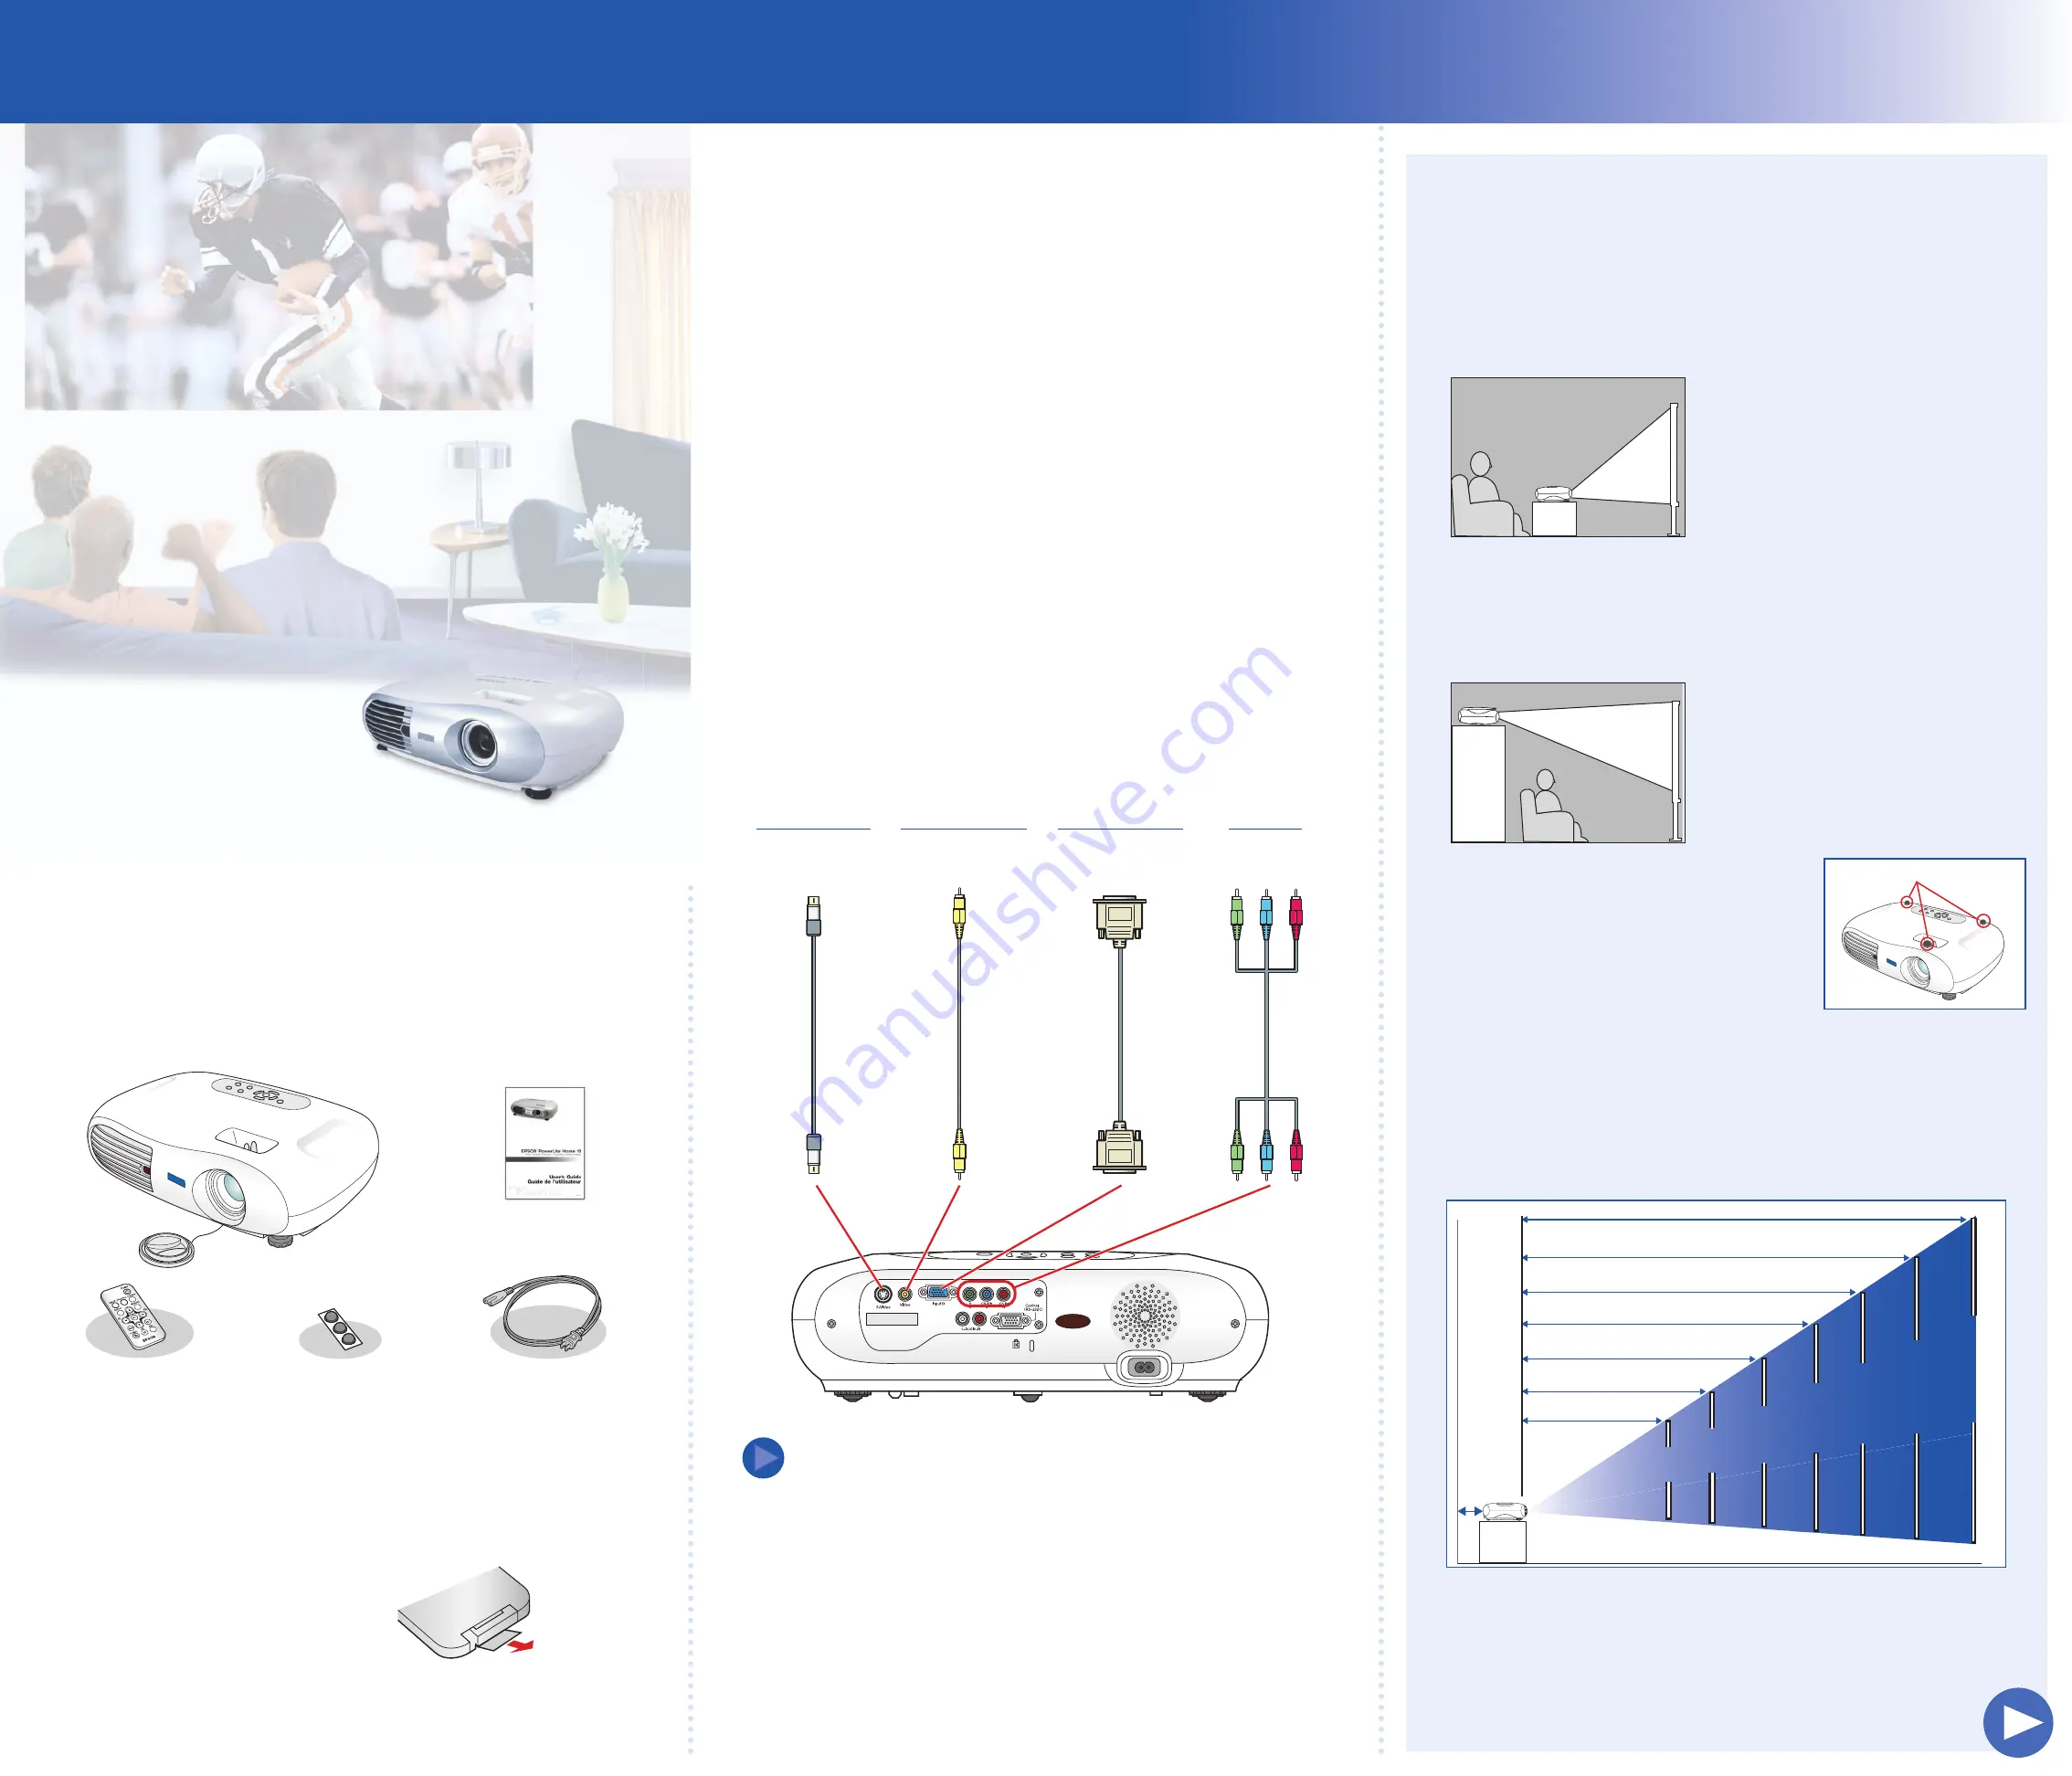
Choosing a location
The easiest way to set up your projector is to place it on a table
in front of your screen or wall, or on a high shelf behind you.
See the
User’s Guide
for other ways of setting up the projector.
Table
Convenient for temporary front projection. Ideally, place the projector
directly in front of the screen, facing the screen squarely. The base
of the lens should be level with the bottom of the screen.
Shelf
For temporary or permanent installation
on a high shelf. Attach the rubber feet
and place the projector upside-down.
After you turn on the projector, choose
Front/Ceiling
for the Projection option
in the Setting menu. See the
User’s
Guide
for details.
The distance between the projector and the screen determines the
size of the image. The diagram below shows approximately how big
your image will be, based on where you set up the projector.
1
Unpack the projector
Your projector comes with the following items:
Quick Setup
3
Connect your equipment
The projector has 4 types of connections, as shown below. Each one
is color-coded and requires a different type of cable (not included).
You can connect up to 4 video sources and use the remote control
to switch from one to the other.
Check the connectors on your video equipment. If more than one
connection is available, choose the one that provides the best quality.
For example, component video produces higher quality images than
S-video or composite video.
Make sure you have the right cable for the connection you want
to use, and the cable is long enough for your setup. If you need
a cable longer than the standard 6 to 10 feet, you may need a
distribution amplifier.
Before you connect your equipment, make sure everything is
turned off.
Connect your video equipment to the projector using any of the
available connections shown below.
Turn over
Projector
User’s Guide
Power cord
Rubber feet
300"
300"
30"
30"
40"
40"
60"
60"
80"
80"
100"
100"
200"
200"
300"
7.9 inches
Distance from projector to screen
Wa
ll
Screen size (diagonal)
30"
40"
60"
80"
100"
200"
2.5-4'
3-5'
5-7.5'
6.5-10'
8-13'
16.5-25.5'
25-38'
EPSON PowerLite
®
Home 10
2
Set up the remote control
Pull out the insulating tape to remove it
from the battery holder.
The remote control is ready for use.
Remote control
To play back audio through the projector, you can connect an audio
cable from your video device to the audio-in ports on the projector.
NOTE
TV
VCR
Camcorder
Video game console
DVD player
HDTV tuner
TV
VCR
DVD player
Camcorder
Cable/satellite box
Computer
RCA video cable
(composite video)
Component
video cable
S-video cable
VGA computer cable
Attach the 3 rubber feet