

1
Remove the tape and packing material from the printer.
2
Open the cover. Then peel off the tape and remove the insert.
Do not
touch or remove the white cable inside the printer.
3
Insert the paper support into the three slots on the back of the printer.
EPSON Stylus
®
C43 Series
Start Here
Unpack
1
4046944-00 XXX
Do not touch
or remove the
white cable
Remove
insert
Power On
2
1
Find the power cord that came in the box and connect
one end to the printer.
2
Plug the other end into a grounded electrical outlet.
3
Press down firmly on the
power button until the green
power light
comes on.
Caution
: Use only the printer’s
power button to turn the printer
on or off.
Power button
Load Ink
3
Note
: The ink cartridges that came with your printer have a lower yield
due to the ink loading process. This process is carried out the first time
you turn on your printer and guarantees a better performance.
Caution
: Keep ink cartridges out of the reach of children and do not
drink the ink.
1
Open the printer cover.
Caution
: Don’t touch the sensor behind
the ink cartridge holders.
2
Lift up the ink cartridge clamps.
3
Unpack the ink cartridges that
came with your printer and
remove the yellow tape only.
4
Insert both cartridges.
Caution
: You must install both
cartridges or the printer won’t work.
5
Press down on the cartridge clamps
until they click shut.
6
Press the
maintenance
button. The green
power light
flashes and you hear the printer
charge its ink.
7
Close the printer cover. When
the green
power light stops
flashing, charging is done.
Caution
: Never turn off the printer
while the green
power
light is flashing, or you’ll waste ink.
Maintenance
button
Load Paper
5
Black
Color
Don’t touch the green part
Read these instructions before using the printer.
1
Set some paper behind the tab on the right edge guide. Don’t force it in.
2
Press in the locking tab on the left edge guide and slide it against
the paper.
3
Pull out the output tray.
Note
: If you’re using special EPSON
®
paper, make sure you load
the brighter, whiter side face up.
USB Cable Users (Windows or Mac
®
)
1
Make sure your computer is turned off. Keep it turned off until
section 6, “Install Software.” (Click
Start
and select your
Shut Down
or
Turn Off
option.)
2
Plug the
square end of the cable into the USB port on
your printer.
3
Plug the
flat end of the cable into any available USB port
on your computer.
Parallel Cable Users (Windows only)
1
Make sure your computer is turned off. Keep it turned off until
section 6, “Install Software.” (Click
Start
and select your
Shut Down
or
Turn Off
option.)
2
Plug the end of the cable with the slotted connector into the parallel
port on the side of the printer, then secure it with the wire clips.
3
Plug the end of the cable with the screws on the side into your
computer’s parallel port and secure it.
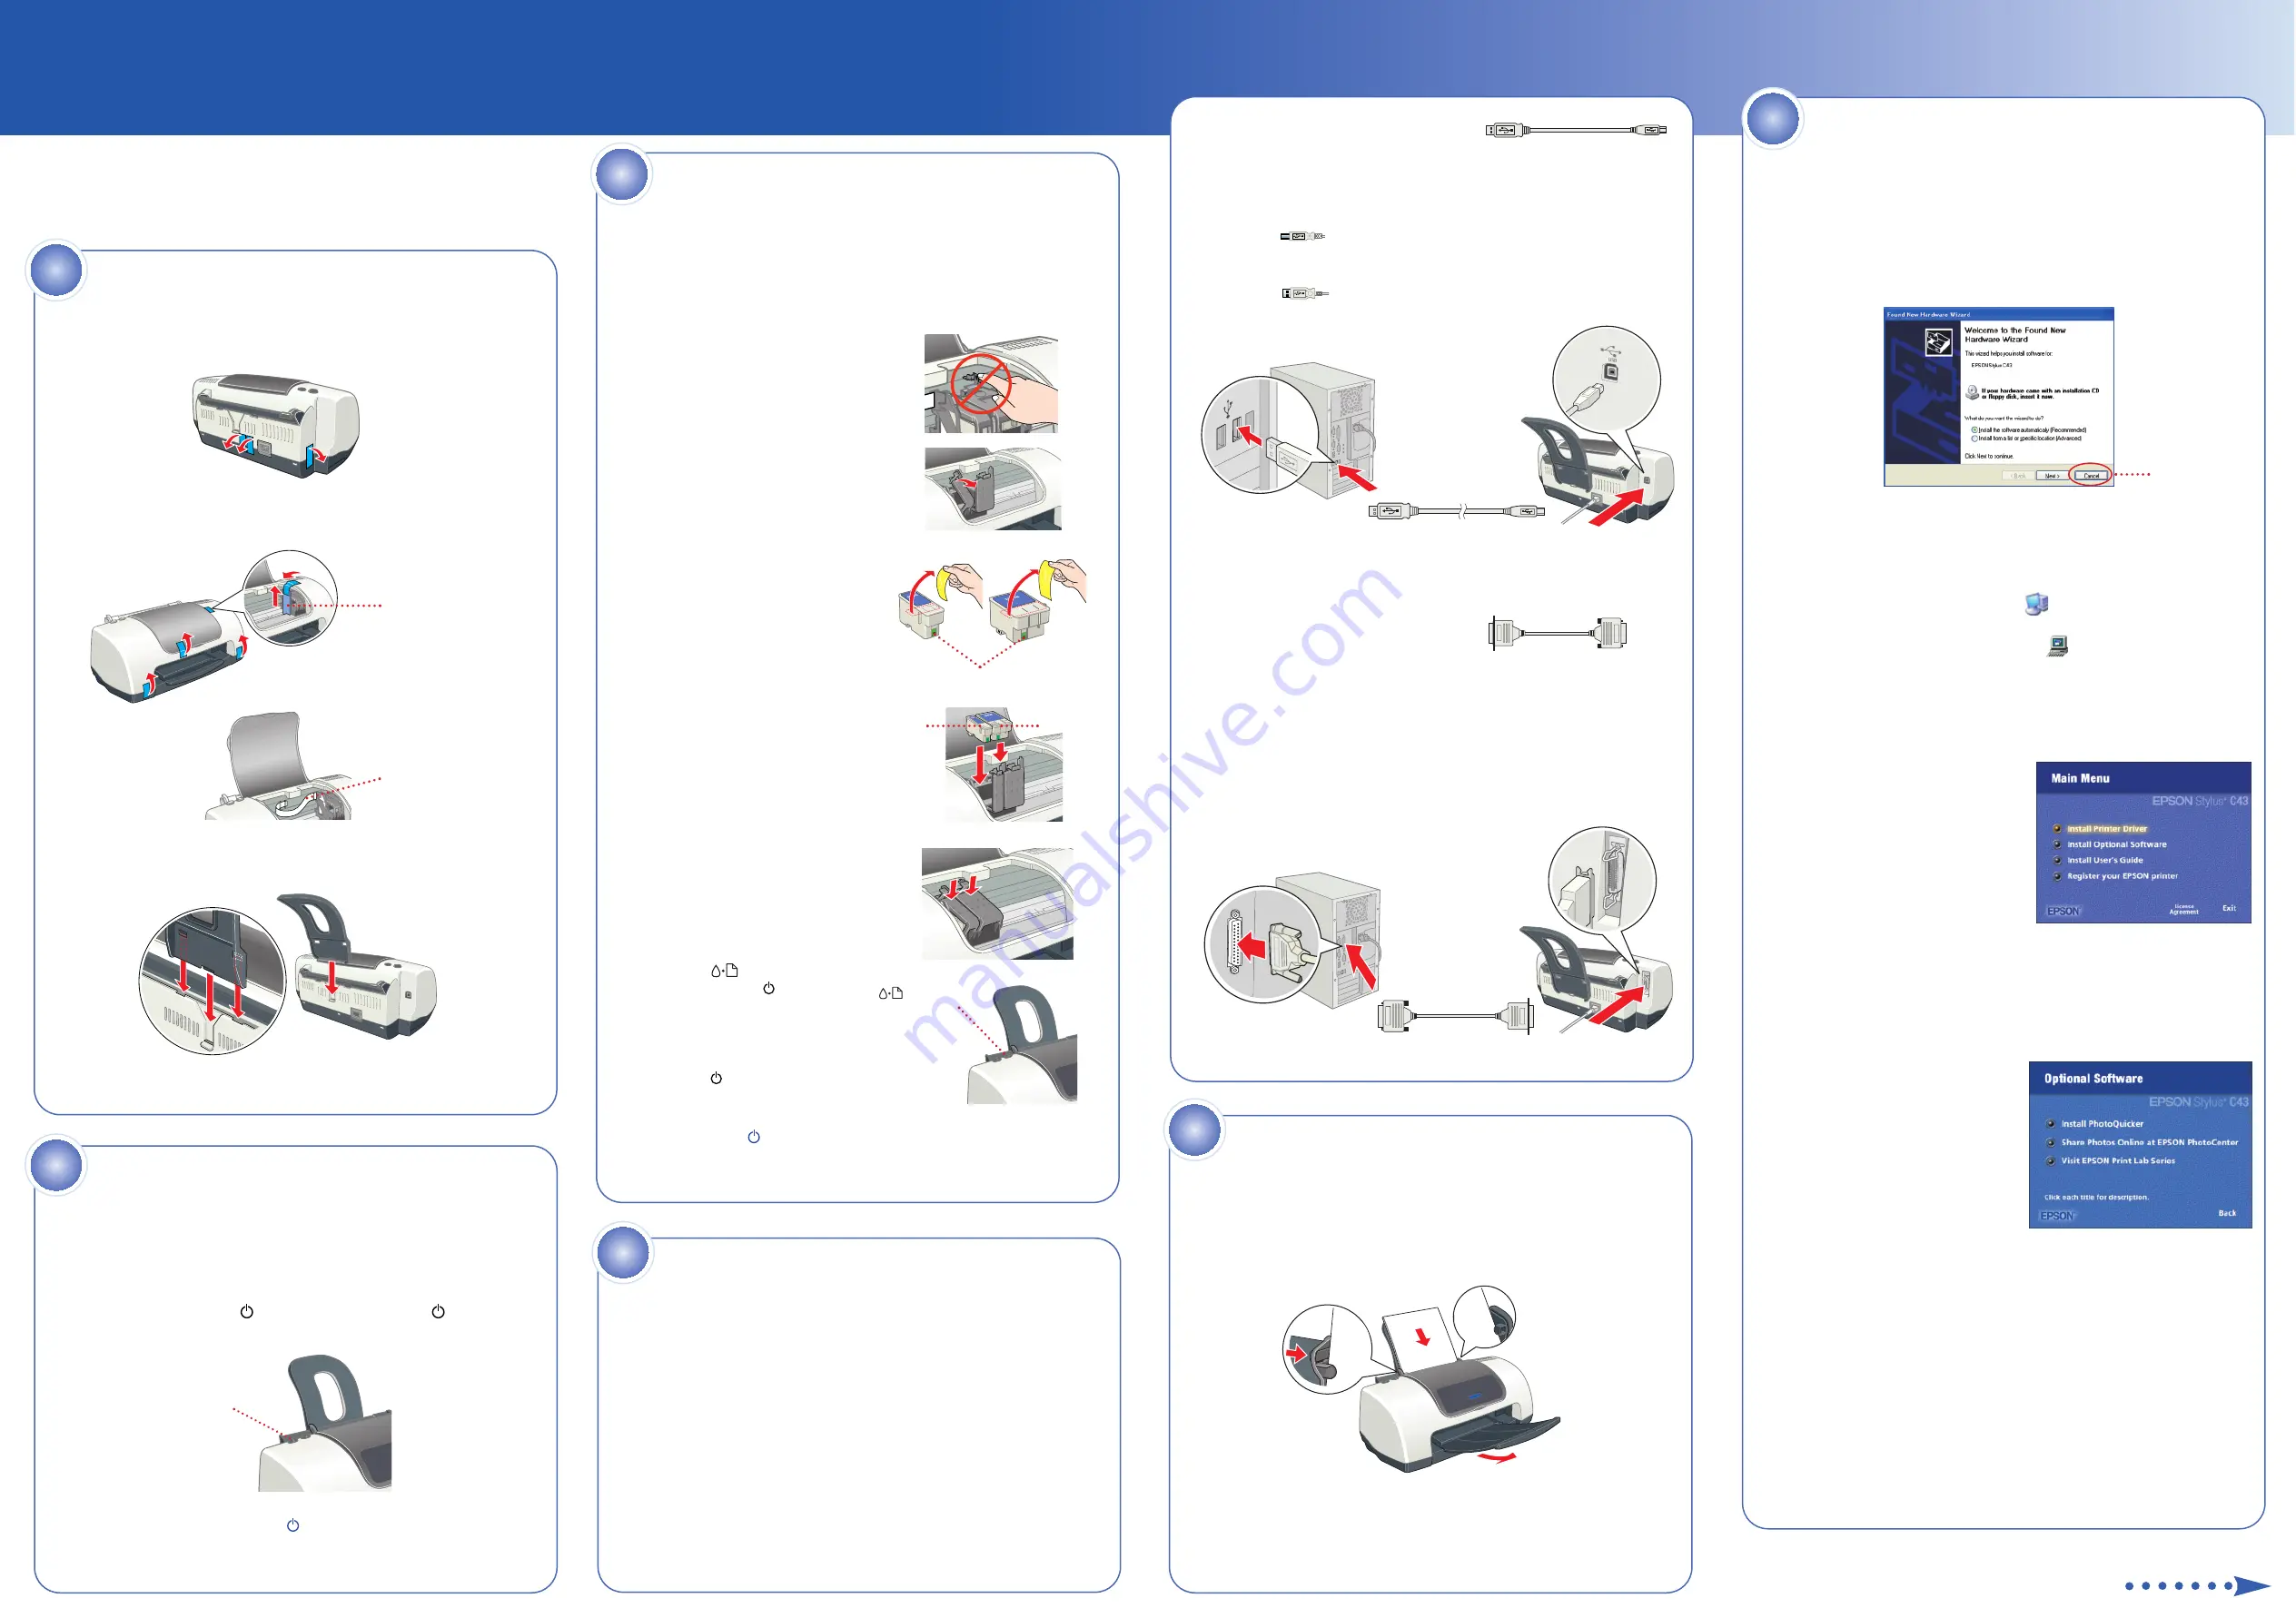
Connect the Printer
4
Note:
Turn off your computer before connecting the interface cable.
Don’t turn on your computer until you are instructed to do so.
Printer cables are not included with your printer. You need only one of the
following cables:
•
USB cable (Windows
®
or Macintosh
®
) or
•
Parallel cable (Windows only)
Note:
If you have Windows 95, you must use a parallel cable.
continue
Windows
1
Make sure your printer is connected and turned on, then turn
on your computer.
2
When you see the Found New Hardware Wizard screen, click
Cancel
.
(If you’re using a parallel cable, you may not see this screen until later.)
3
Insert the printer software CD-ROM in your CD-ROM or DVD drive.
If you see any other Windows screens, close or cancel them.
4
The installer starts automatically. Select
English
. If the language
selection screen doesn’t appear, do the following:
Windows XP:
Click
Start
, then click
My Computer
. Double-click
the
EPSON
CD-ROM icon, then double-click the
EPSON
icon.
Other Windows systems:
Double-click
My Computer
. Double-click
the
EPSON
CD-ROM icon, then double-click the
EPSON
icon.
5
You see the license agreement. Read the license agreement
and click
Agree
.
6
You see the Main Menu.
Click
Install Printer Driver
and
follow the on-screen instructions.
Note:
If you see a screen asking you to turn on the printer, make sure
the printer is connected and turned on and wait for the computer
to detect the printer port.
7
At the end of the installation, click
OK
.
8
Click on
Install Optional Software
.
Select the software you want to
install and follow the on-screen
instructions.
9
When you’re done, click
Back
to return to the Main Menu.
10
Click on
Install User’s Guide
, then follow the on-screen instructions
to install the printer manual on your desktop.
Note:
You need a browser—such as Microsoft
®
Internet Explorer 4.0
or later or Netscape
®
4.0 or later—to view the guide.
11
Click on
Register your EPSON Printer
to register your printer online.
When you’re done, close your browser and click
Exit
on the Main
Menu to close the installation program and remove the EPSON CD.
You’re ready to print! See your electronic
User’s Guide
for details.
Install Software
6
Click
Cancel
Turn over
End with screws
Slotted end
Flat end
Square end


