Epson Dreamio EMP-TW1000 U, User Manual
The Epson Dreamio EMP-TW1000 U is a high-performance projector that will bring your movies, videos, and presentations to life. With its stunning picture quality and advanced features, it's a must-have for any home theater or professional setting. For detailed instructions on how to set up and use this fantastic projector, download the free user manual from manualshive.com.
Share
Download


Reviews:
No comments
Related manuals for Dreamio EMP-TW1000 U

Wide33
Brand: Leonics Pages: 21

DLPS-15C
Brand: Cable Innovations Pages: 2

InstaShow WDC10R
Brand: BenQ Pages: 31

CineTension 2 Dual Series
Brand: Elite Screens Pages: 5

558100302
Brand: MKC Pages: 40

CineTheatre Galleria Curve
Brand: LP Morgan Pages: 20

WTH 4765
Brand: Wize Pages: 2

PJ506D - SVGA DLP Projector
Brand: ViewSonic Pages: 41

Neomounts BEAMER-C80WHITE
Brand: NewStar Pages: 8

CP-X301 series
Brand: Hitachi Pages: 5

DLA-RS15U - Reference Series Home Cinema Projector
Brand: JVC Pages: 18

DLA-VS2000
Brand: JVC Pages: 47

DLA-X3
Brand: JVC Pages: 8

DLA-X35
Brand: JVC Pages: 12
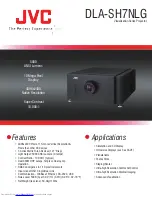
DLA-SH7NLG
Brand: JVC Pages: 2

DLA-VS4010
Brand: JVC Pages: 64

DLA-RS1U - Reference Series Home Cinema Projector
Brand: JVC Pages: 1

DLA-SH4K
Brand: JVC Pages: 48


