


Quick Installation Guide
EnGenius Europe | Veldzigt 28, 3454 PW De Meern,
Netherlands | 0900-WIFIABC | www.wifiabc.com
Disclaimer: Information may be subject to changes without prior notification.
Follow us
https://www.linkedin.com/company/engeniuseurope
https://plus.google.com/+EngeniusEuropeBVDeMeern
https://www.youtube.com/user/engeniuseuropebv
https://twitter.com/engeniuseu
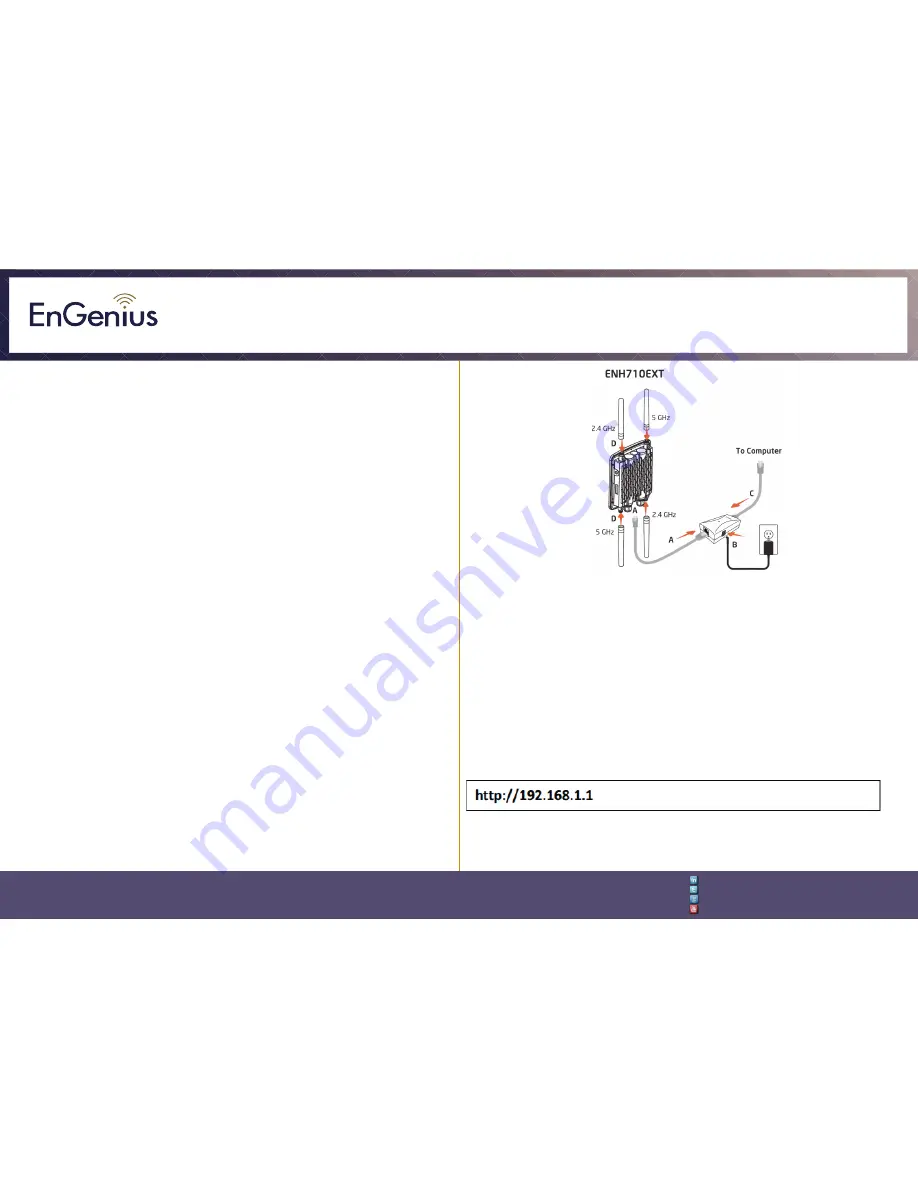
ENH710EXT
Package content
Unpack the box and verify the content:
- ENH710EXT
- PoE injector
- Power adapter
- Quick Start Guide
- Wall mount screw set
- 2* Pole mounting strap
Minimum requirements
- Broadband Internet Service (cable or DSL modem)
- Internet browser (Internet Explorer, Safari, Firefox, Chrome)
Connecting the ENH710EXT
1. Remove the rear bottom panel.
2. Connect one end of the Ethernet cable into the LAN(PoE) port of the
ENH710EXT and the other end to the PoE Ethernet port on the PoE injector.
3. Connect the power adapter to the DC-IN port of the ENH710EXT and plug
the other end into an electrical outlet.
4. Connect the second Ethernet cable into the LAN port of the PoE injector and
the other end to the Ethernet port on the computer.
5. Place the panel removed from step 1 back into the device.
Note
: The ENH710EXT should ONLY be powered via Ethernet cable connected
to the included PoE Injector.
Computer setup
1. After ensuring the EnGenius device is powered on and plugged in, ensure
that your computer is on.
2. For the next steps, refer to your operating system user manual.
3. Once your computer is on, ensure that your TCP/IP is set to ‘
ON
’ or
‘
ENABLED
’. In the control panel, double click network connections and then
double click on the connection of your Network Interface Card (NIC). Select
Internet Protocol (TCP/IP) and then click on the properties button.
4. If your PC is already on a computer network, ensure that you have set it to a
Static IP adress on the interface (or Ethernet card that will use the ENH710EXT)
as
192.168.1.21
and set the subnet mask address as
255.255.255.0
.
Select ‘Use the following IP address’-radio button. Once the computer has been
prepared, proceed to setting up the ENH710EXT.


