background image

Montage und Betriebsanleitung

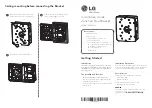
Anschlussbox mit Netzgerät & Montagearm  

EDC-AKS1, NTDF-AKS1

Installation and Operating Instructions

Power & Connection box with Mounting Bracket  

EDC-AKS1, NTDF-AKS1

Mode d’emploi

Boîtier de connexion avec support mural et alimentation  

EDC-AKS1, NTDF-AKS1

Instrucciones de manejo

Caja de conexión con fuente de alimentación y el soporte  

a montaje 

EDC-AKS1, NTDF-AKS1

Summary of Contents for EDC-AKS1

Page 1: ...llation and Operating Instructions Power Connection box with Mounting Bracket EDC AKS1 NTDF AKS1 Mode d emploi Boîtier de connexion avec support mural et alimentation EDC AKS1 NTDF AKS1 Instrucciones de manejo Caja de conexión con fuente de alimentación y el soporte a montaje EDC AKS1 NTDF AKS1 ...

Page 2: ...ox NTDF AKS1 Art Nr 74145 9 5 Montage 11 6 Technische Daten 13 7 Maßzeichnungen 44 Contents 1 Safety Instructions Maintenance 14 2 General Description 14 3 Installation 15 3 1 Dome Camera Series Fastrax I to III with Power Connection Box EDC AKS1 Art No 74125 15 3 2 Dome Camera Housing Series Fastrax III and EDCH with Power Connection Box EDC AKS1 Art No 74125 15 3 3 Web Dome Camera with Power Con...

Page 3: ...anchement 27 4 1 Boîtier de Connexion EDC AKS1 Code 74125 27 4 2 Boîtier de Connexion NTDF AKS1 Code 74145 29 5 Monture 31 6 Caractéristiques techniques 33 7 Croquis 44 Contenido 1 Instrucciones de seguridad Mantenimiento 34 2 Descripción general 34 3 Instalación 35 3 1 Cámara domo serie Fastrax I III con caja de conexión EDC AKS1 código 74125 35 3 2 Carcasa cámara domo serie Fastrax III y EDCH co...

Page 4: ...ung zu schützen Stellen Sie keine schweren Gegenstände auf dem Gerät ab Um das System von der Versorgungsspannung zu trennen ziehen Sie das Kabel nur am Stecker heraus Ziehen Sie nie direkt am Kabel Verlegen Sie die Verbindungskabel sorgfältig und stellen Sie sicher dass die Kabel nicht mechanisch beansprucht geknickt oder beschädigt werden und keine Feuchtigkeit eindringen kann Falls Funktionsstö...

Page 5: ... 3 Installation 3 1 Domekamera Serie Fastrax I bis III mit Anschlussbox EDC AKS1 Art Nr 74125 3 2 Domekameragehäuse Serie Fastrax III und EDCH Serie mit Anschlussbox EDC AKS1 Art Nr 74125 ...

Page 6: ... Lüftung Heizung 24VAC AC 3 3 Netzwerk Domekamera mit Anschlussbox NTDF AKS1 Art Nr 74145 und Anschlusskabel NTD OPX IPX CC1 Art Nr 74144 ...

Page 7: ...destanforderungen an die Leiter 0 75mm2 18AWG Hinweis Für die Anschlüsse an der Klemmleiste den Knopf drücken und gedrückt halten und das Kabel in das Loch unter dem Knopf einführen Nach Loslassen des Knopfs vorsichtig am Kabel ziehen um zu prüfen ob es sicher angeschlossen ist Zum Lösen eines Kabels den Knopf über dem Kabel drücken und halten und das Kabel herausziehen Hinweis Den BNC Anschluss a...

Page 8: ... in den Domegehäusen der Serie Fastrax III Kabelbelegung Farbe Beschreibung Farbe Beschreibung braun weiß 24VAC Gehäuse Heizung und Lüfter orange GND schwarz weiß rot weiß 24VAC rot COM1 orange weiß 24VAC braun NC1 gelb schwarz FGND schwarz NO1 grün weiß RX TX grau AL1 grau weiß RX TX blau AL2 blau weiß GND grün AL3 gelb AL4 offene Enden Belegung s Tabelle Dome Seite Gehäuse Seite ...

Page 9: ...l verwenden Mindestanforderungen an die Leiter 0 75mm2 18AWG Hinweis Für die Anschlüsse an der Klemmleiste den Knopf drücken und gedrückt halten und das Kabel in das Loch unter dem Knopf einführen Nach Loslassen des Knopfs vorsichtig am Kabel ziehen um zu prüfen ob es sicher angeschlossen ist Zum Lösen eines Kabels den Knopf über dem Kabel drücken und halten und das Kabel herausziehen Hinweis Den ...

Page 10: ...le müssen an den 16 pol Stecker RS 485 RX RX 485 RX ALARM OUT ALARM IN angeschlossen werden Anschluss 4 Anschlussblock 2 pol 24VAC Heizung Lüfter 24VAC 24VAC Anschluss 5 Anschlussblock 3 pol 12VDC GND Kabelbelegung offene Enden offene Enden Belegung s Tabelle Farbe Beschreibung Farbe Beschreibung orange RX Netzwerk orange weiß RS 485 RX Telemetrie braun RX grün weiß RS 485 RX grün TX gelb schwarz ...

Page 11: ...den Kunststoffdübeln an der Wand befestigen 4 BNC Kabel mit der Kabelklemme in der Montageeinheit befestigen 5 Montageeinheit schließen und die Schrauben anziehen HINWEIS Das Eindringen von Feuchtigkeit ins Innere kann durch vollständige Abdichtung der Zwischen räume zwischen Kabeldurchführungen und Kabeln verhindert werden Zur Abdichtung das beiliegende Teflonband um das Gewinde der Fassung wicke...

Page 12: ... Schraube BHS M4 L 8 1 9 Unterlegscheibe Stern M4 1 Bei Verwendung der Anschlusskabel 74143 74144 entfernen HINWEIS Der Betriebstemperaturbereich dieser Einheit beträgt 40 C bis 50 C Diese Einheit daher nicht direkter Sonneneinstrahlung aussetzen und an einem gut belüfteten Ort installieren so dass die Innentemperatur sich nicht darüber hinaus erhöhen kann 6 Nach Montage des Gehäuses am Sockel die...

Page 13: ...skabel für EDC xxx 2 Fastrax III Standard Domes im Innen Außengehäuse nur für EDC AKS1 Art Nr 74125 74138 EDC AKS1 MP Adapterplatte für Befestigung EDC AKS1 an EDC PM7 oder EDC CMA2 74055 EDC PM7 Mastmontagset für EDC IPS OPC Gehäuse 70 140mm Mast 74054 EDC CMA2 Eckmontagewinkel für EDC IPS OPC Gehäuse und Wandarm EDC WMB1 Zubehör von Art Nr Typ Kurzbeschreibung 74130 EDC OPC 2 24V Domegehäuse für...

Page 14: ...d vibration Do not place any heavy objects on the unit To disconnect the power cord of the unit pull it out by the plug Never pull the cord itself Pay attention when laying the connection cable and observe that the cable is not subject to heavy loads kinks or damage and no moisture can get in Do not attempt to disassemble the camera board from the dome Contact your local dealer in case of malfunct...

Page 15: ... 3 Installation 3 1 Dome Camera Series Fastrax I to III with Power Connection Box EDC AKS1 Art No 74125 3 2 Dome Camera Housing Series Fastrax III and EDCH with Power Connection Box EDC AKS1 Art No 74125 ...

Page 16: ...16 Fan heater 24VAC AC 3 3 Web Dome Camera with Power Connection Box NTDF AKS1 Art No 74145 and Connection Cable NTD OPX IPX CC1 Art No 74144 ...

Page 17: ...ional Requirement be outdoor Minimum conductor size 0 75mm2 18AWG NOTE To male connections on the Connector Strip press and hold the button and insert the wire in the hole below the button After releasing the button tug gently on the wire to make certain it is connected To disconnect a wire press and hold the button above the wire and pull out the wire NOTE Place the BNC connector at the safe posi...

Page 18: ... dome housings of the Fastrax III series Cable assignment Colour Description Colour Description brown white 24VAC housing fan and heater orange GND black white red white 24VAC red COM1 orange white 24VAC brown NC1 yellow black FGND black NO1 green white RX TX grey AL1 grey white RX TX blue AL2 blue white GND green AL3 yellow AL4 open ends assignment see table Dome Side Housing Side ...

Page 19: ...roduct to National Requirement be outdoor Minimum conductor size 0 75mm2 18AWG NOTE To male connections on the Connector Strip press and hold the button and insert the wire in the hole below the button After releasing the button tug gently on the wire to make certain it is connected To disconnect a wire press and hold the button above the wire and pull out the wire NOTE Place the BNC connector at ...

Page 20: ...embled to 16pin connector RS 485 RX RX 485 RX ALARM OUT ALARM IN Connector 4 Terminal Block 2 pin 24VAC Fan Heater 24VAC 24VAC Connector 5 Terminal Block 3 pin 12VDC GND Cable assignment open ends open ends assignment see table Colour Description Colour Description orange RX Network orange white RS 485 RX Telemetry brown RX green white RS 485 RX green TX yellow black Alarm output grey TX brown whi...

Page 21: ...PTS1 M6 and the plastic anchors on the wall 4 Fix the BNC cable with the cable clamp within the mounting 5 Close the mounting and tighten the screws NOTE You can prevent moisture from generating inside as sealing gaps between PGs and cables completely Seal this using the Teflon tape around a thread of a socket Wire colours according to EIA TIA 568B Pin Colour Ethernet Connected 1 orange Transmit D...

Page 22: ...m Typ 1 8 Screw BHS M4 L 8 1 9 Washer star M4 1 To be removed when using a 74143 74144 connection cable NOTE The range of the operating temperature of this unit is 40 C 50 C Therefore don t expose this unit directly to the sun and install it at a well ventilated place so that the inside temperature may not increase more 6 After assembling the housing to the socket 15 tighten the knocking screw by ...

Page 23: ...I Standard Domes in In Outdoor housing only EDC AKS1 Art No 74125 74138 EDC AKS1 MP Adapter plate for fixation of EDC AKS1 to EDC PM7 or EDC CMA2 74055 EDC PM7 Pole mount adapter for EDC IPS OPC housings and wall bracket EDC WMB1 74054 EDC CMA2 Corner mount adapter for EDC IPS OPC housings and wall bracket EDC WMB1 Accessory to Art No Type Description 74130 EDC OPC 2 24V Pendant mount outdoor dome...

Page 24: ...idité et de vibrations Ne poser aucun objet lourd sur l appareil Pour déconnecter le système de la tension d alimentation il suffit de débrancher le câble de la prise Ne pas tirer directement sur le câble Lors de la pose du câble de branchement toujours respecter la consigne suivante le câble doit être placé de manière à ne pouvoir être endommagé plié ou écrasé et la pénétration d humidité doit êt...

Page 25: ...25 3 Installation 3 1 Caméra dôme series Fastrax I à III avec boîtier de connexion EDC AKS1 ref 74125 3 2 Caisson Caméra Dôme Series Fastrax III et EDCH avec boîtier de connexion EDC AKS1 ref 74125 ...

Page 26: ...26 Ventilation chauffage 24VAC AC 3 3 Caméra dôme pour le Web avec boîtier de connexion NTDF AKS1 ref 74145 et Câble de Raccordement NTD OPX IPX CC1 ref 74144 ...

Page 27: ...es pour l extérieur Taille minimale du conducteur 0 75mm2 18AWG REMARQUE Pour des connexions à la barrette de plomb maintenir le bouton enfoncé et insérer le câble dans le trou situé en dessous du bouton Après avoir relâché le bouton tirer doucement sur le câble pour vérifier qu il est connecté Pour débrancher un câble maintenir le bouton au dessus du câble enfoncé puis retirer le câble REMARQUE P...

Page 28: ...s les boîtiers dômes de la série Fastrax III Remplissage des câbles Couleur Description Couleur Description marron blanc 24VAC caisson ventilation chauffage orange GND noir blanc rouge blanc 24VAC rouge COM1 orange blanc 24VAC marron NC1 jaune noir FGND noir NO1 vert blanc RX TX gris AL1 gris blanc RX TX bleu AL2 bleu blanc GND vert AL3 jaune AL4 fins ouvertes cf tableau Côté dôme Côté boîtier ...

Page 29: ...ionales pour l extérieur Taille minimale du conducteur 0 75mm2 18AWG REMARQUE Pour des connexions à la barrette de plomb maintenir le bouton enfoncé et insérer le câble dans le trou situé en dessous du bouton Après avoir relâché le bouton tirer doucement sur le câble pour vérifier qu il est connecté Pour débrancher un câble maintenir le bouton au dessus du câble enfoncé puis retirer le câble REMAR...

Page 30: ...ivent être connectées à la prise 16 pôles RS 485 RX RX 485 RX ALARM OUT ALARM IN Connecteur 4 Bloc de raccordement 2 pôles 24VAC chauffage ventilateur 24VAC 24VAC Connecteur 5 Bloc de raccordement 3 pôles 12VDC GND Remplissage des câbles fins ouvertes fins ouvertes cf tableau Couleur Description Couleur Description orange RX réseau orange blanc RS 485 RX télémétrie marron RX vert blanc RS 485 RX v...

Page 31: ...ues dans chaque trou 3 Attacher le support à l aide des vis PTS1 M6 et les fixations plastiques au mur 4 Fixer le câble BNC à l aide du collier de câble dans le socle 5 Fermer le socle et serrer les vis REMARQUE Vous pouvez éviter l humidité à l intérieur en fermant complètement les espaces entre les PG et les câbles Pour l étanchéité enrouler la bande Téflon fournie autour du filetage de la fixat...

Page 32: ... 1 9 Rondelle éventail M4 1 À retirer en cas d utilisation du câble de raccordement 74143 74144 REMARQUE La plage des températures de fonctionnement de cette unité se situe entre 40 C et 50 C Par conséquent n exposez pas cette unité directement au soleil Installez la dans un endroit bien ventilé afin d empêcher toute augmentation supplémentaire de la température intérieure 6 Après avoir assemblé l...

Page 33: ...Fastrax III Standard caisson intérieur extérieur seulement EDC AKS1 Code 74125 74138 EDC AKS1 MP Platte adaptateur pour montage EDC AKS1 pour EDC PM7 ou EDC CMA2 74055 EDC PM7 Adaptateur pour montage en mât pour EDC IPS OPC mât 70 140mm 74054 EDC CMA2 Adaptateur pour montage en angle pour EDC IPS OPC et support mural EDC WMB1 Accessoire de N Informatique Modèle Description 74130 EDC OPC 2 24V Dôme...

Page 34: ...s No disposite objetos pesados sobre el aparato Para desconectar el sistema de la corriente de alimentación tire del cable pero sólo agarrando la clavija No tire directamente del cable Al tender los cables de conexión es imprescindible tener en cuenta las siguientes instrucciones Los cables se deberán tender de tal manera que no queden sometidos a carga no queden plegados ni dañados y no pueda pen...

Page 35: ...35 3 Instalación 3 1 Cámara domo serie Fastrax I III con caja de conexión EDC AKS1 código 74125 3 2 Carcasa cámara domo serie Fastrax III y EDCH con caja de conexión EDC AKS1 código 74125 ...

Page 36: ...36 Ventilador calefacción 24VAC AC 3 3 Cámara Web tipo domo con caja de conexión NTDF AKS1 código 74145 y cable de conexión NTD OPX IPX CC1 código 74144 ...

Page 37: ...o nacional para uso exterior Tamaño mínimo del conductor 0 75mm2 18AWG NOTA Para realizar conexiones en la regleta de conectores pulse y mantenga pulsado el botón e inserte el cable en el agujero por debajo del botón Tras soltar el botón tire suavemente del cable para asegurarse de que está conectado Para desconectar un cable pulse y mantenga el botón por encima del cable y sáquelo NOTA Sitúe el c...

Page 38: ...as de cúpula de la serie Fastrax III Ocupación Color Descripción Color Descripción marrón blanco 24VAC carcasa ventilador calefacción naranja GND negro blanco rojo blanco 24VAC rojo COM1 naranja blanco 24VAC marrón NC1 amarillo negro FGND negro NO1 verde blanco RX TX gris AL1 gris blanco RX TX azul AL2 azul blanco GND verde AL3 amarillo AL4 extremos abiertos ocupación véase tabla Lado de la cúpula...

Page 39: ...equisito nacional para uso exterior Tamaño mínimo del conductor 0 75mm2 18AWG NOTA Para realizar conexiones en la regleta de conectores pulse y mantenga pulsado el botón e inserte el cable en el agujero por debajo del botón Tras soltar el botón tire suavemente del cable para asegurarse de que está conectado Para desconectar un cable pulse y mantenga el botón por encima del cable y sáquelo NOTA Sit...

Page 40: ... la clavija de 16 polos RS 485 RX RS 485 RX RX ALARMA OUT ALARMA IN Conector 4 Bloque de conexión 2 polos 24 VAC calefacción ventilador 24 VAC 24 VAC Conector 5 Bloque de conexión 3 polos 12 VDC GND Ocupación extremos abiertos extremos abiertos ocupación véase tabla Color Descripción Color Descripción naranja RX red naranja blanco RS 485 RX telemetría marrón RX verde blanco RS 485 RX verde TX amar...

Page 41: ...stico en cada agujero 3 Fije a la pared la base de soporte mediante los tornillos PTS1 M6 y los tacos de plásticos 4 Fije el cable BNC con la abrazadera dentro del soporte 5 Cierre el soporte y apriete los tornillos NOTA Puede evitar que se forme humedad en el interior sellando bien las ranuras entre los PG y los cables Para conseguir la estanqueidad aplicar la cinta de teflón adjunta sobre la ros...

Page 42: ...rx T20 tipo 5mm 1 8 Tornillo BHS M4 L 8 1 9 Arandela estrella M4 1 Quitarlo si se utiliza el cable de conexión 74143 74144 NOTA El intervalo de temperaturas de funcionamiento de esta unidad es 40 C 50 C Por tanto no exponga la unidad directamente al sol e instálela en un lugar bien ventilado de modo que la temperatura interna no se eleve más 6 Tras montar la carcasa al casquillo 15 apriete el torn...

Page 43: ...s estándar EDC xxx Fastrax III en carcasa para interior o exterior sólo para EDC AKS1 Art Nº 74125 74138 EDC AKS1 MP Placa de adaptador para fijación EDC AKS1 en EDC PM7 o EDC CMA2 74055 EDC PM7 Conjunto de montaje en mástil para carcasa EDC IPS OPC mástil 70 140mm 74054 EDC CMA2 Angular para montaje en esquina para carcasa EDC IPS OPC y brazo de pared EDC WMB1 Accesorios de Código Tipo Descripció...

Page 44: ...y eneo est une marque propriété de Videor E Hartig GmbH Distribution et vente à travers les distributeurs spécialisés eneo es una marca registrada de Videor E Hartig GmbH Venta a traves de los distribuidores especializados VIDEOR E Hartig GmbH Carl Zeiss Straße 8 63322 Rödermark Germany Tel 49 0 6074 888 0 Fax 49 0 6074 888 100 www videor com Adapterplatte 74138 für Mastmontage in Verbindung mit K...

Reviews: