Embraco Fullmotion CF10C, Product Manual
The Embraco Fullmotion CF10C product manual is available for free download at manualshive.com. This comprehensive manual provides detailed instructions on how to effectively operate and maintain your CF10C model. Enhance your product experience by accessing this valuable resource and unleash the full potential of your Embraco appliance.
Share
Download


Reviews:
No comments
Related manuals for Fullmotion CF10C

Oilless Compressors FP209002L
Brand: Campbell Hausfeld Pages: 24

QSB Series
Brand: Quincy Compressor Pages: 87

POLAR AIR PP05H080I1
Brand: Eaton Compressor Pages: 39
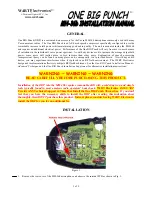
One Big Punch
Brand: W4RT Electronics Pages: 2

60040DCADC
Brand: California Air Tools Pages: 16

8010AD
Brand: California Air Tools Pages: 16

DCB104
Brand: DeWalt Pages: 92

D55145
Brand: DeWalt Pages: 100

XR FLEXVOLT LI-ION DCC1054
Brand: DeWalt Pages: 172

CGT8-65W
Brand: Bosch Pages: 40

MVX50
Brand: Michelin Pages: 48

In Touch HAX4/465-4
Brand: GEA Bock Pages: 32

ATEX
Brand: GEA Pages: 26

0900 1001
Brand: COFAN Pages: 58

R18AC
Brand: Ryobi Pages: 288

Vertex Aquatic Solutions AirStation
Brand: Rentokil Pages: 16

787U77
Brand: Speedaire Pages: 48

170986
Brand: Faller Pages: 12


