background image

user manual

Induction Hob

GK58TSICN

Summary of Contents for GK58TSICN

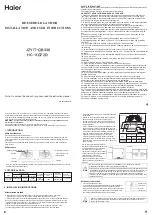
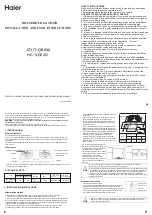
Page 1: ...user manual Induction Hob GK58TSICN ...

Page 2: ...tickers and lay ers from the appliance before the first use Set the cooking zones to off after each use The risk of burns Do not put the objects made of metal for example cutlery or saucepan lids on the surface that you cook They can become hot The Users with an implanted pacemaker must keep their upper body minimum 30 cm from induction cooking zones that are activated Warning Fire risk Too hot fa...

Page 3: ...th a protective floor directly below the appliance Keep safe the cut surfaces of the work top from moisture with a correct sealant Seal the appliance to the work top with no space between with a correct sealant Keep safe the bottom of the appliance from steam and moisture e g from a dishwasher or oven Do not install the appliance adjacent to doors and below windows If not when you open the doors o...

Page 4: ...ctrical connection 220V 240V 230V 400V 2N 220V 240V L2 PE N L1 220V 240V PE N L1 230V PE L2 L1 3 N 2 1 3 N 2 1 3 N 2 1 ASSEMBLY min 50mm min 50mm min 500mm min 5mm 490 1 mm 560 1mm 600mm R 5mm 4 electrolux ...

Page 5: ...are diameter 145 mm 3 Induction cooking zone 1400 W with Power function 2500 W minimum cookware diameter 125 mm 4 Control panel 5 Induction cooking zone 2300 W with Power function 3700 W minimum cookware diameter 180 mm CONTROL PANEL LAYOUT 9 10 8 5 6 4 7 2 3 1 Use the sensor fields to operate the appliance The displays indicators and sounds tell which function operate sensor field function 1 It a...

Page 6: ...on the cooking zone The Automatic Switch Off function operates OPTIHEAT CONTROL 3 STEP RESIDUAL HEAT INDICATOR Warning The risk of burns from residual heat OptiHeat Control shows the level of the re sidual heat The induction cooking zones make the heat necessary for cooking di rectly in the bottom of the cookware The glass ceramic is hot from the heat of the cookware OPERATING INSTRUCTIONS ACTIVAT...

Page 7: ...tting for some time see the illustration and then decreases to the nec essary heat setting To start the Automatic Heat Up function for a cooking zone 1 Touch comes on in the display P 2 Immediately touch the necessary heat setting After 3 seconds comes on in the display To stop the function change the heat set ting POWER FUNCTION The Power function makes more power available to the induction cooki...

Page 8: ...s to flash slow the time counts up The dis play switches between and counted time minutes To see how long the cooking zone operates set the cooking zone with The indicator of the cooking zone starts to flash quickly The display shows the time that the cooking zone operates To deactivate the CountUp Timer set the cooking zone with and touch or to deactivate the timer The indica tor of the cooking z...

Page 9: ...nes with correct cookware COOKWARE FOR INDUCTION COOKING ZONES Important For induction cooking zones a strong electro magnetic field creates the heat in the cookware very quickly Cookware material correct cast iron steel enamelled steel stainless steel the bottom made of multi layer with correct mark from a manufac turer not correct aluminium copper brass glass ceramic porcelain Cookware is correc...

Page 10: ...ntities of food stews and soups 60 150 min Up to 3 l liquid plus ingredients 9 12 Gentle fry escalope veal cordon bleu cutlets rissoles sausages liver roux eggs pancakes doughnuts as nec essary Turn halfway through 12 13 Heavy fry hash browns loin steaks steaks 5 15 min Turn halfway through 14 Boil large quantities of water cook pasta sear meat goulash pot roast deep fry chips The Power function i...

Page 11: ...or fields Remove the ob ject from the sensor fields The appliance deactivates You put something on the Remove the object from the sen sor field The residual heat indicator does not comes on The cooking zone is not hot because it operated only for a short time If the cooking zone should be hot speak to the service cen tre The Automatic Heat Up func tion does not operate There is still residual heat...

Page 12: ...essage that comes on Make sure you operated the appliance cor rectly If not the servicing by a customer service technician or dealer will not be free of charge also during the warranty period The instructions about the customer service and conditions of guarantee are in the guar antee booklet ENVIRONMENT CONCERNS The symbol on the product or on its packaging indicates that this product may not be ...

Page 13: ...electrolux 13 ...

Page 14: ...14 electrolux ...

Page 15: ...electrolux 15 ...

Page 16: ...892947809 A 362011 www electrolux com shop ...

Reviews: