background image

 Rev. 4/11

User Instructions

©Elation Pr

o

fessionals®  -  www.elationlighting.com  - Event Bar Instruction Manual Page 2
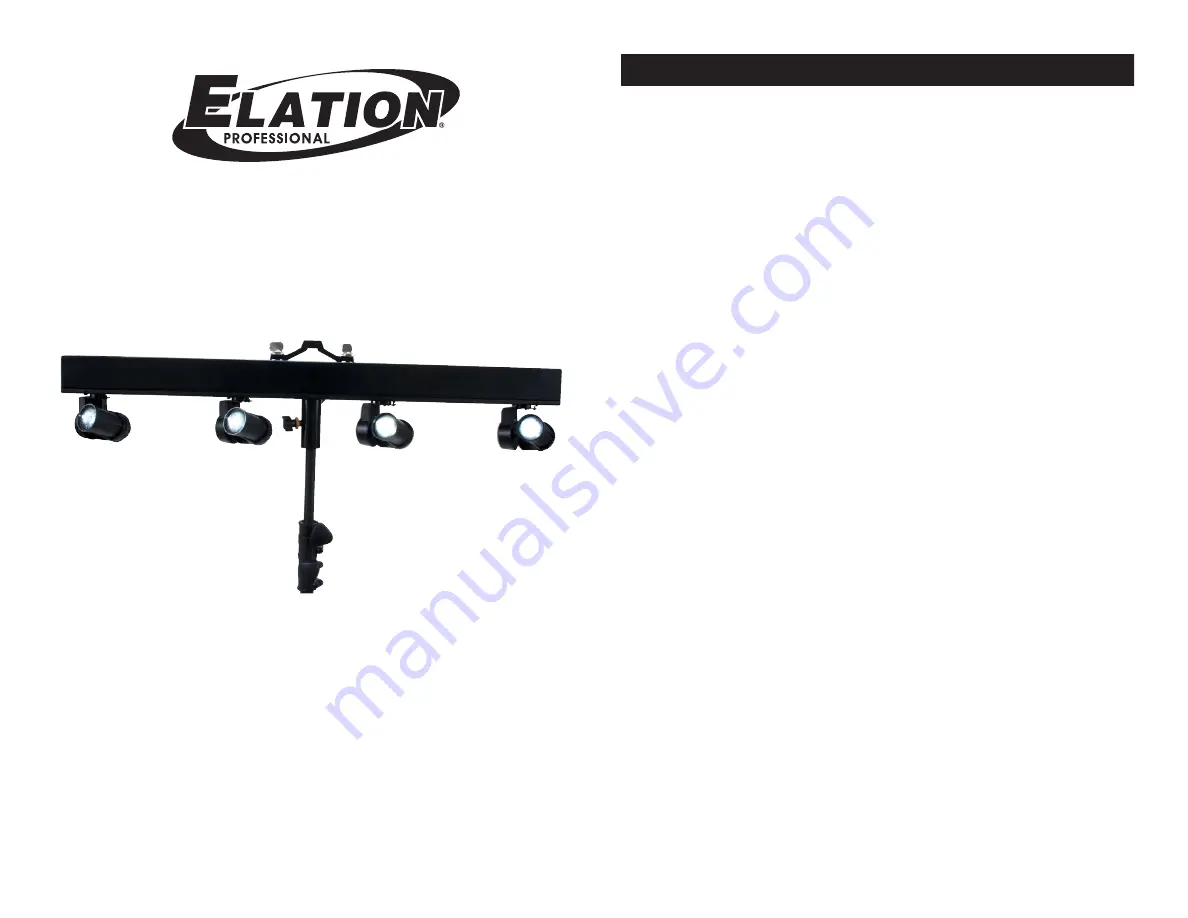
  Event Bar         

                                         General Information

Unpacking: 

Thank you for purchasing the Event Bar by Elation Pro-

fessionals

®

. Every Event Bar has been thoroughly tested and has been 

shipped in perfect operating condition. Carefully check the shipping 
carton  for  damage  that  may  have  occurred  during  shipping.  If  the 
carton appears to be damaged, carefully inspect your fixture for any 
damage and be sure all equipment necessary to operate the unit has 
arrived intact. In the event damage has been found or parts are miss-
ing, please contact our toll free customer support number for further 
instructions. Please do not return this unit to your dealer without con-
tacting customer support first. 

Introduction: 

The Event Bar DMX intelligent LED fixture. The Event 

Bar has 3 DMX Modes; 12 Channel DMX Mode, 14 Channel Mode, and 
25 Channel Mode. The fixture three operating modes;  sound active 
mode, show mode or DMX controlled. The Event Bar can only be run 
as stand alone unit. 

For best results use fog or special effects smoke to 

enhance the light projections. 

Customer Support:

 Elation Professionals

®

 provides a toll free cus-

tomer support line, to provide help and to answer any question should 
you  encounter  problems  during  your  set  up  or  initial  operation.  You 
may also visit us on the web at www.elationlighting.com for any com-
ments or suggestions. Service Hours are Monday through Friday 9:00 
a.m. to 5:00 p.m. Pacific Standard Time.
 

Voice:   

(323) 582-3322


Fax: 


(323) 832-9142


E-mail:  

[email protected]

To purchase parts online visit http://parts.elationlighting.com

Warning! 

To prevent or reduce the risk of electrical shock or fire, do 

not expose this unit to rain or moisture. 

Warning! 

This may cause severe eye damage. Avoid looking directly 

into the light source at all times!

EVENT BAR

Summary of Contents for EVENT BAR

Page 1: ...ture The Event Bar has 3 DMX Modes 12 Channel DMX Mode 14 Channel Mode and 25 Channel Mode The fixture three operating modes sound active mode show mode or DMX controlled The Event Bar can only be run as stand alone unit For best results use fog or special effects smoke to enhance the light projections Customer Support Elation Professionals provides a toll free cus tomer support line to provide he...

Page 2: ...sed to rain or water C The appliance does not appear to operate normally or exhibits a marked change in performance Event Bar Safety Precautions Elation Professionals www elationlighting com Event Bar Instruction Manual Page 4 Elation Professionals www elationlighting com Event Bar Instruction Manual Page 3 3 DMX Channel Modes 12 Channel Mode 14 Channel Mode 25 Channel Mode 2 Operating Modes Show ...

Page 3: ...pproved DMX 512 110 Ohm Data cable for data input and data output We recommend Accu Cable DMX cables If you are making your own cables be sure to use standard 110 120 Ohm shielded cable This cable may be purchased at almost all professional sound and lighting stores Your cables should be made with a male and female XLR connector on either end of the cable Also remember that DMX cable must be daisy...

Page 4: ...XLR fixtures may be implemented in a 3 pin XLR DMX line When inserting stan dard 5 pin XLR connectors in to a 3 pin line a cable adaptor must be used these adaptors are readily available at most electric stores The chart below details a proper cable conversion Conductor 5 Pin XLR Male In 3 Pin XLR Female Out Pin 1 Pin 5 Do Not Use Pin 4 Do Not Use Pin 3 Pin 2 Pin 1 Pin 3 Pin 2 Not Used Not Used Da...

Page 5: ...ENU button until Channel Mode is displayed press ENTER Either 12 Channel Mode 14 Channel Mode or 25 Channel Mode will be displayed 2 Press the UP or DOWN buttons to choose your desired DMX mode and press ENTER to confim and exit Slave Mode This will let you set the unit as a master or slave in a master slave configuration 1 Press the MENU button until Slave Mode is displayed press ENTER Either Mas...

Page 6: ... 2 The fixture will now run a self test program To stop the self test press the MENU button Pan Inverse 1 Tap the MENU button until Pan Inverse is displayed press ENTER Either Inverse or Normal will be displayed 2 To activate the Pan inversion tap the UP or DOWN buttons until Inverse is displayed press ENTER to confim To deacti vate Pan inversion select Normal and press Enter Tilt Inverse 1 Tap th...

Page 7: ...in With this feature you can connect the fixtures to one another using the IEC input and output sockets The quantity that can be connected is 4 fixtures maximum After 4 fixtures you will need to use a new power outlet They must be the same fixtures DO NOT mix fixtures Event Bar Home Position Adjust With this function you can adjust and set the fixtures home position 1 Press the ENTER button for at...

Page 8: ...s www elationlighting com Event Bar Instruction Manual Page 15 Elation Professionals www elationlighting com Event Bar Instruction Manual Page 16 Event Bar 25 Channel Mode Event Bar 12 Channel Mode Event Bar 14 Channel Mode ...

Page 9: ...n Professionals concludes after inspection affects the reliability of the product if the product has been repaired or serviced by anyone other than the Elation Professionals factory unless prior written authorization was issued to purchaser by Elation Profes sionals if the product is damaged because not properly maintained as set forth in the instruction manual D This is not a service contract and...

Page 10: ...e design of this unit and this manual are subject to change without any prior written notice Event Bar Specifications Model Event Bar Voltage 100 240V 50 60Hz LEDs 4 x 3W White LEDs Beam Angle 12 Degrees Optional 6 Degree Lens Power Consumption 54W Fuse 7A Power Cord Daisy Chain 4 Fixtures Max Dimensions 39 L x 3 W x 8 H 1000mm x 80mm x 202mm Weight 16 8 Lbs 7 6 kgs Colors White Duty Cycle None DM...

Reviews: