background image

DynaSample - XpressO 


Quickstart 


When you unpack your new XpressO you should find the following parts: 


XpressO (with soft case) 
- AC adapter 
- USB System Backup Drive (during the presale period NOT in the box! – You will receive it later separately.) 
- Please download the operating manual from the XpressO website. 
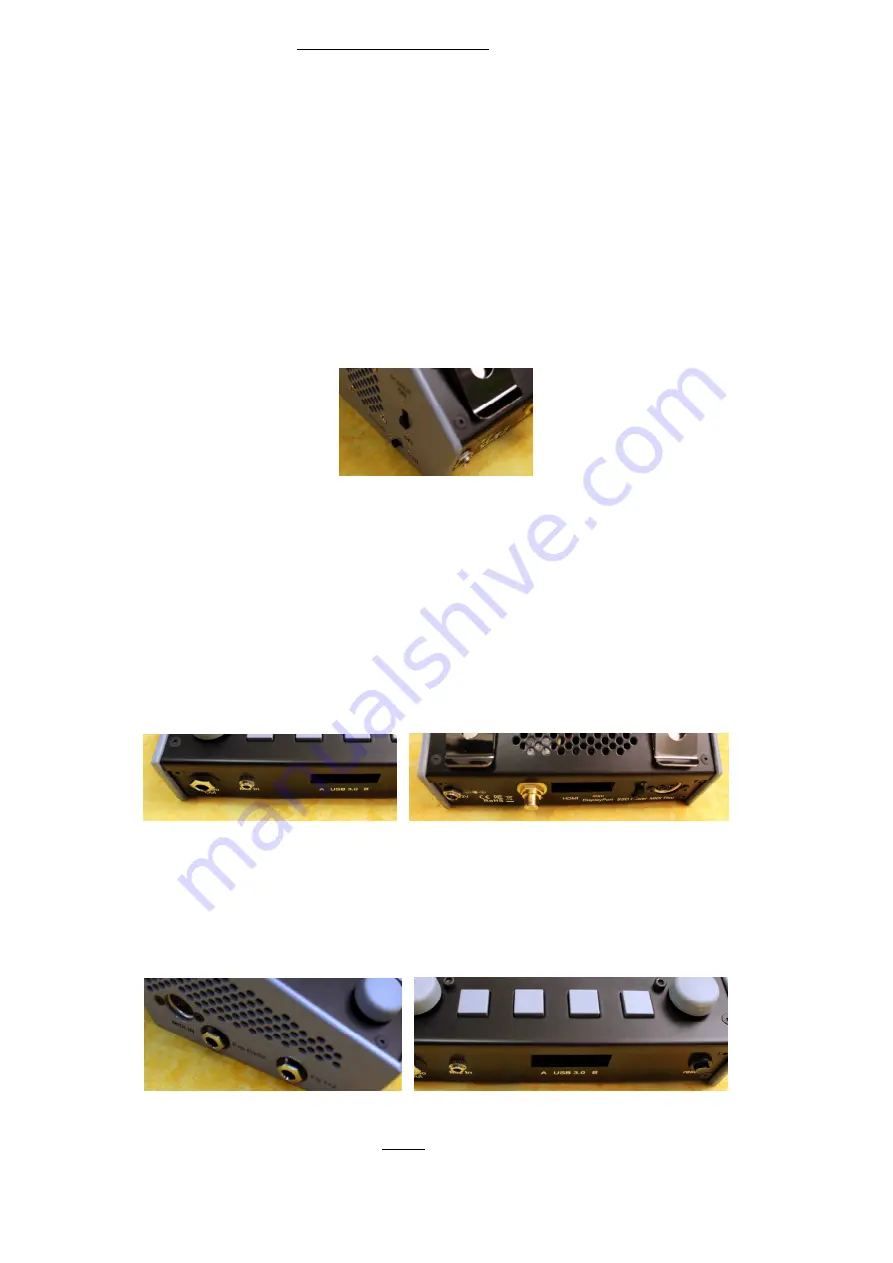
 

Placement 


- Place the device on a dry surface and make sure that the air vents are never covered. 


Power Supply 


-  Connect the included power supply to the Power In (DC 12V) jack on the rear side of the XpressO. Then 

plug it into the wall outlet and move the Power Switch on the right hand to the upper position. You can turn 
it off later by bringing it to the lower position. 


  The display shows a start-up message. 


-  The XpressO is now loading the software and the sound library. This will take a moment. When loading 

has completed the display will show “READY” and change to the main display page showing the current 
program name on the first line of the display. The next line will show the breath level and pitchbend by 
default. The bottom line shows information about the MIDI program, transposition, octave and the current 
edit channel. 


  This can be customized in the [Global] settings. 

 
Audio Connections 


-  Connect the „Stereo Out“ jack with a stereo 1/4 inch TRS cables to your (stereo) amplifier. 


  (If you use a mono TS cable you should set the stereo out to mono in [Utility] – see manual.) 


-  Alternatively you could connect stereo headphones with a 1/4 inch phone connector to the same output. 


-  If you have a digital SPDIF input on your sound system you can also use the rear SPDIF connector. 


-  Turn the volume all the way down before connecting the XpressO and then turn it back up slowly in order 

to avoid damage to both your ears and your amplification system. 


 hint: 

To test the audio connection you could move with the left wheel twice counterclockwise and press onto the right wheel 
to listen to the audio demos. Pressing once more will take you back to normal playing mode. 

 
MIDI Connections 


-  Connect the MIDI Out of your MIDI controller with the MIDI In port of your XpressO


-  You can also use a USB keyboard or an Akai EWI-USB / EWI5000, etc. with any of the 2 USB ports. 

The USB MIDI controller needs to support standard class compliant USB MIDI drivers in order to be 
recognized. Make sure it is connected before starting up. A USB hub might work or not … 

-  Set your controller to transmit on MIDI channel 1. 


 hint: 

For testing the MIDI communication you can activate the MIDI Monitor. Press the buttons 3+4 simultaneously to do so. 
Pressing briefly onto any of the wheels will bring you back to normal playing mode. 


Summary of Contents for XpressO

Page 1: ... Connect the Stereo Out jack with a stereo 1 4 inch TRS cables to your stereo amplifier If you use a mono TS cable you should set the stereo out to mono in Utility see manual Alternatively you could connect stereo headphones with a 1 4 inch phone connector to the same output If you have a digital SPDIF input on your sound system you can also use the rear SPDIF connector Turn the volume all the way...

Page 2: ... 1 5 Done Now you can select the different patches by using MIDI program changes or using the right wheel of the XpressO and play them Different sound banks can be activated by moving to the left to Bank Number or easier by pressing button 1 2 Please note that preset banks for wind controllers start with WC and keyboard banks start with KB With a wind controller always use banks starting with WC Y...

Page 3: ...kenkabel TRS mit Ihrem Verstärker Bei einem Mono Kabel sollte der Ausgang in Utility von Stereo auf Mono gestellt werden s Anleitung Alternativ kann ein Kopfhörer mit 6 3mm Stecker am selben Ausgang angeschlossen werden Wenn Sie einen digitalen SPDIF Eingang haben können Sie auch den gelben SPDIF Ausgang benutzen Regeln Sie das Volumen herunter bevor Sie den XpressO verbinden und drehen Sie die La...

Page 4: ...ieren Schneller geht s indem man Taster 1 2 gleichzeitig kurz drückt Zurück mit OK oder Escape Beachten Sie dass Preset Bänke für Windcontroller mit WC und Keyboard Bänke mit KB beginnen Wenn Sie einen Windcontroller spielen benutzen Sie immer Werksbänke deren Name mit WC beginnt Sie können auch wie oben Audioverbindungen beschrieben die Demo Songs hören Ändern Sie die MASTER Lautstärke durch Drüc...

Page 5: ...lobal settings Connexions Audio Connectez un câble jack TRS stéréo 1 4 de pouce à la prise Stereo Out puis à votre amplificateur stéréo Si vous utilisez un câble TS mono vous devriez régler le stétéo out sur mono in dans Utility voir le manuel Alternativement vous pourriez connecter un casque stéréo avec une fiche 1 4 de pouce à cette même sortie Si vous avez une entrée digitale SPDIF sur votre sy...

Page 6: ...ette gauche vers la gauche jusqu à Bank Number ou plus simplement en pressant les boutons 1 2 S il vous plaît notez que les banques d usine preset banks pour les contrôleurs à vent wind controllers commencent par WC et les banques de claviers keyboard banks commencent par KB Avec un contrôleur à vent utilisez toujours les banques commençant par WC Vous pouvez aussi écouter les démos comme écrit pl...

Reviews: