- 1 -
INSTALLATION INSTRUCTIONS
SA
VE FOR FUTURE USE
Product names listed herein are trademarks of AS America, Inc.
© AS America, Inc. 2020
7302408-100 (2/2020)
RECOMMENDED TOOLS AND MATERIALS
Most of the procedures require the use of common tools and materials, which are available from hardware and plumbing
supply stores. It is tessential that the tools and materials be on hand before work is begun.
Thank you for selecting DXV. To ensure this product is installed properly, please read these instructions carefully before you begin.
(Certain installations may require professional help.) Also be sure your installation conforms to local codes.
CAUTION: PRODUCT IS FRAGILE. TO AVOID BREAKAGE AND POSSIBLE INJURY HANDLE WITH CARE!
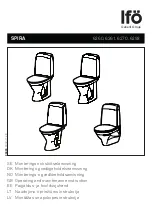
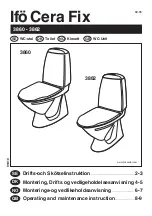
NOTE: Pictures may not exactly define contour of china and components.
!
DXV Belshire
™
1-Piece Toilet, Concealed Trapway
Right Height
®
, Elongated, HET
Model: D22025A101
Gasket
Wax Ring
Regular Screwdriver
10'
Level
Flexible Supply Tube
Closet Bolts
Putty Knife
Tape Measure
Hacksaw
Sealant
Adjustable Wrench
a.
Close toilet supply valve and flush tank completely. Towel or sponge remaining water from tank and bowl.
b.
Disconnect and remove supply line.
NOTE:
If replacing valve, first shut off main water supply!
c.
Remove old mounting hardware, remove toilet and plug floor waste opening to prevent escaping sewer gases.
d.
Remove closet bolts from flange and clean away old wax, putty, etc. from base area.
NOTE:
Mounting surface must be clean and level
before
new toilet is installed!
IMPORTANT:
Water supply on the wall is required at 2-1/4" or 8" from centerline of the toilet. First suggested position is
hidden behind the toilet. The geometry of the toilet gives space for this installation. The second suggested
position is next to the toilet. Between these two positions, the space for the supply between wall and toilet
is limited to 4-1/2". In this case, check your supply and hose dimensions.
1
2
REMOVE OLD TOILET
ALL INSTALLATION PROCEDURES MUST COMPLY IN STRICT ACCORDANCE WITH APPLICABLE LOCAL
PLUMBING AND BUILDING CODES
In the United States:
DXV
One Centennial Avenue
Piscataway, New Jersey 08855
Attention: Director of Customer Care
For residents of the United States, warranty
information may also be obtained by calling
the following toll free number: (800) 227-2734
www.DXV.com
In Canada:
DXV
5900 Avebury Road
Mississauga, Ontario
L5R 3M3
Canada
Toll Free: 1-800-387-0369
Local: 905-306-1093
Fax: 1
-800-395-1498
www.DXV.ca
In Mexico:
DXV
Via Morelos 330
Col. Santa Clara Coatitla
Ecatepec, Estado de México 55540
Toll Free: 01-800-8391200
www.DXV.mx
For rough-in dimensions, see spec page or web site


