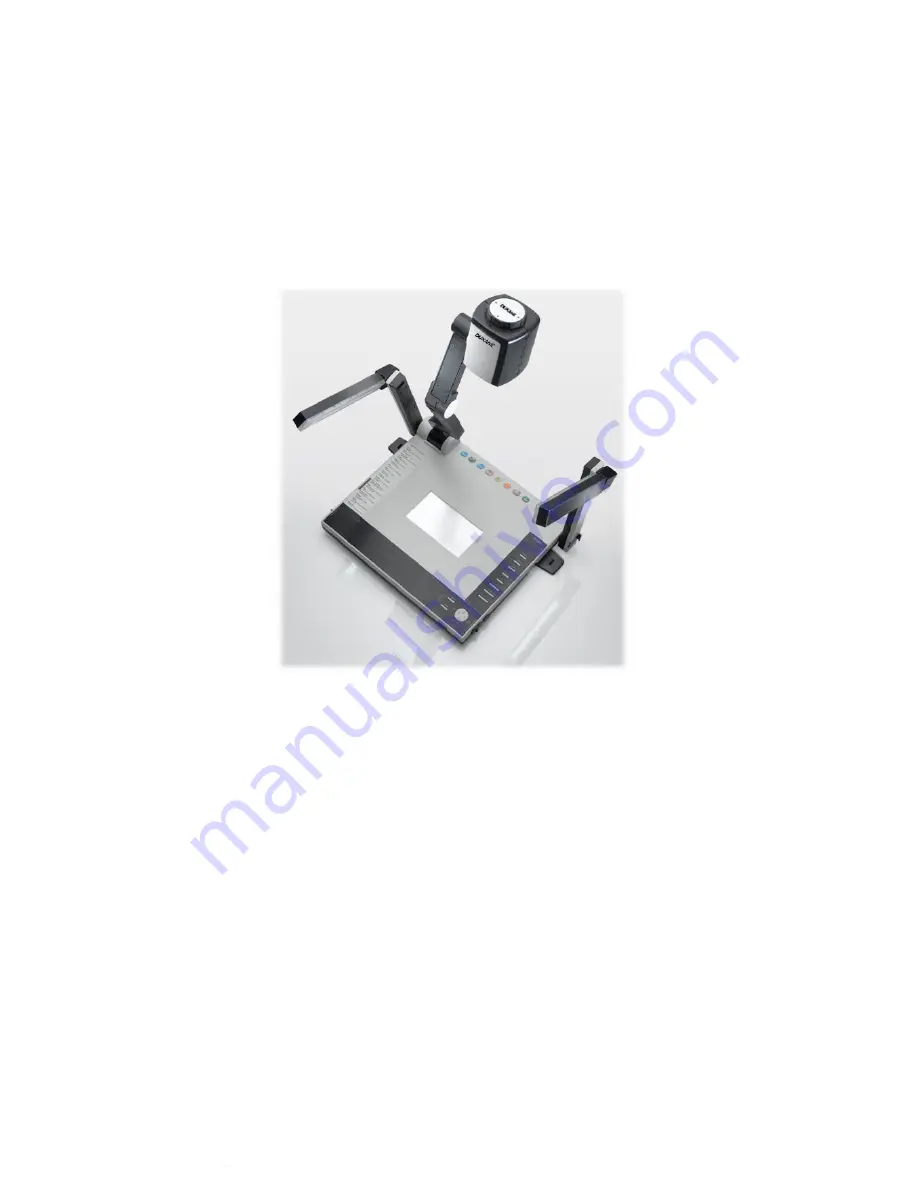
background image

DUKANE  AV                                   

1                                              


Dukane DVP506 

Digital Visualizer


User Manual


Information in this Guide may change due to product improvements. To obtain the latest manuals, literature, and 
software, please visit the Dukane web site at   www.dukcorp.com/av    and look at the specific model SUPPORT  or 
DOWNLOADS section. 


6-11-09

Summary of Contents for DVP506

Page 1: ...r Manual Information in this Guide may change due to product improvements To obtain the latest manuals literature and software please visit the Dukane web site at www dukcorp com av and look at the specific model SUPPORT or DOWNLOADS section 6 11 09 ...

Page 2: ...UNCTION INTRODUCTION 15 5 3 1 Using OSD Menu 15 5 3 2 OSD Menu 16 5 4 OTHER FUNCTIONS 17 5 4 1 Viewing Remote Objects 17 5 4 2 Viewing Positive Negative Images 17 5 4 3 Using USB and RS232 17 5 5 STORAGE AFTER USE 17 CHAPTER 6 Q A 18 Copyright Information Copyright DUKANE CORP All rights reserved No part of this document may be copied reproduced or transmitted by any means without prior written pe...

Page 3: ...e Digital Visualizer 12 Except as specifically instructed in this User s Manual do not attempt to operate this product by yourself Opening or removing covers may expose you to dangerous voltages and other hazards Refer all servicing to licensed service personnel 13 Unplug the Digital Visualizer during thunderstorms or if it is not going to be used for an extended period do not place the Digital Vi...

Page 4: ...se radio interference in which case the user may be required to take adequate measures The typical use is in a school room conference room meeting room or auditorium If this device causes interference to radio or television users can modify the interference with the following methods Readjust the direction of the antenna of the radio or the television Readjust the position between this device and ...

Page 5: ...NE AV 5 Chapter 2 Package Content Please make sure the package comes with the following items DVP506 Quick start guide User Manual Download Card Power Cable USB Cable C Video Cable VGA Cable Remote Control ...

Page 6: ... 1 Front View Rear View 1 Camera Head 2 Camera Arm 3 Lamp 4 Backlight 5 Remote Control Slot 6 CF card slot 7 Lamp lock 8 Control Panel 9 Button Function Guide 10 IR Sensor used for Remote Control 11 Input Output Port including DIP Setting 11 ...

Page 7: ...DEO S Video for video output 5 C VIDEO C Video for composite video output 6 USB Connecting to a computer 7 RS232 Connect external device with RS232 e g central control system used in classroom or meeting 8 Setting Setting output signal modes 9 DC 12V output Output the 12V DC from Digital Visualizer such as the backlight 10 AC in Use this to connect the power cable 100 240V for the power input ...

Page 8: ... Output Default 3 3 2 Video Output NTSC NTSC for USA Taiwan Panama Philippines Canada Chile Japan Korea Mexico 3 3 3 Video Output PAL PAL Setting Others than above NTSC listed countries 3 3 4 SVGA 600 x 800 Output OFF Default ON ON OFF ON OFF ON OFF ...

Page 9: ...lizer 7 FLIP Rotate the image by 180 8 Freeze Freeze the image on screen 9 A4 F1 A5 F2 Speedy zoom to A4 A5 size by pressing A4 or A5 F1 F2 allows to customize functions 10 Zoom Zoom in out by pressing continuously 11 AF Auto focus by pressing once 12 Brightness Brightness Adjustment by pressing BRT 13 Menu Access into the OSD On screen Display menu Press direction buttons to select one menu and c...

Page 10: ...ut by pressing 6 Focus Manual focus for fine tune 7 Enter Enable the selected function 8 Freeze Freeze the image on screen 9 AF Auto Focus 10 Capture Capture image to internal memory 11 Play Recalls thumbmails of the saved images in the Digital Visualizer or Plays image selected 12 Delete Deletes the saved image in the Digital Visualizer Caution Using the wrong model battery might cause an explosi...

Page 11: ...a head is limited Don t turn it forcefully when it reaches the maximal angle 4 2 Turning ON the Digital Visualizer Note Before using the Digital Visualizer make sure that you have connected it to the computer video source or other output devices See Figure 3 2 Rear View for the position of the connector jack 1 Press POWER and open Digital Visualizer The red LED blinks till finishing the initializa...

Page 12: ... Basic Functions 5 1 1 Source The default input source is set as Camera press Source to switch Control Panel Remote Control 5 1 2 Zoom In Out Zoom in out by pressing continuously Control Panel Remote Control Monitor Projector PC Notebook ...

Page 13: ...DUKANE AV 13 5 1 3 Auto Focus Execute AF by pressing once Control Panel Remote Control 5 1 4 Brightness 5 1 5 Lamp Switch ON OFF the lamp and backlight 5 1 6 Photo Text Gray ...

Page 14: ...aptured images miniature 2 Press to select the miniature image that you want 3 Press Enter to display the image on the full screen 4 Press to move up and down the images 5 Press Play to return to main screen 6 Press Menu to exit 5 2 2 Delete Captured Images Remote Control or Control Panel 1 Press Play to access into browsing screen 2 Press to select the miniature image that you want 3 Press Delete...

Page 15: ...u 2 Press to select Storage 3 Press to select Auto Erase 4 Press to select on off 5 Press Menu to exit 5 3 OSD On Screen Display Function Introduction 5 3 1 Using OSD Menu Use Remote Control or Control Panel 1 Press Menu to enter OSD menu 2 Press to select function menu 3 Press Enter to enter menu 4 Press to choose function 5 means more than one menu Use to execute specified function 6 means one m...

Page 16: ...ured images Format Execute Format Auto Erase On Off Delete all captured images when user turns off the power Storage Media Internal PC card Language English Deutsch French Italian Eapanol Русский English Traditional Chinese Simplified Chinese Select your native language Factory Reset Enter Exit Reset all default setting Preset Load Execute load setting parameters Preset Save Execute Save setting p...

Page 17: ...ital Visualizer is based on USB 1 1 2 0 Full speed and USB software For detailed information please refer to software user s guide Go to the Dukane web site for the specific model to obtain the USB software queue and the driver www dukcorp com av RS232 RS232 is a serial protocol which facilitates remote control functions For example you can control the Digital Visualizer installed in a conference ...

Page 18: ... Make sure all of the cables are installed correctly and securely 3 Check that the power of the LCD monitor or projector is turned on 4 Make sure the object is positioned in the shooting area Q3 The image or parts of the image are blurred or not in focus The lens focusing is possibly not correct because the object is tilted or not in the best position Press the AF Auto Focus on the remote control ...

Reviews: