background image

DUKANE CORP AV SERVICE DEPT


2900 Dukane Drive

St Charles, IL 60174

800-676-2487 / 630-762-4032 

Fax  630-584-5156

[email protected]  

www.dukane.com/av

Information in this Guide may change due to product improvements. To obtain the latest 

manuals, literature, and software please visit the Dukane web site at;  www.dukane.com/av  

and look at the specific model 

SUPPORT

 or 

DOWNLOADS

 section.

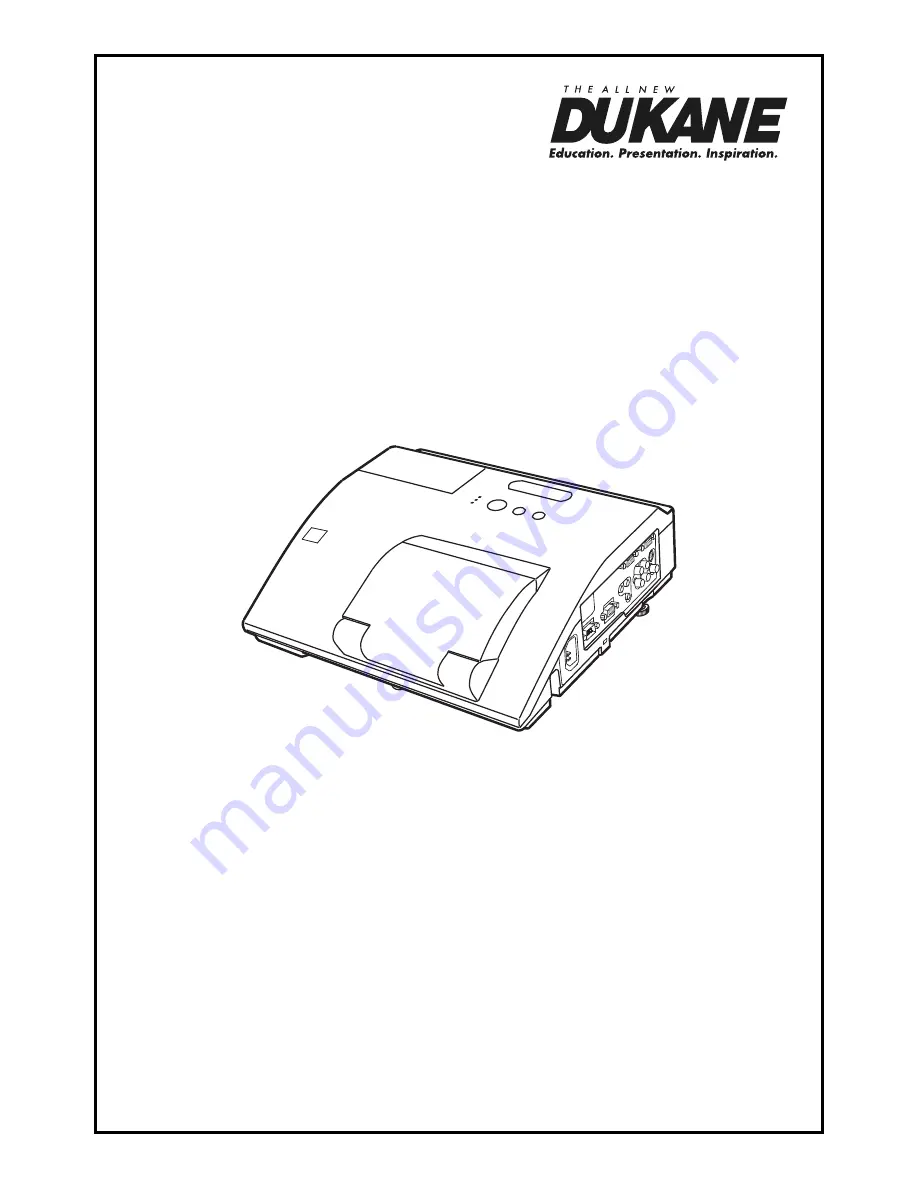
Data Video LCD - Interactive  

WXGA UST Projector

General User’s Manual

MODEL 8107HWI


403-8107HWI-General-00

Summary of Contents for 8107HWI

Page 1: ...com av Information in this Guide may change due to product improvements To obtain the latest manuals literature and software please visit the Dukane web site at www dukane com av and look at the specific model SUPPORT or DOWNLOADS section Data Video LCD Interactive WXGA UST Projector General User s Manual Model 8107HWI 403 8107HWI General 00 ...

Page 2: ......

Page 3: ...t handling This symbol indicates information that if ignored could possibly result in personal injury or physical damage due to incorrect handling Please refer to the pages written following this symbol Mac is a registered trademark of Apple Inc Windows DirectX DirectDraw and Direct3D are registered trademarks of Microsoft Corporation in the U S and or other countries VESA and DDC are trademarks o...

Page 4: ... ASPECT OVER SCAN V POSITION H POSITION H PHASE H SIZE AUTO ADJUST EXECUTE INPUT menu 40 PROGRESSIVE VIDEO NR COLOR SPACE VIDEO FORMAT HDMI FORMAT HDMI RANGE COMPUTER IN FRAME LOCK RESOLUTION SETUP menu 44 D ZOOM D SHIFT PICT POSIT H KEYSTONE KEYSTONE PERFECT FIT AUTO ECO MODE ECO MODE MIRROR STANDBY MODE MONITOR OUT AUDIO menu 47 VOLUME SPEAKER AUDIO SOURCE HDMI AUDIO MIC LEVEL MIC VOLUME SCREEN ...

Page 5: ...tor s network supports the PJLinkTM standard The Interactive Pen included with the projector allows you to write or draw directly on the projected image Also you can control the connected computer on the screen in the same way as using a mouse PJLinkTM is a unified standard for operating and controlling data projectors PJLinkTM enables central control of projectors manufactured by different vendors...

Page 6: ...uring use or just after use since it is too hot Be careful not to pinch your finger with the lens door to prevent an injury Never look into the projection lens or mirror while the projection lamp lights since the projection lamp ray may cause a trouble on your eyes Do not use the security bar and slot to prevent the projector from falling down since it is not designed for it WARNING Maintain normal...

Page 7: ... when a menu is displayed 29 The buttons on the projector work only as the cursor buttons while the template is displayed 53 Ports 9 13 1 USB TYPE A port 2 LAN port 3 HDMI port 4 USB TYPE B port 5 MIC port 6 AUDIO IN1 port 7 AUDIO IN2 port 8 AUDIO IN3 L R ports 9 AUDIO OUT L R ports 10 COMPUTER IN1 port 11 COMPUTER IN2 port 12 MONITOR OUT port 13 CONTROL port 14 VIDEO port 15 S VIDEO port 7 3 11 6...

Page 8: ...on 25 21 FOCUS button 25 22 D ZOOM button 24 23 D ZOOM button 24 24 POSITION button 26 30 25 MENU button 29 30 26 cursor buttons 29 27 ENTER button 29 30 28 ESC button 29 29 RESET button 29 30 Battery cover 16 Back of the remote control 30 VIDEO DOC CAMERA KEYSTONE ASPECT SEARCH BLANK MUTE MY BUTTON POSITION 1 2 ESC ENTER MENU RESET COMPUTER MY SOURCE AUTO MAGNIFY VOLUME ON OFF 㧗 FREEZE FOCUS D ZO...

Page 9: ...ow be aware that it is required to select a screen carefully to have better performance A soft screen such as a pull down screen may cause serious distortion of a projected image A hard screen such as a board screen is recommended for use with this projector A high gain screen such as a bead screen that has narrow viewing angle is not suitable for this projector A low gain screen around 1 0 such a...

Page 10: ...ce the projector in a bathroom or the outdoors Do not place anything containing liquid near the projector Do not place the projector where any oils such as cooking or machine oil are used Use only the mounting accessories the manufacturer specified and leave installing and removing the projector with the mounting accessories to the service personnel Read and keep the user s manual of the mounting a...

Page 11: ...some standard For a cable with a core at only one end connect the end with the core to the projector That may be required by EMI regulations Neither disassemble nor modify the projector and the accessories Do not use the damaged accessory Be careful not to damage the accessories Route a cable so that it is neither stepped on nor pinched out WARNING Do not turn on or off the projector while connect...

Page 12: ... port from the computer use the remote control as a simple mouse and keyboard of the computer or use the Interactive Function 17 56 Setting up continued on next page Plug and Play is a system composed of a computer its operating system and peripheral equipment i e display devices This projector is VESA DDC 2B compatible Plug and Play can be used by connecting this projector to a computer that is V...

Page 13: ...t signal and the projector panel are identical If you connect this projector and a notebook computer you need output the display to an external monitor or output simultaneously to the internal display and an external monitor Consult the computer s manual for the setting Depending on the input signal the automatic adjustment function of this projector may take some time and not function correctly N...

Page 14: ... port In the normal mode the volume of the microphone can be adjusted separately from the volume of the projector using the menu 48 In the standby mode the volume of the microphone is adjustable with the VOLUME buttons on the remote control in synchronization with the volume of the projector 21 Even when the sound of projector is set to mute mode by the AUDIO SOURCE function 47 the volume of the m...

Page 15: ...AN cable To use NETWORK BRIDGE function also connect the CONTROL port and an RS 232C port of the external device to communicate as a network terminal See the User s Manual Network Guide for details of the network functions Setting up Before connecting the projector to a network system be sure to obtain the consent of the administrator of the network 66 Do not connect the LAN port to any network th...

Page 16: ...Do not distribute the power supply to multiple devices Doing so may overload the outlet and connectors loosen the connection or result in fire electric shock or other accidents WARNING Using the security bar and slot A commercial anti theft chain or wire up to 10 mm in diameter can be attached to the security bar on the projector Also this product has the security slot for the Kensington lock For d...

Page 17: ...le cover 3 Insert the three knobs on the cable cover into the three holes on the projector as shown in the figure Pass the cables through the holes on the bottom of the cable cover 1 2 3 1 2 3 knobs Setting up Be careful not to pinch the cables in the cable cover to prevent damage to the cables Use the cable cover that is supplied with the projector Do not attempt any modifications to the cable cove...

Page 18: ...environment Be sure to use only the batteries specified Do not use batteries of different types at the same time Do not mix a new battery with used one Make sure the plus and minus terminals are correctly aligned when loading a battery Keep a battery away from children and pets Do not recharge short circuit solder or disassemble a battery Do not place a battery in a fire or water Keep batteries in a...

Page 19: ...uilt in pointing device because the built in pointing device may have priority to this function Windows 95 OSR 2 1 or higher is required for this function And also this function may not work depending on the computer s configurations and mouse drivers This function can work with the computer which can operate general USB mouse or keyboard You cannot do things like press two buttons at once for inst...

Page 20: ... result in fire injury and or pollution of the surrounding environment Be sure to use only the batteries specified Make sure the plus and minus terminals are correctly aligned when loading a battery Keep a battery away from children and pets Do not recharge short circuit solder or disassemble a battery Do not place a battery in a fire or water Keep batteries in a dark cool and dry place If you observ...

Page 21: ...TER MENU RESET COMPUTER MY SOURCE AUTO MAGNIFY VOLUME ON OFF 㧗 FREEZE FOCUS D ZOOM PAGE UP DOWN STANDBY ON button POWER indicator WARNING Never look into the projection lens or mirror while the projection lamp lights since the projection lamp ray may cause a trouble on your eyes Be careful not to pinch your finger with the lens door to prevent an injury Do not place the projector vertically with th...

Page 22: ...ng in orange The lens door will close right after the lamp goes off However to maintain better picture quality the lens door will close after the lamp has been cooled down when the projector is installed upside down such as in ceiling mount installation Then POWER indicator will stop blinking and light in steady orange when the lamp cooling is complete 107 Do not turn the projector on for about 10...

Page 23: ...r a few seconds Temporarily muting the sound When is selected for current picture input port the sound is always muted Please see AUDIO SOURCE item of AUDIO menu 47 C C Closed Caption is automatically activated when sound is muted and an input signal containing C C is received This function is available only when the signal is NTSC for VIDEO or S VIDEO or 480i 60 for COMPUTER IN1 or COMPUTER IN2 a...

Page 24: ...etected 55 If COMPUTER button is pressed when VIDEO S VIDEO or HDMI port is selected the projector will check COMPUTER IN1 port first It may take several seconds to project the images from the USB TYPE B port 1 Press the MY SOURCE DOC CAMERA button on the remote control The input signal will be changed into the signal you set as MY SOURCE 59 This function also can use for document camera Select the...

Page 25: ... the state selected before the operation Searching an input signal While ON is selected for AUTO SEARCH item in OPTION menu 55 the projector will keep checking the ports in above order repeatedly till an input signal is detected It may take several seconds to project the images from the USB TYPE B port For a computer signal NORMAL 4 3 16 9 16 10 NATIVE For a video signal s video signal or componen...

Page 26: ... do not touch these buttons for a few seconds until the dialog is disappeared If you want to expand a part of the image use the magnify function 27 D ZOOM button VIDEO DOC CAMERA KEYSTONE ASPECT SEARCH BLANK MUTE MY BUTTON POSITION 1 2 MENU COMPUTER MY SOURCE AUTO MAGNIFY VOLUME ON OFF 㧗 FREEZE FOCUS D ZOOM PAGE UP DOWN D ZOOM button Keep the spacers away from children and pets Be careful not to l...

Page 27: ...layed on the edge of the screen depending on the Computer model The items adjusted by this function may vary when the FINE or DISABLE is selected for the AUTO ADJUST item of the SERVICE item in the OPTION menu 60 For a component video signal The vertical position and horizontal position will be automatically set to the default The horizontal phase will be automatically adjusted AUTO button VIDEO D...

Page 28: ...eystone distortions 2 Use the cursor buttons to select MANUAL or PERFECT FIT operation and press the button to perform the following 1 MANUAL displays a dialog for keystone correction Use the buttons to select KEYSTONE KEYSTONE then use the buttons for adjustment 2 PERFECT FIT displays a dialog for adjusting the shape of the projected image in each of the corners and sides To close the dialog and ...

Page 29: ...gles are displayed on the dialog use the cursor buttons to shift the magnifying area Press the MAGNIFY OFF button on the remote control to exit magnification The MAGNIFY dialog will automatically disappear in several seconds with no operation The dialog will appear again if the MAGNIFY ON button is pressed when the dialog has automatically disappeared The magnification is automatically disabled when...

Page 30: ...ojector will go into the FREEZE mode which the picture is frozen To exit the FREEZE mode and restore the screen to normal press the FREEZE button again Temporarily freezing the screen The projector automatically exits from the FREEZE mode when some control buttons are pressed If the projector continues projecting a still image for a long time the LCD panel might possibly be burned in Do not leave ...

Page 31: ... button on the projector works as the cursor buttons The basic operations of these menus are as follows In the EASY MENU continued on next page 1 Use the cursor buttons to select a menu If you want to change it to the EASY MENU select the EASY MENU The items in the menu appear on the right side 2 Press the cursor button or ENTER button to move the cursor to the right side Then use the cursor butto...

Page 32: ...T button on the remote control during the operation Note that some items ex LANGUAGE VOLUME cannot be reset In the ADVANCED MENU when you want to return to the previous display press the cursor button or ESC button on the remote control Indication in OSD On Screen Display The meanings of the general words on the OSD are as follows Indication Meaning EXIT Selecting this word finishes the OSD menu It...

Page 33: ...he magnification ratio Small Large See the D ZOOM item in the SETUP menu 44 The on screen menu might be displayed outside of the image display area depending on the adjustment value of the ASPECT D ZOOM KEYSTON and KEYSTONE Changing the values of ASPECT D ZOOM KEYSTONE and KEYSTONE may fix the symptom KEYSTONE Using the buttons corrects the vertical keystone distortion See the KEYSTONE item in SETUP...

Page 34: ...operated but it is not a malfunction ECO MODE Using the buttons changes the eco mode setting See the ECO MODE item in SETUP menu 46 MIRROR Using the buttons switches the mode for mirror status See the MIRROR item in SETUP menu 46 RESET Performing this item resets all of the EASY MENU items except the FILTER TIME and LANGUAGE A dialog is displayed for confirmation Selecting the OK using the button p...

Page 35: ...menu INTERACTIVE menu Item Description INTERACTIVE Executing this item starts or cancels calibration of the position of the pen For more details refer to the manual for the StarBoard Software in the bundled DVD ROM 79 ...

Page 36: ... an item using the buttons and adjust the level using the buttons You can display a test pattern for checking the effect of your adjustment by pressing the ENTER button Each time you press the ENTER button the pattern changes as below No pattern Gray scale of 9 steps Ramp Gray scale of 15 steps The eight equalizing bars correspond to eight tone levels of the test pattern Gray scale of 9 steps exce...

Page 37: ... Lines or other noise might appear on the screen when this function is operated but it is not a malfunction COLOR Using the buttons adjusts the strength of whole color Weak Strong This item can be selected only for a video s video and component video signal For an HDMITM signal this item can also be selected if either 1 or 2 applies 1 HDMI FORMAT item in the INPUT menu is set to VIDEO 2 HDMI FORMA...

Page 38: ...he or ENTER button performs each function SAVE 1 SAVE 2 SAVE 3 SAVE 4 LOAD 4 LOAD 3 LOAD 2 LOAD 1 SAVE 1 SAVE 2 SAVE 3 SAVE 4 Performing a SAVE function saves the current adjustment data into the memory linked in the number included in the function s name Remember that the current data being stored of a memory will be lost by saving new data into the memory LOAD 1 LOAD 2 LOAD 3 LOAD 4 Performing a...

Page 39: ... or component video signal 4 3 16 9 16 10 14 9 NATIVE For an input signal from the LAN USB TYPE A or USB TYPE B port or if there is no signal 16 10 fixed The NORMAL mode keeps the original aspect ratio of the signal OVER SCAN Using the buttons adjusts the over scan ratio Small It magnifies picture Large It reduces picture This item can be selected only for a video s video and component video signal ...

Page 40: ... set to 10 This function is unavailable for a signal from the LAN USB TYPE A USB TYPE B or HDMI port H POSITION Using the buttons adjusts the horizontal position Right Left Over adjusting the horizontal position may cause noise to appear on the screen If this occurs please reset the horizontal position to the default setting Pressing the RESET button when the H POSITION is selected will reset the ...

Page 41: ... the application window is set to its maximum size prior to attempting to use this feature A dark picture may still be incorrectly adjusted Use a bright picture when adjusting For a video signal and s video signal The video format best suited for the respective input signal will be selected automatically This function is available only when the AUTO is selected for the VIDEO FORMAT item in the INP...

Page 42: ...in defect for example jagged line of the picture for a quick moving object In such a case please select OFF even though the screen image may lose sharpness VIDEO NR Using the buttons switches the noise reduction mode HIGH MID LOW This function works only for a video signal s video signal compo nent video signal of 480i 60 or 576i 50 or 1080i 50 60 and an HDMITM signal of 480i 60 or 576i 50 or 1080...

Page 43: ... the input signal HDMI FORMAT Using the cursor buttons switches the video format for an input from the HDMI port AUTO VIDEO COMPUTER Feature AUTO automatically sets the optimum mode VIDEO sets the suitable mode for DVD signals COMPUTER sets the suitable mode for computer signals When the COMPUTER is selected the functions COLOR PICTURE menu TINT PICTURE menu and OVER SCAN IMAGE menu are unavailabl...

Page 44: ...of component video input to COMPUTER IN1 2 port In the AUTO mode the picture may be distorted with certain input signals In such a case remove the signal connector so that no signal is received and select the SYNC ON G OFF and then reconnect the signal FRAME LOCK Set the frame lock function on off for each port 1 Use the buttons to select the input ports 2 Use the buttons to turn the frame lock fu...

Page 45: ...To set a custom resolution use the buttons to select the CUSTOM and the RESOLUTION_CUSTOM box will be displayed Set the horizontal HORZ and vertical VERT resolutions using the buttons This function may not support all resolutions 5 Move the cursor to OK on screen and press the or ENTER button The message ARE YOU SURE YOU WISH TO CHANGE RESOLUTION appears To save the setting press the button The ho...

Page 46: ... the cursor buttons selects the horizontal picture position LEFT MID RIGHT The PICTURE POSITION is not changed if any of the following cases apply The ASPECT is set to 16 9 or 16 10 The input signal has an aspect ratio of 16 9 16 10 or verticallly smaller than 16 10 while ASPECT is set to NORMAL Horizontal size of the displayed image is full on the effective display area while the ASPECT is set to...

Page 47: ...ns and press the ENTER or INPUT button While the distortion is adjusted with the PERFECT FIT function keystone adjustment feature is unavailable To correct the keystone distortion reset the adjustment of all the corners and sides When the amount of correction is increased using the PERFECT FIT function the Interactive Function may not function properly particularly if the side correction amount is...

Page 48: ...tion control except to turn the projector on and the network function are disabled while the projector is in the standby mode If the COMMUNICATION TYPE in the COMMUNICATION menu is set to NETWORK BRIDGE all of the RS 232C commands are disabled 63 When SAVING is selected STANDBY setting of AUDIO SOURCE 47 is invalid and no signal is output from AUDIO OUT port in the standby mode When SAVING is sele...

Page 49: ...r does not work when SPEAKER is set to OFF 1 Choose a picture input port using the buttons Choose STANDBY to select the sound output in the standby mode 2 Select one of the AUDIO IN ports using buttons Select to mute the sound from the input port or in the standby mode chosen in the step 1 In the AUDIO SOURCE window H symbolizes the audio signal from the HDMI port It can be selected only for the p...

Page 50: ...he suitable one for your HDMITM audio device 1 2 MIC LEVEL Using the buttons switches the input level to match that of the microphone connected to the MIC port HIGH LOW HIGH for a microphone with an amplifier LOW for a microphone without an amplifier MIC VOLUME Using the buttons adjusts the volume of the microphone connected to the MIC port Low High ...

Page 51: ...on on the remote control MyScreen ORIGINAL BLUE WHITE BLACK MyScreen Screen can be registered by the MyScreen item 50 ORIGINAL Screen preset as the standard screen BLUE WHITE BLACK Plain screens in each color To avoid remaining as an afterimage the MyScreen or ORIGINAL screen will change to the plain black screen after several minutes START UP Using the buttons switches the mode for the start up s...

Page 52: ...the position of the image which you want to use The frame may not be able to be moved for some input signals To start registration press the ENTER or INPUT button on the remote control To restore the screen and return to the previous dialog press the RESET button on the remote control Registration may take several minutes When the registration is completed the registered screen and the following m...

Page 53: ...g while searching for the input Detecting while an input signal is detected AUTO ECO MODE while starting up with AUTO ECO MODE The indication of the input signal displayed by changing The indication of the aspect ratio displayed by changing The indication of the PICTURE MODE displayed by changing The indication of the ACTIVE IRIS displayed by changing The indication of the MY MEMORY displayed by c...

Page 54: ... blank until a name is specified 3 Select an icon you would like to assign to the port in the SOURCE NAME dialog The name assigned to the port will also be automatically switched according to your icon selection Press the ENTER or INPUT button to determine your icon selection 4 Select a number you would like to assign to the port along with the icon You can select the number either from blank no nu...

Page 55: ...he same procedure as described at the item 6 above 8 To finish entering text move the cursor to the OK on screen and press the ENTER or INPUT button To revert to the previous name without saving changes move the cursor to the CANCEL on screen and press the ENTER or INPUT button TEMPLATE Using the cursor buttons switches the mode for the template screen Press the cursor or the ENTER button to displa...

Page 56: ...f The caption is not displayed when the OSD menu is active The Closed Caption is the function to display the dialogue narration and or sound effects of a television program or other video sources The Closed Caption availability is depending upon broadcaster and or content MODE Select Closed Caption MODE setting from following options using buttons CAPTIONS TEXT CAPTIONS Display Closed Caption TEXT...

Page 57: ...stop searching and display the image COMPUTER IN1 COMPUTER IN2 LAN USB TYPE A VIDEO S VIDEO HDMI USB TYPE B It may take several seconds to project the images from the USB TYPE B port DIRECT POWER ON Using the buttons turns on off the DIRECT POWER ON function ON OFF When set to the ON the lamp in projector will be automatically turned on without the usual procedure 19 only when the projector is sup...

Page 58: ...t To use this function you need to connect the USB TYPE B port of the projector and the type A USB port of a computer MOUSE USB DISPLAY MOUSE The accessory remote control works as the simple mouse and keyboard of the computer USB DISPLAY The port works as an input port that receives image signals from the computer 94 It may take several seconds to project the images from the USB TYPE B port In the...

Page 59: ...about the lamp For the lamp replacement see the section Replacing the lamp 97 FILTER TIME The filter time is the usage time of the air filter counted after the last resetting It is shown in the OPTION menu Pressing the RESET button on the remote control or the button of the projector displays a dialog To reset the filter time select the OK using the button CANCEL OK Please reset the filter time only w...

Page 60: ...PE A port and starts a Slideshow MY IMAGE Displays the MY IMAGE menu 69 MESSENGER Turns the messenger text displayed on the screen on off Messenger Function in the User s Manual Network Guide When there is no transferred text data to display the message NO MESSENGER DATA appears CALIBRATE Starts or cancels calibration of the position of the pen For more details refer to the manual for the StarBoar...

Page 61: ... to adjust the magnification ratio D SHIFT Turns the D SHIFT mode on off When the D SHIFT mode is on use the cursor buttons to move the magnifying area RESOLUTION Turns on off the RESOLUTION dialog 43 MIC VOLUME Turns on off the MIC VOLUME dialog 48 ECO MODE Turns on off the ECO MODE dialog 46 MY SOURCE Using buttons selects the picture input port to be selected with pressing the MY SOURCE DOC CAME...

Page 62: ...k correctly In such a case please choose DISABLE to disable the automatic adjustment and make adjustment manually GHOST 1 Select a color element of ghost using the buttons 2 Adjust the selected element using the buttons to disappear ghost FILTER MESSAGE Use the button to set the timer for notifying by the message when to replace the filter unit 500h 1000h 2000h 3000h 4000h 5000h OFF After choosing ...

Page 63: ...low impact to the lens door as it incorporates a mirror Keep the projector out of the reach of children Never touch a lens door or mirror If the mirror is broken the projected image will be distorted Close the lens door and contact your dealer When the LENS DOOR LOCK is set to ON and the lens door is not open completely for some reason the image may shift or have keystone distortion In that case u...

Page 64: ...MMUNICATION Selecting this item displays COMMUNICATION menu In this menu you can configure the serial communication settings of the projector using the CONTROL port Select an item using the cursor buttons Then pressing the button opens the submenu for the setting item you selected Or pressing the button instead of the button makes the menu back to the previous one without changing the setup Each su...

Page 65: ...elow SERIAL SETTINGS Select the serial communication condition for the CONTROL port BAUD RATE 4800bps 9600bps 19200bps 38400bps PARITY NONE ODD EVEN The BAUD RATE is fixed to 19200bps and PARITY is fixed NONE when the COMMUNICATION TYPE is set to OFF above TRANSMISSION METHOD Select the transmission method for communication by the NETWORK BRIDGE from the CONTROL port HALF DUPLEX FULL DUPLEX HALF DUP...

Page 66: ...vice that the projector sends data to In this mode the projector can send out data from the computer continuously 1s 2s 3s Select the time period to keep the projector waiting for response from the device that the projector sends data to While waiting the response the projector does not send out any data from the CONTROL port This menu is available only when the NETWORK BRIDGE is selected for the ...

Page 67: ...em can t be selected for no signal and sync out When the MY TEXT DISPLAY is set to ON the MY TEXT is displayed together with the input information in the INPUT_ INFORMATION box 78 FACTORY RESET Selecting OK using the button performs this function By this function all the items in all of menus will collectively return to the initial setting Note that the items LAMP TIME FILTER TIME LANGUAGE FILTER ...

Page 68: ...rk Guide then you must set the DATE AND TIME during the initial installation The network communication control is disabled while the projector is in standby mode if the STANDBY MODE item of SETUP menu is set to SAVING Please connect the network communication to the projector after setting the STANDBY MODE to NORMAL 46 NOTE Item Description SETUP Selecting this item displays the SETUP Menu for the ...

Page 69: ...omputer network that serves as an access point to another network address This function can only be used when DHCP is set to OFF DNS SERVER Use the buttons to input the DNS server address The DNS server is a system to control domain names and IP addresses on the Network TIME DIFFERENCE Use the buttons to enter the TIME DIFFERENCE Set the same TIME DIFFERENCE as the one set on your computer If unsu...

Page 70: ...or ALL CLEAR on screen and push the ENTER or INPUT button 1 character or all characters will be erased The PROJECTOR NAME can be input up to 64 characters 3 To change an already inserted character press the button to move the cursor to one of the first 3 lines and use the buttons to move the cursor on the character to be changed After pressing the ENTER or INPUT button the character is selected The...

Page 71: ... characters or less To switch the image displayed Use the buttons To return to the menu Press the button on the remote control To erase the image displayed and its source file in the projector 1 Press the RESET button on the remote control while displaying an image to display the MY IMAGE DELETE menu 2 Press the button to perform to erase To stop erasing press the button AMX D D AMX Device Discover...

Page 72: ...ose OK in the dialog The Presenter mode is cancelled and a message is displayed indicating the result To make Presenter mode setting use LiveViewer For details see the section Presenter mode in the User s Manual Network Guide MULTI PC MODE If you set one or more computers to the Multi PC mode on LiveViewer and send their images to the projector you can select the display mode on the projector from...

Page 73: ...de to Multi PC mode on your computer see the section Switching the display mode in the User s Manual Network Guide The Presenter mode setting of the selected computer becomes valid when the display mode is changed to Single PC mode Also the Presenter mode setting becomes invalid when the display mode is changed to Multi PC mode regardless the setting on the computers For details see the section Pr...

Page 74: ...ecreases the set time may become incorrect even though accurate date and time are input Replace the battery suitably 101 IP ADDRESS SUBNET MASK and DEFAULT GATEWAY indicate 0 0 0 0 when DHCP is ON and the projector has not gotten address from DHCP server SERVICE Executing this item restarts and initializes the network functions Choose the RESTART EXECUTE using the button Then use the button to exe...

Page 75: ...ton on the remote control for about 3 seconds or press and hold the INPUT button for 3 seconds while pressing the button on the projector 2 The 10 digit Inquiring Code will be displayed Contact your dealer with the 10 digit Inquiring Code Your password will be sent after your user registration information is confirmed If there is no key input for about 55 seconds while the Inquiring Code is display...

Page 76: ...urn to MyScreen PASSWORD on off menu When a password is set for MyScreen The MyScreen registration function and menu will be unavailable The MyScreen Lock menu will be unavailable The START UP setting will be locked on MyScreen and the menu will be unavailable Turning the MyScreen PASSWORD off will allow normal operation of these functions Please do not forget your MyScreen PASSWORD 2 Turning off ...

Page 77: ...ain If an incorrect PIN code is input 3 times the projector will turn off Afterwards the projector will turn off every time an incorrect PIN code is input The projector will also turn off if there is no key input for about 5 minutes while the Enter PIN code box is displayed This function will activate only when the projector is started after AC power is turned off Please do not forget your PIN cod...

Page 78: ... the right side of the NEW PASSWORD AGAIN box and press the button to display the NOTE NEW PASSWORD box for about 30 seconds please make note of the password during this time Pressing the ENTER button on the remote control or the button on the projector will return to the TRANSITION DETECTOR on off menu Please do not forget your TRANSITION DETECTOR password This function will activate only when th...

Page 79: ...ight side of the NEW PASSWORD AGAIN box and press button to display the NOTE NEW PASSWORD box for about 30 seconds then please make note of the password during this time Pressing the ENTER button on the remote control or button on the projector will return to the MY TEXT PASSWORD on off menu 2 Turning off the MY TEXT PASSWORD 2 1 Follow the procedure in 1 1 to display the MY TEXT PASSWORD on off m...

Page 80: ...NTER or INPUT button to select and enter characters To erase 1 character at one time press the RESET button or press the and INPUT button at the same time Also if you move the cursor to DELETE or ALL CLEAR on screen and press the ENTER or INPUT button 1 character or all characters will be erased The MY TEXT can be input up to 24 characters on each line 3 To change an already inserted character pre...

Page 81: ...or of the projector and the supplied pen without the need of a special board System requirements Hardware and software requirement for computer CPU Pentium 4 1 8 GHz or higher Memory 512 MB or higher OS One of the following Windows XP Home Edition Professional Edition 32 bit version only Windows Vista Home Basic Home Premium Business Ultimate Enterprise 32 bit version only Windows 7 Home Basic Hom...

Page 82: ...ironment where resonance is likely to occur such as at the corner of a room or beside a metallic shelf Malfunction may occur when two or more projectors are used in the same room The pen movement may be disrupted if the projector is used near an inverter fluorescent light or when the light of an inverter fluorescent light falls directly on the screen The PEN sensor may not work correctly if strong l...

Page 83: ...are grounded Malfunction may occur if the cables are not grounded The pen sensor may be blocked if the projector is placed directly on the floor It is recommended the projector be mounted on the wall or ceiling The Interactive Function does not work during rear projection Connection during use Follow the procedure below to connect the computer to the projector 1 Connect the computer cable to the CO...

Page 84: ...2 The tip of the pens comes with a mini built in transmitter Transmission of drawing data from the pen may fail if you hold the pen at the transmission unit while writing or drawing If the characters or objects that you have written or drawn on the screen cannot be loaded correctly on the computer check whether the problem can be resolved by changing the way you hold the pen Do not drop the pen or...

Page 85: ...undled DVD ROM The pen comes with a button at the tip and two buttons at the side You can assign mouse actions to any of these three buttons The default button settings are as follows Button Description of action Pen tip Left mouse click SIDE BUTTON No 0 Hovering moving the cursor without clicking the mouse SIDE BUTTON No 1 Right mouse click Click Press the tip of the pen against the screen surfac...

Page 86: ... INTO A NON COMPUTER DVD PLAYER Inserting the DVD ROM into an incompatible DVD drive may produce a loud noise which in turn MAY RESULT IN EAR AND SPEAKER DAMAGE After using DVD ROM please put it into DVD case and keep it Please keep the DVD neither in direct sunlight nor in a high temperature and high humidity environment CAUTION NOTE The information in the DVD ROM is subject to change without not...

Page 87: ...t work if the adapter is acknowledged as multiple devices connected USB hubs may not work USB devices with security software may not work Be careful when inserting or removing a USB device 12 88 Files with a resolution greater than XGA are not supported Files with a resolution smaller than 36x36 are not supported Files with a resolution smaller than 100x100 may not be displayed Some supported files...

Page 88: ...reen Maximum 20 images are displayed in a screen If you wish you can jump into the Full Screen mode or Slideshow mode after you select some images in the Thumbnail mode The Thumbnail mode will be started as the primary function of the PC LESS Presentation after selecting the USB TYPE A port as the input source Thumbnail menu Selected image Thumbnail images ...

Page 89: ... in the Slideshow This setting information will be saved in the playlist txt file 93 ROTATE Press the cursor button or ENTER to rotate the selected image 90 degrees clockwise This setting information will be saved in the playlist txt file 93 You can control the images in the Thumbnail screen with the remote control or keypad or a web browser software The following functions can be supported while th...

Page 90: ...Sorts in descending order by file date Go to previous next page SLIDESHOW Configures and starts the Slideshow 91 RETURN Press the cursor button or ENTER to return to the Thumbnail screen PLAY Press the cursor button or ENTER to start the Slideshow START Sets the beginning number of the Slideshow STOP Sets the end number of the Slideshow INTERVAL Sets the interval time of the Slideshow PLAY MODE Sele...

Page 91: ...tures in 1 page as maximum It is not possible to change the input port by using the INPUT button when the Thumbnail screen Slideshow or Full Screen is displayed Some error icons will be displayed in the Thumbnail NOTE This file seems to be broken or not supported format A file that cannot be displayed on the thumbnail screen is indicated by a file format icon ...

Page 92: ...n Functions The remote control The keypad on the projector Web Remote in web browser software or PAGE DOWN or or PAGE DOWN Shows the next picture or PAGE UP or or PAGE UP Shows the previous picture ENTER INPUT ENTER Displays Thumbnail These operations are not accessible while the projector OSD is displayed It is not possible to change the input port by using the INPUT button when the Thumbnail scr...

Page 93: ...will be held on screen till the ENTER button on the remote control or Web Remote Control or INPUT button on the projector is pushed NOTE You can start this function from the Slideshow menu To display the Slideshow menu select the SLIDESHOW button in the Thumbnail mode and press the ENTER button on the remote control or INPUT button on the projector Button operation Functions The remote control The...

Page 94: ...take more than several seconds to read and display an image file if it is stored in very deep layer directory or if so many files are stored in the same directory 6 PLAY MODE Select the Slideshow mode ONE TIME Play the Slideshow one time ENDLESS Play the Slideshow endless The settings of the Slideshow are saved to the playlist txt file that is stored in the storage media If the file is not existed it ...

Page 95: ...P INTERVAL and PLAY MODE settings 92 2nd line and after file name interval time rotation setting and skip setting interval time It can be set from 0 to 999900 ms with an increment of 100 ms rotation setting rot1 means a rotation at 90 degrees clockwise rot2 and rot3 increase another 90 degrees in order skip setting SKIP means that the image will not be displayed in the Slideshow The maximum length ...

Page 96: ...achidigitalmedia com Follow the instructions that can be obtained at the site for updating NOTE If your CD ROM drive is not drive F on your computer you will need to replace F with the correct drive letter assigned to your CD ROM drive This application will appear in the Windows notification area once it starts You can quit the application from your computer by selecting Quit on the menu Hardware a...

Page 97: ...mages will be displayed w Stop button The image transmission is stopped e Hold button The image on the projector s screen is temporally frozen The last image before the button is clicked is remained on the screen You can revise the image data on your computer without showing it on the projector s screen r Option button The Options window is displayed t Minimize button The Floating menu is closed a...

Page 98: ...ity over Speed It makes JPEG compression rate lower The screen on the projector is rewritten slower because the transferred data is larger but the image quality is better Keep PC resolution If you remove the check mark from the Keep PC resolution box the screen resolution of your computer will be switched as follows and the display speed may be faster CP AW250N CP AW250NM 1280 x 800 If your comput...

Page 99: ...ever loosen any other screws 5 Insert the new lamp and retighten firmly the 2 screws of the lamp that are loosened in the previous process to lock it in place 6 While putting the interlocking parts of the lamp cover and the projector together slide the lamp cover back in place Then firmly fasten the screw of the lamp cover 7 Turn the projector on and reset the lamp time using the LAMP TIME item in t...

Page 100: ...rticles that come out from the projector s vent holes and not to get them into your eyes or mouth Before replacing the lamp turn the projector off and unplug the power cord then wait at least 45 minutes for the lamp to cool sufficiently Handling the lamp while hot can cause burns as well as damaging the lamp Never unscrew except the appointed marked by an arrow screws Do not open the lamp cover wh...

Page 101: ...filter cover 3 Slide the filter unit upward to take it off from the projector 4 Use a vacuum cleaner for the filter vent of the projector 5 Take the fine meshed filter out while holding the filter cover It is recommended to leave the coarse meshed filter in the filter cover as it is 7 Put the fine meshed filter on the coarse meshed one turning its stitched side up 8 Put the filter unit back into the projecto...

Page 102: ...lter becomes clogged by dust or the like internal temperatures rise and could cause a fire a burn or malfunction to the projector WARNING Please replace the air filter when it is damaged or heavily soiled When you replace the projection lamp please replace the air filter An air filter of specified type will come together with a replacement lamp for this projector Please reset the filter time only when y...

Page 103: ... Replacing the internal clock battery This projector has internal clock that uses a battery When the clock of the network function does not work correctly please try solution by replacement of the battery HITACHI MAXELL part number CR2032 or CR2032H NOTE The internal clock will be initialized by removing the battery For setting the clock see the User s Manual Network Guide 1 Turn the projector off...

Page 104: ...procedure 1 Insert the power cord with the lens door opened 2 The power indicator will light in orange and the lens door closes automatically Do not touch the lens door when the door is closing Do not allow anything to obstruct the lens door When the lens door is closed manually it may not shut properly 㩷The lens door may not close when the LENS DOOR LOCK function of the SERVICE item in the OPTION...

Page 105: ... wringing well Then wipe lightly with a soft dry cloth Ensure that the projector is cooled down before removing dust accumulated on the pen sensor s horns using a vacuum cleaner During cleaning do not hit the vacuum cleaner s nozzle against the projector and the pen sensor s horns with force or rub it against them Doing so may damage the projector and pen sensor or cause them to malfunction Incorr...

Page 106: ...uld result in a fire an electric shock and or malfunction to the projector Do not put anything containing water cleaners or chemicals near the projector Do not use aerosols or sprays WARNING Please take right care of the projector according to the following Incorrect care could cause not only an injury but adverse influence such as discoloration peeling paint etc Do not use cleaners or chemicals oth...

Page 107: ...nd several minutes it will be reappeared every time the power is turned on Message Description There is no input signal Please confirm the signal input connection and the status of the signal source The USB TYPE B port is selected as the picture input source even if MOUSE is selected for USB TYPE B 56 Select USB DISPLAY in the dialog to project the picture input to the USB TYPE B port In this case ...

Page 108: ...sed at an altitude of about 1600 m or higher If the projector is used at an altitude of about 1600 m or higher set FAN SPEED of the SERVICE item in the OPTION menu to HIGH 60 A note of precaution when cleaning the air filter Please immediately turn the power off and clean or change the air filter referring to the Cleaning and replacing the air filter section of this manual After you have cleaned or c...

Page 109: ...utes After the projector has sufficiently cooled down please make confirmation of the following items and then turn the power on again Is there blockage of the air passage aperture Is the air filter dirty Does the peripheral temperature exceed 35 C If the same indication is displayed after the remedy please change the lamp referring to the section Replacing the lamp Blinking In Red or Lighting In Red...

Page 110: ...jector is used at an altitude of about 1600 m or higher set FAN SPEED of the SERVICE item in the OPTION menu to HIGH 60 Lighting In Red Turned off Turned off The lens door is not opened properly One of the followings has been happened The lens door is not opened properly when the projector is turned on The lens door position is shifted while the projector is working Restart the projector after con...

Page 111: ...rojector has sufficiently cooled down please make confirmation of the attachment state of the lamp and lamp cover and then turn the power on again 97 Neither sounds nor pictures are outputted The signal cables are not correctly connected Correctly connect the connection cables 9 13 Signal source does not correctly work Correctly set up the signal source device by referring to the manual of the sourc...

Page 112: ... Correctly connect the connection cables 9 13 The brightness is adjusted to an extremely low level Adjust BRIGHTNESS to a higher level using the menu function 34 The computer cannot detect the projector as a plug and play monitor Make sure that the computer can detect a plug and play monitor using another plug and play monitor 10 The BLANK screen is displayed Press BLANK button on the remote contr...

Page 113: ... to OFF in the SETUP menu 45 46 The lamp is approaching the end of its product lifetime Replace the lamp 97 98 Pictures appear blurry Either the focus and or horizontal phase settings are not properly adjusted Adjust the focus using the focus ring and or H PHASE using the menu function 25 39 The lens is dirty or misty Clean the lens referring to the section Caring for the lens 102 Some kind of ima...

Page 114: ...ator blinks in orange a few times Goes into standby mode Disconnect the LAN cable and check that the projector is working properly If this phenomenon occurs after connecting to the network there may be a loop between two Ethernet switching hubs within the network as explained below There are two or more Ethernet switching hubs in a network Two of the hubs are doubly connected by LAN cables This do...

Page 115: ...if your computer has a built in modem For details refer to the relevant manuals such as that for the computer Is the power of the projector turned on Check to ensure that the POWER indicator of the projector is lit in green 107 Is the USB cable connected correctly Connect the USB cable to the computer 81 Is the system started up in the correct sequence Start up the system in the correct sequence T...

Page 116: ...s that allow easy sound reflection such as metal Place near a CRT display TV etc Place that is exposed to direct sunlight Place that is exposed to speaker sound or noise Place where more than one projector is installed in the same room 80 Are you using more than one pen at the same time Only one pen can be used at a time 18 Is transmission between the pen and the projector obstructed Make sure that...

Page 117: ...e above Disconnect the power supply for the projector and connect again Restart Windows and StarBoard Software 14 Lines cannot be drawn properly or are broken Has the battery run out Replace it with a new one 18 Is dust accumulated on the two horns of the pen sensor Check the horns of the pen sensor and remove any dust accumulated on them using a vacuum cleaner 103 Is the tip of the pen worn out R...

Page 118: ...aximum 100 44 The StarBoard Software files may be corrupted or installation may not have completed successfully Uninstall the StarBoard Software and reinstall it 84 Is a part of the image enlarged using the Magnify function Press the MAGNIFY OFF key on the remote control to restore the normal display 27 Is ASPECT set to NATIVE and the display resolution of the computer larger than 1280 x 800 Set AS...

Page 119: ...right or and third party copyrights for each of such software modules Be sure to read End User License Agreement for the Projector Software which is separated document in the CD Please see the Specifications in the User s Manual concise which is a book DUKANE CORP AV SERVICE DEPT 2900 Dukane Drive St Charles IL 60174 800 676 2487 630 762 4032 Fax 630 584 5156 avservice dukane com www dukane com av ...

Reviews: