manualshive.com logo in svg
background image


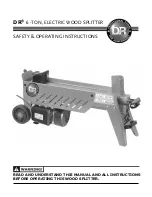
DR

®


6 -TON, ELECTRIC WOOD SPLITTER


SAFETY & OPERATING INSTRUCTIONS


READ AND UNDERSTAND THIS MANUAL AND ALL INSTRUCTIONS 

BEFORE OPERATING THIS WOOD SPLITTER.


Содержание 6-TON ELECTRIC WOOD SPLITTER

Страница 1: ...DR 6 TON ELECTRIC WOOD SPLITTER SAFETY OPERATING INSTRUCTIONS READ AND UNDERSTAND THIS MANUAL AND ALL INSTRUCTIONS BEFORE OPERATING THIS WOOD SPLITTER ...

Страница 2: ...d one of our Technical Support Representatives will be happy to help you We also hope to hear from you on how much you like your new helper In addition please tell your friends about your new DR 6 TON ELECTRIC WOOD SPLITTER Having DR Owners spread the word about our products and our way of doing business is the best advertising we can have and the best way to help us provide even better service in...

Страница 3: ...and Features 10 Unpacking the Wood Splitter 11 CHAPTER 4 13 OPERATING YOUR DR 6 TON ELECTRIC WOOD SPLITTER 13 Before Starting the Electric Motor 13 Splitting Safety 15 Operating the DR 6 TON ELECTRIC WOOD SPLITTER 16 How to Free a Jammed Log from the Wedge 17 CHAPTER 5 19 MAINTAINING THE DR 6 TON ELECTRIC WOOD SPLITTER 19 Regular Maintenance Check List before each use 19 Before each season 19 Adju...

Страница 4: ...iv DR WDS 6 3 6 TON ELECTRIC WOOD SPLITTER ...

Страница 5: ...u Conventions used in this manual Tip This is a helpful hint to guide you in getting the most out of your DR 6 TON ELECTRIC WOOD SPLITTER Tools Needed This indicates you will need a special tool to perform a maintenance function on your Wood Splitter NOTE This information may be helpful to you If you are ever unsure about an action you are about to take don t do it contact Country Home Products to...

Страница 6: ...2 DR WDS 6 3 6 TON ELECTRIC WOOD SPLITTER ...

Страница 7: ... SPLITTER Labels Your DR 6 TON ELECTRIC WOOD SPLITTER carries prominent labels as reminders for its proper and safe use Shown below are copies of all the labels that appear on the equipment Take a moment to study them and make a note of their location on your DR 6 TON ELECTRIC WOOD SPLITTER as you assemble and before you operate the machine Replace damaged or missing safety and information labels ...

Страница 8: ... A NUMBER OF HAZARDS FOR YOU ALWAYS TAKE THE FOLLOWING PRECAUTIONS WHEN USING THIS MACHINE NEVER ALLOW PEOPLE WHO ARE UNFAMILIAR WITH THESE INSTRUCTIONS TO USE THE DR 6 TON ELECTRIC WOOD SPLITTER TO BE SAFE DO NOT OPERATE THE MACHINE NEAR SMALL CHILDREN OR PETS AND NEVER ALLOW CHILDREN TO OPERATE THE WOOD SPLITTER DISENGAGE THE RAM AND STOP THE MOTOR WHEN ANOTHER PERSON OR PET APPROACHES NEVER TEA...

Страница 9: ...OVE BEND CUT FIT WELD OR OTHERWISE ALTER STANDARD PARTS ON THE DR 6 TON ELECTRIC WOOD SPLITTER MODIFICATIONS TO YOUR MACHINE COULD CAUSE PERSONAL INJURIES AND WILL VOID YOUR WARRANTY WHILE USING THE DR 6 TON ELECTRIC WOOD SPLITTER DON T HURRY OR TAKE THINGS FOR GRANTED DO NOT OPERATE THE MACHINE WHEN UNDER THE INFLUENCE OF ALCOHOL OR MEDICATION USE THE MACHINE ONLY IN DAYLIGHT OR GOOD ARTIFICIAL L...

Страница 10: ...GRASP THE POWER CORD PLUG WHEN UNPLUGGING THE CORD FROM THE OUTLET NEVER PULL THE PLUG OUT BY THE CORD NEVER OPERATE THE WOOD SPLITTER UNLESS THE POWER CORD IS PLUGGED INTO A PROPERLY GROUNDED OUTLET WHICH SUPPLIES 110 120V POWER AND IS PROTECTED BY A 15 AMP CIRCUIT BREAKER NEVER TAMPER WITH SAFETY DEVICES CHECK THEIR PROPER OPERATION REGULARLY IF AN EXTENSION CORD IS TO BE USED IT IS RECOMMENDED ...

Страница 11: ...DUAL ENERGY FROM PRESSURIZED HYDRAULIC FLUID AND ALLOW THE FLUID TO COOL BEFORE DOING ANY MAINTENANCE OR REPAIR WORK ON THE WOOD SPLITTER PLEASE FOLLOW THESE STEPS TO DEPRESSURIZE THE SYSTEM AND RELEASE RESIDUAL HYDRAULIC ENERGY BEFORE STARTING ANY REPAIRS UNPLUG THE WOOD SPLITTER FROM THE POWER SOURCE MOVE THE OPERATING HANDLE DOWN AND UP FROM ONE LIMIT OF TRAVEL TO THE OTHER AT LEAST FOUR TIMES ...

Страница 12: ... LEAVE THE WOOD SPLITTER UNATTENDED IF YOU LEAVE THE AREA UNPLUG THE POWER SOURCE CLEAN UP AS YOU WORK ACCUMULATED SPLIT WOOD AND WOOD CHIPS CAN CREATE A HAZARDOUS WORK ENVIRONMENT ALWAYS CHECK THE ALIGNMENT OF MOVING PARTS AND FOR DAMAGED OR WORN PARTS KEEP ALL NUTS AND BOLTS TIGHT AND KEEP THE EQUIPMENT AND ATTACHMENTS IN GOOD OPERATING CONDITION ALWAYS CHECK THE POWER CABLE FOR DAMAGE PRIOR TO ...

Страница 13: ...new machine before you use it It may be helpful to familiarize yourself with the controls and features on your new wood splitter by reviewing the picture in the next section before beginning the steps outlined in this chapter If you have any questions at all please feel free to contact our Customer Service Representatives at our toll free number 1 800 DR OWNER 376 9637 ...

Страница 14: ...OTE The model shown in Figure 1 may look slightly different from your machine Figure 1 Wedge Ram Operating Handle Assembly Wheels and Frame Assembly Oil Pump Assembly Electric Motor On Off Switch Electric Motor Assembly Built In Handle Support Leg Assembly Power Cord Log Guides Bleed Screw Dip Stick ...

Страница 15: ... from the shipping box and rest the machine on the front support legs and the rear wheels 3 If you have banding around your motor and frame as shown in Figure 2 cut the banding Be careful when cutting the banding 4 Remove the wooden packing wedge between the motor and the housing NOTE Look under the machine the wedge may be difficult to see 5 Remove any remaining packing materials from the wood sp...

Страница 16: ...12 DR WDS 6 3 6 TON ELECTRIC WOOD SPLITTER ...

Страница 17: ...rtable for the operator while in use If necessary block the wood splitter wheels to prevent them from rolling The site must be free of slippery surfaces and potentially hazardous obstacles Also make sure there won t be people or animals within a six foot radius around the wood splitter 2 Plan your work before you start Have the logs to be split positioned where they can be easily reached Remember ...

Страница 18: ...r 6 Clean the area around the Hydraulic Fluid Fill Drain Port Figure 4 and then using the adjustable wrench unscrew the Dipstick located in the Hydraulic Fluid Fill Drain Port 7 Clean the Dipstick and check the level do not screw the Dipstick down when checking it should be between the two marks on the Dipstick If the fluid is too high simply pour out a little at a time into a suitable container b...

Страница 19: ...T ON THE BEAM BETWEEN THE LOG GUIDES FIGURE 5 WITH BUTT END TOWARD HYDRAULIC CYLINDER RAM NEVER ATTEMPT TO SPLIT A LOG AT AN ANGLE AND BE SURE THE WEDGE AND RAM WILL CONTACT THE LOG SQUARELY ON THE ENDS BE VERY CAREFUL TO KEEP ARMS AND FINGERS AWAY FROM THE WEDGE AND RAM KEEP HANDS AND FINGERS CLEAR AT ALL TIMES MANY WOOD SPLITTING ACCIDENTS HAPPEN ON THE RETURN PORTION OF THE STROKE DO NOT PUT AN...

Страница 20: ...E The DR 6 TON ELECTRIC WOOD SPLITTER is designed to run at two different speeds When the Operating Handle is fully depressed the Ram will run at a slower speed but have more power When the Operating Handle is depressed half way the Ram will run at a faster speed but the machine will have less splitting power It is recommended to run the Ram at the higher speed until it engages the log You should ...

Страница 21: ...OG BY HITTING IT WITH A TOOL THIS COULD DAMAGE THE MOTOR COVER AND HYDRAULIC PUMP COVER ETC 1 Release the Operator Handle so that the Ram fully retracts Figure 7 2 Insert a plastic or wooden wedge under the jammed log Figure 7 and activate the Ram to push the wood wedge under the jammed log 3 Repeat this process using progressively larger wedges until the jammed log is freed Figure 7 4 Lift the lo...

Страница 22: ...18 DR WDS 6 3 6 TON ELECTRIC WOOD SPLITTER ...

Страница 23: ...E FLUID HAS COOLED READ THE GENERAL SAFETY RULES CHAPTER 2 OF THIS MANUAL BEFORE PERFORMING ANY REPAIRS OR MAINTENANCE Regular Maintenance Check List before each use Clean the log Ram and Guides Check the Splitting Wedge for sharpness page 20 Check the general condition of the wood splitter e g nuts bolts welds etc Before each season Check the hydraulic fluid level page 20 Use an AW32 hydraulic fl...

Страница 24: ...on the Dipstick If the fluid is too high simply pour out a little at a time into a suitable container by tilting the wood splitter If the fluid is too low add an AW32 hydraulic fluid a little at a time until the level falls between the two marks on the Dipstick 4 Clean the Dipstick and the O ring seal thoroughly and reinstall being careful not to damage the threads of the aluminum Hydraulic Fluid ...

Страница 25: ...AINTENANCE Wipe down the wood splitter to remove any moisture wood chips and dirt that may have accumulated on the Log Guide Rails Hydraulic Control and Motor Fan Housing Apply a thin coating of oil or 2 Lithium Grease to the Wedge Cutting Edge to prevent rust Store the DR 6 TON ELECTRIC WOOD SPLITTER in a dry area to prevent moisture from damaging the electrical components of the machine Open the...

Страница 26: ...22 DR WDS 6 3 6 TON ELECTRIC WOOD SPLITTER ...

Страница 27: ...on cord connection to the wood splitter is at least 105VAC The hydraulic fluid may be low Check and adjust the level as required see page 20 The wood being split may be too hard it has knots or its fiber is very tough Log fails to split Check the possible causes for the previous Ram operation symptom Incorrect positioning of the log Re position the log flat on the splitting beam with the ends squa...

Страница 28: ...rts Check that the Bleed Screw has been tightened before moving the machine Use care Do not over tighten and strip the Bleed Screw Threads The hydraulic fluid seals may be worn Call 1 800 DR OWNER 376 9637 or a qualified hydraulic mechanic for assistance to replace worn components NOTE Country Home Products Inc has provided Parts Lists and Schematic Diagrams as reference tools only CHP makes no re...

Страница 29: ...791 Bolt M8 x 30 27 203381 Screw Cr Head M6 x 20 28 204811 Washer Flat M6 29 182201 Handle Carry 30 203371 Nut M6 31 204821 Bolt M6 x 14 32 203691 Leg Support 33 205881 Body Main 34 205891 Plate Log Guiding Right Ref Part Description 35 205901 Plate Log Guiding Left 36 205911 Bolt M8 x 10 37 202481 Bolt M8 x 14 38 205921 Plate Sleeve Plastic 39 205931 Log Pusher Assembly 40 182111 Cover Oil Cylind...

Страница 30: ... 82 182411 Cover Capacitor Box 83 204571 Screw Cross Head ST3 5 x 14 84 204511 Connection Pole 85 204521 Screw Cross Head M4 x 8 86 204581 Clamp Wire 87 211601 Switch 88 204401 Screw Cross Head M4 x 6 89 204411 Washer Spring M4 90 206861 Warning Label Bleed Screw 91 206871 Warning Label Safety 92 192021 DR Power Equipment Label 93 192031 Speed Position Label 94 193521 Serial Label 95 211591 Safety...

Страница 31: ...CALL TOLL FREE 1 800 DR OWNER 27 Schematic DR 6 TON ELECTRIC WOOD SPLITTER WDS 6 3 051122 ...

Страница 32: ...28 DR WDS 6 3 6 TON ELECTRIC WOOD SPLITTER NOTES ...

Страница 33: ... covered by this warranty During the warranty period the warranty holder is responsible for the machine transportation charges if required During the warranty period warranty parts will be shipped by standard method at no charge to the warranty holder Expedited shipping of warranty parts is the responsibility of the warranty holder SOME STATES DO NOT ALLOW LIMITATIONS ON THE LENGTH OF IMPLIED WARR...

Страница 34: ...ou follow this checklist each time you use your machine HARDWARE Check all nuts and bolts to be sure that the components are secure FRAME Check all welds to be sure that the frame is in tact and secure CLEAN Make sure that the log guides and the top of the wood splitter beam are clean HYDRAULIC FLUID Inspect the hydraulic fluid level and adjust as required see page 20 AIR BLEED SCREW Make sure to ...

Отзывы: