Dormakaba Saffire LX, Installation Instructions Manual
The Dormakaba Saffire LX user manual is an essential resource for understanding the features and functionality of this innovative product. With clear and comprehensive instructions, users can easily navigate through its various functions. Download the manual for free at manualshive.com to maximize the potential of your Dormakaba Saffire LX experience.
Share
Download


Reviews:
No comments
Related manuals for Saffire LX
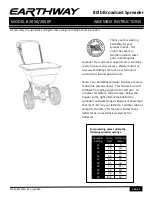
2050
Brand: EarthWay Pages: 3

1D
Brand: ZKTeco Pages: 2

PocketShark SKU-091-10
Brand: WatchDog Pages: 12

AC404iM
Brand: Axxera Pages: 28

M9900
Brand: Magnadyne Pages: 12

SDDR-89-E15
Brand: SanDisk Pages: 17

2054K Series
Brand: 3nStar Pages: 30

Storio
Brand: V-tech Pages: 14

QSDT8PCRP
Brand: Q-See Pages: 97

NTware MiCard
Brand: UniFlow Pages: 22

VX7014
Brand: Jensen Pages: 100

Eclipse CS-450
Brand: Tvone Pages: 68

CR-H228i
Brand: Teac Pages: 120

PCE-1604
Brand: TEDIA Pages: 2

BV9978T
Brand: Boss Audio Systems Pages: 35

027910
Brand: Honeywell Pages: 44

Z800 - Workstation - 6 GB RAM
Brand: HP Pages: 9

PRS-T2BC
Brand: Sony Pages: 2


