


DoorBird Connect
Divus
SYSTEM REQUIREMENTS
•
DoorBird IP Video Door Station D10x/D11x/D20x/D21x-Series or DoorBird IP Upgrade D301A
•
Divus Touchpanel
ADDITIONAL INFORMATION
The following guide will take you through the steps of setting up a DoorBird IP Video Door Station in connection with
a Divus Touchpanel.
Please make sure that the Divus Touchpanel receives an IP address and is connected to the same local network your
DoorBird IP Video Door Station is connected to. Please also make sure that your DoorBird is online, using this service:
https://www.doorbird.com/checkonline
The local IP address of your DoorBird is available from the same page.
Note:
setting up VoIP on a Divus Touchpanel in connection with a DoorBird IP Video Door Station requires a SIP-
PBX account for both the Divus Touchpanel as well as the DoorBird IP Video Door Station, either using a local SIP-
PBX server or opening such accounts at a SIP-PBX service provider (e.g. sipgate.de).
FIRMWARE INFORMATION
This manual was tested using the following firmware versions:
DoorBird IP Video Door Station:
000122.
Divus KNX IQ:
1.0.1 Rev. 63
1. SETTING UP THE DOORBIRD IP VIDEO DOOR STATION
For the DoorBird IP Video Door Station to be properly able to communicate with the Divus Touchpanel, the DoorBird
device’s SIP-settings must be adjusted accordingly.
1. Open the DoorBird App and log into the administration area under
“Settings → Administration”
using
the administrator user and password credentials from the
“DIGITAL PASSPORT”
document that was
shipped with your DoorBird IP Video Door Station.
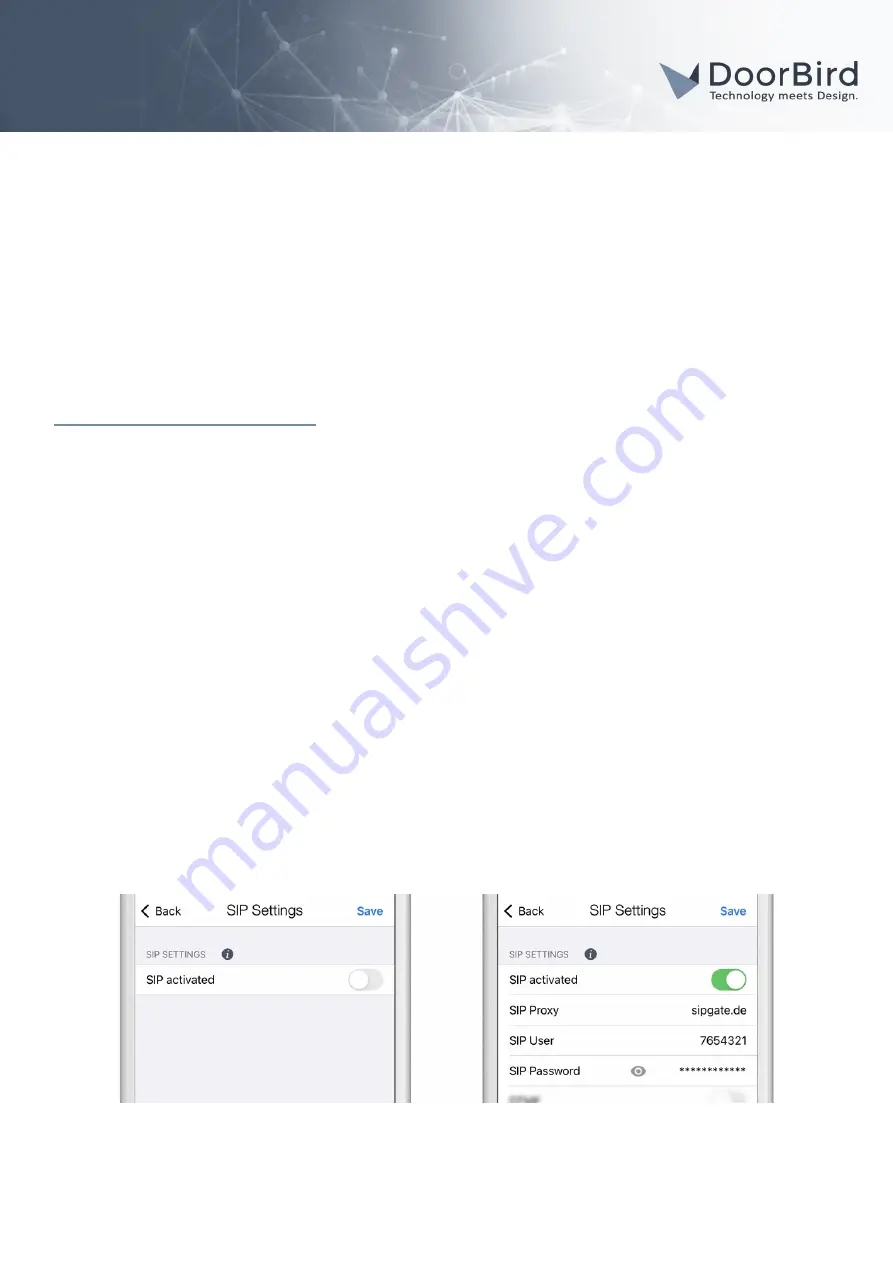
2. Choose
“SIP Settings”
from the menu and activate the
“SIP active”
switch.
3. Enter the following values into the corresponding fields:
All companies, logos and product names are registered trademarks of the respective companies.
Errors and omissions excepted – Last Update 02/2021 - Copyright © 2021 - Bird Home Automation GmbH – www.doorbird.com
1


