background image


Safety Reminder AX/16X   


User    
Manual

Welcome words. 

Thank you for purchasing Safety Reminder Model 
AX/16X, all our wishes is driving your life with safety 
and enjoying your travel! 
 
In order to use this device correctly and more efficient, 
please kindly follow up the following instruction rules 
for the installment and setting. Most of the problems can 
be solved by the explanations and the troubleshooting 
tips. 
 
Once you finish reading it, keep it handy for necessary 
reference. Please note that specification and information 
are subject to changes without prior notice in this 
manual. 
 

Summary of Contents for AX/16X

Page 1: ... use this device correctly and more efficient please kindly follow up the following instruction rules for the installment and setting Most of the problems can be solved by the explanations and the troubleshooting tips Once you finish reading it keep it handy for necessary reference Please note that specification and information are subject to changes without prior notice in this manual ...

Page 2: ... of the cigarette lighter sock would be continuous or can be switched on off by your ignition switch So before you leaving the car please make sure that you have take off the detector 3 Do not leave the detector alone to be longtime running This may lead to complete consumption of the car battery or shorten the life of the detector 4 Remember to conceal your detector in a safe place before you lea...

Page 3: ...n Change between city and highway mode 3 Volume Adjust Button Volume change from high medium low off 4 12V DC power cord 12V Power input to supply working 5 Radar receiver Where the radar receive installed 6 Speaker Where the alert comes from 7 USB Supply power to the Device which need input5V 100m A max ...

Page 4: ... Easy to remove just unlock and pull the tap 360 degree rotation hang with any position you prefer turn any angle bend to different shape Easily adjust to your desired viewing angle for optional viewing Adapter To connect radar detector and other device need power supply Connection Cable To supply power output 5V 100m A max ...

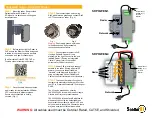
Page 5: ...apter to the bottom of the radar detector 2 1 2 Screw securely with the tenon into the mortise 2 1 3 Insert the right angle shaped end of the mini USB cable to the device need power supply and another end to the output socket of radar detector Black for the supply input and white side for the power output ...

Page 6: ... the detector beeps and power on 2 2 4 After power on the red LED indicator on radar detector will on when it blinks this means the signal transmission in process there is radar around been detected Program Detection 3 1 Volume setting In working condition press M2 button for audio volume adjust there are 3 levels selectable high medium low and quiet each press will sound the current voice prompt ...

Page 7: ...the beeps are Note No matter in whichever way the detector mounted for the best detecting performance never mount behind wipers signs strong metal films etc Because this will affect the receiving of radar and laser signal and result in the delay of critical warning time The direction of the radar antenna should be horizontal forward or slightly down 5 to the road but never face to the sky or towar...

Page 8: ... Sensitivity X BAND 10 42 10 62GHZ 20MHZ Ku BAND 13 32 13 54GHZ 20MHZ K BAND 23 9 24 3GHZ 20MHZ Ka BAND 34 1 35 82 GHZ 20MHZ Laser beam 800 1100nm Main unit Measurement mm Bracket 116L x 145 W x 66 H Max Volts input DC 12V 15V Currency input 150 300mA Operation temp 25 85 Storage temp 30 105 ...

Page 9: ...the power supply Indicator of the adapter or replace the fuse The lighter socket clean or not Continuous abnormal alerts Check if interference nearby Restart Change to another vehicle to test No audio or quiet Check the volume setting Restart Change to another vehicle to test ...

Page 10: ...does cause harmful interference to radio or television reception which can be determined by turning the equipment off and on the user is encouraged to try to correct the interference by one of the following measures Reorient or relocate the receiving antenna Increase the separation between the equipment and receiver Connect the equipment into an outlet on a circuit different from that to which the...

Reviews: