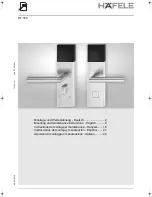
background image


ix Gamma  

2

9

8

3

4

9

 /

 0 /

 g

b

 /

 10

.1

1

 /

 R

evi

si

o

n

 C


Assembly instructions 

Reversible key system 

ix Gamma 

Summary of Contents for ix Gamma

Page 1: ...ix Gamma 298349 0 gb 10 11 Revision C Assembly instructions Reversible key system ix Gamma...

Page 2: ...Notes ix Gamma...

Page 3: ...e box 7 ASSEMBLY 8 Preparing the assembly structures 9 Filling the cylinder body 13 Filling the cylinder core 20 Inserting the cylinder core in the cylinder body 23 Type 333 24 Type 333H 26 Type 333T...

Page 4: ...Contents ix Gamma 2 WARRANTY 44 LOCKING PLAN 45 SPARE PARTS FAX TEMPLATE 47...

Page 5: ...service card for general lock ing systems is provided together with the ix Gamma system This is for your addi tional special security The DOM Service Centre only accepts orders for duplicate keys upo...

Page 6: ...u must store all components in original packaging at a dry and dust free place Caution Damages resulting from incorrect assembly Please read the complete instructions carefully before assembly Follow...

Page 7: ...inate keys You can use the locking plan the table with the assembly structures of the cylinders and the supplementary sheet for subordinate keys for the fabrication of replacement cylinders and replac...

Page 8: ...only be assembled by thoroughly trained staff The manufacturer does not assume any liability for damages caused by untrained staff Tools Caution Damages resulting from incorrectly applied tools The to...

Page 9: ...7397 501006 Body pins N N N AB FB No 0 1 2 No 3 4 5 6 No 7 8 No 0 1 2 No 3 4 5 6 5 5 mm 4 5 mm 3 5 mm 5 5 mm 4 5 mm 201680 201681 201682 201675 112 505492 Master key wafers Master key wafers Master ke...

Page 10: ...assembly e g foamed material Using such a surface ensures that no pins will escape from the cylinder core when inserting the core into the body Note The material numbers for all standard components wi...

Page 11: ...side FB AB body pins are mounted to the positions with the lowest values For super structures locking systems the lowest value including the superstructure is taken into account For 0 1 2 lengths onl...

Page 12: ...3 3 4 5 6 7 FB N AB N N P1 P2 P3 P4 P5 For assembly structures with master key wafers the highest wafer structure determines the body pin as illustrated in the bottom lines of each column 1 First 2 FB...

Page 13: ...The core pins are applied at the positions P1 P 5 depending on their lengths here position P1 P2 and P5 AF pin position P3 and P4 N pin Assembly structure with master key wafers Core pins AF AF N N A...

Page 14: ...are not restricted with regard to positions Therefore an AF core pin is applied at position P5 depending on length Example for locking with master key wafers Core pins AF AF AF AF AF 3 4 7 5 3 5 N FB...

Page 15: ...30 0 0 203644 45 246295 70 30 0 0 203647 246296 35 35 5 5 246289 246289 40 35 0 5 203643 249759 246289 45 35 0 5 203644 246291 246289 50 35 0 5 203645 246292 246289 55 35 0 5 203643 44 246293 246289 6...

Page 16: ...embly structures are highlighted in grey Body pins 0 3 1 4 1 Profile 2 5 1238B 4 5 6 Example N N AB FB N P1 P2 P3 P4 P5 Type 382 H H H H H Body pins N 0 2 201680 5 5 mm 3 6 201681 4 5 mm 7 8 201682 3...

Page 17: ...ght into the follower from the inside to the outside innen 6 5 1 4 5 AB FB N N N KG au en Ill 3 Cylinder assembly structure body pins 2 Select the required body pins In the follower from the inside to...

Page 18: ...the cylinder body using an loading knife 8 Carefully insert follower plus load ing knife into the cylinder body until the front edge of the follower is flush with the internal edge of the body basic...

Page 19: ...ding knife 10 Now you must remove the loading knife 11 Carefully rotate the follower to and fro until the body pins and springs insert engage in the provided boreholes Ill 8 Reinserting loading knife...

Page 20: ...e rotated 14 Rotate follower until the large groove is above the boreholes in the cylinder body Ill 10 Removing the loading knife 15 Remove the loading knife Note If you assemble type 555 without Asse...

Page 21: ...m 16 Precisely insert Assembly clam Ill 12 Removing the follower 17 Remove follower without removing the Assembly clam The pins and springs are fixed in the cylinder body 18 Before you continue mounti...

Page 22: ...structures Note If no profile pin is applied at position 6 a ball with a diameter of 2 1mm 235898 must be inserted at position 6 1 2 3 A B C 4 5 6 7 8 9 0 242637 207464 235898 Ill 13 Numbering the pro...

Page 23: ...4 P5 Core pin N 0 505250 4 8 mm 1 505281 5 2 mm 2 505282 5 6 mm Core pin AF 3 505095 6 0 mm 4 505096 6 4 mm 5 505097 6 8 mm 6 505098 7 2 mm 7 505099 7 6 mm 8 505100 8 0 mm N N N AF AF KG Ill 14 Number...

Page 24: ...adation master key gradation Once determined the even 0 2 4 6 8 or uneven 1 3 5 7 9 value of each pin position cannot be modified anymore It is not necessary to observe a certain direction of assembly...

Page 25: ...ylinder body so that the DOM logo is above the core borehole and can be read 1 Carefully insert the core with the open core side pointing downwards into the cylinder body 90 Ill 17 Removing Assembly c...

Page 26: ...t the keys the cores can be completely removed from the body and the pins will fall out In this case you must completely refill core and body Ill 18 Positioning the cores 1 Insert the appropriate reve...

Page 27: ...0 Applying security rings 7 Slide back the cores into the cylinder housing 8 Rotate the cores until they are in their initial position and remove the keys securing the cores at the same time 9 Slightl...

Page 28: ...ting cam and end piece 1 Insert the appropriate reversible key 2 Slightly turn the key 3 Remove the cylinder core until the core and or the core elongation is flush with the cylinder body on the insid...

Page 29: ...he same time 11 Slightly bend apart the security rings 12 Insert the security rings in the pro vided positions 13 Press the security rings together using the appropriate pliers Adjusting the cam Depen...

Page 30: ...rings If you insert the keys the cores can be completely removed from the body and the pins will fall out In this case you must completely refill core and body Ill 24 Positioning the cores 1 Insert th...

Page 31: ...6 Inserting security rings 7 Slide back the cores into the cylinder housing 8 Rotate the cores until they are in their initial position and remove the keys securing the cores at the same time 9 Slight...

Page 32: ...al pin 236497 1 pressure spring 215230 1 pliers 263629 for the cam 1 pliers 261669 for the extension op tional Caution The cylinder core is not yet fixed by the security ring If you in sert the key th...

Page 33: ...10 Secure the core from falling out 11 Press the security rings together using the appropriate pliers Note If you have a knob shaft with several boreholes and you do not know which borehole to use fo...

Page 34: ...rt the coupling and the carrier wafer into the knob shaft Caution Always adjust the security rings so that the smooth side points towards the cam A B Ill 31 Inserting knob shaft 19 Insert the filled k...

Page 35: ...ylinder you have already inserted the extension and the cylinder pin 245313 Ill 32 Inserting broad cam and coupling here standard 1 Precisely insert the coupling in the broad cam 2 Put together the br...

Page 36: ...the cam Ill 34 Applying the security ring between the cam parts 8 Rotate the core until it is in its initial position and remove the key secur ing the core at the same time 9 Slightly bend apart the...

Page 37: ...d removed the key Ill 35 Adjusting locking direction and in serting lever 1 Use the knurled pin to adjust the closing direction which you require Closing to the right Insert the knurled pin in the upp...

Page 38: ...Assembly Type 382 ix Gamma 36 Ill 37 Mounting the cylinder 5 Insert the cylinder at the provided position and fix the cylinder with an SW30 hexagon nut by hand...

Page 39: ...sembly clam A B C Ill 38 Inserting the core 1 Apply the threaded side of the cylin der core to the assembly rod 2 Push the cylinder core into the cylin der body thus pressing the assembly rod out of t...

Page 40: ...Assembly Type 555 ix Gamma 38 Ill 40 Mounting the cylinder 8 Apply the cylinder body to the pro vided position and fix it with the screw in plate and the counter sunk screw by hand...

Page 41: ...ity ring 202335F Ill 41 Positioning engaging piece 1 Please insert a matching key into the cylinder core 2 Hold the core body as illustrated and insert engaging piece accurately fit ting from behind i...

Page 42: ...an be inserted completely into the padlock 5 Please permanently protect the lock barrel against fall out and open the shackle Ill 44 Fastening lock barrel 6 Please keep protecting the lock barrel agai...

Page 43: ...in the original packaging Caution Material defect because of improper lubricants Please periodi cally lubricate and maintain the lock cylinder using DOM service spray exclusively Disposal Please note...

Page 44: ...n mul tiple levels Cylinder core made of solid brass one piece with a minimum diameter of 13mm Core with horizontal basic profile which acts as a lateral protection for the trun cated cone pin head fo...

Page 45: ...ing open according to DIN EN 1303 04 2005 Tapered core pins and body pins 5 solid pin tumblers with a minimum diameter of 3mm Optionally available additional securing units Increased drilling and core...

Page 46: ...s for damages of the customer due to other reasons than the defect of the supplied product as well as with regard to the rights of the customer in case of fraudulently concealed faults or damages caus...

Page 47: ...ommision Zentralhauptschl ssel Anlage System Zentralschl ssel Anlage Anlage A B 1 2 3 4 5 6 7 8 9 10 11 12 13 X Gruppen schlie t I schlie t Z bzw M G Gleichschlie ung Pos Fb Type Ausf hrung Schl Anz Z...

Page 48: ...3 1 9826660 www dom at office dom at DOM AG Sicherheitstechnik Breitenstra e 11 CH 8852 Altendorf Tel 0041 55 4510707 Fax 0041 55 4510701 dom ch dom sicherheitstechnik com Publisher DOM Sicherheitstec...

Page 49: ...ted according to the cylinder type In order to ensure quick and correct delivery we would kindly ask you to use the fax template for your order You can order individual spare parts as well as complete...

Page 50: ...2 Core pins AF3 6 0 mm 100 505095 AF4 6 4 mm 100 505096 AF5 6 8 mm 100 505097 AF6 7 2 mm 100 505098 AF7 7 6 mm 100 505099 AF8 8 0 mm 100 505100 Body pins N 0 1 2 5 5 mm 100 201680 N 3 4 5 6 4 5 mm 100...

Page 51: ...6 7 8 9 0 4 5 mm 100 207464 Ball 2 1 mm 100 235898 Profile pin supplement 100 207464 Standard cam 10 218228 008 Double entry cam 10 248386 008 HLB cam 10 218426 008 Standard coupling 10 217397 Double...

Page 52: ...Spare parts fax template ix Gamma 50...

Reviews: