D i g i g r a m
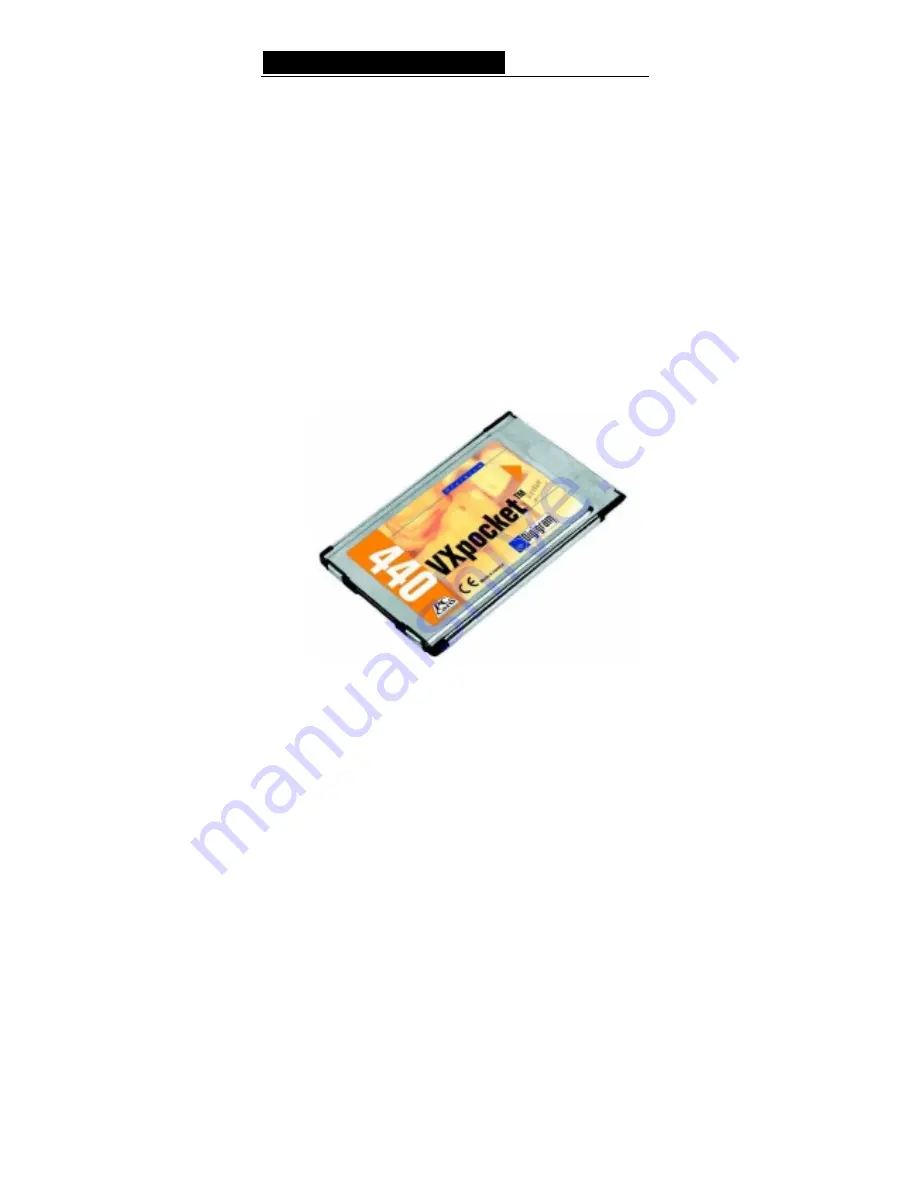
VXpocket 440
Professional Digital Multi-Channel
Laptop Sound Card
User’s manual
Manuel utilisateur
Page 1: ...D i g i g r a m VXpocket 440 Professional Digital Multi Channel Laptop Sound Card User s manual Manuel utilisateur ...
Page 2: ...tion and or reformatting of the information contained in this manual While every effort has been made to ensure accuracy Digigram is not responsible for errors and omissions and reserves the right to make improvements or changes in the products and programs described without notice Digigram and VXpocket are registered trademarks or trademarks of Digigram S A Other trademarks are property of their ...
Page 3: ...oving the VX driver for Windows 98 SE and Millennium 12 Updating the VX driver for Windows 98 SE and Millennium 13 Installation under Windows 2000 13 Removing the VX driver for Windows 2000 14 Updating the VX driver for Windows 2000 14 Installation under Windows XP 14 Removing the VX driver for Windows XP 15 Updating the VX driver for Windows XP 16 Installation under Windows NT 4 17 Removing the V...
Page 4: ...out 24 Headroom Out 24 Nominal in 24 Headroom In 24 ASIO CONTROL PANEL FOR PC 26 General settings 26 Active stereo I O 26 Clock 26 Sample size 27 Digital output 27 Frame rate 27 Level settings 27 Input 27 Output 27 Monitoring 27 Time Error Compensation 28 HOW TO CHECK THE INSTALLATION 28 Is the card properly installed under MacOS 28 Is the card properly installed under Windows 28 SPECIFICATIONS 29...
Page 5: ...ilote VX sous Windows XP 42 Mise à jour du pilote VX driver for Windows XP 42 Installation sous Windows NT 4 42 Suppression du pilote VX sous Windows NT 4 43 Mise à jour du pilote VX sous Windows NT 4 43 VX CONTROL PANEL POUR MAC 44 Généralités 44 General settings 44 ASIO settings 44 Input levels settings 45 Output levels settings 45 Advanced options 45 Latency 45 DIGIGRAM WAVE MIXER 47 Utilisatio...
Page 6: ...stereo I O 52 Clock 52 Sample size 53 Digital output 53 Frame rate 53 Ajustement des niveaux 53 Input 53 Output 53 Monitoring 53 Re synchronisation en cas de rupture de débit 54 VERIFICATION DE LA BONNE INSTALLATION DE LA CARTE 55 La carte est elle correctement installée sous MacOS 55 La carte est elle correctement installée sous Windows 55 Entrées analogiques 56 Entrée numérique 56 Entrée LTC 56 ...
Page 7: ... try to correct the interference by one or more of the following measures reorient or relocate the receiving antenna increase the separation between the equipment and the receiver connect the equipment into an outlet on a circuit different from that of the receiver consult the dealer or an experienced audio television technician NOTE Connecting this device to peripheral devices that do not comply ...
Page 8: ...g mono inputs Microphone and Line Level The micro line selection switches all the inputs to the selected mode 4 balanced analog mono outputs 1 1 digital S PDIF stereo input The selection of the digital input for recording excludes the selection of any of the analog inputs 2 It is possible to use the digital signal connected to the digital input as a reference sampling clock for recording or playba...
Page 9: ...REQUIREMENTS SOFTWARE REQUIREMENTS Supported operating systems The table underneath shows which drivers are supported by which operating system Wave Wave Wave Wave DirectSound DirectSound DirectSound DirectSound ASIO2 ASIO2 ASIO2 ASIO2 Windows 98 SE ME Yes No Yes Windows NT 4 Yes No No Windows 2000 Yes Yes Yes Windows XP Yes Yes Yes VXpocket 440 works in playback only under Windows 2000 and Window...
Page 10: ...ple on the parallel port using the two screws provided for this purpose Disconnecting the cable To disconnect the cable from the card simultaneously press the buttons on both sides of the connector with thumb and forefinger These buttons are marked with arrows Then withdraw the cable of the card while maintaining the two buttons pushed Then detach the support screws of cable on the back of the lap...
Page 11: ...have this expander please download it from http www aladdinsys com version 5 5 or higher required Double click on the Installer icon and follow the instructions The Digigram ASIO driver can be automatically installed for every ASIO compliant application The installer will ask you to confirm this step Restart the computer to complete the driver installation The Sound control panel must be copied fr...
Page 12: ... on the CD Rom in download win9x winme4b or in the extracted destination folder and click OK OK OK OK The wizard should display the suitable driver Click OK OK OK OK to continue Click on the Next Next Next Next button to start copying the driver files Click on the Finish Finish Finish Finish button to complete the driver installation Reboot is not necessary The ASIO driver for Windows 98 SE and Mi...
Page 13: ...uld display the proper driver Click OK OK OK OK to continue Click on the Next Next Next Next button to start copying the driver files Click on the Finish Finish Finish Finish button to complete the driver installation Reboot is not necessary Installation under Windows 2000 Once you have inserted your VXpocket 440 sound card Windows Plug and Play wizard will detect it and request a driver As the in...
Page 14: ...t Click on Next Next Next Next in the following windows Click on Finish Finish Finish Finish to complete the installation and restart the computer The wave driver is installed Note Note Note Note To install the Wave driver DirectSound must have been successfully installed on the system before Removing the VX driver for Windows 2000 Go to Add Remove Programs Add Remove Programs Add Remove Programs ...
Page 15: ...hardware d Add a new hardware de e e evice vice vice vice and Next Next Next Next Select Install the hardware that I manually select from a list Install the hardware that I manually select from a list Install the hardware that I manually select from a list Install the hardware that I manually select from a list Advanced Advanced Advanced Advanced and Next Next Next Next Select Sound video and game...
Page 16: ...dating the VX driver for Windows XP In the Start menu click on the Settings Control Panel command Remove the driver as described above Run the installation program of the new driver See chapter Installation under Windows XP ...
Page 17: ...ox and select a free interrupt and I O address Free interrupt and I O address may be found in the Windows NT 4 diagnostic tools Click on the OK OK OK OK button The Wave driver will be automatically installed Click on OK OK OK OK and exit the installer finish finish finish finish and close close close close The wave driver is now installed No reboot is necessary Note The card MUST NOT be removed wh...
Page 18: ...et 440 icon to launch the VX Control panel It is composed of different sections that allow setting parameters and displaying related information The detected Digigram card appears in the upper left corner of the VX Control and a bitmap shows the selected configuration of inputs and outputs General settings This section of the VX Control panel allows the selection of the following parameters sampli...
Page 19: ...l gain Change digital gain Change digital gain when selected this control allows adjusting the digital input gain directly on the digital input if selected or on the digital signal coming from the analog to digital conversion Output levels settings These levels can be adjusted in the lower right section of the VX Control Select the tab corresponding to the desired output Out tabs Change playback l...
Page 20: ...ow latency induces a higher risk of breaks in the flow particularly if several inputs and outputs are used simultaneously It is necessary to reboot the computer so that a new latency value is taken into account Pro Tools Free Select this option to use Pro Tools Free Restart the computer Time Code Allows the selection of the time code speed ...
Page 21: ...lly launched at system start up To access the program double click on its icon or right click on it for a context menu In case you have closed the program during your session you can restart it from the menu Start Programs Digigram Digigram Mixer Start Programs Digigram Digigram Mixer Start Programs Digigram Digigram Mixer Start Programs Digigram Digigram Mixer Run at start up To enable disable au...
Page 22: ...fault values Click on the Options Options Options Options menu Select Reset levels Reset levels Reset levels Reset levels Selecting the input output mixer channel Click on the Mixer menu Select the required board and channel Mixer Setting the default values for each mixer line selected Right click on the Mixer icon in the taskbar or go to the Mixer Options Options Options Options menu Select Save ...
Page 23: ...s the digital input as clock source only for playback We do not recommend the use of this mode Faders Various faders allow you to adjust input output and monitoring level The faders can be reset by double clicking on their respective buttons Speakers Output Applies an analog gain on the selected output device Wave out Output Applies a digital gain Monitoring Applies a digital gain on the hardware ...
Page 24: ...inal line output level in real time Addition of headroom and nominal level should not exceed the maximum output level of the board 10 dBu Headroom Out Sets the available headroom during playback at nominal level in real time Addition of headroom and nominal level should not exceed the maximum output level of the board 10 dBu Nominal in Sets the nominal input level for recording in real time Additi...
Page 25: ... full scale For a gain of 48 dB a 38 dBu maximum signal gives 0dBfs digital full scale Let N be the nominal input level and H the input headroom N and H values must be set so that N H maximum input level The following must be done to switch the input to microphone gain N H 38 if the fader Analog In Analog In Analog In Analog In is set to a gain higher or equal to 0 dB the micro gain is 48 dB if th...
Page 26: ...er corner IN and OUT settings of the selected device are displayed underneath General settings Active stereo I O It is recommended to activate only the I O required to save CPU resources Clock The clock corresponds to the digital bit clock to which the card refers When an analog input is selected the s s s source ource ource ource can be either the internal clock or taken from the digital input As...
Page 27: ...layback digital control applies a digital gain to the selected output i e to what the application plays including the software monitoring It can be set for each channel of the selected device or for both channels at the same time by clicking the Link box This gain applies to both digital and analog outputs Its default position is in front of the bold dot The analog output gain can be set for each ...
Page 28: ... load HOW TO CHECK THE INSTALLATION HOW TO CHECK THE INSTALLATION HOW TO CHECK THE INSTALLATION HOW TO CHECK THE INSTALLATION Is the card properly installed under MacOS Double click on the VXpocket 440 icon This launches the VX Control panel It should display the card and its serial number and it should be possible to change the sampling frequency You can also check that the inputs and outputs of ...
Page 29: ... 18 dB in steps of 0 5 dB Digital input Digital input Digital input Digital input 1 S PDIF 24 bit available LTC input LTC input LTC input LTC input Sensitivity from 6dBu to 20dBu Speed range 15 of nominal speed Slave Chase Lock of audio to incoming LTC compatible software required Analog outputs Analog outputs Analog outputs Analog outputs 4 balanced analog outputs can be used as unbalanced XLR co...
Page 30: ...tputs loaded 90dB Characteristics measured at 48 kHz sampling frequency record playback in linear Processing Processing Processing Processing Processing power is provided by the computer s native processor Power consumption Power consumption Power consumption Power consumption Supply voltage 5 V Operating 400 mA 1 6 W typical Stand by 150 mA 0 5 W typical Temperature Temperature Temperature Temper...
Page 31: ......
Page 32: ...us Windows 98 SE and Millennium 39 Installation sous Windows 2000 40 Suppression du pilote VX sous Windows 2000 41 Mise à jour du pilote VX driver for Windows 2000 41 Installation sous Windows XP 41 Suppression du pilote VX sous Windows XP 42 Mise à jour du pilote VX driver for Windows XP 42 Installation sous Windows NT 4 42 Suppression du pilote VX sous Windows NT 4 43 Mise à jour du pilote VX so...
Page 33: ...ne et micro 50 PANNEAU DE CONTRÔLE ASIO POUR PC 52 Paramètres généraux 52 Active stereo I O 52 Clock 52 Sample size 53 Digital output 53 Frame rate 53 Ajustement des niveaux 53 Input 53 Output 53 Monitoring 53 Re synchronisation en cas de rupture de débit 54 VERIFICATION DE LA BONNE INSTALLATION DE LA CARTE55 La carte est elle correctement installée sous MacOS 55 La carte est elle correctement ins...
Page 34: ...me de cartes audio CEM Cette carte a été testée et est conforme aux normes suivantes international CISPR22 Class B Europe spécifications CEM 89 336 CEE 1992 Etats Unis FCC Rules Part 15 Class B appareil numérique Pour assurer une conformité aux standards énumérés ci dessus les règles suivantes doivent être observées le câble fourni ne doit pas être modifié les câbles additionnels utilisés doivent ...
Page 35: ...l entrée numérique comme horloge de référence pour les entrées et les sorties analogiques 1 sortie numérique stéréo S PDIF Cette sortie est la version numérique du signal envoyé sur la première sortie stéréo analogique 1 entrée SMPTE LTC longitudinal time code 1 sortie casque stéréo mini jack Cette sortie est en parallèle de la première sortie stéréo analogique Notes Notes Notes Notes 1 La connexi...
Page 36: ...ndée pour les opérations multi voies CONFIGURATION LOGICIELLE CONFIGURATION LOGICIELLE CONFIGURATION LOGICIELLE CONFIGURATION LOGICIELLE NECESSAIRE NECESSAIRE NECESSAIRE NECESSAIRE Systèmes d exploitation supportés Le tableau ci dessous montre avec quels pilotes la VXpocket 440 peut fonctionner et sous quel système d exploitation Wave DirectSound ASIO2 Windows 98 SE ME Oui Non Oui Windows NT 4 Oui...
Page 37: ...ordinateur portable par exemple sur le port parallèle à l aide des deux vis prévues à cet effet Déconnexion du câble Pour déconnecter le câble de la carte exercer une pression simultanément sur les deux ergots latéraux du connecteur avec le pouce et l index Ces ergots sont repérés par les flèches Retirer le câble de la carte tout en maintenant les deux ergots enfoncés Dévisser alors les vis de mai...
Page 38: ...ant installation utiliser Stuffit Expander qui est installé par défaut sur les ordinateurs récents Si vous ne l avez pas veuillez le télécharger du site WEB http www aladdinsys com une version 5 5 ou ultérieure est requise Double cliquer sur l icône de l Installer et suivre les instructions Le pilote ASIO2 peut être installé automatiquement pour toute application compatible l installer demande alo...
Page 39: ...winme ou dans le dossier d extraction Cliquer OK OK OK OK L assistant doit alors afficher le pilote adéquat Cliquer sur OK OK OK OK Cliquer sur Suivant Suivant Suivant Suivant pour lancer la copie des fichiers du pilote Cliquer sur Terminer Terminer Terminer Terminer pour achever l installation du pilote Un redémarrage n est à priori pas nécessaire Le pilote ASIO2 pour Windows 9 x est automatiquem...
Page 40: ...ge de présentation doit s ouvrir automatiquement dans votre navigateur Internet habituel Cliquer alors sur la photo de votre carte puis sur le lien vers sa page de drivers Cliquer sur le lien de la version Windows 2000 du VX kit Si le pilote a été chargé depuis notre site WEB il faut le décompacter avant son installation Double cliquer sur le fichier téléchargé pour démarrer l utilitaire d auto ex...
Page 41: ...00 Dans le menu démarrer sélectionner Paramètres Paramètres Paramètres Paramètres Panneau de Panneau de Panneau de Panneau de configuratio configuratio configuratio configuration n n n Supprimer le driver comme décrit ci dessus Installer le nouveau pilote comme décrit précédemment Installation sous Windows XP Insérer la carte L assistant détecte la carte lors de son insertion et demande un nouveau...
Page 42: ...ur Suivant Suivant Suivant Suivant dans la fenêtre suivante pour démarrer l installation Sélectionner Continuer Continuer Continuer Continuer si Windows affiche un message du type Le logiciel n a pas subit les tests Windows Logo Cliquer sur Terminer Terminer Terminer Terminer pour achever l installation et redémarrer Le driver wave est maintenant installé Suppression du pilote VX sous Windows XP O...
Page 43: ...r wave est maintenant installé Il n est pas nécessaire de redémarrer La carte La carte La carte La carte NE DOIT PAS être retirée pendant une session de Windows NT être retirée pendant une session de Windows NT être retirée pendant une session de Windows NT être retirée pendant une session de Windows NT 4 4 4 4 Suppression du pilote VX sous Windows NT 4 Aller dans Ajout Suppression de programmes A...
Page 44: ... haut à gauche du panneau de contrôle VX et une bitmap reflète la configuration d entrées sorties sélectionnée General settings Cette section permet l ajustement des paramètres suivants fréquence d échantillonnage de la carte type de l entrée micro line Les deux voies d entrée sont systématiquement dans le même état format de la sortie numérique professionnel AES EBU ou consumer S PDIF ASIO settin...
Page 45: ...yback level Change playback level quand cette option est cochée le curseur permet d ajuster le gain numérique de sortie de 0 dB à 18 dB Change analog output Change analog output Change analog output Change analog output quand cette option est cochée le curseur permet d ajuster l atténuation analogique de sortie Change direct monitoring Change direct monitoring Change direct monitoring Change direc...
Page 46: ...rise en compte d une nouvelle valeur de latence Pro Tools Pro Tools Pro Tools Pro Tools Free Free Free Free Cocher cette option pour pouvoir utiliser Pro Tools Free Redémarrer l ordinateur Time Code Time Code Time Code Time Code Permet la sélection de la vitesse du time code ...
Page 47: ...omatiquement démarré au démarrage du système Pour accéder au mixer double cliquer sur son icône dans la barre de tâches ou cliquer droit sur son icône et sélectionner Open Open Open Open Si vous avez fermé le mixer dans votre session vous pouvez le démarrer depuis le menu Start Programs Digigram Digigram Mixer Start Programs Digigram Digigram Mixer Start Programs Digigram Digigram Mixer Start Prog...
Page 48: ...uer sur le menu Options Sélectionner Reset levels Reset levels Reset levels Reset levels Sélection de la voie d entrée sortie du mixer Cliquer sur le menu Mixer Sélectionner la voie désirée Fixer les valeurs par défaut pour chaque ligne mixer sélectionnée Cliquer avec le bouton droit sur l icône du mixer dans la barre des tâches ou aller dans le menu Options du mixer Sélectionner Save current conf...
Page 49: ...nt pas possible dans ce mode il n est pas recommandé d utiliser ce mode Faders Les faders permettent le réglage des niveaux d entrée de sortie et de monitoring hardware Pour ré initialiser les faders double cliquer sur le bouton du fader Speakers sortie Applique un gain analogique sur la sortie Wave out sortie Applique un gain de sortie numérique Monitoring Applique un gain numérique sur le monito...
Page 50: ...niveau nominal de sortie et du headroom ne doit pas excéder le niveau de sortie maximum de la carte 10 dBu Nominal in Nominal in Nominal in Nominal in Ajuste en temps réel le niveau nominal d entrée La somme du niveau nominal d entrée et du headroom d entrée ne doit pas excéder le niveau d entrée maximum de la carte 10 dBu Headroom In Headroom In Headroom In Headroom In Ajuste en temps réel le hea...
Page 51: ...ommuter en gain micro il faut N H 38 puis lorsque le fader Analog In Analog In Analog In Analog In indique un gain supérieur ou égal à 0 dB le gain micro sélectionné est 48 dB lorsque le fader Ana Ana Ana Analog In log In log In log In indique un gain inférieur à 0 dB le gain micro sélectionné est 30 dB le fader de balance Analog In Analog In Analog In Analog In ne doit pas être utilisé en mode ga...
Page 52: ...éro de série et voies monos d entrée sortie Les paramètres généraux de la carte sélectionnée sont affichés dans la partie supérieure droite et les paramètres des entrées et sorties sont affichés dans la partie basse Paramètres généraux Active stereo I O Il est recommandé de n activer que les entrée sorties requises afin d optimiser les ressources CPU de l ordinateur Clock C est l horloge d échanti...
Page 53: ...B ou 48 dB Quel que soit le type de l entrée un gain numérique digital gain peut être appliqué Sa position par défaut se situe en face du point en caractère gras 0 dB Tous ces paramètres agissent à la fois sur les voies gauche et droite de la voie stéréo sélectionnée Output Le contrôle playback digital gain applique un gain numérique sur la sortie sélectionnée donc sur ce qui est joué par l applic...
Page 54: ...l peut y avoir des ruptures de débit dans le transfert des données audio et donc une perte de synchronisation entre ce qui est enregistré et ce qui est joué en même temps L option skip samples on outputs to compensate audio time drift skip samples on outputs to compensate audio time drift skip samples on outputs to compensate audio time drift skip samples on outputs to compensate audio time drift ...
Page 55: ...ectement installée sous Windows Les entrées et sorties de la carte doivent pouvoir être sélectionnées dans le panneau de configuration multimédia ou Sons et multimédia ou Son et les sons systèmes peuvent être joués Les voies de la VXpocket 440 vues à travers le driver wave sont nommées VXpocket 440 out 1 et VXpocket 440 out 2 pour les sorties VXpocket 440 in 1 et VXpocket 440 in 2 pour les entrées...
Page 56: ... vitesse nominale Asservissement de l audio sur le LTC entrant logiciel compatible requis Sorties analogiques 4 sorties analogiques symétriques peuvent être utilisées en asymétrique connecteurs XLR conversion numérique analogique 24 bit suréchantillonnage 64 x delta sigma impédance de sortie 100 Ohms niveau de sortie maximum 10dBu ajustable par logiciel ajustement du gain analogique de sortie de 0...
Page 57: ...entrées et sorties chargées 90dB Ces caractéristiques sont mesurées à 48 kHz en mode record play Traitement La puissance de traitement est fournie par le processeur de l ordinateur Consommation Tension d alimentation 5 V En fonctionnement 400 mA 1 6 W typique En veille 150 mA 0 5 W typique Température Stockage 5 C 70 C En fonctionnement 0 C 50 C Humidité Stockage 0 95 sans condensation En fonction...
Page 58: ...D i g i g r a m 58 ANNEXES ANNEXES ANNEXES ANNEXES SCHEMATIC DIAGRAM ...
Page 59: ...VXpocket 440 Manuel utilisateur 59 CABLE DIAGRAM ...
Page 60: ... 91 44 E mail europe digigram com Digigram Inc 2101 Wilson Boulevard Suite 1004 Arlington VA 22201 USA Tel 1 703 875 9100 Fax 1 703 875 9161 E mail input digigram com Digigram Asia Pte Ltd 350 Orchard Road 19 07 Shaw House Singapore 238868 Singapore Tel 65 291 2234 Fax 65 291 3433 E mail info_asia digigram com Digigram América Latina Av Callao 384 1022 Buenos Aires ARGENTINA Tel 54 11 4375 5585 Fa...