Dietz Sango Advanced F, Руководство пользователя
"Приобретите улучшенный Dietz Sango Advanced F и скачайте бесплатное Service Manual для ознакомления с руководством по эксплуатации. Скачайте его с нашего сайта, чтобы научиться использовать все функции этого продукта. Подробный и понятный мануал доступен для загрузки с manualshive.com."
Поделиться
Скачать


Отзывы:
Нет отзывов
Похожие инструкции для Sango Advanced F

12488KD
Бренд: Drive DeVilbiss Healthcare Страницы: 24

FMC022
Бренд: Felco Страницы: 20

Traveler L4
Бренд: E&J Страницы: 32

BL5148 BetterLiving
Бренд: Novis Страницы: 12

V-MAX mini
Бренд: AAT Страницы: 40

Expedition Plus
Бренд: Drive Страницы: 12

active-easy LAE
Бренд: Levo AG Страницы: 34
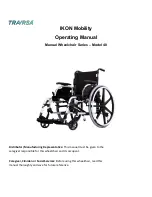
IKON 40
Бренд: Travrsa Страницы: 28

P326A series
Бренд: Merits Страницы: 56

BCW
Бренд: WOK Страницы: 28

Act Discontinued
Бренд: Etac Страницы: 8

10210C
Бренд: Coopers Страницы: 4

VP179T
Бренд: aidapt Страницы: 6

Hydra C650PW
Бренд: Invacare Страницы: 126


