background image


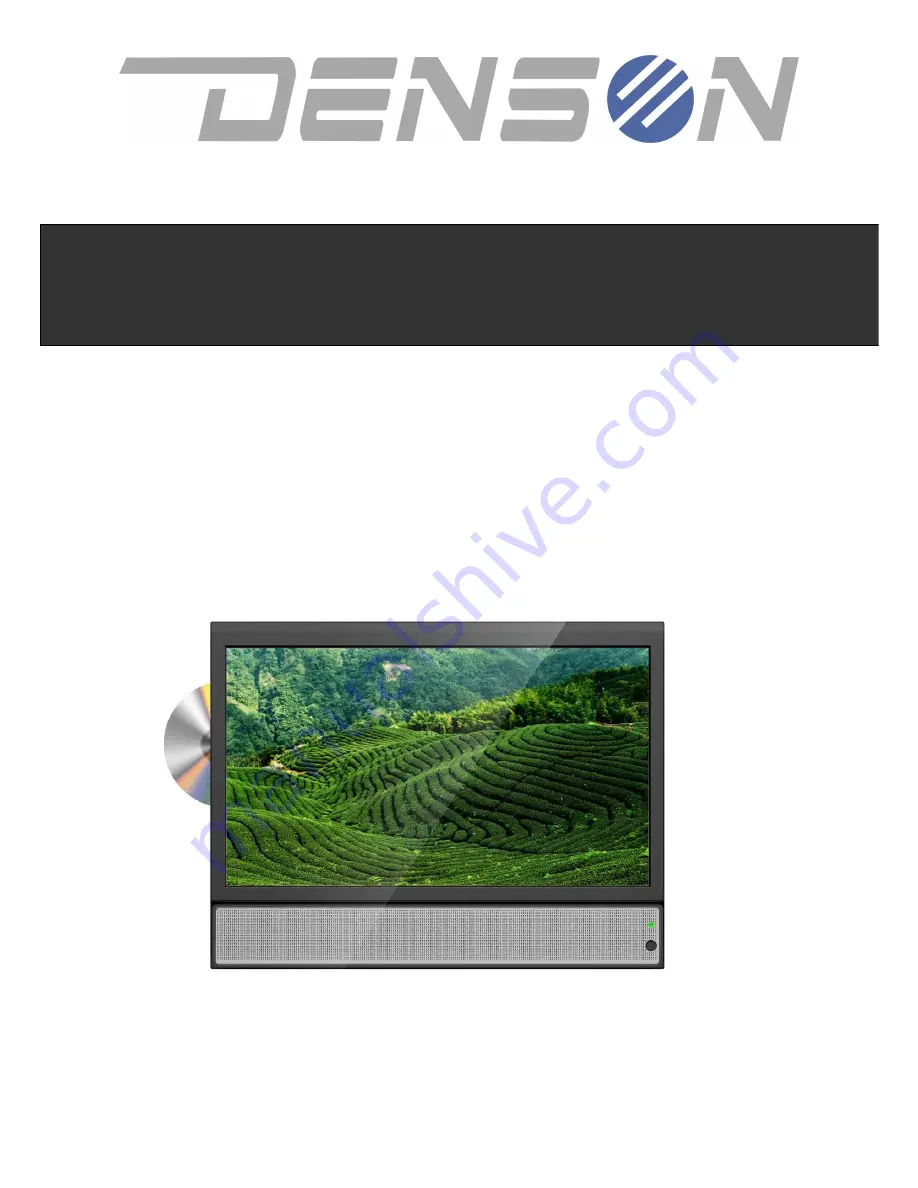
LED TV with DVB S2 CA CI, 

DVB T CI, DVD Loader and 

Sound Bar 


Before connecting, operating or adjusting this product, please read these instructions 

completely. Please keep this manual for future reference 

(All pictures used in this manual are only for illustration purpose. Those pictures may be different from the actual TV unit.) 


USER MANUAL 19LEDCACI 

Summary of Contents for 19LEDCACI

Page 1: ...cting operating or adjusting this product please read these instructions completely Please keep this manual for future reference All pictures used in this manual are only for illustration purpose Those pictures may be different from the actual TV unit USER MANUAL 19LEDCACI ...

Page 2: ...uctions should be retained for future references Heed Warnings All Warnings on the product and in the operation instructions should be adhered to Follow Instructions All Operating and user instructions should be followed Cleaning Unplug this product from the wall outlet before cleaning DO NOT use liquid cleaners or aerosol cleaners Use damp Cloth for cleaning Attachments DO NOT use attachments not...

Page 3: ...e operation of the product and to protect it from Overheating These openings must NOT be blocked or covered There should be at least 15cm of space from these openings The openings should never be blocked by placing the unit on a bed rug or other similar surface This product should NOT be placed in a built in installation such as a bookcase unless proper ventilation is provided Grounding or Polariz...

Page 4: ... antenna system extreme care should be taken to keep from touching such power lines or circuits as contact with them might be fatal Overload DO NOT overload wall outlets extension cords or integral convenience receptacles as this can result in a risk of fire or electric shock CAUTION Danger of explosion if remote battery is incorrectly replaced Replace only with the same or equivalent type Batteri...

Page 5: ...y in the original packing condition to avoid condensation that may cause failure Handling Since the LCD TV consists of glass and precise electronic components it will be damaged by excessive shock or drop Please handle the LCD TV carefully to minimize shock during transportation Recycling This product utilizes lead free solder and has a fluorescent lamp containing a small amount of mercury Disposa...

Page 6: ...eiver 16 4 2 PVR Possibilities of the DVB S2 receiver 16 4 2 1 USB basic operation 16 4 2 2 USB setting 17 4 2 3 PVR setting 17 4 2 4 Play Files 17 4 3 PVR 18 4 4 USB Software Upgrade of the DVB S2 receiver 19 5 Source Operating instructions of the LED TV 19 6 OSD Language settings 20 7 DVB T CI Receiver Modus DTV 21 7 1 Channel Menu 21 7 1 1 Auto Tuning 21 7 1 2 DVB T Manual Tuning 21 7 1 3 ATV M...

Page 7: ...Password setting 29 7 5 3 Block Program 29 7 5 4 Parental Lock 30 7 5 5 Key Lock 30 7 6 Set up Menu 30 7 6 1 OSD Language setting 30 7 6 2 Teletext Languagel 30 7 6 3 Impaired hearing 31 7 6 4 PVR File System 31 7 6 5 Aspect Ratio 32 7 6 6 Blue screen 32 7 6 7 Reset 32 8 PC Mode OSD Operation 33 8 1 Picture Menu 33 8 1 1 Auto adjustment 33 8 1 2 H Offset 33 8 1 3 V Offset 33 8 1 4 Size 33 8 1 5 Ph...

Page 8: ... OSD Operation 35 10 1Photo Menu 35 10 2 Music Menu 36 10 3Movie Menu 37 10 4 Text Menu 38 11 DVD Operation 39 11 1Basic Operation 39 11 2DVD settings DVD menu settings 39 11 3DVD Picture Menu 39 11 4Sound Menu 41 11 5Time Menu 41 11 6Parental Menu 41 11 7Set up Menu 41 12 Reference 42 12 1Screen cleaning 42 13 Trouble Shooting 43 ...

Page 9: ...Powered by SD Electronics 8 ...

Page 10: ...al video and audio signal inputs You will get the feeling that the large sized surface of operation high quality stereo speakers provides a coherent top of the line Audio and Video systems for viewing pleasure In addition the TFT LED display allows Plug Play connection to your PC and has a built in On Screen Display OSD functions that can operate from the convenience of a remote control Product Fe...

Page 11: ...DAPTER THIN FLEXIBLE 50cm coax cable with mounted 2 x Male F connectors and 1 x Female Female Fconn Adapter UNIVERSALAUTO CIGARETTE LIGTHER PLUG LINE QUICK INSTALLATION GUIDE USER MANUAL All pictures used in this manual are only for illustration purposes Those pictures may be different from the actual 2 SYSTEM SETUP USER MANUAL QUICK INSTALLATIO N GUIDE ...

Page 12: ...Turn on off TV 4 SOURCE Call out the input source selection interface 6 MENU Display the main menu on screen go to the previous level of OSD 6 CH Decrease TV channel Increase TV channel 7 VOL Decrease volume Increase volume 8 DVD mode STOP 9 II DVD mode Play Pause 10 EJECT DVD mode eject disc All pictures used in this manual are only for illustration purposes Those pictures may be different from t...

Page 13: ...evious channel in the Favorite list 16 REVEAL To reveal the hidden words in Teletext mode 17 DISPLAY To display the source and channel s info 18 PMODE Press repeatedly to cycle through the available picture modes 19 SMODE Press to cycle through the different sound preset settings 20 SUBPAGE To display a sub page of the selected page in Teletext 21 EPG Electronic Program Guide 22 SOURCE call out so...

Page 14: ...top 35 Recorder at DVB T mode 36 EJECT In DVD mode eject disc 37 RED Code Use for Teletext OSD menu red color coded function PROG In DVD mode display the program 38 GREEN Code Use for Teletext OSD menu green color coded function ANGLE In DVD mode turn angle for the disc have angle 39 YELLOW Code Use for Teletext OSD menu yellow color coded function TITLE In DVD mode change the title have in the di...

Page 15: ...sing to extreme Low or High temperatures Exposing to excessive Moisture Mishandling to Dropping 2 2 2 Remote Control Operating Instruction The Remote Control Transmission consists of an Infrared IR Signal Make sure the line of sight between Remote Control and clear of objects that could interfere with the remote IR signal Always point the Remote Control directly towards the sensor ...

Page 16: ... by SD Electronics 15 2 3 Connectivity TV SET Right Side Linkerkant Left Side 1 LNB IN DVB S2 2 CI Slot DVB S2 behind a detachable cover 3 Smartcard reader DVB S2 4 USB input of the DVB S2 receiver 5 DVD Slot ...

Page 17: ...e Menu of the DVB S2 satellite receiver For Dutch and Belgium viewers of Canal Digital TV Vlaanderen or TeleSat providers you can follow the instructions on the Quick Installation Guide to download the corresponding channels with the FastScan application You can view your favourite channels in a few minutes 4 1 Use of the USB port of the DVB S2 receiver The USB input of the DVB S2 receiver you fin...

Page 18: ...ng file I Play the previous file I Play the next file Fast rewind Fast forward PAUSE Pause VOL VOL Adjust volume EXIT Exit playing state and return to file list menu 2 Photo 1 Press the VOL VOL to highlight the Photo 2 Press the CH CH to change the folder or file and press the OK button to open the folder or play the picture It supports bmp jpg and gif format photos Tip You can press the Green but...

Page 19: ...files are saved in folder named ALIDVRS2 OK View play list or play the highlighted file in the play list Display playing progress PAUSE Pause or Step Stop playing file Fast rewind Fast forward I Play the previous item I Play the next item INFO Display playing progress In this menu press the INFO button again to display the EPG information AUDIO Set the audio language SUB If the file has subtitle p...

Page 20: ...nt to upgrade the software database Below that you see NO selected standard With use of the you can change NEE into JA If selected YES push the OK button and the Software Upgrade starts NOTE Don t interrupt the upgrade progress If upgrade is ready the DVB S2 will re start automatically 4 4 2 Software Firmware uploaded As soon as the upgrade is ready you have to do a Factory Reset Push the MENU but...

Page 21: ... PICTURE SOUND TIME LOCK and SET UP OSD Language setting you find as sub menu under SET UP Select with the button SET UP and push the OK button Next SET UP Menu will be shown on screen Select the OSD LANGUAGE with the button and push OK Next Menu will appear With the and buttons je can select the desired langauge and push OK to confirm Push the MENU button to return to previous menu or push the EX...

Page 22: ...both Analogue TV and Digital TV channels All old stored channels will be deleted o DTV Will tune only Digital TV channels Only old stored DTV channels will be deleted and updated o ATV Will tune only Analogue TV channels Only old stored ATV channels will be deleted and updated 7 1 2 DVB T Manual Tuning Select DTV Manual Tuning then press OK or button to enter DTV manual tuning process Select the f...

Page 23: ...ess to change the character for rename only available in ATV mode Move Press the Yellow button to move current selected channel Press to move the channel then press the Yellow button again to confirm the move Skip Press the BLUE button to mark current selected channel as skipped channel Skipped channel will not be displayed while changing channel by pressing P button Press again to unselect FAV Pr...

Page 24: ...ure Mode Select Picture Mode then press OK or button to enter picture mode sub menu Press button to select the picture mode you desire You can select these picture mode o Dynamic o Standard o Mild o Personal Press OK button to confirm selection Press LCD MENU button to return to previous menu without changes Press EXIT button to exit the OSD completely 7 2 2 Contrast Select Contrast then press OK ...

Page 25: ...ess OK or button to enter contrast sub menu Press button to make the adjustment Press OK or LCD MENU button to confirm adjustment and go back to previous menu Note Contrast only available for adjustment when in Personal picture mode 7 2 7 Colour Temp Colour Temperature Select Colour Temp Mode then press OK or button to enter Colour Temp sub menu Press button to select the colour temperature you de...

Page 26: ...then press OK button or button to enter to the sub menu 7 3 1 Sound Mode Select Sound Mode then press OK or button to enter sound mode sub menu Press button to select the sound mode you desire You can select these sound mode o Standard Music Movie Sports Personal Press OK button to confirm selection Press LCD MENU button to return to previous menu without changes Press EXIT button to exit the OSD ...

Page 27: ...n press OK or button to turn this feature On Off When turned ON you will hear extremely good surround sound of 2 x 8Watt 4 speaker system 7 3 7 AD Switch Select AD Switch then press OK or button to enter AD Switch sub menu Press button to select this feature to be On Off When AD Switch is on press button to adjust the AD volume Press LCD MENU button to confirm adjustment and go back to previous me...

Page 28: ...ess OK button to confirm selection or LCD MENU to back to previous menu without changes Note Not available in ATV mode 7 4 3 Sleep Timer Select Sleep Timer then press OK or button to enter sleep timer sub menu Press button to select the sleep timer you desire You can select from o Off 10min 20min 30min 60min 90min 120min 180min 240min Press OK button to confirm selection Press LCD MENU button to r...

Page 29: ...S 20S 25S 30S Press OK button to confirm selection Press LCD MENU button to return to previous menu without changes Press EXIT button to exit the OSD completely OSD timer is used to set the duration which the OSD is shown Longer setting will cause the OSD to stay on screen longer before disappearing 7 5 Lock Menu 1 Press LCD MENU button to display the MAIN OSD MENU Press button to select the Lock ...

Page 30: ...the password will not be allowed to be modified Enter new password Enter new password again at If both passwords match the password will be changed accordingly Otherwise the Password Doesn t Match menu will be displayed and you need to re enter the new password again 7 5 3 Block Program Select Block Program then press OK or button to enter Block Program interface Select the channel from the channe...

Page 31: ...ress OK or button to set the status as On Off Enable Key Lock will cause the keypad of the TV to be locked which will not have any function Note even though Key lock is On it will only be activated when Lock System is enabled On 7 6 Setup Menu 1 Press LCD MENU button to display the MAIN OSD MENU Press button to select the Setup Menu Press button to select the option that you want to adjust in the ...

Page 32: ... plugged in Check PVR File System Check the file system on the USB drive i e FAT32 or NTFS USB Disk Show whether the USB drive can support the PVR function Format Press OK to enter the File system interface o PVR File System Type FAT32 or NTFS o PVR File System Size Show the size of the USB drive that PVR function can use o SD XX Mins Show how long can a SD video be recorded in Mins with the USB d...

Page 33: ...ress LCD MENU button to return to previous menu without changes Press EXIT button to exit the OSD completely 7 6 6 Blue Screen Select Blue Screen then press OK or button to enable disable the Blue Screen function Blue Screen function allow the background of be displayed as blue colour when there is no signal 7 6 7 Reset Select Reset then press OK or button to reset all the OSD setting back to fact...

Page 34: ...ton to move the PC display horizontally left right 8 1 3 V Offset Select V Offset then press OK or button to move the PC display vertically up down 8 1 4 Size Select Size then press OK or button to adjust the size of the PC display Clock 8 1 5 Phase Select Phase then press OK or button to adjust the phase of the PC display 8 1 6 Position Reset Select Position Reset then press OK or button to reset...

Page 35: ...n of TT Language Hearing Impaired and PVR File System functions are unavailable 9 0 AV SCART HDMI OSD Operation 9 1 Picture Menu Same with ATV DTV mode 9 2 Sound Menu Same with ATV mode 9 3 Time Menu Same with ATV mode 9 4 Lock Menu Same with ATV mode with the exception of Block Program and Parental Guidance function are unavailable 9 5 Setup Menu Same with ATV mode with the exception of TT Langua...

Page 36: ... selected media entries 10 1 Photo Menu Select the drive partition of your USB hard disk Normally it is C drive Select the folder where your Photo files are located After the folder of the photo files are selected you can see the thumbnail preview of the photos Selecting the thumbnail photo will display the resolution size date and time of the photo Press OK button to start the slide show To displ...

Page 37: ... and P channel up down button to go to next page and previous page quickly Info Show the resolution size date and time of the photo Rotate Left Rotate the photo clockwise for 90 0 Rotate Right Rotate the photo anti clockwise for 90 0 Zoom Zoom in the photo x1 x2 x3 mode Zoom Zoom out the photo mode Move View Only available when zoomed in the photo Move the zoomed photo for pan and scan view Press ...

Page 38: ...nfo Show the information of the song Album Title Bit rate Artist Sampling Year and Size Goto Time Input the time directly using the number keys on remote to go directly to a particular section of the song Press EXIT button to return to previous menu 10 3 Movie Menu Select the drive partition of your USB hard disk Normally it is C drive Select the folder where your Movie files are located After the...

Page 39: ...o directly to a particular section of the movie Zoom Zoom in the movie x1 x2 x3 mode Zoom Zoom out the movie mode Aspect ratio Change the aspect ratio of the movie Auto 4 3 16 9 Zoom1 Zoom2 mode Move View Only available when zoomed in the movie Move the zoomed movie for pan and scan view Press EXIT button to return to previous menu 10 4 TEXT Menu Select the drive partition of your USB hard disk No...

Page 40: ...C Insert a disc in the DVD slot at the left side of the TV set as indicated Don t touch the Play surface Keep the disc between your fingers into the slot The DVD player will pull the Disc smoothly and automatically inside the DVD slot The screen will display next Disc is loaded left top corner and the DVD will automatically start playing To Eject the Disc you can use the EJECT button on the TV set...

Page 41: ... If selected PERSONAL and push the OK button you will enter the Personal Picture setting and the screen will show next With the button you can select CONTRAST BRIGHTNESS COLOUR SHARPNESS COLOUR TEMP NOISE REDUCTION and DYNAMIC CR If you for instance select CONTRAST and push OK you will see nest display on screen ...

Page 42: ... shown With the button you can adjust the contrast setting Push EXIT to leave the OSD Menu or push MENU button to return to previous menu For any other Personal setting you follow the same way and follow the instructions 11 4 Sound Menu Refer to Chapter 7 3 11 5 Tijd Menu Refer to Chapter 7 4 11 6 Beveiliging Menu Refer to Chapter 7 5 11 7 SET UP Menu Refer to Chapter 7 6 ...

Page 43: ... wipe the screen with a clean soft lint free cloth to remove dust or other particles that can scratch the screen 2 To clean the tough areas use a soft lint free cloth with a few drops of water to remove the stubborn dirt 3 Do not apply pressure to the surface of the TFT LCD When you clean the housing 1 Use a soft dry cloth to clean housing 2 To clean tough areas use a soft lint free cloth with a f...

Page 44: ...ver AC Transformer etc Refer to the Picture Adjustment Procedure Menu in the OPERATING INSTRUCTIONS Colors are distorted Check that the Video cable is plugged in securely Screen bounces or has wavy oscillations Check Video input range V sync Max 75Hz H sync Max 48 08KHz Make sure Video cable connections are secure No sound Sound might be muted try adjusting the volume Remote Control inoperative Ch...

Reviews: