background image

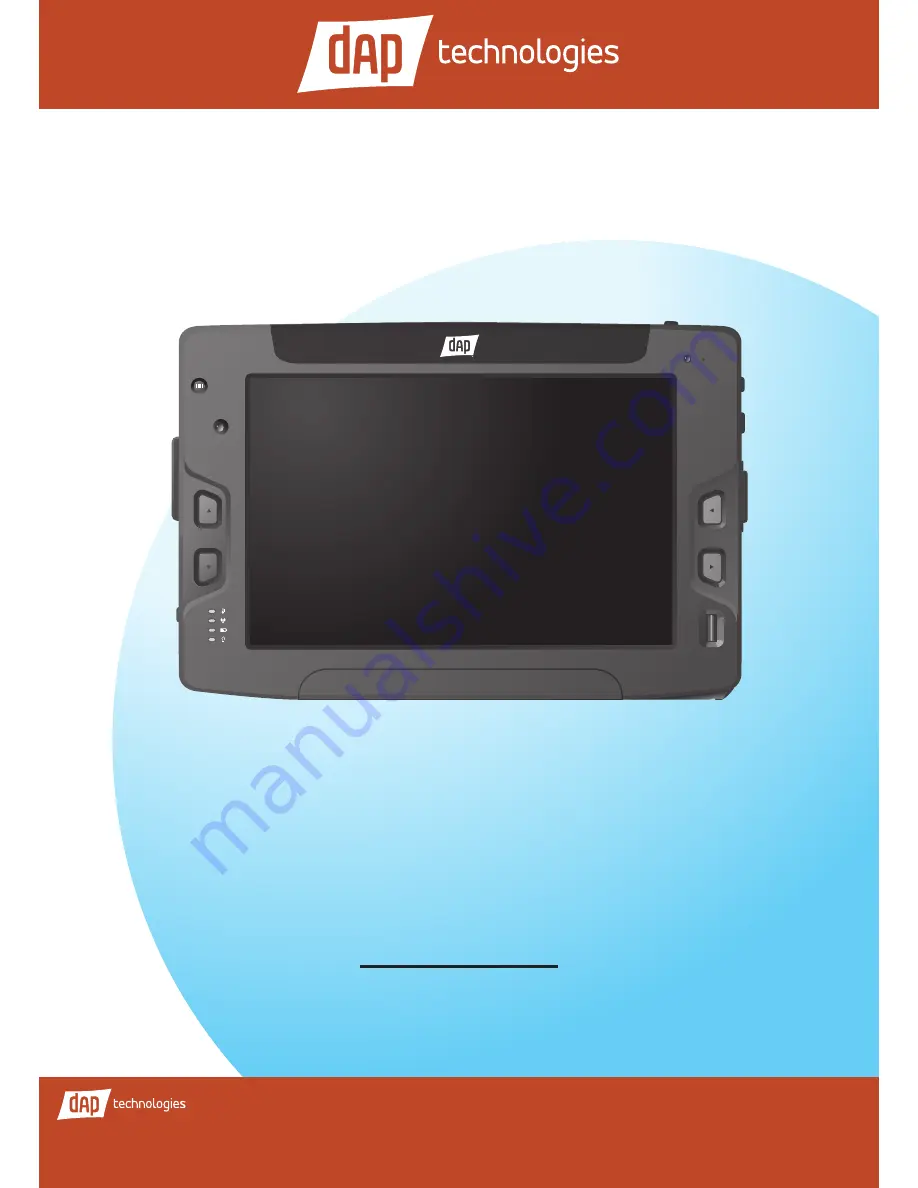
Rugged Tablet Computer

User's Manual

2.0MP

MT1010

United States

8945 South Harl Avenue, Suite 112
Tempe, Arizona, 85284 USA
Phone: +1 (855) DAP-TECH

2915 Premiere Parkway, Suite 300
Duluth, Georgia, 30097 USA
Phone: +1 (855) DAP-TECH

Canada

4535 Wilfrid Hamel Blvd., Suite 100
Quebec City, QC Canada G1P 2J7
Toll Free: +1 (800) 363-1993
Phone: +1 (418) 681-9394
Fax: +1 (418) 681-0799

Europe, Middle East, Africa

9 The Chambers, Vineyard 
Abingdon UK OX14 3PX
Phone: +44 (0) 1235 462130
Fax: +44 (0) 1235 462131

Toll Free : +1 (855) DAP-TECH  (327-8324)

www.daptech.com

Summary of Contents for MT1010

Page 1: ...kway Suite 300 Duluth Georgia 30097 USA Phone 1 855 DAP TECH Canada 4535 Wilfrid Hamel Blvd Suite 100 Quebec City QC Canada G1P 2J7 Toll Free 1 800 363 1993 Phone 1 418 681 9394 Fax 1 418 681 0799 Europe Middle East Africa 9 The Chambers Vineyard Abingdon UK OX14 3PX Phone 44 0 1235 462130 Fax 44 0 1235 462131 Toll Free 1 855 DAP TECH 327 8324 www daptech com ...

Page 2: ...Technologies reserves the right to make any product changes without notice including circuits and or software described or contained in this manual in order to improved design and or performance DAP Technologies assumes no responsibility or liability for the use of the described product s conveys no license or title under any patent copyright or masks work rights to these products and makes no rep...

Page 3: ...ar View Expanded Model 1 7 Top and Bottom View 1 9 Left and Right Views 1 10 Installing the Stylus 1 11 Removing the Stylus 1 11 Installing the Memory Card 1 12 Removing the Memory Card 1 12 Installing the SIM Card 1 13 Installing the Battery Pack 1 14 Connecting to Network 1 15 Connecting to AC Power 1 16 Turning the Tablet Computer On and Off 1 17 Turning On 1 17 Turning Off 1 18 ...

Page 4: ...2 10 Turning the Bluetooth Adapter On and Off 2 10 Pairing with Bluetooth Devices 2 11 Configuring Bluetooth Settings 2 14 Using 3G Network 2 15 Connecting to 3G Network 2 15 Using AirCard Watcher 2 16 Configuring AirCard Watcher Settings 2 18 Using GPS 2 20 Location 2 20 Assistance 2 21 Using the Camera 2 22 Opening the Camera 2 22 The Camera Screen 2 23 Shooting Photos 2 24 Camera Settings 2 25 ...

Page 5: ...necting Audio Devices 3 4 Connecting Serial Devices 3 5 Managing Power 4 1 Battery Pack 4 2 Charging the Battery Pack 4 2 Checking the Battery Level 4 3 Replacing the Battery Pack 4 4 Power Management 4 5 Power Saving Tips 4 5 Expanding Your Tablet Computer 5 1 Connecting the Docking Station 5 2 Docking the Tablet Computer 5 2 Installing the Expansion Module 5 3 Installing the Extendable Battery P...

Page 6: ...idelines A 2 Touchscreen Guidelines A 2 Troubleshooting A 3 Tablet Computer Specifications A 5 Regulatory Information B 1 Important Information B 2 Safety Information EN B 3 Informations de sécurité FR B 4 About the Batteries B 5 About the Adapter B 5 FCC Regulations B 6 CE Notice European Union B 7 RF Exposure Information SAR B 7 IC Regulations B 7 Important Note B 8 ...

Page 7: ...devices Chapter 4 Managing Power provides information on power management Chapter 5 Expanding Your Tablet Computer provides information on installing and using optional accessories such as docking stations expansion modules etc Chapter 6 Using BIOS Setup and System Recovery describes the BIOS Setup utility that configures the Tablet Computer s BIOS settings and system recovery utility that reinsta...

Page 8: ...entifies important information that if not followed may result in loss of data or damage to the Tablet Computer Hardware and keyboard keys are shown in a bold typeset For example Press the F1 key to complete A title command setup item value option or button that you can see on the screen is shown in boldface For example Select When I press the power button set it to Shut down and then tap the Save...

Page 9: ...laces you could not take a consumer grade Tablet Computer This chapter tells you step by step how to get the Tablet Computer up and running You will find instructions for the following procedures Unpacking Device Overview An Explanation of External Components and their Functions Installing the Stylus Installing the Memory Card Installing the SIM Card Installing Battery Packs and Connecting to AC P...

Page 10: ...y Pack 2 0MP Power Adapter Power Cord and Plugs Stylus Tether for Stylus Cleaning Cloth Screen Protector Film Windows 7 Certificate of Authenticity Label COA Quick Start Guide Keep the shipping carton and packaging materials in case you need to ship or store the Tablet Computer in the future NOTE Actual items may slightly differ depending on the model you purchased Optional Items Expansion Module ...

Page 11: ...teractive applications 3 Up Key On menu selection moves the cursor up or increases a value 4 Down Key On menu selection moves the cursor down or decreases a value 5 LED Indicators Shows the current status of the Tablet Computer Thermal Lights up when the Tablet Computer heater is on Wireless Solid green Wireless antenna is enabled Off Wireless antenna is disabled Battery Blinking green Battery is ...

Page 12: ...ightness according to the current ambient light 7 Microphone Use for chatting and other interactive applications 8 Touch Screen Displays and receives information for the Tablet Computer 9 Left Key On menu selection moves the cursor to the left or decreases a value 10 Right Key On menu selection moves the cursor to the right or increases a value 11 Fingerprint Reader Optional Scans fingerprints for...

Page 13: ...ures 4 Expansion Port Connects to expansion modules such as an RFID Reader Smart Card Reader etc Note Expansion modules are optional items and are sold separately 5 Battery Lock Slide up to unlock the battery latch Slide down to lock the battery latch 6 Battery Latch Slide inward to latch the battery pack to the Tablet Computer Slide outward to unlatch the battery pack from the Tablet Computer 7 B...

Page 14: ... Item Description 8 Battery Button Press the button to light the battery status LEDs The LEDs automatically go off after 5 seconds 9 Battery Status LEDs Shows the battery capacity Battery full Battery charged Battery half charged Battery low ...

Page 15: ...sion Module Screw Secures the expansion module to the Tablet Computer 5 SIM Card Slot Stores a SIM card which provides data network capability to the Tablet Computer 6 Smart Card Reader Reads smart cards 7 Battery Screws Secures the high capacity battery pack to the Tablet Computer 8 High Capacity Battery Pack Supplies power to your Tablet Computer when external power is not connected 9 Battery Bu...

Page 16: ...1 8 DAP Technologies Getting Started No Item Description 10 Battery Status LEDs Shows the battery capacity Battery full Battery charged Battery half charged Battery low ...

Page 17: ... headphones external speakers or an audio recording device 2 Antenna Receives and transmits wireless signals 3 Barcode Reader Reads barcodes 4 Memory Card Slot Stores the microSD card for additional storage 5 Docking Connector Connects to a docking station optional 6 Stylus Holder Stores the stylus 7 Stylus Pull to release the stylus from the holder ...

Page 18: ...device such as a USB flash drive mouse printer keyboard etc Mini USB Port Connects to a USB device such as a computer printer scanner etc HDMI Connector Type D Connects to an HDMI device such as an external monitor 4 Power Connector Connects to the AC adapter 5 SIM Card Slot Stores the SIM card which provides 3G data connection to your Tablet Computer 6 Ethernet Port Connects to a LAN jack for net...

Page 19: ...lace to store the stylus Perform the following to prepare and install the stylus to your Tablet Computer 1 Loop one end of the tether to the stylus eyelet 2 Loop the other end of the tether to the Tablet Computer eyelet 2 1 3 Insert the stylus into the stylus holder until it locks into place Removing the Stylus 1 Pull the stylus by its tab to remove it from the stylus holder 2 Before usage expand ...

Page 20: ...ht side of the Tablet Computer open the memory card slot cover 2 Insert the microSD card with the gold contacts facing down 3 Push the microSD card until it clicks into place 4 Close the microSD card slot cover Removing the Memory Card 1 Perform Windows procedures on safely removing removable drives from the Tablet Computer 2 On the right side of the Tablet Computer open the memory card slot cover...

Page 21: ...rst and the gold contacts facing the front of the device 4 Push the SIM card until it clicks into place NOTE For more information on connecting to 3G network see Using 3G Network on page 2 15 To ensure signal connection make sure to turn the Tablet Computer on or off before installing and removing the SIM card Removing the SIM Card 1 Turn the Tablet Computer off see Turning the Tablet Computer On ...

Page 22: ...k to the Tablet Computer 1 Place the Tablet Computer face down on a flat even surface 2 From the bottom side of the battery pack align and place the battery pack on its bay 3 Slide the battery latches inward to the close position A 4 For a more secured installation slide the battery locks to the lock position B A B ...

Page 23: ...reless connection see Using Wireless LAN on page 2 7 To connect the Tablet Computer via wired connection perform the steps below 1 On the right side of the Tablet Computer open the network port cover 2 Connect one end of an Ethernet cable to the Ethernet port of the Tablet Computer 3 Connect the other end to a wall socket or a network hub Network ...

Page 24: ...t the Tablet Computer to AC power 1 On the left side of the Tablet Computer open the power connector cover 2 With the battery pack installed plug the DC cord of the AC adapter into the power connector of the Tablet Computer 3 Plug the female end of the AC power cord into the AC adapter 4 Then plug the male end of the AC power cord into an electrical outlet 1 2 3 When the AC adapter is connected th...

Page 25: ...ld the plug head Never pull on the cord Turning the Tablet Computer On and Off Turning On 1 Make sure that the Tablet Computer is either connected to TouAC power or the battery pack is charged 2 Press the power button Notice the screen remains blank for 8 10 seconds but the power LED lights up The power LED indicator shows two different states Solid green Tablet computer is turned on Blinking gree...

Page 26: ...ter to turn off by pressing and holding the power button for more than 6 seconds This is not the recommended method but may be necessary if the system is locked up Hybrid Sleep Short press the power button or use the Windows Start Menu to put the Tablet Computer in Hybrid Sleep mode Hibernation Use the Windows Start Menu to put the Tablet Computer in hibernation mode Press the power button to resu...

Page 27: ...t the use of the Tablet Computer and describes the operating basics of these components and features Touch Screen Input Panel Panel Keys Wireless LAN Features Bluetooth Features 3G Network Features GPS Features Camera Barcode Reader Fingerprint Reader DAP Control Center Operating Your Tablet Computer ...

Page 28: ...Action Tap Tap gently on the touch screen to select or open an item Tapping is the same as clicking the left mouse button of a PC Double tap Rapidly tap twice on the touch screen This action is similar to double clicking the left mouse button of a PC Tap and hold Tap and hold the stylus lightly on the display A big circle appears to indicate that a pop up menu will soon appear Lift up the stylus a...

Page 29: ... screen and the indicated position of the onscreen pointer recalibrate the screen Perform the following to calibrate the screen 1 Tap Start Control Panel Tablet PC Settings 2 On the Display tab tap Calibrate 3 Tap the cross hair with the stylus as it moves around the screen 4 When calibration is complete tap Yes to close the calibration utility screen ...

Page 30: ...r text and perform various keyboard functions There are two types of Input Panels for you to use Touch Keyboard Allows you to enter text by tapping the keys with the stylus like pressing the keys on a standard keyboard Writing Pad Allows you to write on the writing pad like writing on a piece of paper Your handwriting will be converted into typed text ...

Page 31: ... size of the Input Panel select the lower right corner of the Input Panel and drag To position the Input Panel The Input Panel floats on top of the screen by default To move the Input Panel to an area on the screen place the stylus on the title bar and drag the Input Panel to a new location on the screen To dock the Input Panel You can dock the Input Panel to so that it is anchored at the top or t...

Page 32: ...ightness setting or volume and others Adjusting Volume Peform the following to adjust the volume of your Tablet Computer To increase volume press or repeatedly To decrease volume press or repeatedly Adjusting Screen Brightness Peform the following to adjust the screen brightness of your Tablet Computer To increase brightness press or repeatedly To decrease brightness press or repeatedly ...

Page 33: ...e within range It takes approximately 30 seconds for your Tablet Computer to make a successful wireless connection and approximately 10 seconds to disconnect Turning the Wireless Antenna On and Off By default the wireless antenna is turned on In case you need to turn the wireless antenna on or off perform the following 1 Tap Start All Programs Tap Technology DAP Control Center ...

Page 34: ...2 8 DAP Technologies Operating Your Tablet Computer 2 Tap Power Options tab 3 To turn the wireless antenna on or off tap ON or OFF ...

Page 35: ... icon on the taskbar shows 2 Tap the Wireless Network icon on the taskbar 3 In the list of available networks tap a network 4 Tap Connect 5 If the network requires authentication enter the security key or passphrase NOTE Once you are connected to a wireless network Windows saves the network profile and will automatically connect to that network when it is in range For more information on connectin...

Page 36: ...re is enabled as indicated by the Bluetooth icon on the taskbar but your Tablet Computer is not visible to other devices To make your Tablet Computer visible check the Discovery box in Bluetooth settings see Configuring Bluetooth Settings on page 2 14 Turning the Bluetooth Adapter On and Off In case you need to turn the Bluetooth adapter on or off perform the following 1 Tap Start All Programs Tap...

Page 37: ... you can pair with Bluetooth devices for the first time you need to add and save the device profile to your Tablet Computer To add and pair a Bluetooth device Perform the following to pair your Tablet Compuer with Bluetooth devices 1 Make sure the Bluetooth adapter is on as indicated by the Bluetooth icon on the taskbar 2 Tap the Bluetooth icon to display a pop up menu ...

Page 38: ...r Bluetooth devices within range 4 Tap the device you want to pair with then tap Next 5 Depending on the device you are pairing you may be prompted to enter or verify the pairing code The pairing code entered or shown on your Tablet Computer and the Bluetooth device must be the same Click Next to continue ...

Page 39: ...files and more NOTE For more information on using Bluetooth features see Windows online help To reconnect to a Bluetooth device Once a Bluetooth device has been paired with your Tablet Computer you do not need to enter or verify the pairing code as you did the first time To reconnect to a Bluetooth device perform the following 1 Make sure the Bluetooth adapter is on as indicated by the Bluetooth i...

Page 40: ...When a Bluetooth device wants to pair with your Tablet Computer a pop up message appears on the taskbar tap the message to pair with the device Configuring Bluetooth Settings The Bluetooth Settings allows you to configure how you want to connect to Bluetooth devices sync data and other options To access the settings tap and hold the Bluetooth icon on the taskbar and tap Open Settings ...

Page 41: ...ee Installing the SIM Card on page 1 13 2 Open the AirCard Watcher application tap Start All Programs Sierra Wireless AirCard Watcher The application detects the SIM card and displays network information on the AirCard Watcher main screen TIP To open AirCard Watcher faster create a desktop shortcut icon Alternatively you can set AirCard Watcher to open and connect automatically with your 3G networ...

Page 42: ...nnection type 2 Toolbar Tap an icon to access the function Wireless Profile Tap to view and modify wireless network profile SMS Tap to open SMS Express to send and receive SMS messages on your Tablet Computer NOTE Your data plan subscription must support this feature to be able to send and receive SMS messages on your Tablet Computer History Tap to view the usage history and clear the bitrate coun...

Page 43: ...eam transfer information 5 Home Tap to open the Sierra Wireless website 6 Speed Graph Tap to display a graphical table of the data transfer speed 7 Menu Tap to access the application menu Minimize Tap to minimize the application to the system tray Restore Tap to toggle the display between full view and compact view Close 8 Connect Disconnect Button Tap to connect or disconnect from the 3G network ...

Page 44: ...tings such as service center number default storage and message notification Network Configures network mode and radio technology SIM Settings Enables SIM security settings Sounds Enables sound alert when network is connected disconnected or when a new message is received Profiles Configures network profiles and auto connect functions See To configure 3G network profiles on page 2 19 Data Usage Tr...

Page 45: ...ected profile Displays the name of your 3G network Autoconnect Tap the field and then select one of the following Never Do not auto connect to network While not roaming Automatically connects to network while within the local network coverage Always even when roaming Automatically connects to network even when roaming outside the local network coverage NOTE Connecting to your network while roaming...

Page 46: ...t in and includes the u blox GPS Location Sensors software u blox GPS Location Sensors is an application that allows you to manage the following Location Assistance Satellites To open u blox GPS Location Sensors tap Start All Programs u blox u tray u tray 1 1 0 4 Location The Location tab provides an overview your location and system status ...

Page 47: ...stance The Assistance tab allows you to set the schedule and download assistance data To download update manually tap Download Assistance Data To set automatic download check the Automatic box and select the frequency of automatic download in Offline validity ...

Page 48: ...erating Your Tablet Computer Using the Camera Your Tablet Computer has a built in camera for taking photos Opening the Camera Perform the following to open the camera Tap Start All Programs All Programs DAP Technologies Camera ...

Page 49: ...amera Settings on page OV 3 Minimize Tap to minimize the camera screen 4 Exit Tap to close the camera screen 5 Shutter Tap to capture a photo 6 Open the Photo Tap to open the captured photo 7 Positioning Tap to add remove the GPS based location information on the photo by default disabled 8 Flashlight Tap to activate deactivate the flashlight function by default deactivated 9 Flash Tap to enable d...

Page 50: ...ically Landscape Mode Select this mode if you wish to capture subjects from different distances from the camera for example in the nature Macro Mode Select this mode if you want to capture a close up image of your subject Shooting Photos 1 Open the camera see Opening the Camera on page 2 22 2 Focus on your subject 3 Tap to capture the photo 4 By default the photo preview is briefly shown on the sc...

Page 51: ... camera screen NOTE By default the system automatically creates a folder with the current date to the logged in user s Pictures folder and saves the images into that folder For example C Users My Name PC Pictures 2013 12 16 Camera Settings 1 Tap to open the settings pop up menu 1 2 3 4 2 Modify the necessary settings No Item Description 1 Actions Capture Tap to capture an image Show Image Folder T...

Page 52: ...d white balance of the camera Tap on the parameter and select the desired value After all modifications are done tap Set to save changes Tap to close the page Edit Presets Tap to open the Presets page On this page you can configure the default parameters of Auto Landscape and Macro shooting modes Tap on the mode and then tap Edit You can also set the mode as a default mode by selecting a mode and ...

Page 53: ... of varaibles you can let the system to create an image folder for you with the current date The corresponding variables are as follows PICTURE YEAR MONTH DAY The PICTURE indicates the location of the image folder in Windows file system YEAR MONTH DAY is the current year month day The is the separator in the folder tree in Windows operating system As a result of this example the images are saved i...

Page 54: ...e camera function related shortcuts About Tap to see the camera information page Tap Log to create a log file or tap OK to return to the camera screen 3 When settings are complete do one of the following Tap to capture image Tap to edit the image in Windows Photo Viewer Tap to close the camera screen ...

Page 55: ...Contact your dealer to purchase Alternatively you can also use a Bluetooth scanner or connect an external barcode scanner to the RS232 port See for more information Perform the following to scan barcodes using the built in barcode reader 1 Press and hold the barcode button to active the barcode reader The barcode reader lights red 2 Place the barcode label facing the barcode reader Tablet Computer...

Page 56: ...optical instruments with your Tablet may increase eye hazard Using ScannerManager The ScannerManager allows you to see the status and configure the settings of the Internal Scanner Tethered Scanner and Bluetooth Scanner Opening the ScannerManager Perform one of the following to open the camera Tap Start All Programs All Programs DAP Technologies ScannerManager Press the camera shortcut key icon on...

Page 57: ... default the tethered scanner is disabled Tap Settings to enable this scanner and do modifications to the serial link connection parameters Tap OK to return to the ScannerManager main page 3 Bluetooth Scanner By default the Bluetooth scanner is disabled Tap Settings to configure the Bluetooth scanner connection parameters See Working With Bluetooth Scanners on page 2 33 Tap OK to return to the Sca...

Page 58: ...ription 5 Output to a Select where to direct the barcode scanning output The available options are as follows Keyboard Wedge Link One SDK b Tap Settings to modify the selected output configuration 2 When the modifications are done tap to close the ScannerManager page ...

Page 59: ... pair their devices in their documentation Usually the user must create a special barcode based on the Bluetooth MAC address of the computer Once that barcode has been generated it does not change It can be fixed on Tablet Computer and the next time any scanner has to be associated with the unit an operator simply needs to scan the code and wait the connection to be established automatically For D...

Page 60: ... pre installed on the Tablet Computer Using AuthenTec TrueSuite Before you can use the fingerprint reader you must enroll your fingerprints using the AuthenTec TrueSuite application AuthenTec TrueSuite is a biometric software that protects the security of your data through the use of fingerprint authentication When you enroll your fingerprints your fingerprints are associated with your user name a...

Page 61: ...reference only and may differ from your Tablet Computer 2 Locate the fingerprint reader on your Tablet Computer see Device Overview on page 1 3 then tap Yes The screen below appears 3 Tap Yes 4 When the screen below appears tap a finger that you want to register 5 The tapped finger is marked by a blue icon ...

Page 62: ...ociated with your fingerprints as your identity Enter a password and tap OK NOTE If you have not set Windows Password before you are asked to create a password and confirm it Enter a password confirm the password and tap OK 7 Slowly swipe the marked finger on the fingerprint reader from left to right direction The screen below appears The red bar indicates the scanning process ...

Page 63: ...he blue icon turns green to indicate successful finger enrollment 10 To register another finger tap a finger and repeat steps 4 9 Or tap to complete the enrollment 11 The software registration screen appears Tap Register Now if you want to purchase the full version of AuthenTec TrueSuite or tap Register Later to continue using the version that came with your Tablet Computer ...

Page 64: ...ngerprint Perform the following to remove the authentication of an enrolled fingerprint 1 Open the AuthenTec TrueSuite application Start All Programs AuthenTec TrueSuite AuthenTec TrueSuite 2 Swipe an enrolled fingerprint on the fingerprint reader NOTE Alternatively you can also enter the Windows Password by tapping I want to use my Windows password ...

Page 65: ...DAP Technologies 2 39 Operating Your Tablet Computer 3 Tap and hold the marked fingerprint that you want to remove 4 Tap Delete finger The green icon is removed ...

Page 66: ...ed finger to log on to Windows Perform the following to use fingerprint authentication for Windows log on 1 If the Tablet Computer has more than one account tap the Fingerprint profile icon The screen below appears 2 Slowly swipe an enrolled finger on the fingerprint reader from left to right direction If the fingerprint matches Windows opens ...

Page 67: ...enter Your Tablet Computer has a control center for viewing system information setting power options and defining hotkeys Opening the DAP Control Center Perform the following to open the DAP Control Center Tap Start All Programs All Programs DAP Technologies DAP Control Center ...

Page 68: ... DAP Technologies Operating Your Tablet Computer Viewing System Information To view system information open the DAP Control Center see Opening the DAP Control Center on page 2 41 The System Info page opens ...

Page 69: ... 43 Operating Your Tablet Computer Setting Power Options To switch off or on the WWAN WLAN Bluetooth or Rear Camera open the DAP Control Center see Opening the DAP Control Center on page 2 41 and tap on Power Options tab ...

Page 70: ... Tap New The Input Key window opens You can assign a hotkey function to the following keyboard keys ESC Escape key TAB Tabular key RETURN Enter key 4 Tap on the key in Input key window for hotkey assignment and tap OK The selected hotkey appears in the table on Hotkeys page 5 Assign an action to the hotkey Tap on the hotkey and then tap on Action field A list of actions opens on the screen Tap on ...

Page 71: ...ing illustration the TAB key is assigned to open the Wireless Manager 6 After the hotkey is assigned do one of the following Tap New to assign the next hotkey Repeat steps from 1 to 6 Select the key and tap Delete to delete the hotkey assignment Tap Reset All to Default to remove all the hotkey assignments Tap to close the Hotkeys page ...

Page 72: ...r by connecting other peripheral devices When using a device be sure to read the instructions accompanying the device together with the relevant section in this chapter This chapter gives guidelines on installing and using these devices USB Device HDMI Device Audio Device Serial Devices Connecting Your Tablet Computer ...

Page 73: ...ch as a flash disk drive scanner printer keyboard and mouse To connect a USB device simply plug the device cable into the USB port of your Tablet Computer Mini USB Port Connection Use the mini USB port to connect your Tablet Computer to another computer or notebook To connect plug the mini USB cable connector to the mini USB port of your Tablet Computer and plug the other end of the USB cable to a...

Page 74: ...et Computer Connecting HDMI Devices Your Tablet Computer has one mini HDMI port for connecting HDMI devices such as an external monitor To connect an HDMI device simply plug the device cable into the mini HDMI connector of your Tablet Computer ...

Page 75: ...o Devices Your Tablet Computer has one combo audio connector that supports both audio in and audio out devices You can connect speakers headphones or an earphone set To connect an audio device simply plug the device cable into the audio connector of your Tablet Computer ...

Page 76: ...al Devices Your Tablet Computer has one RS232 port for connecting serial devices such as barcode scanners printers among others To connect a serial device simply plug the device cable into the RS232 port of your Tablet Computer Attach the screws to secure the connection ...

Page 77: ...w you can effectively manage power To maintain optimal battery performance it is important that you use the battery in the proper way The topics in this chapter include How to charge the battery pack How to check the battery level What happens when the battery is low and what actions to take What is Power Management How to save power Managing Power ...

Page 78: ...mful chemicals explosion or fire Contact your local waste disposal service provider regarding the disposal or recycling of used battery packs Charging the Battery Pack To charge the battery pack perform the following 1 With the battery pack installed plug the DC cord of the AC adapter into the power connector of the tablet computer 2 Plug the female end of the AC power cord into the AC adapter 3 T...

Page 79: ...evel To check the battery level press the battery button of the battery pack The battery LED lights up The number of lit up LEDs indicates the battery level of the battery pack NOTE The battery capacity indicator shows only an approximate battery level status ...

Page 80: ... backup To replace the battery pack perform the following 1 Shut down the Tablet Computer 2 Disconnect the Tablet Computer from the AC power 3 Place the Tablet Computer face down on a flat even surface 4 Slide the battery locks to the unlock position A 5 Slide the battery latches outward to the open position B B A 6 Insert your finger on the tab and then lift to remove the battery pack ...

Page 81: ...ined Power Options Balanced Power Saver and High Performance for you to select You can access Power Options by tapping Start Control Panel Power Options By default your Tablet Computer is in Balanced Mode For detailed information on power management see Windows Help Power Saving Tips Here are some practical suggestions that you can do to maximize the operating time of the battery Enable Power Mana...

Page 82: ...ER 5 You can optimize the capabilities of your Tablet Computer by using other optional accessories This chapter gives guidelines on installing and using these accessories Docking Station Expansion Module Extendable Battery Pack Expanding Your Tablet Computer ...

Page 83: ...es Charges the Tablet Computer battery pack Charges an additional battery pack with its extra battery bay Provides four USB ports Provides one RS232 port Provides one Line In and one Line out port Provides one RJ45 jack that supports up to 1GB LAN connection With two LED indicators Docking the Tablet Computer To dock your Tablet Computer simply align the docking connectors of the Tablet Computer t...

Page 84: ...s a Smart Card Reader and a SIM card slot Perform the following to install the Expansion Module to your Tablet Computer 1 Align the expansion connectors pogo connectors of your Tablet Computer to the connectors on the Expansion Module 2 Tighten the screw to secure the Expansion Module to the Tablet Computer NOTE For information on using the Expansion Module refer to the User Manual that comes with...

Page 85: ...ndable Battery Pack which is available as an optional accessory Perform the following to install the Extendable Battery Pack to your Tablet Computer 1 Place the Tablet Computer face down on a flat even surface 2 Align and place the battery pack on its bay 3 Tighten the screws to secure the Extendable Battery Pack to the Tablet Computer ...

Page 86: ... Your Tablet Computer Checking the Battery Level To check the battery level of the Extendable Battery Pack press the battery button The battery LED lights up The number of lit up LEDs indicates the battery level of the battery pack ...

Page 87: ...ates instructions from other layers of software into instructions that the tablet computer hardware can understand The BIOS settings are needed by your tablet computer to identify the types of installed devices and establish special features System Recovery reinstalls Windows to your system and configures it to s factory default settings The chapter describes how to use the BIOS Setup and System R...

Page 88: ...cific hardware settings You want to modify some specific settings to optimize the system performance Starting BIOS Setup Utility A USB keyboard is required to access move around and make selections in the BIOS Setup Utility 1 Before turning on the Tablet Computer connect the USB keyboard to the USB port of the Tablet Computer 2 Power on the Tablet Computer 3 When the system starts up and the post ...

Page 89: ...stem might override similar settings in BIOS Setup Utility Key Function Selects a menu title Selects an item or option Enter Brings up the submenu if available When an item is selected opens or closes the options window Goes to the next field when an item has multiple fields such as System Date Changes the option or adjusts the value F1 Displays help F9 Optimized Defaults F10 Save and exit BIOS Es...

Page 90: ...m Date Sets the system date System Time Sets the system time Quiet Boot Enables or disables the Quiet Boot option Security Menu The Security menu contains the security settings such as configuring the Supervisor Password and Trusted Computing Main Advanced Internal Devices Security Boot Save Exit Aptio Setup Utility Copyright C 2011 American Megatrends Inc Version 2 14 1219 Copyright C 2011 Americ...

Page 91: ...urity Boot Save Exit Aptio Setup Utility Copyright C 2011 American Megatrends Inc Version 2 14 1219 Copyright C 2011 American Megatrends Inc Select Screen Select Item Enter Select _ Change Opt F1 General Help F9 Optimized Defaults F10 Save Exit ESC Exit Storage Device Data Interface AHCI Hard Disk Controller Configuration IDE SATA Controller operates in native IDE mode SATA SATA Controller operate...

Page 92: ...les the GPS antenna ALS Enables or disables the Ambient Light Sensor ALS Boot Menu The Boot menu sets the boot order of devices Main Advanced Internal Devices Security Boot Save Exit Aptio Setup Utility Copyright C 2011 American Megatrends Inc Version 2 14 1219 Copyright C 2011 American Megatrends Inc Select Screen Select Item Enter Select _ Change Opt F1 General Help F9 Optimized Defaults F10 Sav...

Page 93: ...Optimized Defaults F10 Save Exit ESC Exit Save Changes and Reset Discard Changes and Exit Restore Defaults Discard Changes Save Changes Reset the system after saving the changes Save Changes and Reset Saves the changes then restarts the system Discard Changes and Exit Exits BIOS Setup Utility without saving the changes you have made Restore Defaults Restores the default values for all the setup it...

Page 94: ...A 1 Specifications APPENDIX A This chapter covers the following topics How to care for your Tablet Computer Troubleshoot your Tablet Computer Tablet Computer Specifications Maintenance Troubleshooting and Specifications ...

Page 95: ...water or a non alkaline detergent to wipe the exterior of the tablet computer Gently wipe the display with a soft lint free cloth Do not use alcohol or detergent on the display Touchscreen Guidelines Use your finger or the included stylus on the display Using a sharp or metallic object may cause scratches and damage the display thereby causing errors Use a soft cloth to remove dirt on the display ...

Page 96: ... The screen suddenly turns blank and the power indicator goes off Make sure the AC adapter is properly connected If using a battery pack the battery pack may be depleted replace or charge the battery I cannot use the wireless LAN feature Make sure that wireless LAN feature is turned on Wireless LAN signal quality is poor The Tablet Computer may be out of range Move your Tablet Computer closer to t...

Page 97: ... two devices is within 10 meters and there are no walls or large obstructions between the devices Make sure that both devices are turned on and are configured to be discoverable Make sure that both devices are compatible No sound is produced Adjust the volume of the Tablet Computer see Adjusting Volume on page 2 6 If using an external audio device make sure that the cable is properly connected ...

Page 98: ...auto focus Front Cam CMOS 2MP with fixed focus Storage 32 64 128GB Card Slot MicroSD Card Reader Connectivity WLAN 802 11 a b g n half size mini PCI E card with BT WWAN Gobi 5000 LED Status Indicator Heater On RF On Off Battery Full Charging Low Power On Interface 3 5 Φ Audio Jack x 1 HDMI Type D x 1 MicroSD Card x 1 Micro SIM Card x 1 USB Type A x 1 USB Mini A x 1 RJ 45 x 1 Expansion Port x 1 Doc...

Page 99: ...ium Polymer Battery Pack with power saving features activated AC Adapter AC 100 240V 50 60Hz DC 12V 60W Physical Specifications Dimensions WxHxT 290 x 195 x 21 mm Weight 1 2 Kg including battery Security Infineon chip on board Fingerprint Reader Swipe type biometric sensor Kensington Lock ...

Page 100: ...ty notices about your Tablet Computer NOTE Marking labels located on the exterior of your Tablet Computer indicate the regulations that your model complies with Check the marking labels and refer to the corresponding statements in this appendix Some notices apply to specific models only Regulatory Information ...

Page 101: ...r les instructions destinés à alerter l utilisateur d un risque mortel ou de blessure grave en cas d utilisation incorrecte de l unité ATTENTION Pour réduire le risque d incendie ou de choc electrique ne pas exposer l appareil à la pluie ou à l humidité FAIRE le cordon électrique est DÉBRANCHÉ DE LA PRISE MURALE DANS UN DELAI DE PROLONGER INACTIVITÉ De se désengager totalement LE POUVOIR DE L UNIT...

Page 102: ...oducing equipment 7 Do not disregard the safety that a polarized or grounded connection can provide A polarized connection consists of two plugs one of which is larger than the other A grounded connection has two blades and a third one that is grounded If the main plug provided cannot be inserted into your outlet consult an electrician to replace your obsolete outlet 8 Protect the power cord from ...

Page 103: ...es amplificateurs producteurs de chaleur 7 Ne pas négliger la sécurité que procure un branchement polarisé ou avec raccordement à la terre Un branchement polarisé comprend deux fiches dont l une est plus large que l autre Un branchement à la terre comprend deux fiches plus une troisième reliée à la terre Si la fiche secteur fournie ne s insert pas dans votre prise de courant consulter un électrici...

Page 104: ... 12V 4 16A Use of another type of AC adapter will result in malfunction and or danger Do not use the adapter in a high moisture environment Never touch the adapter when your hands or feet are wet Allow adequate ventilation around the adapter when using it to operate the device or charge the battery Do not cover the AC adapter with paper or other objects that will reduce cooling Do not use the AC a...

Page 105: ...articular installation If this equipment does cause harmful interference to radio or television reception which can be determined by turning the equipment off and on the user is encouraged to try to correct the interference by one or more of the following measures Reorient or relocate the receiving antenna Increase the separation between the equipment and receiver Connect the equipment into an out...

Page 106: ...th SAR for general population uncontrolled exposure limits in ANSI IEEE C95 1 1999 and had been tested in accordance with the measurement methods and procedures specified in OET Bulletin 65 Supplement C This equipment complies with FCC RF radiation exposure limits set forth for an uncontrolled environment This device was tested for operations with the device contacted directly to the human body to...

Page 107: ...nly for indoor usage to reduce potential for harmful interference to co channel mobile satellite systems the maximum antenna gain permitted for devices in the bands 5250 5350 MHz and 5470 5725 MHz to comply with the e i r p limit and The maximum antenna gain permitted for devices in the band 5725 5850 MHz to comply with the e i r p limits specified for point to point and non point to point operati...

Page 108: ...300 Duluth Georgia 30097 USA Phone 1 855 DAP TECH Canada 4535 Wilfrid Hamel Blvd Suite 100 Quebec City QC Canada G1P 2J7 Toll Free 1 800 363 1993 Phone 1 418 681 9394 Fax 1 418 681 0799 Europe Middle East Africa 9 The Chambers Vineyard Abingdon UK OX14 3PX Phone 44 0 1235 462130 Fax 44 0 1235 462131 Toll Free 1 855 DAP TECH 327 8324 www daptech com ...

Reviews: