


MAN# 650098-B
HLY-3171 CLOCK WITH COMPASS AND TEMP
(weather and vibration resistant for exposed environments)
OPERATION
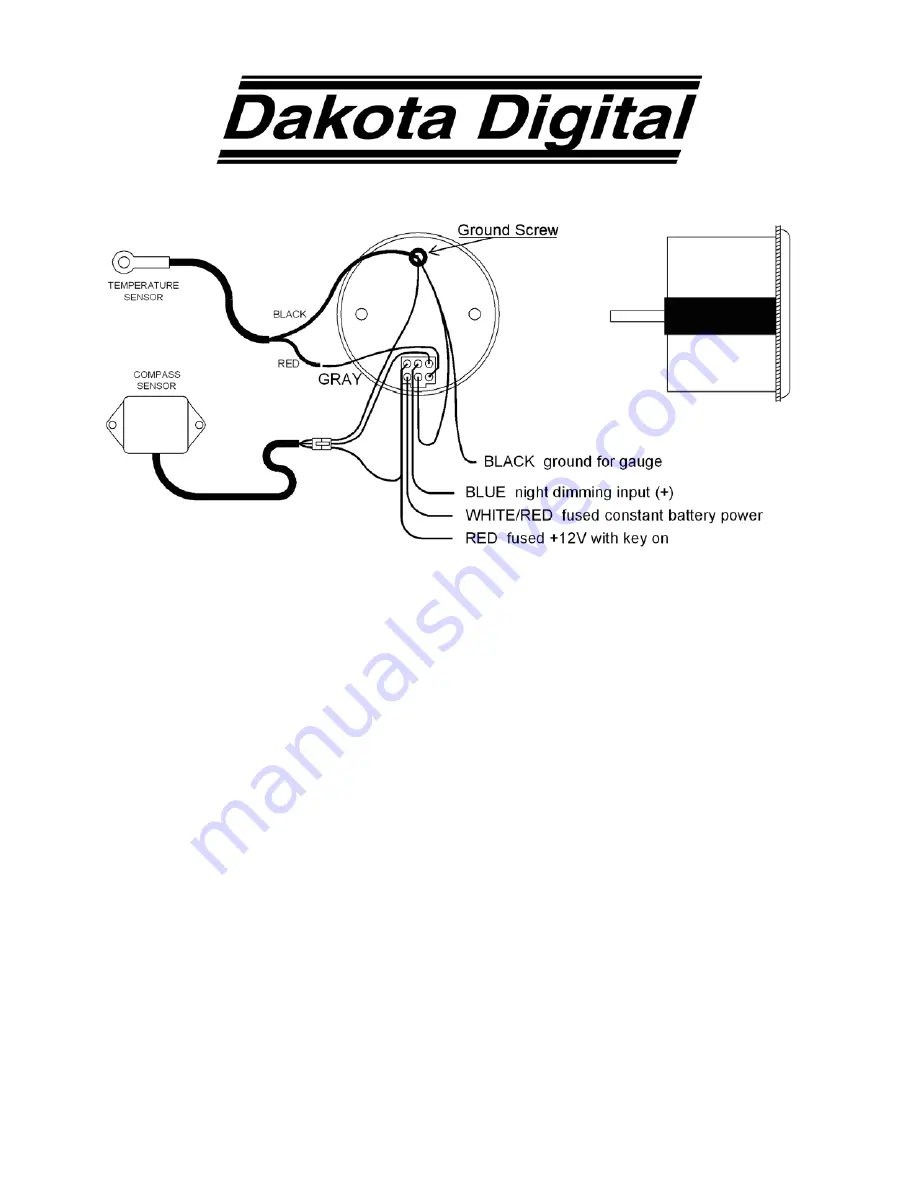
The white/red wire should be connected to a constant 12 volt feed to keep the time. The red wire should be
connected to a 12 volt accessory feed. The case provides the gauge ground. Connect the ring terminal from the black
wire to a screw at the top rear of the case. Attach the loose end of the black wire to a main vehicle ground and also the
temp sensor black wire. When the blue wire has 12 volts, it will dim the display for night viewing. The gray wire attaches
to the temp sensor red wire. The 3-pin plug will mate into a connector from the compass sensor.
The push button on the front of the display switches between the three different display screens and is also used
for calibration. The three display screens are clock, compass, and temp all displayed at the same time; clock only in tall
format; compass and temp only in tall format. Pressing and releasing the switch while the ignition key is on will switch
between the different screens.
MOUNTING
The gauge requires a round hole 2-1/16” in diameter. It should be inserted into the opening from the front and the
U-clamp will be installed from the back. Tighten the two nuts on the U-clamp so that the gauge is secure. Gauge depth to
the back of the case is 1-1/2”. Gauge depth including the mounting studs is 2-3/8”.
POWER
Connect the red wire from the main harness to accessory power from the ignition switch. This will light up the
display. Connect the white/red wire from the main harness to constant 12 volt power. This will keep the time while the key
is off.
Never connect this to a battery charger alone. It needs to have a 12 volt battery connected to it. Battery chargers
have an unregulated voltage output that will cause the gauge to not operate properly.
GROUND
The black wire is the main ground for the gauge. A poor ground connection can cause improper or erratic
operation. The black wire loops over to the top screw on the back of the case. This ensures a good case ground
connection.
NIGHT DIMMING
Your display system has a dimming feature that dims the display intensity. Normally the
system is at full brightness for daytime viewing. When the blue wire has 12 volts the display intensity


