Daikin D2CND024A1AA, Servicing Manual
The Daikin D2CND024A1AA servicing manual is essential for proper maintenance and troubleshooting. Ensure optimal performance of your unit by downloading the free manual directly from manualshive.com. This detailed guide covers everything you need to know, providing you with step-by-step instructions. Download your copy today!
Share
Download


Reviews:
No comments
Related manuals for D2CND024A1AA

RSF 84E
Brand: Ravenheat Pages: 4

EuroCombi Type C A23 MFFI
Brand: Ariston Pages: 32

Deluxe BH 207
Brand: Ecotermal Pages: 20

COMFORT 30
Brand: iQe Pages: 48

K-2-16
Brand: Kalvis Pages: 12

GREENSTAR UTILITY
Brand: Worcester Pages: 64

Alpha 500E (LPG)
Brand: Alpha Pages: 4

EP 26E
Brand: Varmebaronen Pages: 16
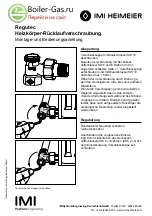
Regutec
Brand: IMI Hydronic Pages: 8

VICTRIX ZEUS SUPERIOR 32 2 ERP
Brand: Immergas Pages: 48

Luna Duo-Tec MP Plus 1.35
Brand: Baxi Pages: 34

AAA Outdoor Boiler
Brand: Nature's Comfort Pages: 24

NCB-120
Brand: Nature's Comfort Pages: 25

PEG112C
Brand: UTICA BOILERS Pages: 28

UB95M-200
Brand: UTICA BOILERS Pages: 52

PELH30Plus
Brand: ATTACK Pages: 60

ATTACK DPX 25 COMBI Pellet
Brand: ATTACK Pages: 100

MINI NIKE X 24 3 E
Brand: Immergas Pages: 36


