Daewoo DRT-10, Instruction Manual
The Daewoo DRT-10 is a versatile electronic device that offers cutting-edge technology and innovation. To discover everything this product has to offer, simply head over to manualshive.com, where you can download the free Instruction Manual. Get your hands on this comprehensive manual and unlock the full potential of your Daewoo DRT-10.
Share
Download


Reviews:
No comments
Related manuals for DRT-10

GB-10
Brand: Tascam Pages: 2

quartz3 BPR zero
Brand: RBR Pages: 20
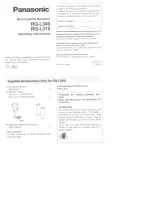
RQ-L31 - Cassette Dictaphone
Brand: Panasonic Pages: 7

XC-0387
Brand: DIGITECH Audio Pages: 14

Voice Logger Analog Line
Brand: Xtend Pages: 21

TP-M131
Brand: Aiwa Pages: 4

GDVDR319
Brand: Goodmans Pages: 44

GDVD306R
Brand: Goodmans Pages: 44

5629403B
Brand: RCA Pages: 25

RR-US570
Brand: Panasonic Pages: 44

DMR-EZ48VP
Brand: Panasonic Pages: 14

RR-US395PC
Brand: Panasonic Pages: 6

RR-US475E
Brand: Panasonic Pages: 20

RR-US350
Brand: Panasonic Pages: 6

RR-XR800
Brand: Panasonic Pages: 60

DA-6400
Brand: Tascam Pages: 64

WS 110 - 256 MB Digital Voice Recorder
Brand: Olympus Pages: 14

WS 110 - 256 MB Digital Voice Recorder
Brand: Olympus Pages: 14


