background image

Summary of Contents for Preference Renaissance RGC365

Page 1: ...Installation Renaissance Cooktop Models RGC304 RGC365 Instructions Pa_ No 103778 Rev H...

Page 2: ...or service required to correct a faulty installation If You Need Help Product Data Label If you have questions or problems with installation contact your Dacor dealer or the Dacor Customer Service Tea...

Page 3: ...a Vi01ent steam explosion may resulL Use a fire extingUiSher ONLY if 0 You have a Class ABC extinguisher and you already know h0w t0 Operate iL The fire is small and contained in the area where it sta...

Page 4: ...ance if the power cord is damaged Turn the knobs to the OFF position prior to removing them from the valve stems To avoid a fire hazard do not hang flammable or heat sensitive objects over the cooktop...

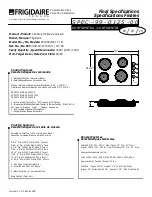
Page 5: ...imensions All tolerances 1 16 1 6 mm unless otherwise noted 53 3 cm 2 1 8 5 4 cm bottom of base to cooking surface 27 1 2 69 9 cm including embosses in side of chassis 4 10 2 cm chassis height Model R...

Page 6: ...ts equipped for LP operation have LP in the model number listed on the product data label See the Chassis Bottom Diagram for label location Units equipped for high altitude operation have an H at the...

Page 7: ...stalling another appliance in the cabinet below allow for the routing of gas and electrical service behind it Combustible overhead cabinets The installation must allow for the following Access to the...

Page 8: ...7 1 2 19 1 cm 7 17 8 cm Stiffener 3 8 min 1 0 cm flat countertop overhang required behind cutout tF RGC series cooktop i I I I Cabinet face _ I I 3 8 min 1 0 cm space z behind raised vent I I chassis...

Page 9: ...oints in the direction of the gas flow towards the cooktop Do not apply excessive pressure when tightening gas connections and fittings Do not use Teflon tape or plumber s putty on flexible gas line c...

Page 10: ...t each piece back and forth until it drops completely into place The burners will not oper ate properly unless all of the burner pieces are properly seated Gently set the grates on top of the spill tr...

Page 11: ...the simmer setting and make sure the low level flame can be adjusted When the unit is installed properly the flame will be steady It will also have a sharp blue inner cone that will vary in length pr...

Page 12: ...roper operation been verified Has the warranty been activated on line or the warranty card filled out completely and mailed Replacement parts may be obtained by contacting Dacor Customer Service Dacor...

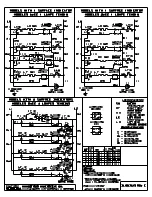
Page 13: ..._N SIm4ER J INBICATDR LIGHT WIRINGDIAGRAM RGC304 CAUTIDNI LABEL ALLVIRES PRIDR Ill DISCDNNECTIBN WHEN SERVICING CBNTRBL WIRING ERRORS CAN CAUSEIMPRBPER ANDDANGER US BPERATInN ISNLATDR BOARD PIN 103780...

Page 14: ...D DANGEROUS OPERATInN L BK BK NIl SVITCH NnSVITCH NOSVITCH V _IGNITOR I _LR BURNER RE IGNITBR_ V _IGNITBR i _CR BURNER RE IGNITDR_ v _IGNITBR i _RR BURNER RE IGNITOR_ V IGNITOR OPENPOSITION NFnN SIMME...

Page 15: ...FamilyOwned American Made Dacor 600 Anton Blvd Suite 1000 Costa Mesa CA 92626 Phone 800 793 0093 Fax 626 403 3130 www Dacor com The Life of the Kitchen...

Reviews: