manualshive.com logo in svg
background image

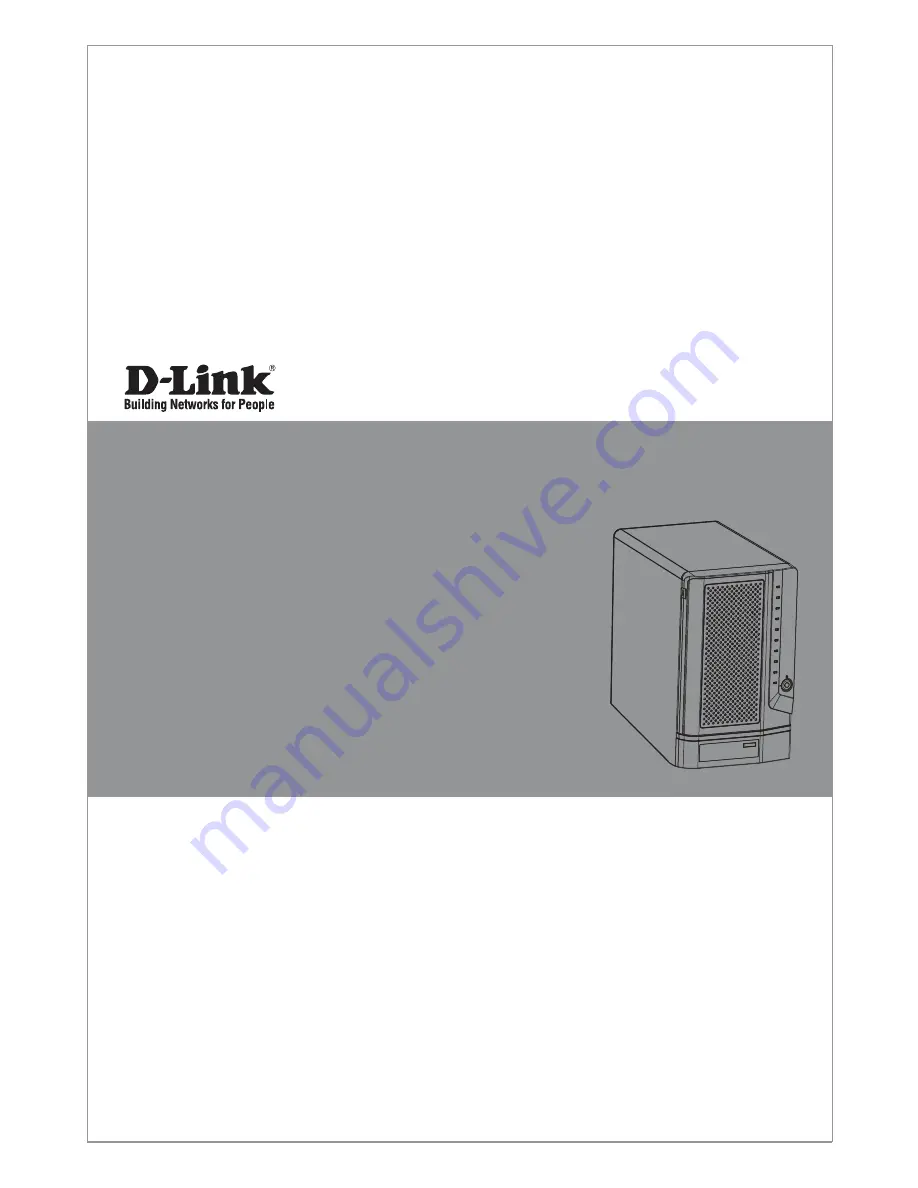
This document will guide you through the basic installation 

process for your new D-Link ShareCenter Pro 1200.

DNS-1200-05

Quick Installation Guide

D-Link ShareCenter Pro 1200

Quick Installation Guide

Installations-Anleitung

Guide d’installation

Guía de instalación

Guida di Installazione

Documentation also available on 

CD and via the D-Link Website

Содержание ShareCenter Pro 1200

Страница 1: ...our new D Link ShareCenter Pro 1200 DNS 1200 05 Quick Installation Guide D Link ShareCenter Pro 1200 Quick Installation Guide Installations Anleitung Guide d installation Guía de instalación Guida di Installazione Documentation also available on CD and via the D Link Website ...

Страница 2: ... Hardware Installation 4 Coniguration with Wizard 1 Package Contents D Link ShareCenter Pro 1200 CD ROM with Manual and Software Quick Installation Guide Power Cord Cat5 Ethernet Cable Front Panel Lock Key Note Using a power supply with a different voltage than the one included with the ShareCenter will cause damage and void the warranty for this product Note The ShareCenter Pro 1200 should only b...

Страница 3: ...Front Panel Lock Turn key to up position to unlock Turn key to left position to lock Drive Trays Use the screws to fasten the SATA hard drives with the trays and insert to the ShareCenter USB Connector Two USB 2 0 Type A connectors The USB Host ports are for Print Servers USB memory disks or USB UPS monitoring Cooling Fan The cooling fan is used to cool the hard drives and feature speed control Wh...

Страница 4: ...e ShareCenter The hard drive slots information Hard Drive Volume information This screen shows the following information The percentage of space used on the hard drives Error Messages This screen shows error messages when there is any system failure Press the button once to alternate between the different Status screens LED Indicator Lights On each hard drive tray there are 2 LED indicator lights ...

Страница 5: ...r or if a new hard disk is installed use the Easy Search utility located on the Installation CD and follow the instructions for setting up coniguring and formatting the new drive To install ShareCenter on your local network refer to the steps below 1 Put a 3 5 SATA hard drive into a drive tray and use screws to fasten the hard drive with the tray There are four holes for fastening the screws Two h...

Страница 6: ...utton to lock it into place 5 Connect an Ethernet cable to the available Ethernet port This cable should connect the ShareCenter to your local network via a router or switch or directly to a computer for coniguration 6 Connect the supplied power adapter to the power receptacle ...

Страница 7: ...make any needed changes Easy Search Utility Device Refresh Coniguration LAN Apply iSCSI Drive Mapping Connect Management Drive Mapping Available Drive Letters About Exit The Easy Search Utility displays any ShareCenter devices it detects on the network here Click Refresh to refresh the device list Click Coniguration to access the Web based coniguration of the ShareCenter Conigure the LAN Settings ...

Страница 8: ...o access the ShareCenter web based coniguration manager must be on the same subnet as the ShareCenter If your network is using a DHCP server and the computer receives IP settings from DHCP server the ShareCenter will automatically be in the same subnet The Login screen will appear Select System Administrator and leave the password ield blank Click Login Note The computer used to access the ShareCe...

Страница 9: ...ettings Click the System Wizard icon in the Homepage window to start the Setup Wizard System Wizard When running the ShareCenter System Wizard the welcome screen details the ive steps of the wizard Click Next to continue This window can conigure the LAN 1 settings Click Next to continue This window can conigure the LAN 2 settings Click Next to continue ...

Страница 10: ...ds Use the drop down menu to select the LAN interface Click Next to continue This window can enable or disable various the ile sharing method Click Next to continue Click Next to continue Select the configuration type of the volume Standard JBOD RAID 0 RAID1 RAID5 or RAID 6 Tick the corresponding check box to select the hard disk s in the array and spare ...

Страница 11: ...o Unlock check box to automatically unlock the volume when the system starts Tick the USB Key check box to save the password to a USB drive This window displays the information you conigured in System Wizard Click Apply to continue A warning message appears before starting to create the volume The volume is being created The status bar displays the percentage of completion in real time The ShareCe...

Страница 12: ...ct any ShareCenter devices that are on the local network Click Easy Search Utility Once connected your mapped drive s will appear in My Computer Highlight an available ShareCenter Available volumes will be displayed under Drive Mapping Highlight the volume you want to map Select an available drive letter from the drop down menu and click Connect If the ShareCenter you are working with does not sho...

Страница 13: ...D Link DNS 1200 05 Quick Installation Guide 13 ENGLISH Double click the My Computer icon on your desktop Double click the mapped drive to access the iles and folders ...

Страница 14: ...P ftp ftp dlink co uk Home Wireless Broadband 0871 873 3000 9 00am 06 00pm Sat 10 00am 02 00pm Managed Smart Wireless Switches or Firewalls 0871 873 0909 09 00am 05 30pm BT 10ppm other carriers may vary Ireland Mon Fri All Products 1890 886 899 09 00am 06 00pm Sat 10 00am 02 00pm Phone rates 0 05ppm peak 0 045ppm off peak times ...

Страница 15: ... Pro 1200 CD ROM mit Handbuch und Software Installationsanleitung Netzkabel Kat 5 Ethernetkabel Sicherungsschlüssel für die Vorderseite Hinweis Die Verwendung eines Netzteils mit einer anderen Spannung als in dem zum Lieferumfang des ShareCenters gehörenden Netzteil führt zu Schäden In diesem Falle erlischt der Garantieanspruch für dieses Produkt Hinweis Die Verwaltung des ShareCenter Pro 1200 sol...

Страница 16: ...ben Drehen Sie den Schlüssel in die Position Links um den Zugang zum Gerät zu sperren Laufwerkfächer Verwenden Sie die Schrauben um die SATA Festplattenlaufwerke an den Fächern Laufwerkschlitten anzubringen und in den ShareCenter einzusetzen USB Anschluss Zwei USB 2 0 Typ A Steckverbinder Die USB Hostports sind für Druckserver USB Speichergeräte oder die USV Beobachtung über USB bestimmt Lüfter De...

Страница 17: ... Festplatteneinschüben Informationen zu logischen Festplattenlaufwerken Es werden die folgenden Informationen angezeigt Der auf den Festplatten verwendete Speicherplatz in Prozent Fehlermeldungen Es werden bei einem Systemfehler die entsprechenden Fehlermeldungen angezeigt Drücken Sie einmal auf die Taste um zwischen den verschiedenen Status Anzeigen zu wechseln LED Anzeigelämpchen An jedem Festpl...

Страница 18: ...en Sie das Easy Search Programm auf der Installations CD und führen Sie die Anleitungen zum Einrichten Konigurieren und Formatieren des neuen Laufwerks aus Führen Sie zum Installieren des ShareCenter in Ihrem lokalen Netzwerk die folgenden Schritte aus 1 Legen Sie eine 3 5 SATA Festplattenlaufwerk in ein Laufwerkfach und sichern Sie das Festplattenlaufwerk an dem Fach mithilfe der Schrauben Zum An...

Страница 19: ...nrastet 5 Schließen Sie ein Ethernet Kabel an den verfügbaren Ethernet Port an Mit diesem Kabel wird das ShareCenter über einen Router oder Switch mit Ihrem lokalen Netzwerk oder direkt mit einem Computer zwecks Koniguration verbunden 6 Schließen Sie das Netzkabel Stromadapter an die Steckdose an ...

Страница 20: ... iSCSI Laufwerkzuordnung Connect Verbinden Management Drive Mapping Laufwerkzuordnung Available Drive Letters Verfügbare Laufwerksbuchstaben About Info Exit Beenden Das Easy Search Programm zeigt alle ShareCenter Geräte im Netzwerk an die es erkennt Klicken Sie auf Aktualisieren um die Geräteliste zu aktualisieren Klicken Sie auf Koniguration um auf die webbasierte ShareCenter Koniguration zuzugre...

Страница 21: ...ter der für den Zugriff auf den webbasierten ShareCenter Konigurationsmanager verwendet wird muss sich auf dem gleichen Subnetz beinden wie das ShareCenter Verwendet Ihr Netzwerk einen DHCP Server und der Computer erhält die IP Einstellungen vom DHCP Server ist das ShareCenter automatisch im gleichen Subnetz Der Anmeldebildschirm wird angezeigt Wählen Sie System Administrator und llassen Sie das K...

Страница 22: ...stenten um die Hilfe zur Einrichtung zu starten Systemassistent Wenn Sie den ShareCenter Systemassistenten starten werden im Startbildschirm die fünf Schritte des Assistenten aufgelistet Klicken Sie auf Next Weiter um fortzufahren In diesem Fenster können Sie die Einstellungen für LAN 1 vornehmen Klicken Sie auf Next Weiter um fortzufahren In diesem Fenster können Sie die Einstellungen für LAN 2 v...

Страница 23: ...stelle Klicken Sie auf Next Weiter um fortzufahren In diesem Fenster können verschiedene Optionen von Datenfreigabemethoden aktiviert bzw deaktiviert werden Klicken Sie auf Next Weiter um fortzufahren Klicken Sie auf Next Weiter um fortzufahren Wählen Sie den Konigurationstyp des logischen Laufwerks Standard JBOD RAID 0 RAID 1 RAID 5 oder RAID 6 Markieren Sie zur Wahl der Festplatte n für Array un...

Страница 24: ...n Auto Unlock Auto Entsperrung um die Sperre des logischen Laufwerks bei Systemstart automatisch aufzuheben Markieren Sie das Kontrollkästchen USB Key USB Schlüssel um das Kennwort auf einem USB Laufwerk zu speichern In diesem Fenster werden die im Systemassistenten konigurierten Einstellungen angezeigt Klicken Sie auf Apply Übernehmen um fortzufahren Es erscheint eine Warnmeldung bevor die Erstel...

Страница 25: ... Search Utility Easy Search Programm Sobald die zugeordneten Laufwerke angeschlossen sind werden Sie unter Arbeitsplatz angezeigt Markieren Sie ein verfügbares ShareCenter Verfügbare Datenträger werden unter der Laufwerkzuordnung Drive Mapping angezeigt Markieren Sie das logische Laufwerk das Sie zuordnen möchten Wählen Sie im Dropdown Menü einen verfügbaren Laufwerksbuchstaben aus und klicken Sie...

Страница 26: ...ink DNS 1200 05 Quick Installation Guide 26 DEUTSCH Doppelklicken Sie auf Ihrem Desktop auf das Symbol Arbeitsplatz Doppelklicken Sie auf das zugeordnete Laufwerk um auf die Dateien und Ordner zuzugreifen ...

Страница 27: ...1805 2787 0 14 pro Minute Zeiten Mo Fr 09 00 17 30 Uhr Österreich Web http www dlink at Telefon 43 0 820 480084 0 116 pro Minute Zeiten Mo Fr 09 00 17 30 Uhr Schweiz Web http www dlink ch Telefon 41 0 848 331100 0 08 CHF pro Minute Zeiten Mo Fr 09 00 17 30 Uhr Gebühren aus Mobilnetzen und von anderen Providern können abweichen ...

Страница 28: ...ion du matériel 4 Coniguration à l aide de l assistant 1 Contenu de la boîte ShareCenter Pro 1200 D Link CD ROM avec manuel et logiciel Guide d installation rapide Cordon d alimentation Câble Ethernet CAT5 Clé de verrouillage de façade Remarque l utilisation d une alimentation dont la tension diffère de celle de votre ShareCenter l endommagera et en annulera la garantie Remarque l entretien du Sha...

Страница 29: ...re Façade Verrouillage de façade Tournez la clé vers le haut pour déverrouiller Tournez la clé vers la gauche pour verrouiller Tiroirs de disques durs Fixez les disques durs SATA à l aide des vis sur les tiroirs puis insérez les dans le ShareCenter Connecteur USB Deux connecteurs USB 2 0 Type A Les ports hôte USB sont destinés à des serveurs d impression à des clés USB ou à la gestion USB d ondule...

Страница 30: ...ations relatives aux compartiments de disques durs Informations sur les volumes des disques durs cet écran afiche les informations suivantes le pourcentage d espace utilisé sur les disques durs Messages d erreur cet écran afiche les messages d erreur en cas de défaillance du système Appuyez une fois sur le bouton pour passer d un écran d état à l autre Voyants lumineux Il y a 2 voyants lumineux su...

Страница 31: ... un nouveau disque dur est installé utilisez l utilitaire Easy Search présent sur le CD d installation puis suivez les consignes d installation de coniguration et de formatage du nouveau disque dur Pour installer le ShareCenter sur votre réseau local procédez comme suit 1 Insérez un disque dur SATA de 3 5 pouces dans un tiroir et ixez le au tiroir à l aide des vis Il y a quatre trous pour la ixati...

Страница 32: ... le verrouiller en place 5 Branchez un câble Ethernet au port Ethernet disponible Ce câble doit relier le ShareCenter à votre réseau local via un routeur ou un commutateur ou directement à un ordinateur pour sa coniguration 6 Branchez l adaptateur secteur inclus dans la iche d alimentation ...

Страница 33: ... en correspondance des disques iSCSI Connexion Gestion Drive Mapping Mise en correspondance des disques Available Drive Letters Lettres de disque disponibles À propos Quitter L utilitaire Easy Search afiche ici tous les périphériques ShareCenter qu il détecte sur le réseau Cliquez sur Refresh Actualiser pour actualiser la liste des périphériques Cliquez sur Coniguration pour accéder à la conigurat...

Страница 34: ...au gestionnaire de coniguration Web du ShareCenter doit se trouver sur le même sous réseau que le ShareCenter Si le réseau utilise un serveur DHCP et que l ordinateur reçoit des paramètres IP par serveur DHCP le ShareCenter sera automatiquement sur le même sous réseau L écran Login Ouverture de session s ouvre Sélectionnez Administrateur système et laissez la zone de mot de passe vide Cliquez sur ...

Страница 35: ...accueil pour lancer l utilitaire de coniguration System Wizard assistant système Lorsque vous exécutez l assistant système du ShareCenter l écran d accueil détaille les cinq étapes de l assistant Cliquez sur Next Suivant pour continuer Cette fenêtre permet de conigurer les paramètres du réseau local 1 Cliquez sur Next Suivant pour continuer Cette fenêtre permet de conigurer les paramètres du résea...

Страница 36: ...électionner l interface du réseau local Cliquez sur Next Suivant pour continuer Cette fenêtre permet d activer ou désactiver plusieurs méthodes de partage de ichiers Cliquez sur Next Suivant pour continuer Cliquez sur Next Suivant pour continuer Sélectionnez le type de coniguration du volume Standard JBOD RAID 0 RAID 1 RAID 5 ou RAID 6 Cochez la case correspondant au x disque s dur s en matrice et...

Страница 37: ...k déverrouillage automatique pour déverrouiller automatiquement le volume lorsque le système démarre Cochez la case USB Key clé USB pour enregistrer le mot de passe dans une clé USB Cette fenêtre afiche les informations que vous avez conigurées à l aide de l assistant System Wizard Cliquez sur Apply Appliquer pour continuer Un message d avertissement s affiche avant de commencer à créer le volume ...

Страница 38: ...Cliquez sur Easy Search Utility Après connexion les disques mis en correspondance apparaissent dans Poste de travail Mettez en surbrillance un ShareCenter disponible Les volumes disponibles s afichent sous Drive Mapping Mise en correspondance des disques Mettez en surbrillance le volume que vous voulez mettre en correspondance Sélectionnez une lettre de lecteur disponible dans le menu déroulant pu...

Страница 39: ...D Link DNS 1200 05 Quick Installation Guide 39 FRANÇAIS Double cliquez sur l icône Poste de travail de votre Bureau Double cliquez sur le disque connecté pour accéder aux ichiers et dossiers ...

Страница 40: ...n Guide 40 FRANÇAIS Assistance Technique Assistance technique D Link sur internet http www dlink fr Assistance technique D Link par téléphone 0820 0803 03 0 12 TTC min depuis un poste ixe Du lundi au vendredi de 9h à 19h hors jours fériés ...

Страница 41: ...guración con el asistente 1 Qué contiene la caja D Link ShareCenter Pro 1200 CD ROM con manual y software Guía de instalación rápida Cable de alimentación Cable Ethernet Cat5 Llave de bloqueo del panel frontal Nota la utilización de una alimentación de corriente con un voltaje distinto del incluido con el ShareCenter provocará daños y anulará la garantía de este producto Nota el mantenimiento del ...

Страница 42: ...para desbloquear Gire la llave a la posición izquierda para bloquear Bandejas de la unidad Utilice los tornillos para sujetar los discos duros SATA a las bandejas e insertarlos en el ShareCenter Conector USB Hay dos conectores USB 2 0 Tipo A Los puertos del host USB son para los servidores de impresión discos de memoria USB o monitorización de SAI a través de USB Ventilador de refrigeración El ven...

Страница 43: ...ación de las ranuras del disco duro Información de volumen del disco duro Esta pantalla muestra la siguiente información El porcentaje de espacio utilizado en los discos duros Mensajes de error Esta pantalla muestra los mensajes de error cuando hay un fallo del sistema Pulse el botón una vez para alternar entre las distintas pantallas de Estado Indicadores LED En cada bandeja de disco duro hay 2 i...

Страница 44: ...se instala un nuevo disco duro use la utilidad Easy Search incluida en el CD de instalación y siga las instrucciones para instalar conigurar y formatear la nueva unidad Para instalar ShareCenter en su red local consulte los pasos siguientes 1 Coloque un disco duro de 3 5 SATA en una bandeja de unidad y utilice los tornillos para sujetar el disco duro a la bandeja Hay cuatro oriicios para sujetar l...

Страница 45: ... en su sitio 5 Conecte un cable Ethernet al puerto Ethernet disponible Este cable debe conectar el ShareCenter a la red local a través de un router o un conmutador o directamente a un ordenador para la coniguración 6 Conecte el adaptador de alimentación suministrado al receptáculo de alimentación ...

Страница 46: ...ción LAN Aplicar Asignación de unidad iSCSI Conectar Administración Asignación de unidad Unidad disponible Letras Acerca de Salir La utilidad Easy Search muestra aquí todos los dispositivos ShareCenter que detecta en la red Haga clic en Actualizar para actualizar la lista de dispositivos Haga clic en Coniguración para acceder a la coniguración del ShareCenter disponible en la web Conigure aquí los...

Страница 47: ... administrador de la coniguración de ShareCenter disponible en la web debe estar en la misma subred que el ShareCenter Si su red utiliza un servidor DHCP y el ordenador recibe parámetros IP del servidor DHCP el ShareCenter estará automáticamente en la misma subred Aparecerá la pantalla Inicio de sesión Seleccione Administrador del sistema y deje en blanco el campo de la contraseña Haga clic en Ini...

Страница 48: ...ventana de la página de inicio para iniciar el asistente de coniguración Asistente del sistema Al ejecutar el asistente del sistema de ShareCenter la pantalla de bienvenida muestra los cinco pasos del asistente Haga clic en Siguiente para continuar En esta ventana se pueden conigurar los parámetros de LAN 1 Haga clic en Siguiente para continuar En esta ventana se pueden conigurar los parámetros de...

Страница 49: ... interfaz de LAN Haga clic en Siguiente para continuar En esta ventana puede activar o desactivar diversos métodos para compartir archivos Haga clic en Siguiente para continuar Haga clic en Siguiente para continuar Seleccione el tipo de coniguración del volumen Estándar JBOD RAID 0 RAID1 RAID5 o RAID 6 Marque la casilla de veriicación correspondiente para seleccionar los discos duros en la matriz ...

Страница 50: ...eo automático para desbloquear automáticamente el volumen cuando se inicia el sistema Marque la casilla de veriicación Clave USB para guardar la contraseña en una unidad USB Esta ventana muestra la información que ha conigurado en el asistente del sistema Haga clic en Aplicar para continuar Aparece un mensaje de advertncia antes de empezar a crear el volumen Se está creando el volumen La barra de ...

Страница 51: ...nter que se encuentran en la red local Haga clic en Utilidad Easy Search Una vez conectadas las unidades asignadas aparecerán en Mi PC Seleccione un ShareCenter disponible Se mostrarán los volúmenes disponibles dentro de Asignación de unidad Seleccione el volumen que desee asignar Seleccione la letra de una unidad disponible en el menú desplegable y haga clic en Conectar Si el ShareCenter con el q...

Страница 52: ...D Link DNS 1200 05 Quick Installation Guide 52 ESPAÑOL Haga doble clic en el icono Mi PC de su escritorio Haga doble clic en la unidad asignada para accedder a los archivos y a las carpetas ...

Страница 53: ...D Link DNS 1200 05 Quick Installation Guide 53 ESPAÑOL Asistencia Técnica http www dlink es Asistencia Técnica Telefónica de D Link 34 902 30 45 45 0 067 min De Lunes a Viernes de 9 00 a 19 00 ...

Страница 54: ...ontenuto della confezione D Link ShareCenter Pro 1200 CD ROM con manuale e software Guida di installazione rapida Cavo di alimentazione Cavo Ethernet CAT5 Serratura a chiave del pannello frontale Nota l utilizzo di un alimentatore con tensione diversa rispetto a quella dell alimentatore fornito con ShareCenter causerà danni e invaliderà la garanzia del prodotto Nota la manutenzione del dispositivo...

Страница 55: ...re la chiave verso l alto per sbloccare Girare la chiave verso sinistra per bloccare Cassetti delle unità Utilizzare le viti per issare le unità disco rigido SATA ai cassetti quindi inserire i cassetti nel dispositivo ShareCenter Connettore USB Due connettori USB 2 0 tipo A Le porte host USB vengono utilizzate per i server di stampa i dischi di memoria USB o il monitoraggio di gruppi di continuità...

Страница 56: ...ive Volume information Informazioni sui volumi dei dischi rigidi In questa schermata vengono visualizzate le seguenti informazioni Percentuale di spazio utilizzato nelle unità disco rigido Error Messages Messaggi di errore In questa schermata vengono visualizzati i messaggi di errore restituiti in caso di malfunzionamento del sistema Premere una volta il pulsante per passare da una schermata di st...

Страница 57: ...r la prima volta oppure se viene installato un nuovo disco rigido utilizzare l utilità di ricerca sempliicata disponibile sul CD di installazione quindi attenersi alle istruzioni per installare conigurare e formattare la nuova unità Per installare ShareCenter nella rete locale eseguire le operazioni seguenti 1 Inserire un unità disco rigido SATA da 3 5 in un cassetto per unità e utilizzare le viti...

Страница 58: ...arlo in posizione 5 Collegare un cavo Ethernet alla porta Ethernet disponibile Il cavo consente di collegare il dispositivo ShareCenter alla rete locale tramite un router o uno switch oppure direttamente a un computer per la conigurazione 6 Collegare l alimentatore fornito alla presa elettrica ...

Страница 59: ...ive Mapping Mapping unità iSCSI Connect Connetti Management Gestione Drive Mapping Mapping unità Available Drive Unità disponibile Letters Lettere About Informazioni Exit Esci In questo riquadro vengono visualizzati tutti i dispositivi rilevati in rete dall utilità di ricerca sempliicata Fare clic su questo pulsante per aggiornare l elenco dei dispositivi Fare clic qui per accedere al programma di...

Страница 60: ...programma di gestione della conigurazione basato su Web di ShareCenter deve appartenere alla stessa subnet del dispositivo ShareCenter Se la rete utilizza un server DHCP e i computer ricevono le impostazioni IP dal server DHCP il dispositivo ShareCenter apparterrà automaticamente alla stessa subnet Verrà visualizzata la schermata di accesso Selezionare System Administrator Amministratore di sistem...

Страница 61: ...e per avviare la procedura guidata System Wizard Conigurazione guidata sistema Quando si esegue la procedura guidata di configurazione del sistema di ShareCenter nella schermata iniziale vengono visualizzati i cinque passaggi che compongono la procedura Fare clic su Next Avanti per continuare In questa inestra è possibile conigurare le impostazioni della LAN 1 Fare clic su Next Avanti per continua...

Страница 62: ... interfaccia LAN Fare clic su Next Avanti per continuare In questa inestra è possibile abilitare o disabilitare il metodo di condivisione ile Fare clic su Next Avanti per continuare Fare clic su Next Avanti per continuare Selezionare il tipo di conigurazione del volume tra Standard JBOD RAID 0 RAID1 RAID5 o RAID 6 Selezionare la casella di controllo corrispondente per selezionare i dischi rigidi d...

Страница 63: ...er sbloccare automaticamente il volume all avvio del sistema Selezionare la casella di controllo USB Key Chiave USB per salvare la password su un unità USB In questa inestra sono visualizzate le informazioni conigurate nella procedura guidata di conigurazione del sistema Fare clic su Apply Applica per continuare Prima della creazione del volume viene visualizzato un messaggio di avviso La creazion...

Страница 64: ... clic su Easy Search Utility Utilità di ricerca sempliicata Una volta connesse le unità mappate verranno visualizzate in Risorse del computer Evidenziare un dispositivo ShareCenter disponibile I volumi disponibili verranno visualizzati in Drive Mapping Mapping unità Evidenziare il volume che si desidera mappare Selezionare una lettera di unità disponibile dal menu a discesa quindi fare clic su Con...

Страница 65: ...D Link DNS 1200 05 Quick Installation Guide 65 ITALIANO Fare doppio clic sull icona Risorse del computer sul desktop Fare doppio clic sull unità mappata per accedere ai ile e alle cartelle ...

Страница 66: ...ink DNS 1200 05 Quick Installation Guide 66 ITALIANO Supporto Tecnico http www dlink it support Supporto Tecnico dal lunedì al venerdì dalle ore 9 00 alle ore 19 00 con orario continuato Telefono 199400057 ...

Страница 67: ...NOTES ...

Страница 68: ...Ver 1 00 EU 2010 11 29 6NS12005EQ01G ...

Отзывы: