

DES-1016A
ENGLISH
Quick Install Guide
16-Port 10/100 Mbps Unmanaged Switch
Thank you for purchasing the 16-Port 10/100 Mbps Unmanaged Switch. Follow
the easy steps in this guide to properly set up your switch. Please verify that all the
package contents listed below are available.
Package Contents
Network
Before You Begin
The setup of the Switch can be performed using the following steps:
• Visually inspect the DC power jack and make sure that it is fully secured to the power adapter.
• Do not cover the ventilation holes on the sides of the Switch, and make sure there is adequate
ventilation around it.
• Do not place heavy objects on the switch.
• Place the Switch in a cool and dry environment.
Technical Support
Having trouble installing your new product? D-Link’s website contains the latest user documentation and
software updates for D-Link products. U.S. and Canadian customers can contact D-Link Technical Support
through our website or by phone.
United States
Telephone:
(877) 453-5465
Internet:
http://support.dlink.com
Canada
Telephone:
(800) 361-5265
Internet:
http://support.dlink.ca
Copyright ©2013 All rights reserved. D-Link and the D-Link logo are registered trademarks of D-Link Corporation or its subsidiaries. Other
trademarks are the property of their respective owners. Product specifications, size and shape are subject to change without notice, and actual
product appearance may differ from that depicted on the packaging. Visit dlink.com (US) or dlink.ca (Canada) for more details.
Version 1.00 | March 04, 2013 5202798
What This Product Does
Expand your home or office network with the D-Link® 16-Port 10/100 Mbps Unmanaged Switch. This
Switch lets you network up to sixteen devices at speeds up to 200Mbps (at full duplex) and is compact
enough to be placed virtually anywhere in your home or office. Add a computer, printer, NAS storage
device, or network camera and expand the functionality of your network. You may also connect the
Switch to hubs, switches, and routers to expand your network.
DES-1016A 16-Port 10/100 Mbps Unmanaged Switch
Quick Install Guide
Power Adapter
D-Link Green Technology implements special power-saving features that detect cable length and link
status and adjust power usage accordingly. Green Technology saves energy in two specific ways:
1. If there is no link on a port (when there is no connection or the device connected is turned off) the
port(s) will enter a “sleep mode” which will drastically reduce the amount of power used.
2. D-Link Green Technology detects the length of connected Ethernet cable and adjusts power
usage accordingly without affecting performance. This way, a port connected to a 20m or under
cable only uses as much power as it needs, instead of using full power, which is only needed for
100m cables.
This product is IEEE 802.3az Energy Efficiency Ethernet compliant. The IEEE 802.3az EEE standard defines
mechanisms and protocols intended to reduce the energy consumption of network links during
periods of low utilization, by transitioning interfaces into a low-power state without interrupting the
network connection. Both connected devices must support 802.3az EEE for power saving support. If the
connected device does not support 802.3az EEE, the switch will default to D-Link’s Green Technology of
power saving.
D-Link Green Technology
Power Indicator
- This green indicator light is on when the Switch is receiving power; otherwise, it is off.
Link/Act -
This LED indicator light is green when the port is successfully connected to a 100Mbps
device and will blink as data is transmitted or received.
This LED indicator light is amber when the port is successfully connected to a 10Mbps device and will
blink as data is transmitted or received.
LEDs
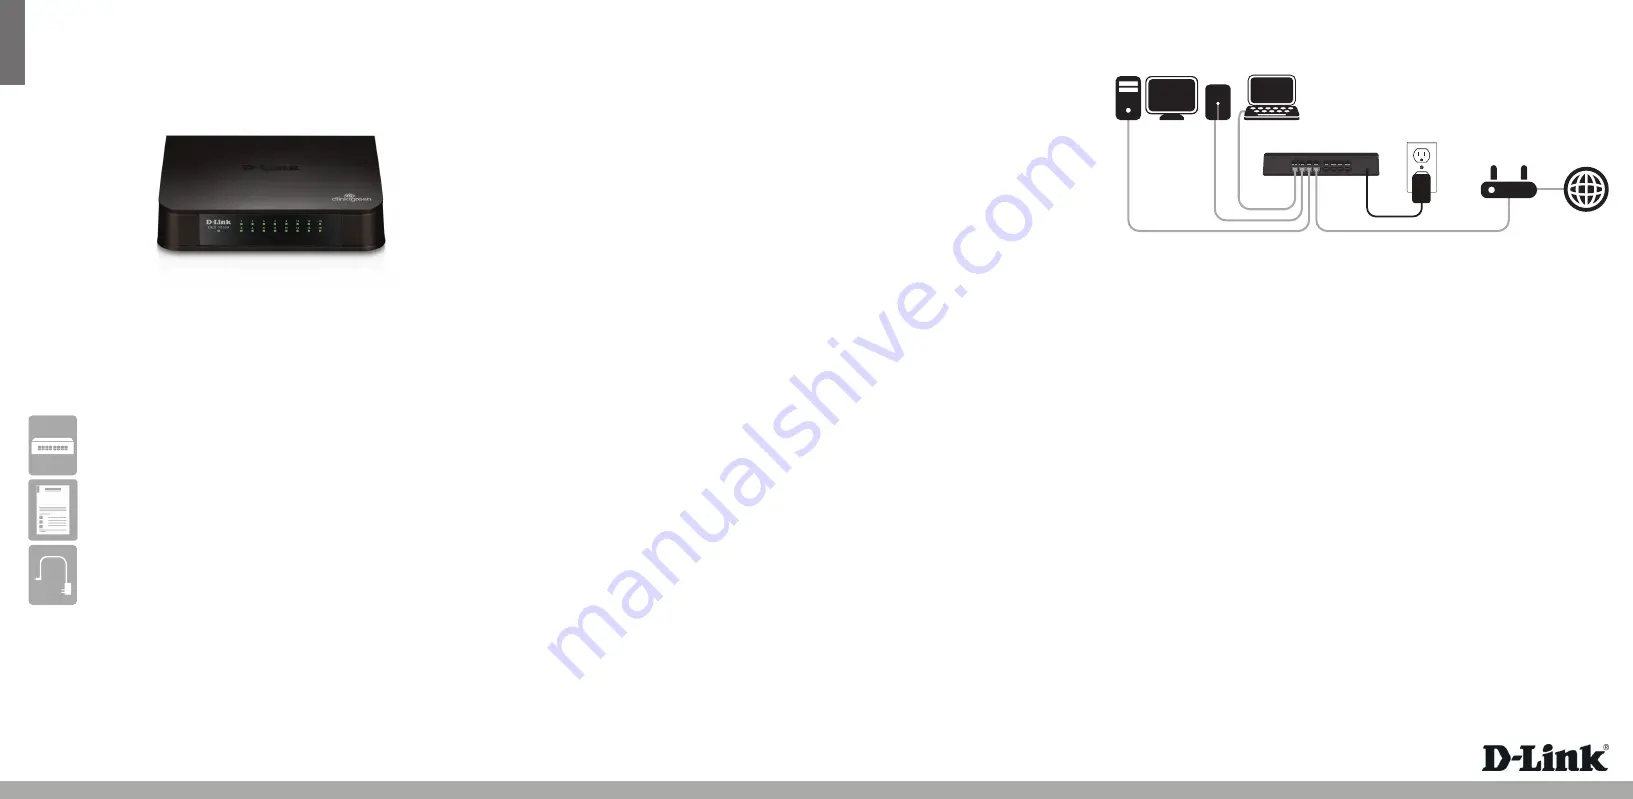
Connecting the Switch
Step 1
Plug the supplied power adapter into the Switch and the other end into a power outlet, power strip,
or surge protector (recommended). Verify the Power indicator is lit on the Switch.
Step 2
Connect one end of an Ethernet cable to the device you want to connect to the Switch, and the other
end to one of the Ethernet ports on the Switch. Check the Link lights (LEDs) on both the Switch and
the device to verify that the cable is good and that there is a working connection
Note:
A Category 5 (or higher) Ethernet cable must be used for 100Mbps or higher operation.
POWER
2
4
6
8
10
12
14
16
DES-1016A
Router
Internet
Computer
NAS
Laptop
If any of the above items are missing, please contact your reseller.


