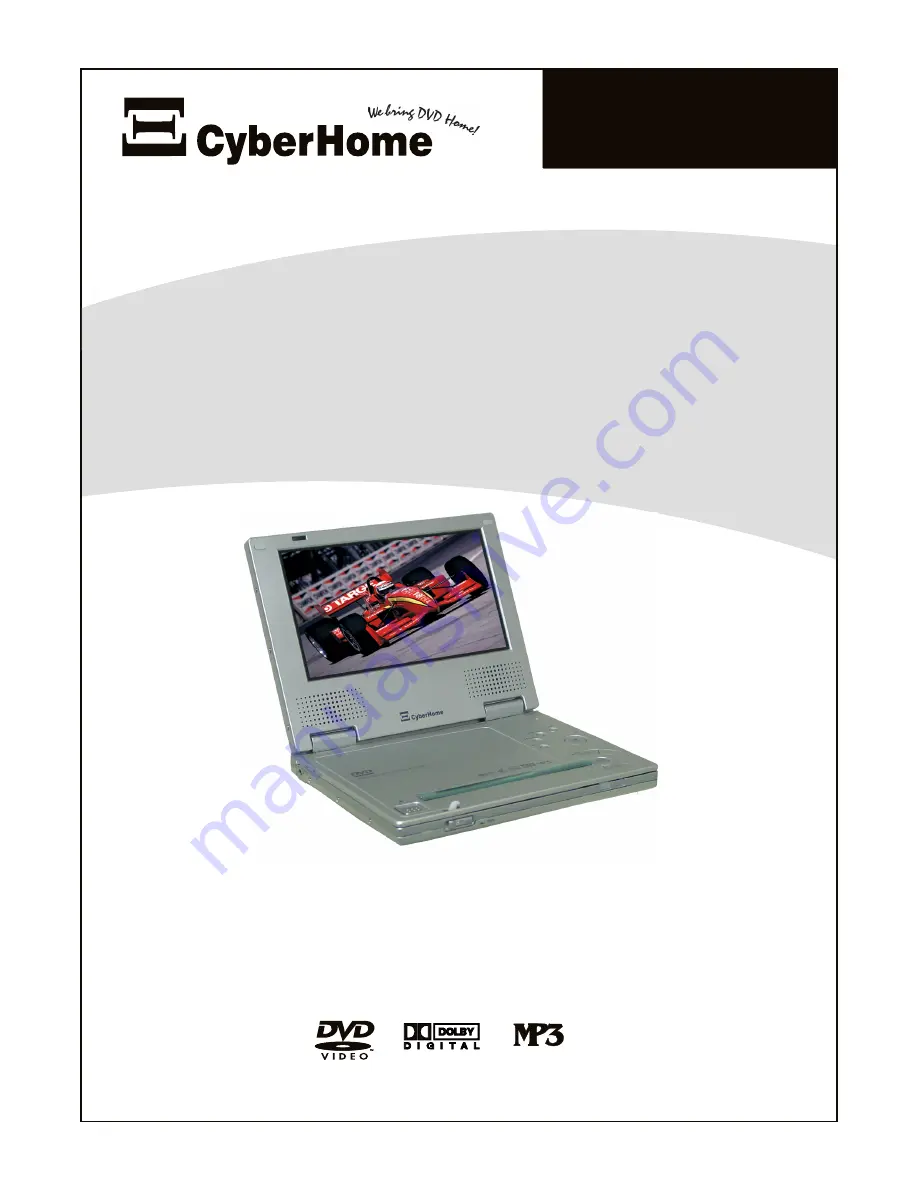
background image

Portable DVD Player


Owner’s Manual

Welcome to the Digital Video Revolution! 

Your CyberHome Portable DVD Player is designed to provide a great Home 
Theater experience on the go! Please retain this User Manual for future 
reference. Remember to read the manual carefully before connecting and 
powering on the unit.  

LDV-702

USA  VERSION  B

www.cyberhome.com

Summary of Contents for LDV 702

Page 1: ...n Your CyberHome Portable DVD Player is designed to provide a great Home Theater experience on the go Please retain this User Manual for future reference Remember to read the manual carefully before connecting and powering on the unit LDV 702 USA VERSION B www cyberhome com ...

Page 2: ... on or pinched particularly at plugs convenience receptacles and the point where they exit from the apparatus 11 Only use attachments accessories specified by the manufacturer 12 Use only with the cart stand tripod bracket or table specified by the manufacturer or sold with the apparatus When a cart is used use caution when moving the cart apparatus combination to avoid injury from tip over 13 Unp...

Page 3: ... dropped or otherwise damaged which may become hot turn off the power and disconnect the AC power cord CONDENSATION If smoke odors or noises are emitted from the unit Moisture may form on the lens in the following cases turn off the power and disconnect the AC power cord immediately after a heater has been turned on PLACEMENT in a steamy or very humid room Avoid placing the unit in areas of the un...

Page 4: ...e stored within proper voltage and temperature 0 60 C Keep the battery terminals clean while storing Others Do not disassemble the cells and battery Do not use a damaged battery Do not expose the battery to fire or throw the battery into a fire This may cause the battery to explode Use the specified charger only Do not touch the battery terminals with metal objects Keep out of reach of children If...

Page 5: ...ctions 18 Optical Digital Audio Connections 19 External Video Audio Sources to DVD Player Connections 19 Basic Playback Functions Getting Started Powering On Playing a Disc 20 Stopping and Pausing Play 21 Navigating Disc Menus 22 Advanced Playback Functions Fast Forward Reverse Slow Motion Scanning 23 Skip Forward and Skip Back 23 Jumping to a Specific Chapter Track or Time Position 24 Saving Loca...

Page 6: ...een Setup Menu 38 Parental Lock and Other Options 39 Adjusting Audio and Video Settings Video Setup Options 40 Audio Setup Options 41 Language Options 42 Further Information Troubleshooting Common Problems 43 Specifications 44 Battery Specifications 45 Glossary of DVD related Terms 46 47 Index 48 Table of Contents Cont d 5 ...

Page 7: ... control A wide variety of Multi Language Display Usage mode can be functions can be controlled by the Remote Control displayed on the screen in different languages in the most convenient way On Screen Display and Setup On Screen Interface Direct track selection function MP3 and CD for MP3 Playback and JPG Viewing Number buttons can be used for quick selection of Parental Control allows you to blo...

Page 8: ...oducts or solutions which contain benzene thinner or any other vaporizing substances as they may damage the disc surface Never add labels or adhesive tapes on the discs and be careful not to scratch or damage the disc surface Storage of Discs To prevent discs from becoming bent or deformed they should be vertically kept in the disc storage case To prevent damage avoid leaving discs in your car whe...

Page 9: ... be used for an extended length of time it s wise to remove the battery before storage The life of the battery depends on the amount of usage With typical usage a battery life of approximately 6 1 Pull out the Battery Holder to remove the battery compartment 2 Insert new Battery into the Battery Holder Make sure that Positive side is facing upwards 3 Return the Battery Holder back into the remote ...

Page 10: ...as a bookmark that can be accessed quickly without searching ANGLE View Multi Angles with discs that support this feature Press again to cycle through available angles FAST REVERSE Press to reverse play the disc at high speed for searching Press again to cycle through available speeds 2x 4x 8x LEFT RIGHT UP DOWN ARROWS Use the arrow keys to select menu items in disc menus as well as to navigate in...

Page 11: ...EPEAT 1 ALL Press to enable repeat mode Press again to cycle through choices Repeat Chapter Title or Disc REPEAT A B Press this button to set the start of the segment you wish to repeat Press again to set the end point of the segment and begin repeat play Remote Control Functions 2 of 2 10 See previous page for upper buttons SKIP NEXT Press to skip to the next chapter or track AUDIO Changes the av...

Page 12: ... seconds to turn the unit into STANDBY mode Fast Forward Next Track Multi SpeedFastForwardsearchduringplayback Press and hold 3 seconds to skip to the next chapterortrack Fast Reverse Previous Track Multi Speed Fast Reverse search during playback Press and hold 3 seconds to skip to the previous chapter or track MENU Press to enter the menu of a DVD disc MODE Enables the cursor mode menu see next p...

Page 13: ...ted instructions Cursor Mode Functions Your DVD Player s panel buttons also function as directional arrow keys allowing you to navigate Disc Menus the Cursor Mode Menu and other options without using the Remote Control You can use the unit s Cursor Mode Function Buttons to navigate disc items and play discs This is a useful feature when the remote control is not handy Quick Tips Pressing the MODE ...

Page 14: ...rd into the AC Adapter Connect the Power Plug into the Power Jack Plug the Power Plug firmly into the DC IN 10 V Power Jack on the Left Side of the unit Plug in to Wall Power Outlet Plug the Power Cord to the Adapter and the other end of the Power Cord into a household wall Power Outlet 1 2 3 Quick Tips Once Power is applied the unit will be in STANDBY mode See pg 18 The unit consumes 0 3W when it...

Page 15: ...attery pack Plug the Power Adapter into the Battery DC IN 10 V Jack on the Left Side of the Battery Pack Plug the other end of the Power Cord into a household wall Power Outlet 2 3 Recharging and Charging times We recommend that you charge the Battery Pack only when the battery status becomes less than 25 Unnecessary charging of the battery will reduce Battery Pack service life When the Battery Pa...

Page 16: ...als dirty Slide and hold in position Slide the latch toward the front of the unit Hold the tab in this position 1 2 You can use a Car Adapter while in a vehicle Connect the Car Adapter Power Plug into the unit s Power Jack and the other end to the Vehicle Cigarette Lighter Socket Using a Car Adapter Cigarette Lighter Socket Using Headphones to avoid disturbing others Connect the Headphone Connecto...

Page 17: ... Stereo Audio Television Connections One Required In order to use your DVD Player your TV must support at least one of the Video Input types shown below To get started identify the best Video Connection shown below that your TV offers and proceed to that section If you are using your TV s speakers for audio rather than a separate receiver or amplifier you will use the Stereo Audio In outlined in s...

Page 18: ...s only a single Video Input jack typically a yellow colored plug you will use the Composite Video output of the DVD Player for the Video Connection We ll also assume your TV has Red and White Stereo Audio In connectors You will use these for the Audio Connection Use the included Video Cable to connect the Video Out of the DVD Player to the Video In of your TV Connect the Stereo Audio outputs of th...

Page 19: ...ponent Video Cables to the appropriate jacks Normally cables and jacks are color coded to make connection easier Power on TV and set your TV to the Video In Channel associated with the Component Video inputs Video 3 Input 3 etc You should now see the DVD Player splash screen on your TV Component Video Connectors Step 3 If You Are Using a PROGRESSIVE SCAN TV Now that you are using the Component Vid...

Page 20: ...necting Video Audio Sources from External Devices Connecting to a Video Source with Composite Video Out and Stereo Audio Out Your DVD Portable features playing programs on unit s built in screen with an External Composite Audio Video Device to your DVD Portable Most camcorders or other external devices have Composite video and analog stereo output connectors Use the included Video Cable to connect...

Page 21: ...Disc Lid and insert a disc Make sure the disc is placed in the center of the spindle firmly Press down gently on the disc until the disc is locked on to the spindle Gently close the Disc Lid back to original and lock the position Powering on from the Remote If the power is applied from AC Power or Battery Pack the player can be turned off and on by the remote When the player is turned off by the r...

Page 22: ... with the PAUSE button Pressing the PAUSE button repeatedly allows you to step through the video in frame by frame mode Pressing PAUSE while playing Audio CDs will mute the sound and hold the play position Press the PLAY button to resume normal playback Quick Tips Screen Saver When a DVD remains paused on a still frame for an extended length of time approximately 3 minutes the Screen Saver will be...

Page 23: ...itle Menu Title menus are available on some DVDs These menus allow you to select a particular Title or Chapter to play With some DVD discs pressing this button will bring up the normal DVD menu If the not available symbol is displayed on screen this feature is not available on your disc Navigate with the ARROW Buttons With DVDs use the ARROW buttons to navigate through the menu left right up down ...

Page 24: ...ow Motion Scanning With DVDs you can slow the speed of playback to a mere fraction of the normal speed While the video is playing press the SLOW button The playback speed will slow to normal speed To cycle through all speeds continue to press the SLOW key Press PLAY to resume normal playback 1 FORWARD FORWARD 2 SLOW SLOW REVERSE REVERSE Advancing to the Next Track or Skipping Back Through Tracks Y...

Page 25: ...tton When a DVD is playing press GOTO to select the Title Chapter or Time Hours Minutes and Seconds of the position on the disc you wish to begin playback GOTO GOTO 1 Jumping to a Specific Chapter Track or Time Position 24 2 Navigating the GOTO Menu Select the Title Chapter or Time categories by pressing the LEFT and RIGHT ARROW keys to move to the appropriate box Use the UP DOWN ARROWs to select ...

Page 26: ... buttons to navigate through the available Bookmark locations 1 5 to the one that you would like to save the current disc play position to In the example here all locations are open so we ll choose the first one 2 3 Press ENTER to Save the Bookmark Location Now the play position is saved as a Bookmark in position one 1 4 BOOKMARK BOOKMARK Press BOOKMARK to Exit the Bookmark Menu Now you can return...

Page 27: ...e viewing or listening to a disc when you get to the point that you would like to mark as the Beginning of your repeating segment press the REPEAT A B button The following display will appear in the upper left hand corner on the screen The display indicates that the start point of your repeat segment has been marked Next you will enter the endpoint of the segment you want to repeat When you reach ...

Page 28: ...current program navigate to AC Press ENTER Program Mode does not work with DVDs Add a Track to the Program List with ENTER Hit the ENTER key on a Track Number that you want to add to the Program List In this example we press ENTER on track seven Notice that it s now added to the program list Playing Tracks in a Particular Order with Program Play 27 PROGRAM MENU DISC PROGRAM 1 2 3 4 5 6 7 8 9 10 11...

Page 29: ...s to select the File you wish to play or the Folder you want to open To return to a previous folder press LEFT ARROW key to return to the previous folder Press ENTER to Play Pressing ENTER will play the selected File Folder or Repeat Program Also use ENTER to open folders If no Repeat Mode is selected pressing ENTER on a file will begin playing all files on the disc in the order they are stored 28...

Page 30: ...tton to see a Negative of the image MENU MENU 2 File Listing List of files in current directory with selected file highlighted JPG File Logo This logo is show on the menu to indicate the file listed is a JPG At the beach Nightlife 1 Vacation1 3 Vacation3 4 Vacation4 5 Jeff playing his guitar MEDIA PLAYER Vacation Pics Current Folder Displays the current folder on the disc 2 Vacation2 RETURN RETURN...

Page 31: ...ever Zoom will work while playing a movie as well If you wish to Pause the action press the PAUSE button 3 Navigate with the ARROW or NUMBER Keys You can use the ARROW keys to move to a part of the screen you would like to see closer Pressing the LEFT ARROW button will move the focus of the Zoom to the left and so on 1 Return to Normal Viewing Press the ZOOM button again to return to normal playba...

Page 32: ...ces Inputting from External Devices playing mode You can watch your Camcorder etc or other External Audio Video sources on your player s built in screen The Power Indicator will be changed when the player is in External Audio Video mode Important Note about Output Signals Please keep your player away from televisions computers or other monitors easily influenced by magnetism Your player s speakers...

Page 33: ...TVs try this setting A unique horizontal timing scaling is used to display the image on the full widescreen where it would otherwise appear stretched over the width Normal Mode When viewed on the player s widescreen display movies made for standard televisions 4 3 aspect ratio will appear stretched horizontally To solve this problem use the NORMAL mode to convert the player s widescreen display to...

Page 34: ...Key repeatedly to cycle through the Brightness levels Adjusting Brightness Levels with BRIGHTNESS Button Your DVD Player provides a convenient function allowing you to adjust Brightness either by pressing Remote Control BRIGHTNESS Button or using Cursor Mode BRIGHTNESS See pg 36 Adjust the Brightness when your viewing environment is insufficient light or too bright Some titles are recorded too dim...

Page 35: ...n to bring up the Angle Menu Then use the UP DOWN ARROW keys to switch between available Angles SUBTITLE SUBTITLE SUBTITLE Explore Subtitle Languages Use the SUBTITLE button with DVDs recorded with Subtitle tracks This key will allow you to turn Subtitles On and Off and switch between the available languages on the disc More Audio Video Functions Quick Tips Most functions depend on the type of dis...

Page 36: ... 8 9 1 2 3 4 5 6 7 8 9 A B 00 00 00 Jump to Track 24 A B Repeat Mode 26 Jump to Time 24 Bookmarks 25 Program Random Play 41 Battery Status 37 Repeat Playback 27 1 2 3 4 5 6 1 2 3 4 5 6 Tr OFF OFF OFF A B 01 1 2 5 1 CH 01 03 EN C01 00 00 00 EN ON T01 OFF OFF A B 1 2 2 Navigate with the ARROW Buttons Press the RIGHT LEFT ARROW keys to move through the menu Continue to the right to access the second ...

Page 37: ...RROW and ENTER buttons to move around and select options In this example we ll hit the DOWN key twice to adjust Brightness then hit ENTER Button to enter that setting Now we can use the ENTER key again to adjust the BRIGHTNESS Press the button repeatedly to cycle through all available BRIGHTNESS 0 to 24 levels Press Mode key again to Exit the Cursor Mode Menu You can exit the Cursor Mode Menu at a...

Page 38: ...bout 10 seconds It will be closed when Cursor Mode time is out 1 2 5 1 CH 01 03 EN C01 00 00 00 EN ON T01 OFF OFF A B DVD BATTERY Once BATTERY is selected you will see the Battery Indicator appears on upper left hand corner of the screen It indicates the Battery currently usage Once Battery is almost exhaust the Power Indicator on the front of Player starts to blink and Battery Icon on the screen ...

Page 39: ...layed on the built in Screen After exiting the Setup Menu you can resume playback where you left off 3 4 Move Around the Menu with the ARROW Keys Use the ARROW buttons to move around the menu In this example we ll hit the DOWN key twice to go to AUDIO SETUP then hit ENTER or Right Arrow Key to enter that Menu Then we ll hit the DOWN key again to select DIGITAL Pressing the ENTER key and then press...

Page 40: ...HILD option You can choose from 8 levels of Parental Control corresponding to the standard rating system in the USA The available levels and their equivalent ratings are listed to the right CHANGE CANCEL PASSWORD Here is where you can change or Cancel your existing password If you have not already entered the existing password in the Setup Menu you are prompted for the old password Enter the exist...

Page 41: ...UTPUT settings and your TV will get displayed S Video is a higher quality video signal that is separated into brightness and color channels YCbCr or COMPONENT video is used for TVs Computer Monitors and Projectors that support three video inputs one for a color channel Yellow Blue Red YPbPr P SCAN or Progressive Scan TVs are able to scan a complete video frame on each pass unlike normal interlaced...

Page 42: ...ssion in three levels FULL Highest compression TV MODE Optimized for smaller speakers and OFF No compression DIGITAL DOLBY LPCM Most DVDs are produced with Dolby 5 1 Channel soundtracks So normally this setting should be at the default of DOLBY However this setting can be set to LPCM to support DVDs featuring this type of audio format LPCM or Linear Pulse Code Modulation is a stereo digital audio ...

Page 43: ...Afrikaans 7176 Galician 7778 Mongolian 8469 Tegulu 6577 Amharic 7178 Guarani 7779 Moldavian 8471 Tajik 6582 Arabic 7185 Gujarati 7782 Marathi 8472 Thai 6583 Assamese 7265 Hausa 7783 Malay 8473 Tigrinya 6588 Aymara 7273 Hindi 7784 Maltese 8475 Turkmen 6590 Azerbaijani 7282 Croatian 7789 Burmese 8476 Tagalog 6665 Bashkir 7285 Hungarian 7865 Nauru 8479 Tonga 6669 Byelorussian 7289 Armenian 7869 Nepal...

Page 44: ...case the disc cannot be used Disc may not be industry standard No Sound from TV or Speakers Once you close the unit s Disc Cover the unit is still running but No Sound comes out Disc is Dirty or Damaged Clean the Disc or change to another one Volume Control is set to Minimum Raise up the Volume Headphones are connected Pull out the Headphones If you are using a Digital Receiver check the Dolby set...

Page 45: ...igital Audio Less than 0 015 Wow and Flutter Less than 0 001 W PEAK Connections Component Video Out Y 1 0Vpp 75 Ohm Negative Sync Pb Pr 7 Vpp 75 Ohm S Video Out Mini DIN 4 Pin 75 Ohm Video In Out One Pin Jack 1Vpp 75 Ohm Analog Audio In Out Two Pin Jacks 2 0VRMS 470 Ohm Operating Conditions 5 C to 35 C 41 F to 95 F Operation Status Horizontal Power Supply AC 100 240V 60Hz DC 10V 3A Power Consumpti...

Page 46: ...0 45 C Discharging 0 60 C Storage 0 60 C RH 60 20 Internal Impedance 150 m ohms Estimate Cycle Life 80 initial capacity remaining after 300 cycles Charging Time 2 7 4 hours LED Indicator Charging Red Fully Charged Green Dimensions 5 23 W x 6 57 H x 0 55 D 133mm x 167mm x 14mm Weight 0 84 lbs 384 g Not e Design and specifications are subject to change without notice 45 ...

Page 47: ...els plus a sub bass woofer developed by Dolby Labs Supported on most DVD discs Dual Layer DVD A DVD disc that has two layers on each side A single sided dual layered DVD can hold almost four hours of video and audio and is also known as a DVD 9 DVD Digital Video Disc DVDs come in different formats such as single sided or double sided Each side can have a single layer or two layers of data DVD 5 A ...

Page 48: ... USA and Japan among others PAL Video standard used in most European countries and elsewhere Progressive Scan Scans all horizontal lines of a monitor or TV display in one pass as opposed to Interlaced which scans only odd or even lines with each pass Region Code DVD movies are produced with region encoding to restrict distribution of titles to certain areas at certain times To play back a DVD titl...

Page 49: ...nt video output 18 using 8 composite video output 17 repeat buttons 10 connections 16 18 repeat playback 26 cursor mode button 12 36 37 resetting player video output 40 discs 6 7 factory defaults 39 display button 9 35 return button 10 reverse button 9 11 enter button 9 12 safety instructions 2 factory default settings 39 screen saver 21 fast forward button 9 11 setup button 9 features 6 setup men...

Reviews: