Creda TVR2, Instruction Book
The Creda TVR2 is a top-of-the-line electronic appliance that brings unparalleled entertainment to your home. To ensure you make the most of its advanced features, we provide a comprehensive Instruction Book, available for free download at manualshive.com. This manual offers detailed guidance for optimal usage and enjoyment of your Creda TVR2.
Share
Download


Reviews:
No comments
Related manuals for TVR2

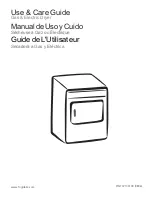
DWSR405GBWW
Brand: GE Pages: 8

CHD20
Brand: Cellini Pages: 12

Headlines HD7800
Brand: Sunbeam Pages: 9

VS 937 BE
Brand: Vidal Sassoon Pages: 4

RDHP 20
Brand: OMEGA AIR Pages: 37

MAXX AFO 52484 SS
Brand: Kalorik Pages: 101

RM12
Brand: Rupes Pages: 12

S18SF Series
Brand: Garland Pages: 24

FLSG72GCSB
Brand: Frigidaire Pages: 7

FRE5714KW - 5.7 cu. Ft. Electric Dryer
Brand: Frigidaire Pages: 11

FLEB8200FS4
Brand: Frigidaire Pages: 8

FGQ1442E
Brand: Frigidaire Pages: 12
FGQ332E
Brand: Frigidaire Pages: 24

FGQ1452H
Brand: Frigidaire Pages: 8

FGR231CAS4
Brand: Frigidaire Pages: 8

FGFB9100ES0
Brand: Frigidaire Pages: 12

FGQBB30D
Brand: Frigidaire Pages: 12

FGQ221CA
Brand: Frigidaire Pages: 12


