background image

Sears Brands Management Corporation, Hoffman Estates, IL 60179, U.S.A.

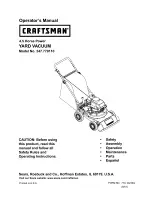
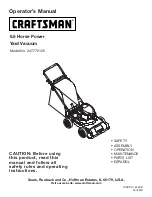
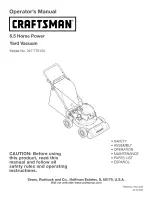
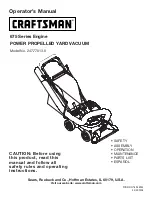
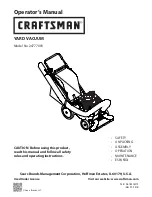
CAUTION: Before using this product, 

read this manual and follow all safety 

rules and operating instructions.
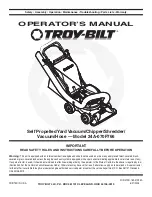
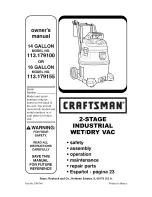
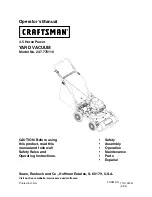
Operator’s Manual

•  SAFETY
•  UNPACKING
•  ASSEMBLY
•  OPERATION
•  MAINTENANCE
•  ESPAÑOL

Visit our website: www.craftsman.com

Used Under License

YARD VACUUM

Model No. 247.77003

Form No. 769-15410

(May 22, 2018)

© Sears Brands, LLC

Summary of Contents for 247.77003

Page 1: ...his product read this manual and follow all safety rules and operating instructions Operator s Manual SAFETY UNPACKING ASSEMBLY OPERATION MAINTENANCE ESPAÑOL Visit our website www craftsman com Used Under License YARD VACUUM Model No 247 77003 Form No 769 15410 May 22 2018 Sears Brands LLC ...

Page 2: ...oes NOT include Expendable items that can wear out from normal use within the warranty period such as the blades spark plug air cleaner flail screen and catcher bag Product damage resulting from user attempts at product modification or repair or caused by product accessories Repairs necessary because of accident or failure to operate or maintain the product according to all supplied instructions P...

Page 3: ...age them quickly Never allow children under 16 years of age to operate this machine Children 16 and over should read and understand the instructions and safe operation practices in this manual and on the machine and be trained and supervised by an adult Never allow adults to operate this machine without proper instruction Keep bystanders pets and children at least 75 feet from the machine while it...

Page 4: ...t Always be sure of your footing and keep a firm hold on the handles Do not operate this machine on a paved gravel or non level surface Do not operate this machine while under the influence of alcohol or drugs Muffler and engine become hot and can cause a burn Do not touch Never pick up or carry machine while the engine is running If situations occur which are not covered in this manual use care a...

Page 5: ...eet from the machine while it is in operation Stop machine if anyone enters the area WARNING THROWN OBJECTS This machine may pick up and throw and objects which can ricochet EYE PROTECTION Always wear safety glasses or safety goggles when operating this machine WARNING GASOLINE IS FLAMMABLE Allow the engine to cool at least two minutes before refueling WARNING CARBON MONOXIDE Never run an engine i...

Page 6: ...arts and loose packing material 3 Lift unit from the rear to detach it from underlying carton material and roll unit out of carton 4 Check carton thoroughly for any other loose parts NOTE Make sure not to crimp cables while removing loose parts or the entire unit from the carton Loose Parts In Carton See Figure 1 Upper and Lower Handle Hose Assembly Safety Glasses Engine Oil May be located in bag ...

Page 7: ...igns with lower handle Make sure the rope guide is on the right side of upper handle See Figure 3 IMPORTANT Make sure the cables are routed outside the lower handle Also do not crimp the cables while lifting up the handles d Secure the two handles by tightening the handle knobs carriage bolts must be seated properly into the handle See Figure 3 2 Loosen the wing nut that secures the rope guide to ...

Page 8: ...into hose cradle Attaching The Bag 1 Grasp bag handle with one hand and slide locking rod on mounting bracket with other hand toward engine Use the end of mounting bracket as leverage when sliding the locking rod See Figure 7 2 Slip bag over the rim of the discharge opening and release locking rod to secure bag in place 3 Snap bag clip to the top of the lower handle 4 Place the lower straps on the...

Page 9: ...ute Refer to nozzle height adjustment below WARNING Always stop engine and disconnect spark plug wire before performing any maintenance or adjustments Always wear safety glasses during operation or while performing any adjustments or repairs Nozzle Height Adjustment The nozzle can be adjusted to any five positions ranging from 5 8 to 4 1 8 ground clearance The nozzle height has to be adjusted acco...

Page 10: ...ou have set up your yard vacuum for operation get acquainted with its controls and features These are described below and illustrated on this page This knowledge will allow you to use your new equipment to its fullest potential WARNING The operation of any yard vacuum can result in foreign objects being thrown into the eyes which can damage your eyes severely Always wear the safety glasses provide...

Page 11: ...ce oil fill dipstick and tighten Subsequent Uses Use 4 stroke motor oil that meets or exceeds the requirements for API service category SF SG SH SJ or higher Always check the API service label on the oil container to be sure it includes the letters SF SG SH SJ or higher Outdoor temperatures determine the proper oil viscosity for the engine Use the chart shown in Figure 12 to select the best viscos...

Page 12: ...p and tighten it until it clicks 4 Move yard vaccum at least 10 feet away from the fuel container source and site before starting the engine NOTE Check the fuel level periodically to avoid running out of gasoline while operating the yard vacuum If the unit runs out of gas as it is chipping it may be necessary to unclog the discharge area before it can be restarted Refer to SERVICE AND MAINTENANCE ...

Page 13: ...s See Figure 16 Hold bag handle and bag clip while emptying the contents 6 Compress bag opening and fold inner flap over opening 7 Fold outer flap over inner flap and insert buttons on the bag through metal outlets See Figure 16 8 Twist the buttons to lock bag Place bag back onto unit as instructed in the ASSEMBLY section To Remove Blower Chute 1 Grasp blower chute with one hand and pull lock rod ...

Page 14: ...into the chipper chute WARNING Do not attempt to shred chip or vacuum any material larger than specified on the machine or in this manual Personal injury or damage to the machine could result IMPORTANT The flail screen is located inside the housing in the discharge area If the flail screen becomes clogged remove and clean as instructed in the Service Maintenance section For best performance it is ...

Page 15: ...l or add stabilizer to a full tank of fresh fuel prior to storage Clean more often under dusty conditions or when airborne debris is present WARNING Always stop engine and disconnect spark plug wire before performing any maintenance or adjustments Always wear safety glasses during operation or while performing any adjustments or repairs General Recommendations Always observe safety rules when perf...

Page 16: ...l level is near or below the lower limit mark on the dipstick remove the oil filler cap dipstick and fill with the recommended oil to the upper limit mark Do not overfill 5 Reinstall the oil fill dipstick Change Engine Oil WARNING Gasoline and its vapors are extremely flammable and explosive Fire or explosion can cause severe burns or death Change engine oil after the first five hours of operation...

Page 17: ...for this job 1 Disconnect and ground spark plug wire Empty the fuel tank by running engine until tank is dry 2 Tip the yard vacuum so that it rests on its side keeping the muffler side down Hold yard vacuum firmly 3 Scrape and clean the underside of the deck and nozzle with a suitable tool Do not spray with water IMPORTANT Do not use a pressure washer or garden hose to clean your unit These may ca...

Page 18: ...dry and empty the oil reservoir as described in To Drain Oil 1 Disconnect and ground the spark plug wire 2 Remove bag assembly or blower chute 3 Remove the three hex cap screws holding the chipper chute to the upper housing See Figure 26 4 Remove the front hubcaps flange lock nuts front wheels and wave washers that attach to the pivot arm assemblies See Figure 27 5 Remove the shoulder screws thrus...

Page 19: ...moved earlier See Figure 30 10 The nuts on the flat head cap screws can be reached from underneath using a 1 2 inch socket universal and extension See Figure 31 11 Replace or sharpen chipper blade The blade can be sharpened with a file or on a grinding wheel WARNING The chipper blade is sharp When sharpening blade wear leather work gloves to protect your hands and follow the original angle of grin...

Page 20: ...n poorly ventilated areas where fuel fumes may reach an open flame spark or pilot light as on a furnace water heater clothes dryer or gas appliance Preparing The Yard Vacuum Clean and lubricate yard vacuum thoroughly as described in the lubrication instructions Do not use a pressure washer or garden hose to clean your unit Refer to Preparing the Engine for correct engine storage instructions Store...

Page 21: ...MovechokecontroltoCHOKEposition 3 Connectwiretosparkboot 4 Clean adjustgap orreplace 5 Filltankwithclean freshgasoline 6 CallCraftsmanat1 888 331 4569tohavefuellinecleaned 7 Obstructionlodgedinimpeller Disconnectsparkplugwireand removelodgedobject 8 Safetyswitchmustbedepressedbythefronttabonthebag handlewhensecuringthebag 9 Connectsafetyswitchwiretoengineconnectorandgroundto mountingbracket Engine...

Page 22: ...snotdischarge 1 Dischargeareaclogged 2 Foreignobjectlodgedinimpeller 3 LowengineRPM 4 Vacuumbagisfull 1 Stopengineimmediatelyanddisconnectsparkplugwire Clean flailscreenandinsideofdischargeopening 2 Stopengineanddisconnectsparkplugwire Removelodged object 3 Alwaysrunengineatfullthrottle 4 Emptybag Rateofdischargeslows considerablyorcompositionof dischargedmaterialchanges 1 LowengineRPM 2 Chipperbl...

Page 23: ...ative at 1 800 469 4663 The emission warranty is a defects warranty Defects are judged on normal engine performance The warranty is not related to an in use emission test Sears Emission Control Defects Warranty Provisions The following are specific provisions relative to your Emission Control Defects Warranty Coverage It is in addition to the Sears engine warranty for non regulated engines found i...

Page 24: ...e pueden gastarse por el uso normal dentro del periodo de garantía tales como las cuchillas bujías filtro de aire pantalla de desgranado y una bolsa Producto daños resultantes de los intentos del usuario de modificación del producto reparación o causados por accesorios de productos Reparaciones necesarias debido al accidente o por no operar o mantener el producto según las instrucciones provistas ...

Page 25: ...Para protegerse los ojos utilice siempre anteojos o antiparras de seguridad mientras opera la máquina o mientras la ajusta o repara Los objetos arrojados que rebotan pueden lesionar gravemente la vista Utilice zapatos de trabajo resistentes de suela fuerte así como pantalones y camisas ajustados Las prendas sueltas o las alhajas pueden quedar atrapadas en las piezas móviles Nunca utilice la máquin...

Page 26: ... el material que desea triturar y saque los objetos metálicos piedras botellas latas u otros objetos extraños que pueden ocasionar lesiones o dañar la máquina Si el motor golpea un objeto extraño o si la máquina empieza a producir un sonido poco común o una vibración apague el motor de inmediato Deje que el motor se detenga por completo Desconecte el cable de la bujía póngalo de manera que haga ma...

Page 27: ...s Estados Unidos CPSC y la Agencia de Protección Ambiental de los Estados Unidos EPA este producto tiene una vida útil media de siete 7 años ó 60 horas de funcionamiento Al finalizar la vida útil media adquiera una máquina nueva o haga inspeccionar anualmente ésta por un distribuidor de servicio autorizado para cerciorarse de que todos los sistemas mecánicos y de seguridad funcionan correctamente ...

Page 28: ...itos y los niños por lo menos 75 pies de la máquina mientras está en la operación Pare máquina si cualquiera entra el área ADVERTENCIA OBJETOS TIRADOS Esta máquina puede recoger y poder tirar y los objetos que pueden rebotar PROTECCION DE OJO Siempre lleve gafas de seguridad o gafas de seguridad al operar esta máquina ADVERTENCIA GASOLINA ES INFLAMABLE Permita que el motor se enfríe al menos dos m...

Page 29: ... caja que quede debajo y haga rodar la unidad fuera de la caja 4 Verifique cuidadosamente si en la caja queda alguna parte suelta NOTA Asegúrese de no doblar los cables mientras extrae de la caja las partes sueltas o toda la unidad Piezas Sueltas Dentro De La Caja Vea la Figura 1 Manija superior e inferior Montaje de la manguera Bolsa Canal de soplado Anteojos de seguridad Aceite para motor puede ...

Page 30: ...lineada con la manija inferior Asegúrese que la guía de la cuerda esté situada a la derecha de la manija superior Vea la Figura 3 IMPORTANTE Asegúrese de enrutar los cables fuera de la manija inferior Asimismo no prense los cables mientras levanta las manijas d Para sujetar las dos manijas ajuste las perillas de la manija los pernos del carro deben estar colocados de forma adecuada en la manija Ve...

Page 31: ... cuna de la manguera Montaje De La Bolsa 1 Sostenga la manija de la bolsa con una mano y deslice la varilla de seguridad del soporte de montaje hacia el motor con la otra mano Use el extremo del soporte de montaje como palanca cuando deslice la varilla de seguridad Vea la Figura 7 2 Deslice la bolsa por encima del borde de la abertura de descarga y suelte la varilla de seguridad para ajustar la bo...

Page 32: ...onsulte las instrucciones para ajustar la altura del pico en la siguiente sección ADVERTENCIA Siempre detenga el motor y desconecte el cable de la bujía antes de hacer cualquier tipo de mantenimiento o ajustes Utilice siempre anteojos de seguridad durante la operación o mientras ajusta o repara este equipo Ajuste De La Altura Del Pico Puede ajustar el pico en seis posiciones que varían desde 5 8 a...

Page 33: ...ara picarlas Vea la Figura 10 Palanca Los desechos que se acumulan en los patios como por ejemplo las hojas o las agujas de los pinos se pueden aspirar con el pico para picarlos Manija de la bolsa Se utiliza para tomar la bolsa para colocarla sacarla y vaciarla Vea la Figura 10 Canal de Soplado Cuando se lo une a la unidad el canal de soplado se utiliza para soplar o esparcir por los patios los de...

Page 34: ...icación de servicio API SF SG SH SJ o equivalente Compruebe siempre la etiqueta de servicio API en el recipiente del aceite para asegurarse que incluye las letras SF SG SH SJ o equivalente Temperaturas al aire libre de determinar la viscosidad del aceite correcto para el motor Use la tablase muestra en la Figura 12 seleccionar la mejor viscosidad para el rango de temperatura al aire libre se esper...

Page 35: ...te de la gasolina NOTA Verifique periódicamente el nivel de combustible para evitar quedarse sin gasolina mientras está operando la aspiradora para patios Si la unidad se queda sin combustible mientras está triturando puede resultar necesario destapar el área de descarga antes de poder volver a encenderla Consulte la sección Servicio y Mantenimiento Para Encender El Motor ADVERTENCIA Asegúrese de ...

Page 36: ...enido Vea la Figura 16 Sostenga la manija y el broche de la bolsa mientras vacía el contenido 6 Comprima la abertura de la bolsa y doble la aleta interior sobre la abertura 7 Doble la aleta exterior sobre la aleta interior e inserte los botones de la bolsa a través de las salidas metálicas Vea la Figura 16 8 Gire los botones para cerrar la bolsa Ubique la bolsa de nuevo en la unidad como se indica...

Page 37: ...e diámetro en el canal de la cortadora ADVERTENCIA No intente triturar picar ni aspirar material de mayor tamaño al especificado en la máquina o en este manual Se podrían producir lesiones o daños a la máquina IMPORTANTE La pantalla de desgranado está ubicada dentro de la caja en la zona de descarga Si se tapa la pantalla de desgranado sáquela y límpiela como se indica en la sección de mantenimien...

Page 38: ...trol pivotes y ruedas 3 Parte inferior de la cubierta 1 Limpio 2 Lubricación con petróleo ligero 3 Limpie Anualmente o 50 horas 1 El aceite de motor 1 Cambio Anualmente 1 Bujía 2 Depurador de aire 1 Reemplazar 2 Reemplazar Antes de Almacenaje 1 Sistema de combustible 1 El motor dirigido hasta que esto se pare a falta del combustible o añadir estabilizador de un tanque lleno de combustible nuevo an...

Page 39: ...ico 3 Para aflojar los desechos golpee suavemente el filtro sobre una superficie dura Si el filtro está excesivamente sucio reemplácelo con un nuevo filtro 4 Inserte aquí cubierta en las ranuras en la parte inferior de la base 5 Inclinación de la cubierta para arriba en lugar seguro y con cierre Comprobar el aceite del motor Comprobar el nivel de aceite antes de cada operación Asegúrese de que el ...

Page 40: ...ntamiento y combustión de los residuos acumulados PRECAUCIÓN No use agua para limpiar las piezas del motor El agua puede contaminar el sistema de combustible Use un cepillo o un trapo seco Lubricación Ruedas Sitúe unas pocas gotas de aceite SAE 30 en cada tornillo con reborde una vez por temporada Palancas de Ajuste de Altura del Pico Lubrique las palancas de ajuste de altura del pico con aceite l...

Page 41: ...do de la unidad como se indica en la sección OPERACIÓN para acceder a la pantalla de desgranado 4 Retire los tres tornillos autosellantes que aseguran la tapa de la correa y extraiga la misma Vea la Figura 23 5 Saque el tornillo autosellante del lado derecho de la unidad que se une a la pantalla de desgranado Vea la Figura 24 6 Saque el tornillo de cabeza hexagonal de la parte superior de la caja ...

Page 42: ...res tornillos de cabeza hexagonal que sostienen el canal de la cortadora a la caja superior Vea la Figura 26 4 Saque las tapas de buje delanteras las tuercas de seguridad de brida las ruedas delanteras y las arandelas ondulatorias que van unidas a los montajes del brazo giratorio Vea la Figura 27 5 Saque los tornillos con reborde las arandelas de arrastre y las arandelas de campana que pasan por l...

Page 43: ... Vea la Figura 30 10 Es posible alcanzar las tuercas de los tornillos de cabeza plana desde la parte inferior mediante una llave universal de 1 2 pulg con extensión Vea la Figura 31 11 Cambie o afile las hojas de la cortadora Se puede afilar la cuchilla con un afilador o con una rueda de esmalte ADVERTENCIA Cuando afile las hojas protéjase las manos mediante el uso de guantes y siga el ángulo orig...

Page 44: ...ventilación donde los gases del combustible puedan alcanzar el fuego chispas o una luz piloto como la que tienen algunos hornos calentadores de agua secadores de ropa o algún otro dispositivo a gas Preparación del Vacío de Yarda Limpie y lubrique la cortadora como se describe en las instrucciones de lubricación No utilice una lavadora a presión ni una manguera de jardín para limpiar su unidad Refi...

Page 45: ...telaseparación ocambielabujía 5 Lleneeltanquecongasolinalimpiayfresca 6 Parabtenerservicio comuniqueseconCraftsmanalteléfono 1 888 331 4569 7 Hayunaobstrucciónenelmotor Desconecteelcabledelabujía yretireelobjetoatascado 8 Elinterruptordeseguridaddebeserpresionadoporlaaleta delanteradelamanijadelabolsacuandoseaseguralabolsa 9 Conecteelcabledelinterruptordeseguridadalconectordel motor demaneraquehag...

Page 46: ...descargaestátapada 2 Hayunobjetoextrañoenelmotor 3 RPMdelmotorbajas 4 Labolsadelaaspiradoraestállena 1 Detengaelmotordeinmediatoydesconecteelcabledelabujía Limpielapantalladedesgranadoyelinteriordelaaberturade descarga 2 Detengaelmotorydesconecteelcabledelabujía Saqueel objetoextrañodelmotor 3 Siempreaccioneelmotorconelestranguladoralmáximo 4 Vacíelabolsa Latasadedescargasereducede maneraconsidera...

Page 47: ...l 1 800 469 4663 La garantía de emisiones es una garantía por defectos Los defectos se juzgan de acuerdo con el funcionamiento normal de un motor La garantía no está relacionada con una prueba de emisiones en uso Disposiciones de la garantía Sears para defectos en el control de emisiones Las siguientes son disposiciones específicas relacionadas con la cobertura de la garantía para defectos en el c...

Page 48: ...To order replacement parts or schedule repair service Para ordenar piezas o pedir servicio de reparación 1 888 331 4569 ...

Reviews: