background image


2 Mega Pixel Network 

Box Camera 


CCIH200 

101 Wrangler, Suite 201 

• 

Coppell, Texas 75019  

• 

Phone: 469-635-6800 

• 

Fax: 469-635-6822 

• 

Toll Free: 1-888-694-STAR (7827) 


www.costarvideo.com


Features: 

  2 mega pixel resolution (1080p) 

  1/2.7” CMOS image sensor 

  True day/night with IR cut filter 

  OnVIF supported; iNEX compatible 

  2 Dimensional Noise Reduction (2DNR) 

  Back Light Compensation (BLC) 

  Two-way audio communication 

  SD memory card supported 

  Multiple compression (H.264, MPEG4, MJPEG) 

  Motion detection 

  Dual IP streaming 

  Dynamic adjustment bit rate 

  Event buffering 

  FTP image upload 

  Password protection, IP filtering 

  Power over Ethernet (PoE) or DC12V 
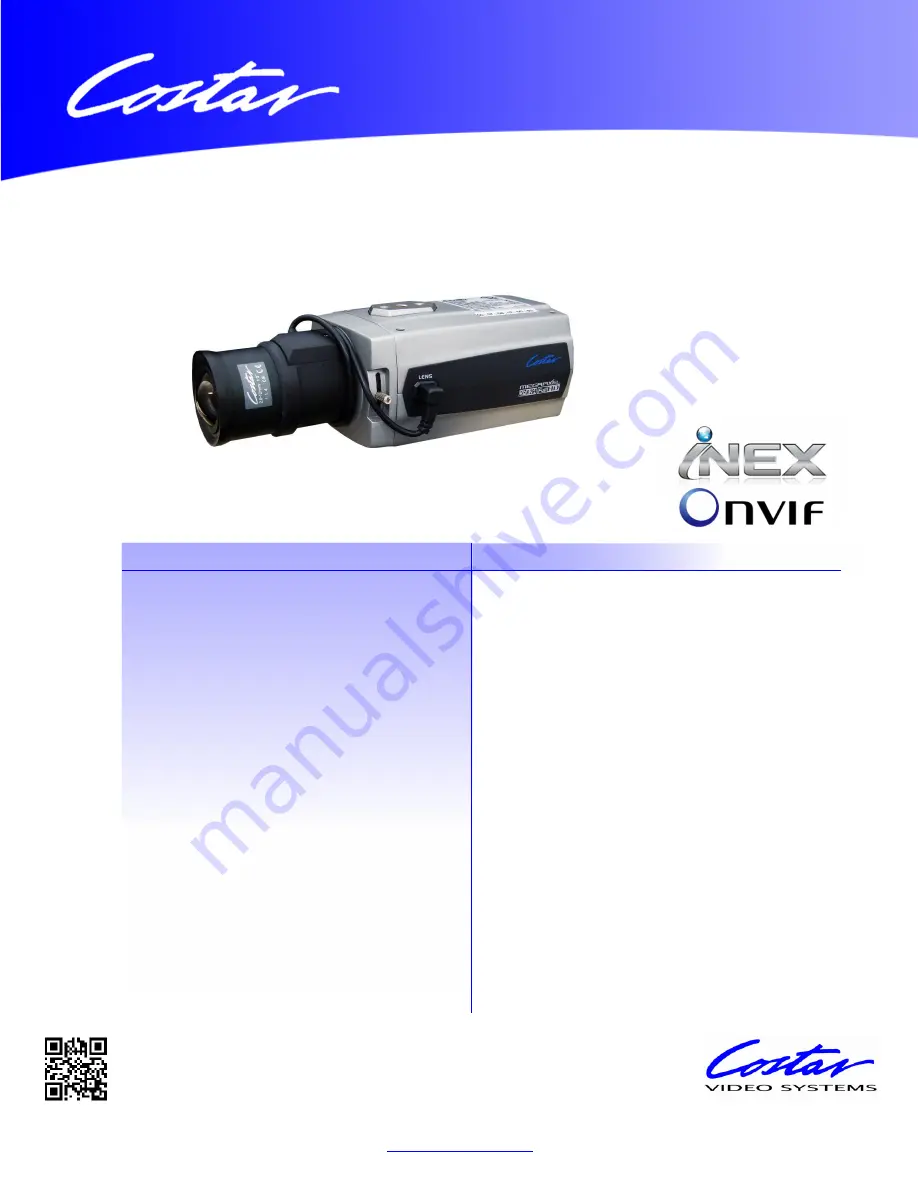
 

Description:  

 
The CCIH200  box  camera provides high 

quality video with (1080p) 2.0  mega pixel 

resolution. The ability to be powered by PoE 

simplifies installation. Costar Video’s IP 

cameras are compatible with the iNEX user 
interface platform. The iNEX user interface 

incorporates features such as simplified user 

management, advanced camera mapping 

and logical camera grouping making it easier 

to monitor and access each of your cameras. 
The iNEX user interface also has the ability 

to integrate both analog and IP camera 

technology on the same platform allowing 

you to have a diverse surveillance system. 

Costar Video’s IP cameras are OnVIF 
supported. The industry standard OnVIF 

protocol makes  it easy to integrate Costar 

branded IP cameras with OnVIF compatible 

recorders. 


Summary of Contents for CCIH200

Page 1: ...over Ethernet PoE or DC12V Description The CCIH200 box camera provides high quality video with 1080p 2 0 mega pixel resolution The ability to be powered by PoE simplifies installation Costar Video s IP cameras are compatible with the iNEX user interface platform The iNEX user interface incorporates features such as simplified user management advanced camera mapping and logical camera grouping maki...

Page 2: ...cked by the qualified personnel before operating it any further Unplug the unit from the wall outlet if it is not going to be used for several days or more To disconnect the cord pull it out by the plug Never pull the cord itself Allow adequate air circulation to prevent internal heat build up Do not place the unit on surfaces rugs blankets etc or near materials curtains draperies that may block t...

Page 3: ... NOT INSTALLED AND USED IN ACCORDANCE WITH THE INSTRUCTION MANUAL MAY CAUSE HARMFUL INTERFERENCE TO RADIO COMMUNICATIONS CAUTION CHANGES OR MODIFICATIONS NOT EXPRESSLY APPROVED BY THE PARTY RESPONSIBLE FOR COMPLIANCE COULD VOID THE USER S AUTHORITY TO OPERATE THE EQUIPMENT THIS CLASS A DIGITAL APPARATUS COMPLIES WITH CANADIAN ICES 003 CET APPAREIL NUMÉRIQUE DE LA CLASSE A EST CONFORME À LA NORME N...

Page 4: ...nce receptacles and the point where they exit from the apparatus 11 Only use attachments accessories specified by the manufacturer 12 Use only with the cart stand tripod bracket or table specified by the manufacturer or sold with the apparatus When a cart is used use caution when moving the cart apparatus combination to avoid injury from tip over 13 Unplug this apparatus during lightning storms or...

Page 5: ...ction 17 3 4 Live View Page 18 3 5 Network Camera Setup 20 3 5 1 Basic Configuration 20 1 Users 21 2 Network 22 3 Video Image 23 4 Audio 25 5 Date Time 27 3 5 2 Video Image 28 3 5 3 Audio 34 3 5 4 Event 35 1 Event In 35 2 Event Out 40 3 Event Map 48 3 5 5 Device 49 1 PTZ 49 2 RS 485 50 3 5 6 System 51 1 Information 51 2 Security 52 3 Date Time 55 4 Network 56 5 Language 65 6 Maintenance 66 7 Suppo...

Page 6: ...6 4 Appendix 72 4 1 Troubleshooting 72 4 2 Alarm Connection 73 4 3 Preventive Maintenance 73 4 4 Product Specification 74 ...

Page 7: ... settings and real time monitoring screens are also provided through an access to the web The Network Camera is fully featured for security surveillance and remote monitoring needs It is based on the DSP compression chip and makes it available on the network as real time full frame rate Motion JPEG and H 264 or MPEG 4 video streams The alarm input and alarm output can be used to connect various th...

Page 8: ...pabilities The Network Camera includes intelligent capabilities such as enhanced video motion detection The network camera s external inputs and outputs can be connected to devices such as sensors and relays enabling the system to react to alarms and activate lights or open close doors Resolution CDIH200 2 Megapixel 30fps 1920x1080 Micro SD Recording support The Network Camera also supports a micr...

Page 9: ... PoE functionality 5 Video Switch Selects Video On Off Set to On to output a video signal 6 Video Output Connects the video output This BNC connector provides a 1 0Vp p 75 ohms composite video signal 7 Micro SD Card Slot Card Slot for Micro SD Open the protection cover with a supported tool to insert Micro SD card 8 3pin Terminal IO Connects alarm In Out 2pin RS485 Terminal Connects PT device 9 Re...

Page 10: ...y default 1 4 Camera Adjustment 1 Video auto IRIS installation adjustment The camera supports video type auto iris lenses which adjust to changing light levels Perform the following steps to install and adjust a video type auto iris lens If necessary solder the lens control wires to the connector supplied with the camera 1 Attach the video type auto iris lens to the lens mount on the front of the ...

Page 11: ...test or peak object in the video Use this setting if you want to see the brightest object and not the background objects For Level adjustments Adjust the level control for the best picture during the day A night adjustment may not provide the proper setting for controlling the light during the day 6 Set the back focus of the camera before the final adjustment of the video level 7 If the auto iris ...

Page 12: ...ight or while using a 6 or 8 welder s glass in front of the lens The focus of the camera will change slightly if the camera iris was adjusted on a light scene then changes to a dark scene However the camera will remain in focus if the iris was focused on a dark scene and the scene lightens 1 The lens should be mounted on the camera before applying power 2 If a picture is visible focus on the pictu...

Page 13: ...ra at night or use a welders glass in front of the lens 3 Adjust the focus to the stop on the far range 4 Adjust the zoom on the lens to obtain the widest picture 5 Loosen the back focus lock screw 6 Adjust the back focus ring for the clearest picture 7 Tighten the back focus lock screw 8 Adjust the zoom on the lens to the far telephoto position 9 Adjust the back focus ring for the clearest pictur...

Page 14: ...ling lens Set Video Switch to On position to output the video signal Video Output is restricted to VGA 640x480 resolution Caution After lens installation you must set Video Switch to Off position to provide the best performance of the Network Camera Connecting the Power Connect the power of DC12V or AC24V 330mA for the network camera Connect the positive pole to the position and the negative pole ...

Page 15: ...list and click right button of the mouse You can see the pop up menu below 4 Select Assign IP You cam see a Assign IP window Enter the required IP address Note For more information refer to the Smart Manger User s Manual 3 Operation ...

Page 16: ...o in Microsoft Internet Explorer set your browser to allow ActiveX controls 3 1 Access from a browser 1 Start a browser Internet Explorer 2 Enter the IP address or host name of the Network Camera in the Location Address field of your browser 3 You can see a starting page Click Live View or Setup to enter web page 4 The network camera s Live View page appears in your browser 3 2 Access from the int...

Page 17: ...when the network camera is accessed for the setup at the first time Enter your admin name and password set by the administrator NOTE The default administrator username and password is admin If the password is lost the Network Camera must be reset to the factory default settings See 3 8 Resetting to the Factory Default Settings for more details To prevent network eavesdropping when setting the admi...

Page 18: ... list allows you to select a customized or pre programmed video stream on the live view page Stream profiles are configured under Setup Basic Configuration Video Image For more information please see 3 5 1 Basic Configuration Video Image of User s Manual The resolution drop down list allows you to select the most suitable one out of video resolutions to be displayed on live view page The protocol ...

Page 19: ... Esc button on the computer keyboard to cancel full screen view The Manual Trigger button activates a pop up window to manually start or stop the event The PTZ button activates a pop up window for Pan Tilt and Zoom control Use this scale to control the volume of the speakers Use this scale to control the volume of the microphone Use this scale to control the volume of the speakers and microphones ...

Page 20: ...ng Setup in the top right hand corner of the Live View page Click on this page to access the online help that explains the setup tools When accessing the Network Camera for the first time the Admin Password dialog appears Enter your admin name and password set by the administrator Note If the password is lost the Network Camera must be reset to the factory default settings See 3 8 Resetting to the...

Page 21: ...s User Group Authority Guest Provides the lowest level of access which only allows access to the Live View page Operator An operator can view the Live View page create and modify events and adjust certain other settings Operators have no access to System Options Administrator An administrator has unrestricted access to the Setup tools and can determine the registration of all other users Enable an...

Page 22: ...o possible to use it to set a static known IP address for a particular MAC address Use the following IP address To use a static IP address for the Network Camera check the radio button and then make the following settings IP address Specify a unique IP address for your Network Camera Subnet mask Specify the mask for the subnet the Network Camera is located on Default router Specify the IP address ...

Page 23: ...ions particularly for high definition television applications for example this is the profile adopted by the Blu ray Disc storage format and the DVB HDTV broadcast service H 264 MP Main Profile Primarily for low cost applications that requires additional error robustness this profile is used rarely in videoconferencing and mobile applications it does add additional error resilience tools to the Co...

Page 24: ...ording to network situations users can increase the compressibility to carry out the network transmission stably On the other hand when it is necessary to maintain a detailed monitoring screen by enhancing the image quality users can do so by decreasing the compressibility In ease case please adjust this function according to the network status and monitoring purposes The default is 2000 Kbps Fram...

Page 25: ... Audio The Network Camera can transmit audio to other clients using an external microphone and can play audio received from other clients by attaching a speaker The Setup page has an additional menu item called Audio which allows different audio configurations such as full duplex and simplex Audio Setting Enable audio Check the box to enable audio in the video stream Compression type Select the de...

Page 26: ...e It means that you can transmit and receive audio talk and listen at the same time without having to use any of the controls This is just like having a telephone conversation This mode requires that the client PC has a sound card with support for full duplex audio Uncheck the box enable Simplex mode The simplex mode only transmits audio from the network camera to any web client It does not receiv...

Page 27: ...djust for daylight savings time select the Automatically adjustment for daylight saving time changes From the Time Mode section select the preferred method to use for setting the time Synchronize with computer time sets the time from the clock on your computer Synchronize with NTP Server the network camera will obtain the time from an NTP server every 60 minutes Set manually this option allows you...

Page 28: ...28 Basic Refer to 3 5 1 Basic Configuration Video Image for more details Appearance ...

Page 29: ...ue in the range 1 10 Lower values mean less color saturation Saturation Adjust the image s contrast by raising or lowering the value in this field Sharpness Controls the amount of sharpening applied to the image A sharper image might increase image noise especially in low light conditions A lower setting reduces image noise but the image would be less sharp Enable flip image Check this box to flip...

Page 30: ...ions The default setting is Auto with DC IRIS Automatic Automatically sets the amount of light detected by the DC IRIS and AGC Hold Current Fixes the exposure at its current state Value Select a value in the drop down list to tune the exposure The default setting is 3 Enable automatic IRIS adjustment This checkbox should always be set to be checked except during focusing or when using a fixed iris...

Page 31: ...r the light source color This can be used in most situations and is the recommended setting Fixed Incandescent Fixed color adjustment ideal for a room with incandescent a glow lighting and good for a normal color temperature around 2600K Fixed Fluorescent Fixed color adjustment good for fluorescent lighting with a color temperature around 4000K to 5000K Fixed Outdoor Fixed color adjustment for sun...

Page 32: ...o possible to resize or delete or move the window by selecting the appropriate window at the mouse menu on the video screen To create a mask window follow steps 1 Click the right button of mouse to see the mouse menu 2 Select New Privacy Mask in the mouse menu 3 Click and drag mouse to designate a mask window area You can also modify or delete a mask window index Select an index and then modify it...

Page 33: ...e HTML code generated on the screen and pastes it in page code of the website you want to display live video Note To use webcasting service the Enable Anonymous viewer login option must be checked Refer to 3 5 1 Basic Configuration Users for more details 3 5 3 Audio ...

Page 34: ...34 Refer to 3 5 1 Basic Configuration Audio for more details 3 5 4 Event ...

Page 35: ...35 1 Event In On Boot This is used to trigger the event every time the Network Camera is started Select Enable to activate the motion event Alarm In ...

Page 36: ...network camera supports 1 alarm input port Type Choose the type of alarm you wish to use from the drop down list Dwell Time Set the dwell time of an event lasts for the specified dwell time from the point of detection of an alarm input Manual Trigger ...

Page 37: ...use of the manual trigger button provided on the live view page which are used to start or stop the event type manually Alternatively the event can be triggered via the product s API Application Programming Interface Motion ...

Page 38: ...n window needs to be masked this can be configured in a Mask window Pre Viewer Motion detection windows are configured by Motion or Mask windows Each window can be selected by clicking with the mouse It is also possible to resize or delete or move the window by selecting the appropriate window at the mouse menu on the video screen To create a motion or mask window follow steps 1 Click the right bu...

Page 39: ...the motion detection Sensitivity Sets up the sensitivity for the motion detection Dwell Time Set the hold time an event lasts for the specified hold time from the point of detection of a motion You can also modify or delete a motion index Select an index and then click the Modify or Delete button Select Enable to activate the motion window Network Loss This is used to trigger the event every time ...

Page 40: ...o be used as the sender for all messages sent by the Network Camera Interval Represents the frequency of the email notification when an event occurs Aggregate events Shows the maximum number of emails sent within each interval If your mail server requires authentication check the box for Use authentication to log in to this server and enter the necessary information User Name Password Enter the Us...

Page 41: ...address or host name Note that a DNS server must be specified in the TCP IP network settings if using a host name Port Enter the port number used by the FTP server The default is 21 Use passive mode Under normal circumstances the Network Camera simply requests the target FTP server to open the data connection Checking this box issues a PASV command to the FTP server and establishes a passive FTP c...

Page 42: ...file name This name will be used for all the image files saved If suffixes are also used the file name will take the form prefix suffix extension Additional suffix Add either a date time suffix or a sequence number with or without a maximum value HTTP Server When the network camera detects an event HTTP Server is used to receive uploaded image files and or notification messages Check the box to en...

Page 43: ... detects an event it can control external equipment connected to its alarm output port Check the box to enable and then select either Enable When you select Enable alarm out the output will be activated for as long as the event is active ...

Page 44: ...om your PC Provide the path to the file directly or use the Browse button to locate it Then click the Upload button An audio file for Audio Alert can be made by Audio Recorder tool in the NC Titanium software Audio Alert Test When the setup is complete the audio output can be tested by clicking the Test button To remove an audio file select index and click the Remove button Note For a proper opera...

Page 45: ...top playing audio Procedures to make an audio file in G 711 format for Audio Alert 1 Connect the microphone in your PC 2 Click the Capture button and talk to the microphone to record the audio or voice You can record up to 30 seconds Click the Stop button to stop on capturing 3 Click the Save button and then set the file name to save a current capture file with PCM format If you don t need to make...

Page 46: ...vent Enter pre event time value for the storage device pre recording Post event Enter post event time value for the storage device pre recording Device Setting Select Device Type to be recorded in the drop down list SD built in SD card CIFS A file format for a NAS device NFS A file format for a NAS device Note1 Common Internet File System CIFS is a remote file access protocol that forms the basis ...

Page 47: ...Enter IP address for NAS device Remote Directory Enter directory or folder location to be recorded in the NAS device Capacity Enter the capacity of storage to be used It must be less than the total storage capacity IP Password Enter ID and Password The network camera will ask them whenever you access NAS device Check Press the Check button to check the validity of Device Setting data Format Click ...

Page 48: ...allows you to change the settings and establish a schedule for each event trigger from the Network Camera You can register the event map up to max 15 Click Add button to make a new event map and you can see a popup window as below ...

Page 49: ...n server must first be configured on the Event In page Enter a message you want to send Audio Alert Select a Audio alert file the Network Camera output when audio alert event triggered The Audio alert file must first be configured on the Event In page 3 5 5 Device 1 PTZ The Network Camera supports several PTZ devices Using an appropriate cable connect the device to your RS 485 port These ports are...

Page 50: ... a Baud Rate in the drop down list Default 9600 bps Data bits Select Data Bits in the drop down list Default None Parity bits Select Parity Bits in the drop down list Default 8 bits Stop bits Select Stop Bits in the drop down list Default 1 bit ...

Page 51: ...n enter the system information This page is very useful when you refer device information after installation Device Name Configuration Enter the device name Location Configuration Enter the location information You can enter that by four ...

Page 52: ...ymous viewer login to the Live View page as described below User Setting Check the box to enable anonymous viewer login to the Network Camera without the user account When using the user account users have to try log in at every access User List Setting This section shows a registered user account Enter a user name and password to be added and register them by pressing the Add button You can see t...

Page 53: ...ist for the administrator Operator and Viewer to enable HTTPS connection set to HTTP by default HTTP HTTPS HTTP HTTPS Upload Certificate To use HTTPS for communication with the Network Camera An official certificate issued by a CA Certificate Authority must be uploaded from your PC Provide the path to the certificate directly or use the Browse button to locate it Then click the Upload button Pleas...

Page 54: ...dresses added to the list are set as allowed or denied addresses All other IP addresses not in this list will then be allowed or denied access accordingly that is if the addresses in the list are allowed then all others are denied access and vice versa See also the online help for more information Note that users from IP addresses that will be allowed must also be registered with the appropriate a...

Page 55: ...t Automatically adjustment for daylight saving time changes From the Time Mode section select the preferred method to use for setting the time Synchronize with computer time sets the time from the clock on your computer Synchronize with NTP Server the network camera will obtain the time from an NTP server every 60 minutes Set manually this option allows you to manually set the time and date Note N...

Page 56: ...56 4 Network Setting in regard to network can be executed Settings for IP DNS Host Name Port and ARP Ping can be established along with setting for DDNS uPnP QoS Zeroconfig and Bonjour ...

Page 57: ...tomatically use the DNS server settings provided by the DHCP server Click the View button to see the current settings Use the following DNS server address to enter the desired DNS server by specifying the following Domain name enter the domain s to search for the host name used by the Network Camera Multiple domains can be separated by semicolons The host name is always the first part of a Fully Q...

Page 58: ...w cctv network co kr Enable DDNS Check to get DDNS service to be available DDNS Server Select the DDNS server Registered host Enter an address of the DDNS server Username Enter an ID to access to the DDNS server Password Enter a password to be used for accessing the DDNS server Confirm Enter a password again to confirm it Maximum time interval Set a time interval to synchronize with the DDNS serve...

Page 59: ...ream3 This function is for sending Video and Audio to Multicast group Enable Multicast Check the checkbox to enable multicast operation Multicast destination IP Enter an IP between 224 0 0 0 and 239 255 255 255 Although it is empty an IP will be entered automatically RTP port Enter a value between 1024 and 65532 RTP TTL Enter a value between 1 and 255 If a network status is smooth enter a lower va...

Page 60: ...ating systems and clients that support this protocol Note UPnP must be installed on your workstation if running Windows XP To do this open the Control Panel from the Start Menu and select Add Remove Programs Select Add Remove Windows Components and open the Networking Services section Click Details and then select UPnP as the service to add ...

Page 61: ...n may use and thus control over bandwidth races between applications DSCP Settings For each type of network traffic supported by your network video product enter a DSCP Differentiated Services Code Point value This value is used to mark the traffic s IP header When the marked traffic reaches a network router or switch the DSCP value in the IP header tell the router or switch which type of treatmen...

Page 62: ...vate network to the outside that is the Internet Security on the private network LAN is increased since most broadband routers are pre configured to stop attempts to access the private network LAN from the public network Internet Use NAT traversal when your network cameras are located on an intranet LAN and you wish to make it available from the other WAN side of a NAT router With NAT traversal pr...

Page 63: ... The Network Camera automatically search for NAT routers on your network manual setting Select this option to manually select a NAT router and enter the external port number for the router in the field provided Notes If you attempt to manually enter a port that is already in use an alert message will be displayed When the port is selected automatically it is displayed in this field To change this ...

Page 64: ...rs and printers to connect to a network automatically Without zeroconf a network administrator must set up services such as Dynamic Host Configuration Protocol DHCP and Domain Name System DNS or configure each computer s network settings manually which may be difficult and time consuming Zeroconf is built on three core technologies Assignment of numeric network addresses for networked devices link...

Page 65: ... Also known as zero configuration networking Bonjour enables devices to automatically discover each other on a network without having to enter IP addresses or configure DNS servers Bonjour is a trademark of Apple Computer Inc 5 Language It will be able to select a user language The type of language it will be able to select is the English the French the German the Spanish and the Italian ...

Page 66: ...e subnet mask the system time Default The default button should be used with caution Pressing this will return all of the Network Camera s settings to the factory default values including the IP address Update Server Carry out the upgrade by importing an upgrade file and pressing the Upgrade button During the upgrade do not turn off the power of the Network Camera And try an access again after wai...

Page 67: ...ance Logs The network Camera support system log information Click the System Log button to get the log data Update Server Server Report Click the Server Report button to get the important information about the server s status and should always be included when requesting support Parameter List Click the Parameter List button to see the unit s parameters and their current settings 3 5 7 About The f...

Page 68: ...when playing the video clip in the Micro SD memory 2 Playback Buttons To view a recording data in the SD local storage select it from the list and click the Playback buttons Go to the first go to the beginning of the video clip Fast backward play Backward play play backward of the video clip Step backward play go back one frame of the video clip Pause pause playback of the video clip Step forward ...

Page 69: ...ar Search results from the SD local storage in the network camera connected are displayed monthly If there is a recorded data for a particular date a blue square on the date will be displayed 6 Play Time Displays time of the video playing 7 Event Search Window Select a search option in the drop down list and click GO button You can also enter the time period for searching If you click Start Date o...

Page 70: ...ndow will be provided as a popup window so that users can open and read it without a need for log in It will offer a description on setting and Help page by which users can manipulate the Network Camera without a reference to the manual ...

Page 71: ... Reset Button 1 Switch off the Network Camera by disconnecting the power adapter 2 Press and hold the Reset Button with a straightened paperclip while reconnecting the power 3 Keep the Reset Button pressed until the Status indicator blink 4 Release the Reset Button 5 When the Power Indicator changes to Green may take up to 40 seconds the process is complete and the network video camera has been re...

Page 72: ...lurred images Refocus the camera Poor image quality Increased lighting can often improve image quality Check that there is sufficient lighting at the monitored location Check all image and lighting settings Rolling dark bands or flickering in image Try adjusting the Exposure Control setting under AE and AWB part H 264 not displayed in the client Check that the correct network interface is selected...

Page 73: ...eventive maintenance allows detection and correction of minor that faults before they become serious and cause equipment failure Every three month perform the following maintenance 1 Inspect all connection cables for deterioration or other damage 2 Clean components with a clean damp cloth 3 Verify that all the mounting hardware is secure ...

Page 74: ... Programming Interface API Supported Open Platform Compatible ONVIF Alarm Triggers Motion Detection External Input Manual Trigger Alarm Events File upload via FTP and HTTP Notification via E mail HTTP and TCP External Output activation Audio alert activation Video Buffering Pre and Post Alarm Motion Detection Yes max 8 programmable zone Network Time Synchronization Yes SD Recording Yes Continuous ...

Page 75: ...stem Microsoft Windows 98 Microsoft Windows ME Microsoft Windows 2000 Microsoft Windows XP or Microsoft Windows Vista CPU Intel Core 2 Duo 2Ghz or higher 1GB RAM or more 10GB free disk or higher VGA AGP Video RAM 32MB or higher 1024x768 24bpp or higher ...

Page 76: ...76 Printed in Korea HD NETWORK BOX CAMERA ...

Reviews: