Cortelco 2700, Owner'S Instruction Manual
The Kenmore 2700 Owner's Manual is now available for free download on our website. This comprehensive manual offers detailed instructions and helpful insights to ensure you make the most of your Kenmore 2700 product. Get the user manual today at manualshive.com and unleash the full potential of your Kenmore 2700.
Share
Download


Reviews:
No comments
Related manuals for 2700

USB Phone
Brand: Hama Pages: 35
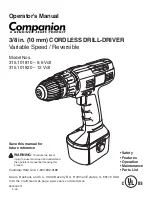
315.101810
Brand: COMPANION Pages: 18

SwyxPhone D765
Brand: Swyx Pages: 4

DIVERSE
Brand: BT Pages: 25

Gigaset 2015
Brand: Gigaset Pages: 86

OL5800
Brand: Olympia Pages: 26

VCO
Brand: Walker Ameriphone Pages: 39

TL92273
Brand: AT&T Pages: 2

MH9002
Brand: BellSouth Pages: 26

CL81101
Brand: AT&T Pages: 39

29299
Brand: GE Pages: 72

KX-TPA50 B08
Brand: Panasonic Pages: 10

KX-THA19C
Brand: Panasonic Pages: 10

KX-THA 16
Brand: Panasonic Pages: 17

KX-TGF773
Brand: Panasonic Pages: 12

KX-TS85EXW
Brand: Panasonic Pages: 32

KX-TS85EXB
Brand: Panasonic Pages: 32

KX-TU301FX
Brand: Panasonic Pages: 36


