Corsair CC800DW, User Manual
The Corsair CC800DW is a high-quality computer case designed for gaming enthusiasts. Its sleek design and spacious interior make it perfect for building your dream gaming rig. For detailed instructions on how to set up and maintain your case, you can download the user manual for free from manualshive.com.
Share
Download


Reviews:
No comments
Related manuals for CC800DW

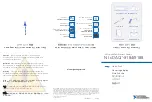
NATIVE-C1
Brand: N.A.T. Pages: 43

DMC 1000 - Modular Expansion Base
Brand: D-Link Pages: 16
NI cDAQ-9184
Brand: National Instruments Pages: 4

M9010A PXIe
Brand: Keysight Technologies Pages: 18

AXIe Series
Brand: Keysight Technologies Pages: 22

M9502A AXIe
Brand: Keysight Technologies Pages: 28

M9506A
Brand: Keysight Technologies Pages: 41

M9506A-BC1
Brand: Keysight Technologies Pages: 96

AT-MCR12
Brand: Allied Telesis Pages: 2

AT-SB4151
Brand: Allied Telesis Pages: 11

AT-MCR1
Brand: Allied Telesis Pages: 46

AT-TS24TS
Brand: Allied Telesis Pages: 64


