Corradi Pergotenda Flux, Installation Manual
The Corradi Pergotenda Flux is a versatile and innovative outdoor shading system designed to enhance your outdoor living space. To assist you in setting up and enjoying your pergola, we provide a comprehensive Installation Manual that you can effortlessly download for free from our website.
Share
Download


Reviews:
No comments
Related manuals for Pergotenda Flux
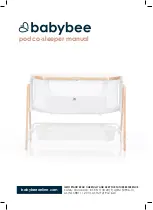
pod
Brand: Babybee Pages: 24

AMIRA
Brand: baby&child Pages: 3

Ocean
Brand: Baby's Dream Pages: 4

Crib
Brand: Baby's Dream Pages: 2

Travel Cot
Brand: OBaby Pages: 4

pod
Brand: Babybee Pages: 24

PF-CH357B-BK
Brand: Patioflare Pages: 6

Infinity Matrix AD11302
Brand: Zobo Pages: 11

1003 348 766
Brand: HAMPTON BAY Pages: 18

0-65857-17221-8
Brand: Baby Relax Pages: 27

-4530-66B
Brand: Graco Pages: 11

Twins PY66 F Series
Brand: Baby Trend Pages: 30

657
Brand: DOM FAMILY Pages: 13

3102
Brand: Perma Pages: 12

694.185.24
Brand: IKEA Pages: 20

PEARSON 49588
Brand: OXFORD BABY Pages: 14

M10611
Brand: Babyletto Pages: 36

JL-936 COCCOLONE
Brand: Joyello Pages: 12


