background image


Table of Contents 


  INTRODUCTION 


Overview…………………………………………………………………………………..1 
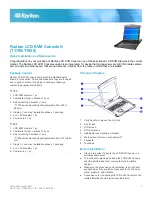


  STREAMLINE CONSOLE 


Overview…………………………………………………………………………………..2 


Features………….………………………………………………………………………..2 


Packing List…………………………………………………………………………….….3 


Assembly…………………………………………………………………………….. 4 ~ 6 


Installation…………………………………………………………………………………7 


Front Panel………………………………………………………………..………………8 


Specifications …………………………………………………………………………….9 


Please read this manual thoroughly and follow the 

Installation

 procedures to prevent 

any damage to the StreamLine or any connected device.


Summary of Contents for Master-IT StreamLine SL-01

Page 1: ... CONSOLE l Overview 2 l Features 2 l Packing List 3 l Assembly 4 6 l Installation 7 l Front Panel 8 l Specifications 9 Please read this manual thoroughly and follow the Installation procedures to prevent any damage to the StreamLine or any connected device ...

Page 2: ... you up to 1 3 of valuable rack cabinet spaces and acts as a space saving console with keyboard mouse and monitor It can be connected to a computer directly or to the console ports of a KVM switch StreamLine Console with One Console StreamLine KVM Switch This powerful combination allows you to access multiple computers from one keyboard mouse and monitor on the StreamLine drawer Operation is as si...

Page 3: ...15 VGA connector for computer or KVM switch connection l Features n Modularized design n Optional Master IT PRO KVM switches available n Flip open 15 TFT LCD panel included with resolution 1024x768 n For rack cabinet with depth from 20 50cm and up with appropriate Rear bracket extension kit n Standard 19 1U rack drawer n Ergonomic hand rest design n Locking mechanism locks the drawer when pulled o...

Page 4: ...en front pole and rear pole inside a rack cabinet not the outside depth of a rack cabinet enclosure RES 1 RES 2 RES 3 RES 4 Front Pole to rear pole distance cm inch cm inch cm inch cm inch Minimum 49 5 19 1 2 57 5 22 5 8 67 5 26 5 8 77 5 30 1 2 Maximum 57 22 3 8 70 5 27 3 4 80 5 31 5 8 90 5 35 5 8 n KVM Switch KVM module box can be connected to a StreamLine Console or be used as a stand alone KVM ...

Page 5: ... the assembled drawer The safety stopper is designed to refrain the drawer from sliding out during transportation WARNING After the safety stopper is removed the drawer may slide out when tilted and cause serious injury 3 Slide the assembled drawer to the rack cabinet from the front and insert the two slide rails of the assembled drawer into the pockets of the rear brackets 4 Fasten the assembled ...

Page 6: ...e of the following ways Short aluminum extensions attachment Long aluminum extensions attachment 7 The rear brackets aluminum extensions and slide rails have tight fit Make sure you follow these steps for easy installation A Slide the rear brackets onto the aluminum extensions B Then insert both sliding rails of the assembled drawer into the tight space formed by the rear brackets and the aluminum...

Page 7: ...9 Slide the assembled drawer out Push the KVM module box evenly toward the drawer and then lock both units by the screws 10 Make sure the C 36 connectors are firmly mated during step 10 11 Connect the power supply to the power jack on the KVM module to complete the installation ...

Page 8: ...f keyboard mouse and monitor and connect it directly to a computer with the 14 4 1 KVM module StreamLine Console connects to a computer Or the StreamLine Console with the 14 4 1 KVM module can be connected to a KVM switch as shown below StreamLine Console connects to a KVM switch ...

Page 9: ...puter is accessed through the StreamLine Console 4 Remote Console in operation It turns green when a computer is accessed by another set of keyboard mouse monitor connected to the Remote console when the KVM switch is either SK 28 or SK 216 n LCD Panel Control 5 LCD Panel Menu These buttons invoke the OSD menu for the LCD panel and acts as menu selection 6 LCD Panel Adjustment Lets you adjust sett...

Page 10: ...Control OSD Control auto saving Input Signal RGB analog H V separate Plug n Play VESA VESA DDC 1 2B Power Management VESA DPMS compliant on mode 23 2W stand by mode 1W suspend mode 1W off mode 1W Viewing Angle left right 80 80 up down 80 80 Keyboard 105 Key PS 2 Mouse Touch Pad PS 2 ø It is suggested to set the VGA resolution for all the computers to 1024 x 768 with Large Fonts in order to achieve...

Page 11: ...ectPRO makes no warranty or representation expressed or implied with respect to the contents or use of this documentation and especially disclaims its quality performance merchantability or fitness for any particular purpose ConnectPRO also reserves the right to revise or update the product or documentation without obligation to notify any user of such revisions or updates All the brand names and ...

Page 12: ...20525 Paseo Del Prado Walnut CA 91789 888 999 1983 www connectpro com info connectpro com PP5 SL 008 Printed in Taiwan ...

Reviews: