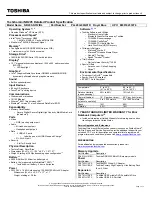
background image

Thank you for purchasing this Factory Service 
Manual CD/DVD from servicemanuals4u.com. 
 
Please check out our eBay auctions for more great 
deals on Factory Service Manuals: 
 

servicemanuals4u

Summary of Contents for Presario 1660

Page 1: ...Thank you for purchasing this Factory Service Manual CD DVD from servicemanuals4u com Please check out our eBay auctions for more great deals on Factory Service Manuals servicemanuals4u ...

Page 2: ...oubleshooting Illustrated Parts Catalog Removal Replacement Procedures Specifications Connector Pin Assignments Battery Pack Operations See the Notice for copyright and trademark information and see the Preface for symbol conventions Technician Notes and Serial Number locations on the unit Download a ZIP file of the complete MSG 1 93 MB onto local hard drive For content comments or questions conta...

Page 3: ...enance and Service Guide This MSG will be periodically updated online as needed 1 800 AT COMPAQ privacy and legal statement file C SERVICE 20MANUALS COMPAQ 20_ 20checked 20ok NOTEBOOKS PRESARIO 201660 index html 2 of 2 6 27 2004 3 00 04 AM ...

Page 4: ...n protected by copyright No part of this guide may be photocopied or reproduced in any form without prior written consent from Compaq Computer Corporation 1999 Compaq Computer Corporation All rights reserved Printed in the U S A Compaq Presario Registered U S Patent and Trademark Office Microsoft MS DOS and Windows are registered trademarks of Microsoft Corporation Windows 95 is a trademark of Mic...

Page 5: ...ntenance and Service Guide First Edition December 1999 Compaq Computer Corporation 1 800 AT COMPAQ privacy and legal statement file C SERVICE 20MANUALS COMPAQ 20_ 20checked 20ok NOTEBOOKS PRESARIO 201660 notice html 2 of 2 6 27 2004 3 00 14 AM ...

Page 6: ... Model Portable Computers Compaq Computer Corporation reserves the right to make changes to the Compaq Presario 1660 Model Portable Computers without notice Symbols The following words and symbols mark special messages throughout this guide WARNING Text set off in this manner indicates that failure to follow directions in the warning could result in bodily harm or loss of life CAUTION Text set off...

Page 7: ... can create a safety hazard Any indications of component replacement or printed circuit board modifications may void any warranty Serial Number When requesting information or ordering spare parts the computer serial number should be provided to Compaq The serial number is located on the bottom of the computer Locating Additional Information The following documentation is available to support this ...

Page 8: ... Product Description Models and Features Upper Unit Components Front Bezel Buttons Front Bezel Lights Left Side Components Right Side Components Bottom of Unit Rear Connectors Power Management for Windows 98 Compaq Presario 1600 Portable Computer is a continuation of the new generation of multimedia portable computers with an innovative integrated design outstanding audio and video advanced core f...

Page 9: ...60 Model Maintenance and Service Guide allows full desktop functionality 1 800 AT COMPAQ privacy and legal statement file C SERVICE 20MANUALS COMPAQ 20_ 20che d 20ok NOTEBOOKS PRESARIO 201660 product html 2 of 2 6 27 2004 3 00 15 AM ...

Page 10: ...ing information for the Compaq Presario 1660 Model Portable Computer The basic steps in troubleshooting include 1 Follow the Preliminary Steps 2 Run the Power On Self Test POST 3 Follow the recommended actions described in the diagnostic tables if you are unable to run POST or if POST displays an error message When following the recommended actions in the Sections on POST and Diagnostic Error Code...

Page 11: ...mpaq Presario 1660 Model Maintenance and Service Guide 1 800 AT COMPAQ privacy and legal statement file C SERVICE 20MANUALS COMPAQ 20_ 20checked 20ok NOTEBOOKS PRESARIO 201660 trouble html 2 of 2 6 27 2004 3 00 16 AM ...

Page 12: ...ications Pin Assignments Battery Pack Operations Illustrated Parts Catalog System Unit Boards Display Assembly Mass Storage Devices Miscellaneous Cable Kit External Cables Miscellaneous Hardware and Plastics Kits Miscellaneous Parts Documentation and Software This section provides a breakdown and identifies the spare parts ordering number associated with items for the Compaq Presario 1660 Model Po...

Page 13: ...mpaq Presario 1660 Model Maintenance and Service Guide 1 800 AT COMPAQ privacy and legal statement file C SERVICE 20MANUALS COMPAQ 20_ 20checked 20ok NOTEBOOKS PRESARIO 201660 illust html 2 of 2 6 27 2004 3 00 16 AM ...

Page 14: ...ck Operations Removal and Replacement Procedures This section explains the removal and replacement procedures for the computer Serial Number Location Disassembly Sequence Electrostatic Discharge Service Considerations Cables and Connectors Preparing the Computer for Disassembly Battery Pack Palmrest Assembly Keyboard and Heatspreader Processor Hard Drive Report the computer serial number to Compaq...

Page 15: ... Drive Battery Charger Board Modem Display Panel Assembly Speaker Assembly Diskette Drive Fan Assembly System Board Memory Module 1 800 AT COMPAQ privacy and legal statement file C SERVICE 20MANUALS COMPAQ 20_ 20checked 20ok NOTEBOOKS PRESARIO 201660 rmvrep html 2 of 2 6 27 2004 3 00 17 AM ...

Page 16: ...s Specifications This section covers the following specifications of Compaq Presario 1660 Model Portable Computers Physical and environmental System Interrupts System DMA System I O Address System Memory Catalog Display Diskette drive Hard drive CD drive DVD drive Battery pack Physical and Environmental Computer Specifications U S Metric Dimensions Height Depth Width 1 97 in 12 32 in 10 12 in 4 95...

Page 17: ...on operating 10 G 11 ms half sine 240 G 2 ms half sine Vibration Operating Nonoperating 0 5 G 1 5 G NOTE Applicable product safety standards specify thermal limits for plastic surfaces Compaq Presario 1660 Model Portable Computers operate well within this range of temperatures System Interrupts System Interrupts Hardware IRQ System Function IRQ0 System Timer IRQ1 Standard 101 102 Key or Microsoft ...

Page 18: ...IRQ12 Synaptics PS 2 TouchPad IRQ13 Numeric data processor IRQ14 Primary IDE controller dual fifo IRQ14 Intel 82371AB EB PCI Bus Master IDE Controller IRQ15 Secondary IDE controller dual fifo IRQ15 Intel 82371AB EB PCI Bus Master IDE Controller System DMA System DMA Hardware DMA System Function 1 NewMagic MagicWave 3DX Sound System 2 NewMagic MagicWave 3DX Sound System 3 free 4 Standard Floppy Dis...

Page 19: ...omputers For more information on connectors refer to the section on Rear Connectors NOTE The signals in all tables of this appendix are considered active high unless otherwise indicated by an asterisk Parallel Connector Pin Signal Pin Signal 1 Strobe 10 Acknowledge 2 Data Bit 0 11 Busy 3 Data Bit 1 12 Paper Out 4 Data Bit 2 13 Select 5 Data Bit 3 14 Auto Linefeed 6 Data Bit 4 15 Error 7 Data Bit 5...

Page 20: ... 6 Data 1 Clock 2 Ground 5 V Clock 1 Data 2 External VGA Monitor Connector Pin Signal 1 2 3 4 5 6 7 8 9 10 11 12 13 14 15 Red Analog Green Analog Blue Analog Not connected Ground Ground Analog Ground Analog Ground Analog Not connected Ground Monitor Detect DDC2B Data Horizontal Sync Vertical Sync DDC2B Clock Universal Serial Bus Connector Pin Signal file C SERVICE 20MANUALS COMPAQ 20_ 20checked 20...

Page 21: ...4 Switch B 64 TXD 5 Kb Data 1 25 Printer Data 4 45 Switch C 65 RTS 6 Joystick Data B 26 Printer Data 5 46 Switch D 66 N C 7 Kb Clk 2 27 Printer Data 6 47 N C 67 Detect 8 Joystick Data C 28 Printer Data 7 48 MIDI In 68 N C 9 Kb Data 2 29 USB 0 49 MIDI Out 69 V Sync 10 Joystick Data D 30 USB 0 50 5V 70 Ground 11 Lp Select In 31 USB 1 51 5V 71 H Sync 12 Lp Paper End 32 USB 1 52 N C 72 Ground 13 Lp In...

Page 22: ...Adapter In 57 RXD 77 Red 18 Lp Strobe 38 Adapter In 58 Lp Select 78 Ground 19 DDC2BC 39 N C 59 RI 79 N C 20 DDC2BD 40 N C 60 DTR 80 N C Compaq Home Search Products Service Worldwide Compaq com Comments Legal Notices and Privacy Statement Revised 15 January 1999 file C SERVICE 20MANUALS COMPAQ 20_ 20checked 20ok NOTEBOOKS PRESARIO 201660 conPA html 4 of 4 6 27 2004 3 00 21 AM ...

Page 23: ...rmation concerning battery pack operating time Increase battery pack operating time Conditioning a battery pack Disposal of a used battery pack Increasing Battery Pack Operating Time Battery pack operating time differs depending on several variables To avoid unnecessary replacement consider the following variables when determining how long a charged battery pack should last Power management settin...

Page 24: ...value to work more efficiently with the applications The amount of battery life depends on the values selected Maximizing the Energy Stored To maximize the energy stored in the battery pack follow these guidelines Condition the battery pack at least every 30 days to improve overall battery performance Keep a battery pack in the computer when using it with AC power to supply the battery pack with a...

Page 25: ...e conditioned and you may begin using the computer normally The battery pack charge time may vary greatly from 2 hours to 5 hours or more depending on many factors including whether it is charged on line or off line Disposal of a Used Battery Pack In the interest of safeguarding our environment Compaq Computer Corporation recommends that nickel metal hydride NiMH and lithium ion Li ion battery pac...

Page 26: ...attery Pack Operations Models and Features Models and Features Upper Unit Components Front Bezel Buttons Front Bezel Lights Left Side Components Right Side Components Bottom of Unit Rear Connectors Power Management for Windows 98 Compaq Presario 1660 Model Portable Computer Display 13 3 TFT Processor 300 MHz Pentium II Hard Drive 4 GB Memory 64 MB or 128 MB SDRAM CD Drive DVD Modem 56 Kbps Data Fa...

Page 27: ...mpaq Presario 1660 Model Maintenance and Service Guide 1 800 AT COMPAQ privacy and legal statement file C SERVICE 20MANUALS COMPAQ 20_ 20checked 20ok NOTEBOOKS PRESARIO 201660 models html 2 of 2 6 27 2004 3 00 25 AM ...

Page 28: ...tery Pack Operations Controls and Lights Models and Features Upper Unit Components Front Bezel Buttons Front Bezel Lights Left Side Components Right Side Components Bottom of Unit Rear Connectors Power Management for Windows 98 1 Display 2 Power On Off Button 3 Keyboard 4 Touch Pad 5 Left Touch Pad Button 6 Headphone Jack 7 Microphone Jack 8 Right Touch Pad Button 9 Speakers and Ports Compaq Home ...

Page 29: ... 1660 Model Maintenance and Service Guide Comments Legal Notices and Privacy Statement Revised 15 January 1999 file C SERVICE 20MANUALS COMPAQ 20_ 20checked 20ok NOTEBOOKS PRESARIO 201660 contrls html 2 of 2 6 27 2004 3 00 25 AM ...

Page 30: ...ations Front Bezel Buttons Models and Features Upper Unit Components Front Bezel Buttons Front Bezel Lights Left Side Components Right Side Components Bottom of Unit Rear Connectors Power Management for Windows 98 1 Instant Internet Access Button 2 Instant Search Button 3 Volume Down 4 Scroll Up down Button 5 Volume Up 6 Secure E Commerce Button or Favorite Website 7 Instant E Mail Button Compaq H...

Page 31: ... 1660 Model Maintenance and Service Guide Comments Legal Notices and Privacy Statement Revised 15 January 1999 file C SERVICE 20MANUALS COMPAQ 20_ 20checked 20ok NOTEBOOKS PRESARIO 201660 bezbutt html 2 of 2 6 27 2004 3 00 26 AM ...

Page 32: ...signments Battery Pack Operations Front Bezel Lights Models and Features Upper Unit Components Front Bezel Buttons Front Bezel Lights Left Side Components Right Side Components Bottom of Unit Rear Connectors Power Management for Windows 98 1 Power 2 Battery Charge 3 AC Adapter 4 Num Lock 5 Cap Lock 6 Scroll Lock Compaq Home Search Products Service Worldwide Compaq com Comments Legal Notices and Pr...

Page 33: ...ent Procedures Specifications Pin Assignments Battery Pack Operations Left Side Components Models and Features Upper Unit Components Front Bezel Buttons Front Bezel Lights Left Side Components Right Side Components Bottom of Unit Rear Connectors Power Management for Windows 98 1 PC Card Eject Lever 3 Diskette Drive Slot 2 PC Card Slot 4 Diskette Eject Button 1 800 AT COMPAQ privacy and legal state...

Page 34: ...ent Procedures Specifications Pin Assignments Battery Pack Operations Right Side Components Models and Features Upper Unit Components Front Bezel Buttons Front Bezel Lights Left Side Components Right Side Components Bottom of Unit Rear Connectors Power Management for Windows 98 1 Battery Compartment 2 DVD Drive 3 DVD Drive Eject Button 4 Manual DVD Eject Hole 1 800 AT COMPAQ privacy and legal stat...

Page 35: ... Parts Catalog Removal Replacement Procedures Specifications Pin Assignments Battery Pack Operations Bottom of Unit Models and Features Upper Unit Components Front Bezel Buttons Front Bezel Lights Left Side Components Right Side Components Bottom of Unit Rear Connectors Power Management for Windows 98 1 Memory Compartment 2 Feet 1 800 AT COMPAQ privacy and legal statement file C SERVICE 20MANUALS ...

Page 36: ...Assignments Battery Pack Operations Rear Connectors Models and Features Upper Unit Components Front Bezel Buttons Front Bezel Lights Left Side Components Right Side Components Bottom of Unit Rear Connectors Power Management for Windows 98 1 AC Adapter 2 USB 3 Security Slot 4 Serial Port 5 Port Replicator Port 6 External Monitor Port 7 Parallel Printer Port 8 Keyboard Mouse Port 9 Modem Jack 1 800 ...

Page 37: ...es include keyboard or mouse movement CD or DVD playback while under program control that monitors Sleep and modem use Each of the following system components can be made to go to sleep after periods of inactivity system goes into Sleep Standby mode screen times out and goes blank hard drive spins down You can select different conditions or power schemes through Power Management The optional setti...

Page 38: ... While in Sleep mode your computer will maintain system information and open files Unsaved information will be lost if you turn off your system prior to system wake up or if you lose power while using the AC adapter CAUTION While in Sleep mode your computer will maintain system information and open files Unsaved information will be lost if you turn off your system prior to system wake up or if you...

Page 39: ...omputer Full Off Mode If you need to install or replace components in your system you must turn the computer off completely Follow the instructions above for properly putting the computer into Off mode unplug from the outlet and remove the battery see battery section for instruction on removing battery Rebooting After a Lockup Occasionally you may encounter a frozen keyboard or a locked screen To ...

Page 40: ...nd number of installed PC Cards For more information on increasing battery pack operating time conditioning the battery pack and disposing of a used battery pack refer to the Battery Pack Operations 1 800 AT COMPAQ privacy and legal statement file C SERVICE 20MANUALS COMPAQ 20_ 20che ed 20ok NOTEBOOKS PRESARIO 201660 pwrmgt html 4 of 4 6 27 2004 3 00 30 AM ...

Page 41: ...kup 3 Turn off the computer and its external devices 4 Disconnect any external devices that you do not want to test Do not disconnect the printer if you want to test it or use it to log error messages IMPORTANT If the problem only occurs when an external device is connected to the computer the problem may be related to the external device or its cable Verify this by running POST with and without t...

Page 42: ...nce and Service Guide When the preliminary steps are completed you are ready to run POST 1 800 AT COMPAQ privacy and legal statement file C SERVICE 20MANUALS COMPAQ 20_ 20che d 20ok NOTEBOOKS PRESARIO 201660 trbprlm html 2 of 2 6 27 2004 3 00 31 AM ...

Page 43: ...nments Battery Pack Operations Clearing the Power on Password Clearing the power on password requires removing all Setup attributes that are programmed in the CMOS If the password is not known clear it by removing the RTC battery located on the system board as follows 1 Turn off the computer 2 Disconnect the power cord 3 Remove the battery pack 4 Remove the palmrest assembly 5 Remove the keyboard ...

Page 44: ...e it 8 Reassemble the computer 9 Turn on the computer to verify that the power on password has been cleared If it has not been cleared repeat all steps above 1 800 AT COMPAQ privacy and legal statement file C SERVICE 20MANUALS COMPAQ 20_ 20che d 20ok NOTEBOOKS PRESARIO 201660 ponpass html 2 of 2 6 27 2004 3 00 32 AM ...

Page 45: ...run successfully and boots from the hard drive or from a bootable diskette if one is installed in the diskette drive If POST detects errors the errors are indicated by screen and or audible messages Refer to the following tables for a list of POST codes and their relevant descriptions If there is more than one recommended action only try the later actions in the list if the first action recommende...

Page 46: ...tem board 162 System Options Not Set Probable Cause Recommended Action Configuration incorrect Run Computer Setup CMOS reflects that an invalid configuration has been set Run Computer Setup XX000YZZ 201 Memory Error Probable cause Recommended action RAM failure 1 Replace the memory modules 2 Replace the system board Memory test data error 1 Replace the memory modules 2 Replace the system board XX0...

Page 47: ...mmended Action Keyboard or system board error 1 Replace the keyboard 2 Replace the TouchPad or mouse 3 Replace the system board 601 Diskette Controller Error Probable Cause Recommended Action Mismatch in drive type or failure in the diskette controller 1 Run Computer Checkup TEST 2 Check and or replace cables 3 Replace the system board 605 Diskette Drive Error Probable Cause Recommended Action fil...

Page 48: ...uter Checkup TEST 2 Replace the hard drive Hard drive format error 1 Run Computer Checkup TEST 2 Replace the hard drive 1782 Hard Drive Controller Probable Cause Recommended Action Hard drive controller failure 1 Run Computer Setup 2 Replace the hard drive 1 800 AT COMPAQ privacy and legal statement file C SERVICE 20MANUALS COMPAQ 20_ 20checked 20ok NOTEBOOKS PRESARIO 201660 post html 4 of 4 6 27 ...

Page 49: ...f you have a problem you cannot solve run the Diagnostics utilities before you call for support Run Computer Checkup and select to save the device list to a file and to print or to save the log of errors Run the View System Information INSPECT utility and select to print or to save that information Have the files or the printed information available when you call for support Computer Setup The Com...

Page 50: ...sert the Compaq Diagnostics diskette in drive A 4 Turn on or restart the computer The computer starts from drive A and the Diagnostics Welcome screen appears 5 Press Enter to continue The Diagnostics menu appears 6 Select Computer Checkup from the Diagnostics menu A Test Option menu appears 7 Select View the Device List from the Test Option menu A list of the installed Compaq devices appears 8 If ...

Page 51: ...ces You can display print or save the information Follow these steps to run View System Information INSPECT from the Compaq Diagnostics diskette 1 Turn on the external devices that you want to test Connect the printer if you want to print the information 2 Insert the Compaq Diagnostics diskette in drive A 3 Turn on or restart the computer The computer starts from drive A and the Diagnostics Welcom...

Page 52: ...mpaq Presario 1660 Model Maintenance and Service Guide 1 800 AT COMPAQ privacy and legal statement file C SERVICE 20MANUALS COMPAQ 20_ 20che d 20ok NOTEBOOKS PRESARIO 201660 cpqdiag html 4 of 4 6 27 2004 3 00 33 AM ...

Page 53: ...lp identify possibly defective subassemblies The following tables list error codes a description of the error condition and the action required to resolve the error condition IMPORTANT Retest the system after completing each step If the problem has been resolved do not proceed with the remaining steps For the removal and replacement of a particular subassembly see Removal and Replacement Procedure...

Page 54: ... xx DMA page registers test failed Replace the system board and retest 104 xx Interrupt controller master test failed 105 xx Port 61 error 106 xx Keyboard controller self test failed 107 xx CMOS RAM test failed 108 xx CMOS interrupt test failed 109 xx CMOS clock test failed 110 xx Programmable timer load data test failed 113 xx Protected mode test failed 114 01 Speaker test failed 1 Check system c...

Page 55: ...nter 2 Check power to the printer 3 Install the loop back connector and retest 4 Check port and IRQ configuration 5 Replace the system board and retest 402 xx Failed Port Test 403 xx Printer pattern test failed Diskette Drive Test 600 xx Diskette ID drive types test failed 1 Replace the diskette media and retest 2 Check and or replace the diskette power and signal cables and retest 3 Replace the d...

Page 56: ...9 xx Diskette drive media ID error 1 Replace media 2 Run the Configuration and Diagnostics Utilities Back to top 1 800 AT COMPAQ privacy and legal statement file C SERVICE 20MANUALS COMPAQ 20_ 20checked 20ok NOTEBOOKS PRESARIO 201660 error html 4 of 4 6 27 2004 3 00 35 AM ...

Page 57: ...ages contain troubleshooting information on these topics Audio Power Hard drive Memory Diskette Diskette drive Keyboard Numeric keypad Battery Battery gauge Printer Hardware Installation PC Card Display CD or DVD drive Touch Pad Since symptoms can appear to be similar carefully match the symptoms of the computer malfunction against the problem description in the Troubleshooting tables to avoid a m...

Page 58: ...changes have been made to the CONFIG SYS file Verify that all required changes have been made to the AUTOEXEC BAT file Verify that all printer drivers have been installed for each application 1 800 AT COMPAQ privacy and legal statement file C SERVICE 20MANUALS COMPAQ 20_ 20checked 20ok NOTEBOOKS PRESARIO 201660 tswo html 2 of 2 6 27 2004 3 00 35 AM ...

Page 59: ...ation Keyboard Memory PC card Power Printer Touchpad pointing device Audio Problems Problem Probable Cause Solution s Computer does not beep after the Power On Self Test POST This is typical it indicates successful completion of the Power On Self Test POST No action is required Battery Pack and Battery Gauge Problems see also Power Problems Problem Probable Cause Solution s Computer won t turn on ...

Page 60: ...rm to the touch after charging Normal warming has occurred due to charging No action is required Battery pack operating time is far less than the documented average operating time Power management is turned off or disabled Enable power management in Computer Setup and in Windows Power Properties An external device or PC Card is draining the battery Turn off or disconnect external devices when not ...

Page 61: ...h space is left on the diskette Use another diskette Drive error has occurred Run Computer Checkup from the Compaq Diagnostics diskette Diskette is not formatted Format the diskette At the system prompt enter FORMAT A Diskette drive cannot read a diskette The wrong type of diskette is being used Use the type of diskette required by the drive Diskette has a bad sector Copy files to hard drive or an...

Page 62: ...date Conditions under which the problem occurred Any error messages that have occurred Hardware configuration Type of printer connected Hardware software being used Printed result of Computer Checkup TEST Printed copies of CONFIG SYS and AUTOEXEC BAT files if possible Shipping Preparation To ship the computer complete the following steps 1 Back up the critical hard drive files Ensure that backup t...

Page 63: ...C Cards in the PC slots 4 Close the display and all exterior doors of the computer 5 Pack the computer with sufficient packing material to protect it Use the original packing box or similar packaging 1 800 AT COMPAQ privacy and legal statement file C SERVICE 20MANUALS COMPAQ 20_ 20che d 20ok NOTEBOOKS PRESARIO 201660 cpqdgs2 html 2 of 2 6 27 2004 3 00 37 AM ...

Page 64: ...ent Procedures Specifications Pin Assignments Battery Pack Operations Illustrated Parts Catalog System Unit Boards Display Assembly Mass Storage Devices Miscellaneous Cable Kit External Cables Miscellaneous Hardware and Plastics Kits Miscellaneous Parts Documentation and Software To obtain the description and spare part number of an item position the mouse cursor over the item for a few seconds fi...

Page 65: ...mpaq Presario 1660 Model Maintenance and Service Guide 1 800 AT COMPAQ privacy and legal statement file C SERVICE 20MANUALS COMPAQ 20_ 20checked 20ok NOTEBOOKS PRESARIO 201660 system html 2 of 2 6 27 2004 3 00 38 AM ...

Page 66: ...ications Pin Assignments Battery Pack Operations Illustrated Parts Catalog System Unit Boards Display Assembly Mass Storage Devices Miscellaneous Cable Kit External Cables Miscellaneous Hardware and Plastics Kit Miscellaneous Parts Documentation and Software To obtain the description and spare part number of an item position the mouse cursor over the item for a few seconds Not shown 128 MB SODIMM ...

Page 67: ...mpaq Presario 1660 Model Maintenance and Service Guide 1 800 AT COMPAQ privacy and legal statement file C SERVICE 20MANUALS COMPAQ 20_ 20checked 20ok NOTEBOOKS PRESARIO 201660 boards html 2 of 2 6 27 2004 3 00 39 AM ...

Page 68: ...ent Procedures Specifications Pin Assignments Battery Pack Operations Illustrated Parts Catalog System Unit Boards Display Assembly Mass Storage Devices Miscellaneous Cable Kit Exteranl Cables Miscellaneous Hardware and Plastics Kit Miscellaneous Parts Documentation and Software To obtain the description and spare part number of an item position the mouse cursor over the item for a few seconds fil...

Page 69: ...mpaq Presario 1660 Model Maintenance and Service Guide 1 800 AT COMPAQ privacy and legal statement file C SERVICE 20MANUALS COMPAQ 20_ 20checked 20ok NOTEBOOKS PRESARIO 201660 display html 2 of 2 6 27 2004 3 00 39 AM ...

Page 70: ...Procedures Specifications Pin Assignments Battery Pack Operations Illustrated Parts Catalog System Unit Boards Display Assembly Mass Storage Devices Miscellaneous Cable Kit External Cables Miscellaneous Hardware and Plastics Kit Miscellaneous Parts Documentation and Software To obtain the description and spare part number of an item position the mouse cursor over the item for a few seconds 1 800 A...

Page 71: ...acement Procedures Specifications Pin Assignments Battery Pack Operations Illustrated Parts Catalog System Unit Boards Display Assembly Mass Storage Devices Miscellaneous Cable Kit External Cables Miscellaneous Hardware and Plastics Kit Miscellaneous Parts Documentation and Software Cable Kit Spare Part Number 330946 001 Contains each of the cables shown 1 800 AT COMPAQ privacy and legal statement...

Page 72: ...res Specifications Pin Assignments Battery Pack Operations Illustrated Parts Catalog System Unit Boards Display Assembly Mass Storage Devices Miscellaneous Cable Kit External Cables Miscellaneous Hardware and Plastics Kit Miscellaneous Parts Documentation and Software Description Spare Part Number AC Power Cord Australia China PRC 293831 011 293831 AA1 Modem cable Australia China PRC 304398 011 30...

Page 73: ...mpaq Presario 1660 Model Maintenance and Service Guide 1 800 AT COMPAQ privacy and legal statement file C SERVICE 20MANUALS COMPAQ 20_ 20checked 20ok NOTEBOOKS PRESARIO 201660 xtrcbl html 2 of 2 6 27 2004 3 00 41 AM ...

Page 74: ...Boards Display Assembly Mass Storage Devices Miscellaneous Cable Kit External Cables Miscellaneous Hardware and Plastics Kits Miscellaneous Parts Documentation and Software To obtain the description of an item shown position the mouse cursor over the item for a few seconds Miscellaneous Plastics Kit Spare Part Number 330949 001 Contents Miscellaneous Screw Kit Spare Part Number 330959 001 Miscella...

Page 75: ...tenance and Service Guide not shown 4 Rubber Plugs Left and Right Latches 8 Rubber Feet 1 800 AT COMPAQ privacy and legal statement file C SERVICE 20MANUALS COMPAQ 20_ 20ch d 20ok NOTEBOOKS PRESARIO 201660 miscHW html 2 of 2 6 27 2004 3 00 42 AM ...

Page 76: ...ery Pack Operations Illustrated Parts Catalog System Unit Boards Display Assembly Mass Storage Devices Miscellaneous Cable Kit External Cables Miscellaneous Hardware and Plastics Kit Miscellaneous Parts Documentation and Software To obtain the description and spare part number of an item position the mouse cursor over the item for a few seconds Other parts not shown Logo Kit Return Kit 352887 001 ...

Page 77: ...cs Kit Miscellaneous Parts Documentation and Software Description Spare Part Number Quick Restore CD Australia China PRC 388205 371 388205 AA1 Quick Reference Guide single issue Quick Reference Guide quarterly subscription 162212 001 184960 001 QuickFind for Windows Asia Pacific Edition 137906 xxx QuickFind is updated monthly To complete the QuickFind part number add the suffix from the table belo...

Page 78: ...rvice Guide 003 March 009 September 004 April 010 October 005 May 011 November 006 June 012 December 1 800 AT COMPAQ privacy and legal statement file C SERVICE 20MANUALS COMPAQ 20_ 20ch d 20ok NOTEBOOKS PRESARIO 201660 docume html 2 of 2 6 27 2004 3 00 44 AM ...

Page 79: ...e affected at all and will work perfectly throughout a normal cycle Although it may function normally for a while then degrade in the internal layers reducing its life expectancy Networks built into many integrated circuits provide some protection but in many cases the discharge contains enough power to alter device parameters or melt silicon junctions Generating Static The table shows how differe...

Page 80: ...000 V 3 500 V Removing bubble pack from PCBs 26 000 V 20 000 V 7 000 V Packing PCBs in foam lined box 21 000 V 11 000 V 5 000 V NOTE 700 volts can degrade a product Return to Removal Replacement Procedures 1 800 AT COMPAQ privacy and legal statement file C SERVICE 20MANUALS COMPAQ 20_ 20checked 20ok NOTEBOOKS PRESARIO 201660 electro html 2 of 2 6 27 2004 3 00 44 AM ...

Page 81: ...ed the following Compaq screwdriver kit Spare Part No 161946 001 Torx T 9 screwdriver 3 16 inch and 5mm nut drivers for screwlocks and standoffs Small standard screwdriver Small Phillips screwdriver Diagnostics software Screws The screws used in the computer are not interchangeable If an incorrect screw is used during the reassembly process it can damage the unit Compaq strongly recommends that al...

Page 82: ...mpaq Presario 1660 Model Maintenance and Service Guide 1 800 AT COMPAQ privacy and legal statement file C SERVICE 20MANUALS COMPAQ 20_ 20checked 20ok NOTEBOOKS PRESARIO 201660 service html 2 of 2 6 27 2004 3 00 45 AM ...

Page 83: ...d ensure that the cables are routed in such a way that they cannot be caught or snagged by parts being removed or replaced Cables Use the following precautions when handling cables to avoid damage to the cable or computer Always handle cables by their connectors Avoid bending twisting or pulling on the cables Apply minimum required force when seating or unseating the cables from their connectors P...

Page 84: ...cessive force during disassembly and reassembly When handling the plastic parts use care Apply pressure only at the points designated in the maintenance instructions Back to Top of Page Return to Removal Replacement Procedures Compaq Home Search Products Service Worldwide Compaq com Comments Legal Notices and Privacy Statement Revised 15 January 1999 1 800 AT COMPAQ privacy and legal statement fil...

Page 85: ...ny components the following procedures must be completed 1 Disconnect AC power and any external devices 2 Remove the battery pack 3 Remove any PC Cards WARNING Metal objects can damage the battery pack as well as the battery contacts in the battery compartment To prevent damage do not allow metal objects to touch the battery contacts Place only the battery pack for the Compaq Presario 1660 Model P...

Page 86: ...rs have several screws of various sizes which are not interchangeable Care must be taken during reassembly to ensure that the correct screws are used in their correct location During removal please keep respective screws with their associated sub assembly 1 800 AT COMPAQ privacy and legal statement file C SERVICE 20MANUALS COMPAQ 20_ 20checked 20ok NOTEBOOKS PRESARIO 201660 prpdiss html 2 of 2 6 2...

Page 87: ...ack Operations Removing the Battery Pack Electrostatic Discharge Service Considerations Cables and Connectors Preparing the Computer for Disassembly Battery Pack Palmrest Assembly Keyboard and Heatspreader Processor Hard Drives Upper CPU Cover DVD Drive Battery Charger Board Modem Display Panel Assembly To remove the battery pack complete the following steps 1 Slide the battery pack compartment do...

Page 88: ...e and Service Guide Speaker Assembly Diskette Drive Fan Assembly System Board Memory Module 1 800 AT COMPAQ privacy and legal statement file C SERVICE 20MANUALS COMPAQ 20_ 20che d 20ok NOTEBOOKS PRESARIO 201660 rmvbatt html 2 of 2 6 27 2004 3 00 47 AM ...

Page 89: ... Electrostatic Discharge Service Considerations Cables and Connectors Preparing the Computer for Disassembly Battery Pack Palmrest Assembly Keyboard and Heatspreader Processor Hard Drives Upper CPU Cover DVD Drive Battery Charger Board Modem The Palmrest Assembly must be removed to gain access to any of the interior components of the computer and it is the first component that has to be removed to...

Page 90: ...bly System Board Memory Module 1 Prepare the computer for disassembly 2 Close the computer and turn it upside down 3 Remove seven screws from the bottom of the computer Next Step 1 800 AT COMPAQ privacy and legal statement file C SERVICE 20MANUALS COMPAQ 20_ 20ch 20ok NOTEBOOKS PRESARIO 201660 rmvpalm html 2 of 2 6 27 2004 3 00 48 AM ...

Page 91: ...eyboard and Heatspreader Electrostatic Discharge Service Considerations Cables and Connectors Preparing the Computer for Disassembly Battery Pack Palmrest Assembly Keyboard and heatspreader Processor Hard Drives Upper CPU Cover DVD Drive Battery Charger Board Modem The keyboard and heatspreader are best removed together 1 Prepare the computer for disassembly 2 Remove the palmrest assembly 3 Lift u...

Page 92: ...uide Display Panel Assembly Speaker Assembly Diskette Drive Fan Assembly System Board Memory Module Next Step 1 800 AT COMPAQ privacy and legal statement file C SERVICE 20MANUALS COMPAQ 20_ 20ch 20ok NOTEBOOKS PRESARIO 201660 rmvkybd html 2 of 2 6 27 2004 3 00 49 AM ...

Page 93: ...Operations Removing the Processor Electrostatic Discharge Service Consideration Cables and Connectors Preparing the Computer for Disassembly Battery Pack Palmrest Assembly To remove the processor complete the following steps 1 Prepare the computer for disassembly 2 Remove the palmrest assembly 3 Remove the keyboard and heatspreader 4 Rock the processor back and forth just a little until it comes o...

Page 94: ...est the speakers with the corresponding screw sockets on the system board then push the processor in carefully but firmly CAUTION If the processor is not correctly aligned with the socket the connectors on either the processor or the system board will be bent out of alignment The processor or board will then be destroyed and will need to be replaced 1 800 AT COMPAQ privacy and legal statement file...

Page 95: ...ng the Hard Drive Electrostatic Discharge Service Consideration Cables and Connectors Preparing the Computer for Disassembly Battery Pack Palmrest Assembly Keyboard and Heatspreader Processor Hard Drives Upper CPU Cover DVD Drive To remove the hard drive complete the following steps 1 Prepare the computer for disassembly 2 Remove the Palmrest Assembly 3 Remove the keyboard and heatspreader 4 Remov...

Page 96: ...arger Board Modem Display Panel Assembly Speaker Assembly Diskette Drive Fan Assembly System Board Memory Module Next Step 1 800 AT COMPAQ privacy and legal statement file C SERVICE 20MANUALS COMPAQ 20_ 20ch ed 20ok NOTEBOOKS PRESARIO 201660 rmvHD html 2 of 2 6 27 2004 3 00 51 AM ...

Page 97: ...rations Removing the Upper CPU Cover Electrostatic Discharge Service Considerations Cables and Connectors Preparing the Computer for Disassembly Battery Pack Palmrest Assembly Keyboard and Heatspreader Processor Hard Drives Upper CPU Cover To remove the Upper CPU cover complete the following steps 1 Prepare the computer for disassembly 2 Remove the palmrest assembly 3 Remove the keyboard and heats...

Page 98: ...Fan Assembly System Board Memory Module assembly 6 Remove four screws holding the cover to the chassis 7 Lift the Upper CPU Cover off the chassis To replace the Upper CPU Cover reverse the previous steps 1 800 AT COMPAQ privacy and legal statement file C SERVICE 20MANUALS COMPAQ 20_ 20checked 20ok NOTEBOOKS PRESARIO 201660 rmvcvr html 2 of 2 6 27 2004 3 00 51 AM ...

Page 99: ...tions Removing the DVD Drive Electrostatic Discharge Service Consideration Cables and Connectors Preparing the Computer for Disassembly Battery Pack Palmrest Assembly Keyboard and Heatspreader Processor Hard Drives Upper CPU Cover DVD Drive To remove the DVD drive complete the following steps 1 Prepare the computer for disassembly If a CD or DVD disc is jammed in the drive remove it manually 2 Rem...

Page 100: ... Diskette Drive Fan Assembly System Board Memory Module 4 Remove the upper CPU cover 5 Remove the screw at the back end of the DVD drive near the edge of the system board Next Step 1 800 AT COMPAQ privacy and legal statement file C SERVICE 20MANUALS COMPAQ 20_ 20ch ed 20ok NOTEBOOKS PRESARIO 201660 rmvCD html 2 of 2 6 27 2004 3 00 52 AM ...

Page 101: ...ctrostatic Discharge Service Considerations Cables and Connectors Preparing the Computer for Disassembly Battery Pack Palmrest Assembly Keyboard and Heatspreader Processor Hard Drives To remove the battery charger board complete the following steps 1 Prepare the computer for disassembly 2 Remove the Palmrest Assembly 3 Remove the keyboard and heatspreader 4 Remove the hard drive 5 Remove the screw...

Page 102: ...stem board and lift it out of the chassis To replace the battery charger board reverse the previous steps NOTE When replacing the battery charger board ensure the pins are aligned with the sockets on the system board connector before pressing the board in place 1 800 AT COMPAQ privacy and legal statement file C SERVICE 20MANUALS COMPAQ 20_ 20che d 20ok NOTEBOOKS PRESARIO 201660 rmvbchb html 2 of 2...

Page 103: ...e Modem Electrostatic Discharge Service Considerations Cables and Connectors Preparing the Computer for Disassembly Battery Pack Palmrest Assembly Keyboard and Heatspreader Processor Hard Drives Upper CPU Cover DVD Drive Battery Charger Board Modem To remove the modem complete the following steps 1 Prepare the computer for disassembly 2 Remove the Palmrest Assembly 3 Remove the keyboard and heatsp...

Page 104: ...r Assembly Diskette Drive Fan Assembly System Board Memory Module modem off the connector on the left hand side of the system board Next Step 1 800 AT COMPAQ privacy and legal statement file C SERVICE 20MANUALS COMPAQ 20_ 20ch d 20ok NOTEBOOKS PRESARIO 201660 rmvmdm html 2 of 2 6 27 2004 3 00 54 AM ...

Page 105: ...ssembly Electrostatic Discharge Service Considerations Cables and Connectors Preparing the Computer for Disassembly Battery Pack Palmrest Assembly Keyboard and Heatspreader Processor Hard Drives Upper CPU Cover DVD Drive Battery Charger Board Modem Display Panel Assembly To remove the display panel assembly complete the following steps 1 Prepare the computer for disassembly 2 Remove the Palmrest A...

Page 106: ...r Assembly Diskette Drive Fan Assembly System Board Memory Module carefully pry the covers off the chassis Next Step 1 800 AT COMPAQ privacy and legal statement file C SERVICE 20MANUALS COMPAQ 20_ 20che d 20ok NOTEBOOKS PRESARIO 201660 rmvdisp html 2 of 2 6 27 2004 3 00 55 AM ...

Page 107: ... Pack Operations Removing the Speaker Assembly Electrostatic Discharge Service Considerations Cables and Connectors Preparing the Computer for Disassembly Battery Pack Palmrest Assembly Keyboard and Heatspreader Processor Hard Drives Upper CPU Cover To remove the speaker assembly complete the following steps 1 Prepare the computer for disassembly 2 Remove the palmrest assembly 3 Remove the keyboar...

Page 108: ...ly System Board Memory Module the charger board 6 Disconnect the speaker cables from the system board and remove the speaker assembly from the chassis To replace the speaker assembly reverse the previous procedures 1 800 AT COMPAQ privacy and legal statement file C SERVICE 20MANUALS COMPAQ 20_ 20che d 20ok NOTEBOOKS PRESARIO 201660 rmvspkr html 2 of 2 6 27 2004 3 00 56 AM ...

Page 109: ... Pack Operations Removing the Diskette Drive Electrostatic Discharge Service Consideration Cables and Connectors Preparing the Computer for Disassembly Battery Pack Palmrest Assembly Keyboard and Heatspreader Processor Hard Drives To remove the diskette drive complete the following steps 1 Prepare the computer for disassembly 2 Remove the palmrest assembly 3 Remove the keyboard and heatspreader 4 ...

Page 110: ...stem Board Memory Module 6 Remove the charger board 7 Remove the speakers 8 Disconnect the diskette drive data cable from the system board by pulling out the cable lock lip about 1 or 2 mm at each end then removing the cable Next Step 1 800 AT COMPAQ privacy and legal statement file C SERVICE 20MANUALS COMPAQ 20_ 20checked 20ok NOTEBOOKS PRESARIO 201660 rmvfpy html 2 of 2 6 27 2004 3 00 57 AM ...

Page 111: ...ng the Fan Assembly Electrostatic Discharge Service Considerations Cables and Connectors Preparing the Computer for Disassembly Battery Pack Palmrest Assembly Keyboard and Heatspreader Processor Hard Drives To remove the fan assembly complete the following steps 1 Prepare the computer for disassembly 2 Remove the palmrest assembly 3 Remove the keyboard and heatspreader 4 Remove the display panel a...

Page 112: ...oard Memory Module fan cable and lift the fan assembly from the chassis slot To replace the fan assembly reverse the previous steps NOTE Be sure to insert the fan as shown in the figure to prevent damage to the cable Removing the Fan Gasket 1 800 AT COMPAQ privacy and legal statement file C SERVICE 20MANUALS COMPAQ 20_ 20checked 20ok NOTEBOOKS PRESARIO 201660 rmvfan html 2 of 2 6 27 2004 3 00 59 A...

Page 113: ... and Heatspreader Processor Hard Drive Upper CPU Cover DVD Drive Battery Charger Board Modem Display Panel Assembly Speaker Assembly Diskette Drive Fan Assembly System Board Memory Module To remove the system board complete the following steps 1 Prepare the computer for disassembly 2 Remove the palmrest assembly 3 Remove the keyboard and heatspreader 4 Remove the hard drive 5 Remove the Upper CPU ...

Page 114: ...ompaq Presario 1660 Model Maintenance and Service Guide 1 800 AT COMPAQ privacy and legal statement file C SERVICE 20MANUALS COMPAQ 20_ 20che d 20ok NOTEBOOKS PRESARIO 201660 rmvsybd html 2 of 2 6 27 2004 3 01 00 AM ...

Page 115: ...moving the Memory Module Electrostatic Discharge Service Considerations Cables and Connectors Preparing the Computer for Disassembly Battery Pack Palmrest Assembly Keyboard and Heatspreader Processor Hard Drives DVD Drive Battery Charger Board Modem Display Panel Assembly To remove the memory module complete the following steps 1 Prepare the computer for disassembly 2 Close the computer and turn i...

Page 116: ...ide Upper CPU Cover Speaker Assembly Diskette Drive Fan Assembly System Board Memory Module door off Next Step 1 800 AT COMPAQ privacy and legal statement file C SERVICE 20MANUALS COMPAQ 20_ 20ch 20ok NOTEBOOKS PRESARIO 201660 rmvdimm html 2 of 2 6 27 2004 3 01 00 AM ...

Page 117: ...0h 000Fh Direct memory access controller 0010h 001Fh In use by unknown device 0020h 0021h Programmable interrupt Controller 0022h 003Fh In use by unknown device 0040h 0043h System timer 0044h 005Fh In use by unknown device 0060h 0060h Standard 101 102 Key or Microsoft Natural Keyboard 0061h 0061h System speaker 0062h 0063h In use by unknown device 0064h 0064h Standard 101 102 Key or Microsoft Natu...

Page 118: ...Fh NeoMagic MagicMedia 256AV 03F0h 03F5h Standard Floppy Disk Controller 03F6h 03F6h Intel 82371AB EB PCI Bus Master IDE controller 03F6h 03F6h Primary IDE controller dual fifo 03F7h 03F7h Standard Floppy Disk Controller 03F8h 03FFh Communications Port COM1 04D0h 04D1h Motherboard resources 0530h 0537h NeoMagic MagicWave 3DX Sound System 0CF8 0CFFh PCI bus 2180h 218Fh Motherboard resources 8000h 8...

Page 119: ...dia 256AV FFF80000h FFFFFFFFh Motherboard resources Display 13 3 TFT Display Model Sharp LQ133XILH05 Sanyo TM133XG 02L02 LG LP133X4 A U S Metric U S Metric U S Metric Dimensions Height Width 7 98 in 10 64 in 202 8mm 270 3mm 7 98 in 10 64 in 202 8mm 270 3mm 7 98 in 10 64 in 202 8mm 270 3mm Display Dimensions Height Width Depth 8 43 in 11 18 in 0 28 in 214 0mm 284 0mm 7 0mm 8 43 in 11 46 in 0 27 in ...

Page 120: ... drive CD drive DVD drive Battery pack Diskette Drive Diskette Drive Model Mitsumi D353F3 Capacity per Diskette High Low Diskette Size 1 0MB 1 6MB 2 0MB Number of LED Indicators Read Write None Drive Rotation rpm 300 360 300 Transfer Rate Kbps 250 500 500 KBytes per Sector Sector 0 256 16 0 512 9 1 024 5 0 256 26 0 512 15 1 024 8 0 256 32 0 512 18 1 024 10 KBytes per Track Sector 4 096 16 4 608 9 ...

Page 121: ...S1 Sanyo CDR U242 Z Dimensions 128 x 12 7 x 129 mm 5 04 x 0 5 x 5 08 in 128 x 12 7 x 129 mm 5 04 x 0 5 x 5 08 in 128 x 12 7 x 129 mm 5 04 x 0 5 x 5 08 in Weight 0 230kg 8 11 oz 0 27kg 9 52 oz 0 270kg 9 52 oz Maximum Rotational Speed 24x 24x 24x Typical Sustained Data Transfer Rate 3600kB sec max 3600kB sec max 3600kB sec Average Random Access Time 110ms 120ms 120ms Spin Up Time 2 7sec max n a 10se...

Page 122: ...Open Circuit Voltage Ah rating Capacity standard 14 4 V enhanced 14 8 V standard 2600 mAh enhanced 3000 mAh standard 37 5 Wh enhanced 44 5 Wh Environmental Requirements Operating Temperature Non operating Temperature Charging Temperature 50 F to 95 F 10 C 35 C 32 F to 140 F 0 C 60 C 41 F to 113 F 5 C 45 C Compaq Home Search Products Service Worldwide Compaq com Comments Legal Notices and Privacy S...

Reviews: