background image

Printed In USA

Safe Operation Practices • Set-Up • Operation •  Maintenance • Service • Troubleshooting •  Warranty


WARNING

READ AND FOLLOW ALL SAFETY RULES AND INSTRUCTIONS IN THIS MANUAL


BEFORE ATTEMPTING TO OPERATE THIS MACHINE. 


FAILURE TO COMPLY WITH THESE INSTRUCTIONS MAY RESULT IN PERSONAL INJURY.
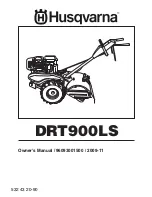
OPERATOR’S MANUAL

LES DISTRIBUTIONS RVI LIMITÉE, 2955, JEAN-BAPTISTE DESCHAMPS, LACHINE, QUEBEC H8T 1C5


MTD LLC, P.O. BOX 361131 CLEVELAND, OHIO 44136-0019

769-06899

1.22.11

Front Tine Tiller — 390 Series

Summary of Contents for 390 Series

Page 1: ...S AND INSTRUCTIONS IN THIS MANUAL BEFORE ATTEMPTING TO OPERATE THIS MACHINE FAILURE TO COMPLY WITH THESE INSTRUCTIONS MAY RESULT IN PERSONAL INJURY OPERATOR S MANUAL LES DISTRIBUTIONS RVI LIMITÉE 2955 JEAN BAPTISTE DESCHAMPS LACHINE QUEBEC H8T 1C5 MTD LLC P O BOX 361131 CLEVELAND OHIO 44136 0019 769 06899 1 22 11 Front Tine Tiller 390 Series ...

Page 2: ...his entire manual prior to operating the equipment It instructs you how to safely and easily set up operate and maintain your machine Please be sure that you and any other persons who will operate the machine carefully follow the recommended safety practices at all times Failure to do so could result in personal injury or property damage All information in this manual is relative to the most recen...

Page 3: ...ly an approved gasoline container a Never fill containers inside a vehicle or on a truck b or trailer bed with a plastic liner Always place containers on the ground away from your vehicle before filling When practical remove gas powered equipment c from the truck or trailer and refuel it on the ground If this is not possible then refuel such equipment on a trailer with a portable container rather ...

Page 4: ... so equipped Never store the machine or fuel container inside l where there is an open flame spark or pilot light as on a water heater space heater furnace clothes dryer or other gas appliances Operation Do not put hands or feet near rotating parts Contact with 1 the rotating parts can amputate hands and feet Do not operate machine while under the influence of 2 alcohol or drugs Never operate this...

Page 5: ...THE OPERATOR S MANUAL S Read understand and follow all instructions in the manual s before attempting to assemble and operate WARNING ROTATING TINES Do not put hands or feet near rotating parts Contact with the rotating parts can amputate hands and feet WARNING ROTATING TINES Do not put hands or feet near rotating parts Contact with the rotating parts can amputate hands and feet WARNING GASOLINE I...

Page 6: ...o kink cables while attaching Hook the Z end of the forward clutch cable A into the 2 forward tine engagement lever Fig 3 2 Hook the Z end of the reverse clutch cable B into the 3 reverse tine engagement lever Fig 3 2 Contents of Carton One Tiller One Handlebar Assembly One Depth Gauge Assembly One Operator s Manual One Engine Operator s Manual One 20 oz Bottle SAE30 Oil Forward Clutch Cable Rever...

Page 7: ...the carriage bolt through the welded bracket on the 9 handle bell washer handle brace and into the hand knob See Fig 3 4 Select one of the three handle height positions three 10 notches in the welded handle bracket and tighten the hand knob to secure the handle in the desired position Fig 3 4 Return to the lower handle and tighten the hex bolt securely Depth Gauge Disassemble the depth gauge assem...

Page 8: ...wheels adjusted so that the machine sits level The wheels need to be adjusted to meet your tilling needs before operation This adjustment is made by removing the clevis pin from the wheel yoke and raising the wheels to the desired height See Fig 3 8 Set Up Gas Oil Fill Up Service the Engine with gasoline and oil as instructed in the separate Engine Operator s Manual packed with your tiller Read th...

Page 9: ...rse Release the lever to stop the tines NOTE Never engage both the forward and reverse tine drives at the same time Engaging both forward and reverse tine drives at the same time could damage the belt drives and cause the engine to stall Depth Stake The depth stake controls the tilling depth Tines and End Caps Tilling tines and end caps are used to cultivate furrow and prepare your garden for seed...

Page 10: ... Make sure that the tine clutch control is disengaged 1 Setting the Depth Yoke Forward Place the wheel yoke so that wheels are forward nearest to tines for shallow tilling cultivating and transport See Fig 5 1 Yoke to Back Place the wheel yoke so that wheels are toward the rear closest to depth stake for deep tilling and cultivating See Fig 5 2 Depth Stake The depth stake acts as a brake for the t...

Page 11: ...pth is desirable The tine width can be reduced to 13 inches by removing the outer tines completely from the tiller See the Maintenance Adjustments Section for instructions on removing the tines When laying out plant rows be sure to allow enough width to permit cultivation between the rows In growing corn or similar crops check row planting will permit cross cultivation and practically eliminate ha...

Page 12: ...ivot points and linkages at least once a season with light oil Keep the belts free of lubrication Tine Shafts Remove the tine assemblies and lubricate the tine shafts at least once a season Wheel Shafts Remove the wheel assemblies and lubricate the axle shafts at least once a season Chain Drive The chain drive is pre lubricated and sealed at factory Adjustments Cable Adjustment From time to time y...

Page 13: ...ng the pins in the holes provided See Fig 6 6 Off Season Storage If the tiller will not be used for a period longer than 30 days the following steps should be taken to prepare the tiller for storage Clean the exterior of the engine and the entire tiller 1 thoroughly Lubricate the tiller as described in the lubrication instructions The use of pressure washers is not recommended for 2 cleaning your ...

Page 14: ...ng screws and hex stop nut and washer See Fig 7 1 Remove belt from transmission pulley and then from 3 around the reverse idler pulley See Fig 7 2 To reassemble the new belt follow the instructions in 4 reverse order Be sure to place the wider side of the belt against transmission and idler pulley while slimmer side goes over the engine pulley See Fig 7 2 NOTE Upon reassembly make certain the belt...

Page 15: ...ansmission pulley Retain the screws for reassembly See Fig 7 5 Remove the belt from the reverse idler pulley and then 5 from around the transmission pulley See Fig 7 6 To reassemble the new belt follow the instructions in 6 reverse order Be sure to place the wider side of the belt away from the engine and transmission pulleys NOTE Upon reassembly make certain that the idler pulley keeper is as sho...

Page 16: ...er to the Controls Features Section for 4 proper shifting procedures Adjust control cable 5 Replace belt 6 Tines skip over ground Improper rotation 1 Forward rotation should only be used on soil 1 that has already been tilled not on virgin soil Wheels do not engage Clevis pin missing 1 Tiller is not being shifted properly 2 Control cable not adjusted properly 3 Belt worn and or stretched 4 Replace...

Page 17: ...ine 714 04043 Cotter Pin 911 0415 Clevis Pin 954 0428 Forward V Belt 954 0429 Reverse V Belt 946 0918 Forward Cable 746 0953 Reverse Cable 734 1268 Wheels 8 x 1 75 NOTE Download a complete Parts Manual refer to customer support on page 2 Be sure to have your model number and serial number ready Refer to page 2 for more information regarding locating your model and serial numbers ...

Page 18: ...as lubricants filters blade sharpening tune ups brake adjustments clutch adjustments deck adjustments and normal deterioration of the exterior finish due to use or exposure d Service completed by someone other than an authorized service dealer e MTD does not extend any warranty for products sold or exported outside of Canada including possessions and territories f Replacement parts that are not ge...

Page 19: ...E RESPECTIVE MANUFACTURERS SERVICE DEALERS Belts light bulbs clutch parts friction wheels grass bags tires seats rider deck wheels and cutting blades are covered by a 60 day limited warranty Batteries are warranted against defect for 90 days at 100 of their value and 50 of their value for the period between the 91st day and the 120th day Fuses shear bolts and blade adapters are considered consumab...

Page 20: ...20 Notes ...

Page 21: ...20 Notes ...

Reviews: