background image

1

CLEARSPAN

 POLY BUILDINGS

Revision date: 09.11.09

©2009 ClearSpan™

All Rights Reserved. Reproduction 

is prohibited without permission.

ClearSpan


26' Wide Pony Wall Building

STK# 

  DIMENSIONS

PB00826R3/R4 

26' W x 16' H x 24' L

PB00828R3/R4 

26' W x 16' H x 36' L

PB00830R3/R4 

26' W x 16' H x 48' L

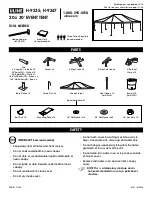
Photo may show a different but similar model.

Summary of Contents for PB00826R3

Page 1: ...pan All Rights Reserved Reproduction is prohibited without permission ClearSpan 26 Wide Pony Wall Building STK DIMENSIONS PB00826R3 R4 26 W x 16 H x 24 L PB00828R3 R4 26 W x 16 H x 36 L PB00830R3 R4 26 W x 16 H x 48 L Photo may show a different but similar model ...

Page 2: ...anchoring may cause shelter instability and failure of the structure Failing to anchor the shelter properly will void the manufacturer s warranty and may cause serious injury and damage LOCATION Choosing the proper location is an important step before you begin to assemble the structure Always consult local and regional building codes before you begin The following suggestions and precautions will...

Page 3: ...before you begin to assemble your shelter Conduit An assembly of pipes used to secure the main cover and end panels if equipped Purlins and some strut assemblies also consist of connected pipes to form a conduit Each pipe joint of a conduit assembly is secured with a self tapping Tek screw Coupler or Fitting A part of the frame assembly where legs purlins and rafter pipes are inserted and secured ...

Page 4: ...the shelter 1 Unpack the contents of the shipment and place where you can easily inventory the parts Refer to the Bill of Materials Spec Sheets 2 Verify that all parts listed on the Bill of Materials Spec Sheets are present If anything is missing or you have questions consult the Pictorial Parts Guide and all shelter diagrams throughout these instructions for clarification or contact Customer Serv...

Page 5: ...erent parts of the building Consult the Quick Start Guide for additional details and diagrams Some parts are not shown FA4482B Tek Screw 102857 End Clamp 102547 Cross Connector QH1061 Ratchet 103620b Plain End Strap Swaged Plain Swaged and Plain Rafter Sections QH1400 Band Clamp 104302 Rafter Foot QH1404 Band Clamp ...

Page 6: ...our pony wall building For details of each assembly procedure consult the Quick Start Guide and the individual sections of these instructions See illustration below to identify main parts of shelter 1 Layout the site and identify the required parts for each assembly procedure 2 Assemble all rafters 3 Assemble and anchor the frame 4 Prepare and install the main cover ClearSpan Pony Wall Building ...

Page 7: ... assemble properly if the top of the pony wall is uneven Pony wall thickness The thickness of the pony wall must provide a surface for the entire mounting base of each rafter foot See diagram to the right REMEMBER The cover of the building is attached to the outside of the pony wall Position rafters as close to the outside edge of the pony wall as possible The pony wall must support the load creat...

Page 8: ...the rafter in the locations noted below Do not secure the clamps to the rafter at this time These clamps are repositioned during the frame assembly when the purlins are added View of the end rafter and clamps as shown is from the outside when the frame is assembled NOTE Position all clamps as shown Use a piece of duct tape to keep the clamps from sliding when the rafter is set in place if desired ...

Page 9: ...in ATTACH RAFTER FEET After assembling the rafters attach two 2 rafter feet to each rafter NOTE Skip this section if you have first spaced and secured the rafter feet to the pony wall Continue with the frame assembly Adapt those steps as needed to account for any changes resulting from first attaching the feet 1 Attach one rafter foot 104302 to a rafter using the 3 8 hex head bolt FAG363 and nut F...

Page 10: ...after in position and repeat Steps 3 4 Additional assistants are required to hold the rafter in position See Side Profile diagrams for the correct rafter spacing 3 Verify that the on center rafter width is 26 and secure the rafter feet of the end rafter to the pony wall using customer supplied fasteners to prevent shifting If pony wall is concrete consult the Attaching Rafter Feet to Concrete sect...

Page 11: ... until the frame is nearly complete NOTE Remember to add band clamps to the lower purlins between the second and third rafter at the remaining end of the frame for the installation of the struts Review Step 1 to set the final end rafter 14 Finish each purlin with a plain pipe and use the final end rafter to complete the assembly NOTE To prevent cover damage DO NOT allow the purlin to extend beyond...

Page 12: ...s shown below Actual strut and position may vary ANCHOR THE SHELTER At this point anchor the frame Once the frame is anchored properly continue with these instructions WARNING You must anchor the shelter as described in the MUST READ document FAILING TO PROPERLY ANCHOR THE SHELTER WILL RESULT IN DAMAGE TO THE SHELTER AND MAY CAUSE PERSONAL INJURY READ THE MUST READ DOCUMENT TO PROPERLY ANCHOR THE ...

Page 13: ...lls constructed of material such as concrete stone or wood are not included and must be purchased separately Consult a contractor if needed ATTENTION If attaching ratchets to concrete read the Attaching Ratchets to Concrete section and apply that procedure to the following instructions 4 Measure approximately 12 16 down from the top of the pony wall and attach as shown below Install ratchets immed...

Page 14: ...er to secure wedge anchor into concrete NOTE Depending on wedge anchor bolt verify that the washer and securing nut are attached before driving the anchor bolt into concrete Striking bolt may cause thread damage and prevent the nut installation 3 Tighten the nut 4 Test ratchet operation Cut excess if needed 5 Repeat for each ratchet 1 Verify rafter foot is in the correct position Using the fastene...

Page 15: ...he Side Profile Diagram in the Quick Start section for pipe identification 2 After assembling the cover conduits locate the main cover and unfold it on a clean smooth surface against the pony wall Unfold the main cover with the inside surface facing up and the straps positioned at the front and back of the pony wall a Locate all sections of pipe needed to assemble the cover conduit b Insert the sw...

Page 16: ...will be the underside of the cover when it is pulled into position on the frame 3 Once the main cover is pulled into position center the cover on the frame end to end and side to side WARNING To prevent damage and injury do not leave the cover unattended if it has not been properly secured 4 Locate the straps at the front and rear hems and feed the straps through the center slot in each end ratche...

Page 17: ... the main cover was pulled in place a slit in the cover pocket may already be present When creating the slit in the pocket for the strap do not cut the main cover Cut only the pocket material 2 Select one of the tie down straps 103620B that shipped with the building and insert one end of the strap through the slit and around the cover conduit NOTE Do not tighten completely at this time Ratchet loc...

Page 18: ... 1 800 245 9881 for assistance NOTE With the exception of Truss Arch buildings ClearSpan shelters and greenhouses do not have any tested loading criteria TIGHTEN THE SIDE RATCHETS Verify that the cover is in the desired position and centered on the frame Loosen and reposition if needed Continue with these steps to tighten the side ratchets 1 Move to the side ratchets attached to the outside of the...

Page 19: ...SPAN POLY BUILDINGS Revision date 09 11 09 QUICK START GUIDE 26 Wide Pony Wall Building 26 0 Width Grid Represents 12 Squares F FR RO ON NT T 12 10 7 8 HEIGHT Frame shown may differ in length from actual frame ...

Page 20: ...te Purlin Connection Rafter Foot 104302 Rafter Foot 104302 See Note Purlin Connection See Note Purlin Connection See Note Purlin Connection See Note Purlin Connection See Note Purlin Connection Note Purlin connected to end rafters using 102857 clamp See View 1 Purlin connected to mid rafters using 102547 connector See View 3 Ground Level 26 On Center ...

Page 21: ...SIDE PROFILE PB00826R3 Shelter Length 24 0 Center to center 3 0 Rafter Spacing Center to Center 131P0735 131S075 131S075 131S075 R R R R Purlin Cover Conduit Ratchets are attached on the sides of the pony wall below the rafters labeled with R Pony Wall ...

Page 22: ... SIDE PROFILE PB00826R4 Purlin Cover Conduit R R R 24 0 Shelter Length Center to Center Center to Center 4 0 Rafter Spacing 131P0735 131S075 131S075 131S075 Ratchets are attached on the sides of the pony wall below the rafters labeled with R Pony Wall ...

Page 23: ...LE PB00828R3 131S075 131S075 131S075 131P0735 131S075 131S075 Shelter Length 36 0 Rafter Spacing Center to Center Center to Center Purlin Cover Conduit R R R R R R 3 0 Ratchets are attached on the sides of the pony wall below the rafters labeled with R Pony Wall ...

Page 24: ...FILE PB00828R4 131S075 131S075 131S075 131P0735 131S075 131S075 Purlin Cover Conduit R R R R Shelter Length 36 0 4 0 Rafter Spacing Center to Center Center to Center Ratchets are attached on the sides of the pony wall below the rafters labeled with R Pony Wall ...

Page 25: ...R3 Shelter Length 48 0 3 0 Rafter Spacing Center to Center Center to Center 131S075 131S075 131S075 131S075 131S075 131P0735 131S075 131S075 R R R R R R Ratchets are attached on the sides of the pony wall below the rafters labeled with R Purlin Cover Conduit R R Pony Wall ...

Page 26: ...30R4 131S075 131S075 131S075 131S075 131P0735 131S075 131S075 131S075 Shelter Length 48 0 4 0 Rafter Spacing Center to Center Center to Center Purlin Cover Conduit R R R R R R Ratchets are attached on the sides of the pony wall below the rafters labeled with R Pony Wall ...

Page 27: ... Revision date 09 11 09 Band Clamp Strut Connection View 3 Purlin End Rafter Connection View 2 Purlin Mid Rafter Connection View 1 Rafter Foot Connection View 4 CONNECTIONS NOTE Frame shown may differ in length from actual frame ...

Page 28: ...rlin End Rafter Purlin End Clamp Mid Rafter Purlin Cross Connector View 1 Purlin Mid Rafter View 2 Purlin End Rafter View 3 Band Clamp Strut Connection Connection Connection Rafter Leg FAG363B 3 8 x 3 Bolt 104302 Rafter Foot FALB04B 3 8 Nut Customer Supplied Fasteners View 4 Rafter Foot Connection ...

Page 29: ...29 CLEARSPAN POLY BUILDINGS Revision date 09 11 09 Space below is reserved for customer notes ...

Reviews: