background image

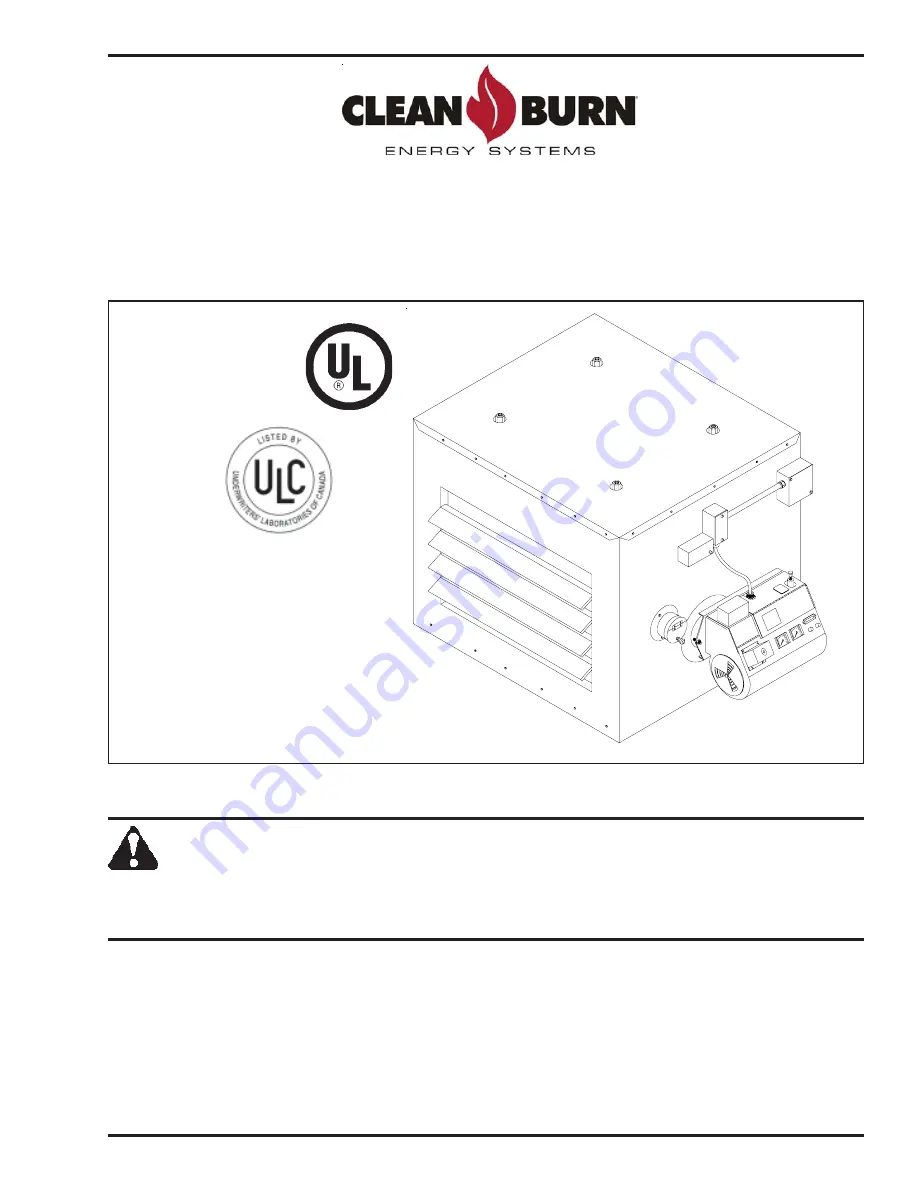
CLEAN BURN MODEL:  CB-1400

MULTI-OIL FURNACE

with CB-525-S2 BURNER

IMPORTANT FOR U.S. INSTALLATIONS:  All installations must be made in accordance with state and local codes
which may differ from the information provided in this manual.  Save these instructions for reference.

IMPORTANT FOR CANADIAN INSTALLATIONS:  These instructions have been reviewed and accepted by
Underwriters' Laboratories of Canada as being appropriate for the installation of the ULC labelled products
identified herein.  The use of these instructions for the installation of products NOT bearing the ULC label and
NOT identified herein may result in an unacceptable or hazardous installation.

IMPORTANT FOR CANADIAN INSTALLATIONS:  The installation of this equipment is to be accomplished by
qualified personnel and in accordance with the regulation of authorities having jurisdiction and CSA Standard B 139,
Installation Code for Oil Burning Equipment.

PUBLICATION DATE:  8/15/07, Rev. 3

CLEAN BURN PART # 43204

U.L. Listed Used Oil
Burning Appliance
#MH15393 (N)

U.L.-C Listed
#CMP217

WARNING:  DO NOT assemble, install, operate, or maintain this equipment without first
reading and understanding the information provided in this manual.   Installation and

service must be accomplished by qualified personnel.  Failure to follow all safety precautions
and procedures as stated in this manual may result in property damage, serious personal injury
or death.

I88817

OPERATOR'S MANUAL

Summary of Contents for CB-1400

Page 1: ...lt in an unacceptable or hazardous installation IMPORTANT FOR CANADIAN INSTALLATIONS The installation of this equipment is to be accomplished by qualified personnel and in accordance with the regulation of authorities having jurisdiction and CSA Standard B 139 Installation Code for Oil Burning Equipment PUBLICATION DATE 8 15 07 Rev 3 CLEAN BURN PART 43204 U L Listed Used Oil Burning Appliance MH15...

Page 2: ......

Page 3: ...e for any labor or costs of removal or reinstallation of its products and shall not be liable for transportation costs to and from its plant at Leola Pennsylvania Use of parts for modification or repair of the product or any component part thereof not authorized or manufactured by MANUFACTURER specifically for such product shall void this warranty This warranty shall not apply to any damage to or ...

Page 4: ...e the registered trademarks or trademarks of their respective owners COPYRIGHT Copyright 2007 Clean Burn Inc All rights reserved No part of this publication may be reproduced or distributed without the prior written permission of Clean Burn Inc 34 Zimmerman Road Leola PA 17540 Subject to change without notice ...

Page 5: ...tor Block Oil Line Tubing and Air Line Tubing 3 6 Installing the Connector Block on the Furnace Cabinet 3 6 Installing the Oil Line Tubing 3 6 Installing the Air Line Tubing 3 7 Locking the Burner into Firing Position 3 8 SECTION 4 FURNACE INSTALLATION 4 1 Understanding Installation 4 1 Selecting a Location 4 3 Guidelines for Selecting a Location 4 3 Mounting the Furnace 4 4 Ceiling Mounting 4 4 R...

Page 6: ...nspecting the Furnace Installation 4 26 SECTION 5 METERING PUMP PRIMING 5 1 Understanding Metering Pump Priming 5 1 Required Tools and Materials 5 1 Preparing the Burner for Use with the Metering Pump 5 2 Priming the Metering Pump 5 4 Vacuum Testing the Oil Pump 5 6 SECTION 6 STARTING AND ADJUSTING THE BURNER 6 1 Understanding Burner Startup and Adjustment 6 1 Preparing the Burner for Startup 6 1 ...

Page 7: ... End of Season Maintenance 9 9 SECTION 10 TROUBLESHOOTING 10 1 Flow Chart 10 2 Troubleshooting Tables 10 3 APPENDIX A Detailed Furnace Specifications A 1 Furnace Technical Specifications A 1 Burner Technical Specifications A 2 Furnace Dimensions A 3 Burner Components A 4 Cleaning the Nozzle A 9 Fan Limit Control A 10 APPENDIX B Wiring Diagrams B 1 Furnace Wiring Diagram B 1 Burner Wiring Diagram B...

Page 8: ......

Page 9: ...UNPACKING Section 2 ASSEMBLY Section 3 INSTALLATION Section 4 OPERATION Metering Pump Priming Section 5 Starting and Adjusting the Burner Section 6 Resetting the Furnace and Burner Section 7 Adjusting the Draft Section 8 MAINTENANCE Section 9 Themanualalsocontainsimportantanddetailedtechnical reference materials which are located at the back of the manual in the Appendixes Please read all sections...

Page 10: ...utions are not taken In addition to observing the specific precautions listed throughout the manual the following general precautions apply and must be heeded to ensure proper safe furnace operation DANGER DO NOT create a fire or explosion hazard by storing or using gasoline or other flammable or explosive liquids or vapors near your furnace DANGER DO NOT operate your furnace if excess oil oil vap...

Page 11: ... specifications in the Clean Burn Operator s Manual and with all national state and local codes or authorities having jurisdiction over environmental control building inspection and fuel fire and electrical safety and the following standards NFPA 30 Flammable and Combustible Liquids Code NFPA 30A Automotive and Marine Service Station Code NFPA 31 Standard for the Installation of Oil Burning Equipm...

Page 12: ...e of your furnace EPA regulations require that Your used oil is generated on site You may also accept used oil from do it yourself oil changers Hazardous wastes such as chlorinated solvents are NOT to be mixed with your used oil The flue gases are vented to the outdoors with an appropriate stack Your used oil is recycled as fuel for heat recovery DO NOT operate your furnace in warm weather just to...

Page 13: ...ocal codes Consult your local municipal authorities for more information as necessary Review and adhere to the safety guidelines for used oil supply tanks as stated in the WARNING shown Ensure that the tank for your furnace installation complies with all code and safety requirements as stated here If the tank does not comply DO NOT use it If you do not have a copy of the tank safety label pictured...

Page 14: ...For your safety and the safe operation of your furnace review all labels and heed all safety messages as printed on the labels If any labels on your Clean Burn furnace ever become worn lost or painted over please call your Clean Burn dealer for free replacements CB 1400 Furnace Cabinet Labels Label Part Description 42030 FurnaceElectricalShockHazardWarningLabel 42027 FurnaceBurnHazard HazardousVol...

Page 15: ...Operator sManual ModelCB 1400 1 7 For Your Safety continued CB 1400 Furnace Cabinet Safety Labels ...

Page 16: ... 60 POWER 1 0 15 0 1 5 2 0 15 0 1 0 04 18 24 18 36 24 5 3 0 75 1 4 3 3 18 2 MULTI OIL BURNING UNIT HEATER 1 0 1 0 15 0 15 0 1 5 1 5 60 24 FOR COMMERCIAL OR INDUSTRIAL USE ONLY 20 30 INPUT RATING W NO 2 FUEL OIL BTU HR 140000 NO MH 15393 3 5 3 9 60 60 120 120 1 3 1 3 42171 MAXIMUM FUSE SIZE WITH OPTIONS 10523 UNDERWRITERS LABORATORIES OF CANADA LISTED ...

Page 17: ...er Safety Warning Label High Voltage Moving Parts Hazards 42000 Burner Safety Warning Label Fire Explosion Hazard Reset Button 42235 Burner Safety Warning Label Fire Explosion Hazard Burner Installation and Service 42321 Burner Model Serial Number Label 42197 Patent Pending Label 42229 Logo Burner Description Label 42023 Burner Power Label CB 1400 BurnerSafety Labels ...

Page 18: ...Operator sManual ModelCB 1400 1 10 ...

Page 19: ...d Inspecting All Components Following is an itemized list of all components you should have received in your Clean Burn furnace shipment Open all shipping containers and inspect all components according to the list Immediately notify the freight company and your Clean Burn dealer in case of shipping damage or shortage s Keep all components together so you will have them as needed for furnace assem...

Page 20: ...egistration For proper warranty registration Clean Burn requires that you fill out the provided warranty registration card and return it within 30 days to CLEAN BURN WARRANTY REGISTRATION Clean Burn Inc 34 Zimmerman Road Leola Pennsylvania 17540 ...

Page 21: ... assembly procedures before proceeding paying careful attention to safety information statements Figures 3A and 3B provide a general overview of the furnace components and their proper assembly and how the unit should look following proper assembly Required Tools and Materials Thefollowingtoolsarerequiredforfurnaceassemblyandshouldbegatheredbeforestartinganyprocedures 1 4 nutdriver Mediumflat blad...

Page 22: ...all safety procedures as outlined in this manual when observing the flame through the port 1 Refer to Figure 3B 2 Use a 1 4 nut driver to remove the two 2 self tapping screws from the half moon piece 3 Position the half moon piece and the faceplate on the observation port and install the two self tapping screws 4 Open the port and make sure the faceplate moves and closes freely If the faceplate ha...

Page 23: ...as a Unit Heater ONLY 1 RefertoFigure3C 2 Spinthefanbladetocheckthatitspinsfreely 3 Removethecoveroftheelectricaljunction box 4 Attachthefanmotorelectricalcabletothe electricaljunctionbox 5 Connectthefanmotorwiresaccordingtothe wiring schematic provided in Appendix B at the back of the manual FIGURE 3C Fan Installed on Furnace Cabinet ...

Page 24: ...B 3X I88340 Installing the Burner Checking the Burner Nozzle and Electrodes NOTE The burner nozzle a Delavan 9 5 is factory installed The nozzle size is indicated on the nozzle as shown in Figure 3D Refer also to Appendix A at the back of the manual for additional specifications instructions on the burner nozzle ATTENTION Check the electrode settings as specified in Figure 3D The electrode setting...

Page 25: ...netasshowninFigure3E 3 Carefully swing the burner so the retention head enters the throat of the furnace 4 Check the clearance between the retention head and the furnace throat There must be at least 1 8 clearance so the retention head is not bumped as you swing the burner into firing position NOTE If the retention head bumps the furnace throat adjust the hinge bracket bolts as follows While suppo...

Page 26: ...ATTENTION DO NOT use teflon tape on any fittings Teflontaperesidueswillplugvitalburnercomponents Figure3F Installationof ConnectorBlock Installing the Oil Line Tubing NOTE DONOTdisassemblethecompressionfittingfromtheswivelfitting Topreventleaks theNPT threadsofthecompressionfittinghavebeensealedwithhydraulicsealant duringassemblyofthefittingsatthe factory 1 Removeanddiscardtheredcapsfromtheoilline...

Page 27: ...gandtightenthenutsonthe compressionfittings DONOTovertighten thesefittingstoavoiddamagingtheferrules NOTE Youmayalsocheckthepositioningoftheoilline accordingtoFigure3Honthenextpagewhichprovidesa largerfrontviewoftheconnectorblockassembly Installing the Oil Line Tubing continued NOTE Your furnace is now assembled and ready for installation Install the furnace as soon as possible so the burner and o...

Page 28: ...lcable NOTE Besuretoproperlyaligntheplugwhenpluggingitinto thereceptacle SeeFig3I CONNECTOR PLUG KEY IN PLUG MUST ALIGN WITH SLOT IN RECEPTACLE RECEPTACLE ON TOP OF BURNER I88641 B Figure 3I Detail of Burner Electric Receptacle Figure3H InstallationofConnectorBlock OilLine andAirLine FrontView Installing the Connector Block Oil Line Tubing and Air Line Tubing continued AIR OIL CONNECTOR BLOCK INST...

Page 29: ...e and electrical safety and the following standards of the National Fire Protection Association NFPA 30 FlammableandCombustibleLiquidsCode NFPA 30A AutomotiveandMarineServiceStationCode NFPA 31 StandardfortheInstallationofOilBurningEquipment NFPA 211 Chimneys Fireplaces VentsandSolidFuelBurningAppliances NFPA88A ParkingStructures NFPA 88B RepairGarages NFPA 70 NationalElectricalCode TheInternation...

Page 30: ...C CIRCUIT OIL PUMP ELECTRICAL CIRCUIT 24 VOLT WALL THERMOSTAT 2 WIRE MIN 18 GA THERMOSTAT CABLE SETTING DRAFT ADJUST BAROMETRIC DAMPER FOR 04 W C DRAFT AT BREECH 1 4 HOLE FOR 2 FT AIR INTAKE OIL LINE SUCTION I88827 COMPRESSED AIR LINE PRIME AND OR THE FLOW RATE FROM SUCTION LIFT OR THE PUMP WILL NOT CAUTION DO NOT EXCEED 6 FT VERTICAL THE PUMP MAY DECREASE GASOLINE FUMES IN YOUR SHOP CHECK LOCAL C...

Page 31: ...blesurfaceswhich willalsoprovideadequateclearanceforservicing Figure4B failuretomaintainproperclearances mayresultinfire explosion personalinjuryordeath TOP 18 FRONT burner side 24 REAR stack side 36 LOUVERSIDE 60 FAN SIDE 24 BOTTOM 96 CHIMNEY CONNECTOR 18 WARNING National codesrequirethatyour furnaceismountedaminimumof eight 8 feetoffthegroundwhen installingthefurnaceinarepair facility RefertoNFP...

Page 32: ...e iron beams bridged across sufficient structural members to safely support the furnace 1 RefertoFigures4C 2 Followtheinstructionsasprovidedinthediagram 3 Use a spirit level to make sure the cabinet is level side to side and front to back FIGURE4C CeilingMountingInstallationOverview I88829 ANGLE IRON SUPPORT BEAMS DOUBLE NUTS CEILING MOUNTING SYSTEM WARNING USE MINIMUM 2 1 2 X 2 1 2 X 1 4 ANGLE IR...

Page 33: ...rnace Installed on RaisedPlatform Constructing a Non Combustible Floor 1 Determinethesizeofflooryouwillneedtoconstruct Measurethewidthandlengthofthefurnacecabinet Add12 minimum toallsidesofthecabinettoachievethetotalmeasurementforthe non combustiblefloor TheCB 1400isapproximately34 x30 34 12 12 58 30 12 12 54 Thereforeyournon combustiblefloorwillneedtobe58 x54 2 RefertoFigure4E Installtwo 2 pieces...

Page 34: ...blesasstatedatthebeginning ofSection4inthismanual 8 Afterpositioningthefurnacecabinetonthesheetmetalpan install2 tall minimum cinder blocks 4 undereach corner of thefurnacetoelevatethe cabinetoff thesheetmetalpantoallow clearance for installation of fittings on the connector block Figure4E FurnaceInstalledonNon CombustibleFloor LIP FOR OIL CONTAINMENT TALL CINDER BLOCK MIN 24 GA STEEL 2 PIECES 5 8...

Page 35: ...noughtoallowwater sludge etc tosettleoutoftheusedoil Thetankmusthaveamanualshut off type valve on the side of the tank to allow thewater sludge etc tobedrainedfrom thebottomofthetank All unused openings in the tank must be pluggedorcappedoff Foroptimalsystemfunctioning CleanBurn recommendsinsidetankinstallationsas showninFigures4A 4F and4J The tank must be vented to the outside of thebuildingusing...

Page 36: ...re to the following installation guidelines Install a length of minimum 2 steel pipe user supplied terminating outside with a proper vent cap as shown in Figure 4F Consult local codes for information and requirements concerning the proper venting of oil storage tanks Install an emergency vent as shown in Figure 4F Contact your tank manufacturer for information concerning the proper emergency vent ...

Page 37: ...rials e g fittings tubing are to be user supplied Standard mounting is vertical mounting on a wall this pump installation is recommended Alternate mounting is horizontal mounting on a bracket Be sure to carefully follow the appropriateprocedures diagramsforpumpmounting Foroptimalmeteringpumpfunctioning ensurethatthepumpismountedatadistancenot more than four 4 feet from the oil tank Standard Mounti...

Page 38: ...32021 3 4 CHECK VALVE 4 32062 MALE CONNECTOR 1 4 T TO 1 4 NPT GEARMOTOR PART CLEAN BURN MODEL CB 1400 33291 33355 CB 3500 33354 33356 CB 2501 CB 5000 33507 CB 200 CTB 28 28 32061 3 4 CHECK VALVE SCREEN 16 23 24 26 25 24 23 17 16 22 21 20 19 18 17 32446 1 2 X 5 NIPPLE 18 32429 1 2 STREET TEE BRASS 19 32137 1 2 HEX NIPPLE 20 32142 1 2 BALL VALVE 21 32062 1 4 NPT x 1 4 TUBING FITTING 22 32443 1 4 x 1...

Page 39: ...0degreestothehorizontalpositionasshowninFigure4I 4 Re install and tighten the two pump mounting bolts 5 Use the appropriate type of bolts and washers user supplied to securely mount the metering pumptothemountingbracket whichistobeinstalledontheappropriatewallinyourbuildingata distance not more than four 4 feet from the tank GAUGE INLET INLET INLET GAUGE INLET RECOMMENDED SETUP PUMP IS MOUNTED LEF...

Page 40: ...ureB1 inAppendixB 3 Checkforcorrectvoltageatthefurnace andrefertothefollowingchart ATTENTION Incorrectvoltagewillseverelydamagetheblowermotor furnacecomponents DONOToperateyourfurnaceonanynon specificationpowersystem Model Voltage Breaker Size Circuit Hertz CB 1400 110 120 20 amps Dedicated 60 NOTE Breakersizewithoptionalequipmentis30amps Wheninstallingany optionalequipment e g aircompressorordraf...

Page 41: ...tion 6 verticalfeetx0 75 4 50 hg AND 4 horizontalfeet 0 75 hg 4 50 hg 0 75 hg 0 75 hg 6 00 hgvacuum Themeteringpumpmustbeinstalledwitha3 4 checkvalveandscreenattheendofthe suctionoilline orthepumpwillnotmaintainitsprime UsePermatex 2 non hardening gasket sealer on every threaded fitting DO NOT use teflontapeorteflonpipedopecompounds thetefloncanflakeoffandcausedamagetothe pumphead Thesuctionoillin...

Page 42: ...sstreetelbowasshowninFigure4H Thecanisterfiltermustbeinstalledwiththearrowpointingtowardsthepump directionof oilflow Installthe1 2 x5 brassnippleintothetopsideofthe1 2 brassteeassembly Looselyinstallthe1 2 brasscapontothisnipple DONOTtightenthecapatthistime Figure4J OilLineInstallationOverview WITH TUBING BENDER RADIAL BEND MADE OF COPPER TUBING TANK BOTTOM TO CREATE SLUDGE TRAP CHECK VALVE IS MIN...

Page 43: ...2 brassbushingintothe3 4 checkvalve l Installthe1 2 MPTx1 2 flareadapterintothe3 4 x1 2 brassbushing m Slidethe1 2 flarenutovertheendofthe1 2 coppertubing andflaretheendofthetubing NOTE Useahigh qualityflaringtool suchasaRidgidFlaringTool toensurethatall flaresaremadeproperly i e sotheywillbe100 airtight n Installtheflaredoillineandnutontotheassembledcheckvalve screenandtighten o Pickuptheassemble...

Page 44: ...sure line BesuretousePermatex 2non hardeninggasketsealertosealeverythreadedfitting DONOTuseteflon tapeorteflonpipedopecompounds 1 RefertoFigure4K 2 Removetheplugfromthegaugeportontopofthemeteringpumphead 3 Installthepressurereliefvalveassemblyinaverticalpositioninthegaugeport Notethatthe directionalarrowsonthereliefvalvemustbepositionedsothatthearrowspointawayfromthe pumphead i e inthedirectionoft...

Page 45: ...ythreadedfitting DONOTuseteflontapeorteflonpipedope compounds Installing the Compressed Air Line NOTE Youraircompressorsystemmustsupplyairpressuretothefurnacewiththefollowing requirements 50psiandwatertrapordryer Ifyoudonothaveshopair anoptionalaircompressoris available ContactyourlocalCleanBurndealerformoreinformation 1 Runacompressedairlinefromyourshopairtotheconnectorblockonthefurnace Useminimu...

Page 46: ...in the stack run If needed increase the vertical length of the stack orinstalladraftinducertoobtain 02 W C draftoverfire Section8containsdetailson adjustingthedraft Keep the horizontal stack run as short as possible slant it upward at a minimum of 1 4 per footofrun Keepthestackdesignsimple Complicatedstacks withlongrunsandmanyturns reduce draftandresultinpoorburnerperformance Yourstackmayincludeon...

Page 47: ... A STACK COMPONENTS 10 FT MIN VERTICAL STACK HEIGHT PLUS 1 FT FOR INSULATED STACK WITH A STAINLESS STEEL LINER 10 FT 2 FT SETTING DRAFT ADJUST BAROMETRIC DAMPER FOR 04 W C DRAFT AT BREECH 1 4 HOLE FOR WARNING MAKE SURE TO INSTALL THE PROPER ROOF SUPPORT SYSTEM TO SAFELY SUPPORT THE STACK WARNING ENSURE PROPER CLEARANCES BETWEEN STACK COMPONENTS AND COMBUSTIBLES PER ALL APPLICABLE CODES NOTE THE LA...

Page 48: ...ULATED STACK WITH A STAINLESS STEEL LINER CLASS A STACK PENETRATION AND CLEAN OUT TEE SINGLE WALL STACK MIN 24 GAUGE 2 FT WARNING ENSURE PROPER CLEARANCES BETWEEN STACK COMPONENTS AND COMBUSTIBLES PER ALL APPLICABLE CODES DRAFT AT BREECH SETTING DRAFT ADJUST BAROMETRIC 1 4 HOLE FOR DAMPER FOR 04 W C STACK SIZE MIN 8 WARNING MAKE SURE TO INSTALL THE PROPER WALL SUPPORT SYSTEM TO SAFELY SUPPORT THE ...

Page 49: ... Installing the Barometric Damper 1 RefertoFigure4L Installasinglewalltee min 24gauge afterthe90degreeelbowinthestraight verticalstacksectionwithinthreetofivefeetofthefurnacebreach Forhorizontalstackruns asshown inFigure4M installtheteeafterthefirststraightsectionofpipe NOTE Theteeisrequiredtosupportthebarometricdamper Youmustpurchasethisteewhen you purchase your stack materials 8 single wall tee ...

Page 50: ...permustbeinstalledsothatitislevelandtheflappermovesfreely 2 EnsurethatmainpowertotheheatingequipmentisturnedOFF 3 PositionthestacksafetyswitchoverthelipofthebarometricdamperasshowninFigure4O 4 Drilla1 8 pilotholeforthemountingscrew andmountthestacksafetyswitchusingthemounting screwsuppliedwiththeswitch NOTE Themountingscrewmustnotinterferewiththefreemovementoftheflapperonthebarometric damper 5 Ins...

Page 51: ...itch checkthestacktomakesureitisclearofanyobstructions 2 Removethecoverfromthestacksafetyswitch andpushthesmallbuttoninthemiddleoftheswitch 3 Pushingthestacksafetyswitchresetbuttonwillre establishthethermostatcircuit andtheburnerwill start assumingthewallthermostatiscallingforheat Figure 4P Stack Safety Switch Wiring Diagram T T F F I88965 WALL THERMOSTAT OIL PRIMARY STACK SAFETY SWITCH MOUNTED ON...

Page 52: ...idedbythestackmanufacturer 3 Installwater tightroofflashingaroundthepenetrationoftheexteriorstack NOTE CleanBurnrecommendstheuseof Dektite roofflashing orequivalent whichensuresa water tightsealwheninstalledproperly ContactyourlocalCleanBurndealerfordetails Installing the Stack Cap NOTE Properinstallationofa ClassA stackcapensuresthefreeflowofstackgaseswhichis essentialforoptimalburnerperformance ...

Page 53: ...TAIN 02 W C DRAFT OVERFIRE SINGLE WALL 24 GAUGE INTERIOR STACK 5 FEET 8 FEET OPTIONAL InstallingtheDraftInducer WARNING TurnOFFthemainpowertothefurnacebeforeproceedingwiththeinstallationof thedraftinducer ATTENTION Itisveryimportanttoinstallthedraftinduceronaverticalsectionofstacktoisolatethe inducerfromexcessiveheatandashbuildup Neverinstallthedraftinduceronahorizontalsectionofstack closetothefur...

Page 54: ...ecoveroffthebase ordamagemayoccur 3 Removethegreenpaperinsertandtheblackplasticbatteryisolatorfromthebatterysectionofthe thermostat 4 RefertotheBurnerWiringDiagraminAppendixBatthebackofthismanual Runtwowire 18 gauge minimum thermostatcablefromtheterminalsonthebackofthethermostatbasetotheT T terminalsoftheprimarycontrolontheburner ATTENTION NEVERjumpbetweenT Tterminalsontheprimarycontrolwithoutremo...

Page 55: ...ENTION Please note that in order to use the metering pump with the CB 525 S2 burner and to accomplish pump priming the oil regulator assembly must first be removed from the preheater block assembly The following procedure provides the necessary instructions Required Tools and Materials The following tools and materials are required for oil pump priming and should be gathered before starting any pr...

Page 56: ...ingboltsonthelockingbar 4 Remove the locking bar 5 Refer to Figure 5B Use a 5 32 Allen wrench to remove the four 4 bolts and washers holding thesurface mountedoilregulatorinplace thencarefullyremovetheoilregulator 6 Cleanthetopoftheheaterblocktoremoveusedoil etc DONOTallowanydebristofallinto theoilpassagewayswhichhavebeenexposedbytheremovaloftheoilregulator 7 Install the square cap with the o ring...

Page 57: ...0 9 REMOVE THESE PARTS STEP 2 INSTALL STEP 1 SAVE AND USE THESE 4 SCREWS AND WASHERS SQUARE CAP I88193 TO INSTALL SQUARE CAP SURFACE MOUNTED OIL REGULATOR AND O RING COMPLETE REGULATOR Figure 5B Detail of Heater Block with Surface Mounted Oil Regulator ...

Page 58: ... used oil into the funnel until oil comes out of the side of the pump head this will fill the oilline canisterfilter andpumpheadwithoil ATTENTION Neverrunthepumpheaddry withoutoilinthepumphead doingsowillseverely damagethepump 4 ApplyPermatex 2non hardeninggasketsealertothethreadsoftheplug removedfromthe pump head Re install the plug and tighten 5 Apply Permatex 2 non hardening gasket sealer to th...

Page 59: ...asticbarrierstripisinplacebetweenthe F and T terminalsas showninFigure5Dbeforeproceeding failuretodosowillresultindamagetotheprimarycontrol b Connectajumperwiretoone F terminalontheprimarycontrol c Adjustthethermostataboveroomtemperature Theburnershouldstartrunning d Immediatelyturntheknobontheairregulatorclockwiseuntiltheairgaugeregisters10to 12 psi You will adjust the air pressure further during...

Page 60: ...have a stainless steel ball and should be pressure tested by the manufacturer to ensure that it does not leak If the ball valve leaks the vacuum test will not be accurate Priming the Metering Pump continued 8 Run the pump until a solid stream of oil flows from the pump bleeder This will bleed all air out of the suction line oil filter and pump head ATTENTION For the metering pump to operate correc...

Page 61: ...evacuumshouldthenholdsteadyfor15minutes ATTENTION If the vacuum drops more than one to five inches within the first minute there is one or more leaks somewhere between the pump and the ball valve Do the following Wipeyourfingeralongthecylinderattheshaftofthepump Ifthereisoilhere thepump seal is damaged Replace the pump Disassemble and clean all the fittings from the pump to the ball valve Properly...

Page 62: ...Operator sManual ModelCB 1400 5 8 ...

Page 63: ...E If your thermostat does not have an OFF setting disconnect one thermostat wire so the burner will not run 2 Turn the main power to the furnace ON 3 Wait at least 15 minutes until the preheater block is thoroughly warmed up Feel the back of the burner box to make sure the preheater is sufficiently warm The proving switch on the preheater Figure 6A Component Detail of the CB 525 S2 Burner block wi...

Page 64: ...ectionoftheslot Thisinitialsettingofthecombustionairbandwillallowyouto starttheburner Youwillfinetunethecombustionairbandfurtherasdescribedlaterin theseinstructions Initial Adjustments for CB 1400 Maximum Input 140 000 BTUH 1 0 GPH with CB525 S2 Burner OilType Oil PSI Flame Length AirPSI AirBand Nozzle 2FuelOil check flame length 12 16 1 4 9 5 UsedCrankcaseOil check flame length 12 16 1 4 9 5 Used...

Page 65: ... chamber WARNING The observation port gets hot as the burner fires To avoid personal injury always wear heavy work gloves and safety glasses when opening the port and viewing the flame CAUTION WHEN OPENING INSPECTION PORT PORT MAY BE HOT PROTECT HANDS WEAR SAFETY GOGGLES KEEP FACE AWAY OPEN PORT SLOWLY Figure6B FlameLengthAdjustment Incorrect Flame Adjustment Air Pressure Too High Ensure proper ai...

Page 66: ...romthestack Smokeindicatesimproperair fueladjustment NOTE Whenusinginstrumentstoadjusttheburnerforasmokelessburn thefollowing readingsshouldbeachieved Draftoverfireshouldbe 02inchw c Adjust for a smoke spot of a trace to 2 Adjust for a CO2 reading of 8 to 10 or an O2 reading of 7 to 9 Cadcellreadingbelow500ohms Checking the Operation of the Fan Motor NOTE Itisimportanttoverifythatthefanmotoroperat...

Page 67: ...er is hot DO NOT operate your furnace if excess oil oil vapor or fumes have accumulated in or near your furnace As with any oil burning furnace improper operation may result in a fire or explosion hazard 1 Refer to Figure 7A 2 Check the combustion chamber for fuel mist by shining a flashlight through the observation port If you see fog fuel mist in the chamber DO NOT push the reset button 3 If the...

Page 68: ...Operator sManual ModelCB 1400 7 2 ...

Page 69: ...of gauge 2 Note the draft overfire reading on the draft gauge ATTENTION The draft reading should be in the 02 to 04 w c range Poor draft i e 01 to 08 results in back pressure in the furnace and poor burner performance Too much draft overfire i e greater than 04 sucks the heat from the furnace and results in abnormally high stack temperature Figure 8A Checking for Proper Draft Overfire Understandin...

Page 70: ...erfire Problems WARNING If you cannot achieve proper draft overfire do not operate your furnace Contact your Clean Burn dealer for assistance ATTENTION Backdraft must be resolved or your furnace will not operate correctly Under backdraft conditions draft overfire readings will show positive pressure in the combustion chamber Backdraft means that oil spray combustion products and heat are blown bac...

Page 71: ...ethod of determining how much backdraft is created by the exhaust fans Once this is determined you can select the correct method for resolving the backdraft RefertoFigure8Casneeded 1 Turn off ALL exhaust fans and close ALL doors and windows in the building any open door or window will allow make up air to enter the building and will negate the test 2 Start the furnace and adjust the barometric dam...

Page 72: ...g the draft to final levels BACKDRAFT EXHUST FAN CREATES BACKDRAFT IN STACK AND SUCKS COMBUSTION GASES DOWN THE STACK AND BACK INTO THE FURNACE OIL SPRAY AND HEAT IS FORCED BACK AGAINST THE BURNER AND RESULTS IN OIL FOULED ELECTRODES AND RETENTION HEAD SEVERE BACKDRAFT WILL HEAT AND DAMAGE THE CAD CELL AND THE TRANSFORMER RISING HOT COMBUSTION GASES PRODUCE PROPER DRAFT PROPER DRAFT ...

Page 73: ...n Thisinformationshouldbestampedon a label on the exhaust fan Make sure to add up the total CFM if more than one exhaust fan exists in the building b Select the correct size of make up air louver to provide the required CFM of fresh air If you cannot determine the CFM rating of the exhaust fan use the following procedure Procedure2 a Countthetotalnumberofexhaustfansinthebuilding b Closeallofthedoo...

Page 74: ...elouvermustbehighinthesidewallofthebuildingsothecoldfreshairdoesnotblowacrossthe floorlevelandchilltheservicepersonnel 3 Thelouvershouldbeinstalledintheoppositewallfromthelocationoftheexhaustfan This will quickly vent diesel exhaust from the top of the building and reduce the amount of run time for the exhaust fan Installing a Make up Air Louver continued Calculated Opening Size Square Feet Requir...

Page 75: ...Service instructions proceduresfortheseactivitiesareincludedinthischapter MaintenanceActivity Interval PeriodicBurnerInspection Monthly Cleaningthecanisterfilter Beforevacuumgaugereads10 HGofvacuum Servicingthemeteringpump At least once a year Cleaningthecheckvalve screen At least once a year Cleaningwater sludgeoutoftank At least once a year Cleaningoutash Approx 700hoursasindicatedontheburnerhou...

Page 76: ...eisdiminishingordisplayswide variations cleanthecanisterfilterandcheck valve screen proceduresprovidedinthis section Iftheflameisfiringtoostrongly i e flame touchesbackand orsidewallsofthe combustionchamber checktheairpressuresetting seefollowingguideline Checktheairpressurebyobservingtheairgauge properairpressuresettingsareprovidedin Section6 DONOToverfiretheburner doingsoonacontinualbasiswilldam...

Page 77: ...ts to drain the oil from the canister 4 Remove the canister bowl 5 Clean the screen and the bowl in a parts washer 6 ReferringtoFigure9B examinethefiltercomponentsasyoureassemblethem 7 Check the condition of the O rings Replace any that are cracked or worn 8 Ensure that the canister filter is 100 airtight by firmly tightening the four bolts 9 Afterthepumpheadscreenisservicedaswell page9 4 opentheb...

Page 78: ...re9C 2 Remove the pump head cover part 1 3 Remove the screen part 2 and wash it 4 Remove and discard the used gasket part 3 5 Install a new gasket Clean Burn Part 32422 6 Replace the screen and pump head cover Figure9C ServicingtheMeteringPump 3 2 1 PART No 32423 PART No 32422 ...

Page 79: ...eanthesecomponentsinapartswasher 3 Check the operation of the check valve The valve must seat so it is airtight to hold pump prime 4 Re assemble and re install the components Apply Permatex 2 non hardening gasket sealer or equivalent to the threaded fittings Firmly tighten all connections so the suction line is 100 airtight 5 Follow pump priming instructions in Section 5 to re establish prime Figu...

Page 80: ...m the furnace is approximately 700 hours of operation as indicated on the hour meter on the burner refer to the servicing intervals at the beginning of this chapter Be sure to clean the ash from your furnace at least twice during the heating season Your furnace may require more frequent clean out of the ash due to contaminants in the oil or heavy use As ash accumulates furnace heat output declines...

Page 81: ...burnerpowercable b Removethelock downnutandswingtheburneropen c Cleanouttheburnerthroatusingasmallscrapertoremovetheresidues ATTENTION Keep the burner open swung out so that you do not knock or bend burner componentswhencleaningoutthecombustionchamber 3 Cleantheashfromthestackcomponents a Brushaccumulatedashfromthestackcap b Lightlytapthestackcomponentstoloosentheash c Allowashanddusttosettleinthe...

Page 82: ...theashinthebackofthetubesbyfirstvacuumingthefluesbefore pushingthefluebrushdowntheflues g Useafluebrushtothoroughlycleantheflues h Thoroughlyvacuumanyremainingashresiduefromtheflues i Checkthefluesforrust ATTENTION Thepresenceofrustinthefluesindicatesthatchlorinatedmaterialsare beingburned Burningchlorinatedmaterialswillseverelydamageyourheatexchangerand voidyourwarranty ContactyourCleanBurndealer...

Page 83: ...er to prepare the furnace for the next heating season Various levels of service are provided to fit your particular need End of Season Maintenance ATTENTION TurnmainpowertoyourfurnaceOFFattheendoftheheatingseason Thiswill preventtheoilfrombeing cooked inthepre heaterblockwhenitisnotinuse Failuretodosomayresultin carbonbuildupintheburnerpreheaterblockwhichwillblockoilflow ATTENTION EPAregulationsal...

Page 84: ...Operator sManual ModelCB 1400 9 10 ...

Page 85: ... in furnace operation and adjustment The Flow Chart outlines the proper sequence of events in furnace operation use this chart to help diagnose where a problem may be occurring More specific troubleshooting information is provided in the Troubleshooting Tables following the flow charts Each table lists a Problem Possible Cause and Possible Action s to fix the problem ...

Page 86: ...es as it receives more than 10 psi of air pressure Pump circuit starts oil pump Yellow indicator light ON Pump circuit opens oil solenoid Air sensing switch receives power from centrifugal switch INITIAL START UP Combustion air band adjusted for proper combustion air Centrifugal switch closes and sends power to the air sensing switch Burner motor starts and reaches full rpm Burner ignites Oil prim...

Page 87: ...hould be 140 degrees F If the heater block is NOT HOT a Wait 15 minutes for the heater block to heat up and re check the back of the burner and b Check the block heater thermostat and block heater element Refer to the wiring diagram and ladder schematic in Appendix B 4 If the block is HOT a Check the red wire at the F 120 proving switch for power If there is NO power at the red wire refer to the w...

Page 88: ...tructions in Section 8 5 Disconnect the yellow wires from the F terminals Start the burner and check the ohm reading from the cad cell You have 10 seconds to perform this test before the burner shuts off on reset Refer to Section 7 to reset the oil primary control If the ohm reading is above 500 ohms a Check the position of the cad cell the cad cell must look straight through the central hole in t...

Page 89: ...w the procedures in the previous problem top page 10 4 3 Follow the instructions in Section 5 to adjust the air regulator for proper air pressure DO NOT turn the air compressor off while the furnace is operating If you turn the air compressor off at night turn the wall thermostat to OFF so the burner will not run 4 DO NOT shut off power to the furnace overnight or the heater block will cool down a...

Page 90: ...d is filled with oil prior to starting the pump See Section 5 3 Follow the procedure in Section 5 to fill the oil line and prime the pump 4 With the pump not running wipe your finger along the bottom of the cylinder at the pump shaft If there is oil at the pump shaft the seal is damaged Replace the pump or replace the seal NOTE Some oils will expand as they warm up Because there is a check valve i...

Page 91: ...rage draw of the pump motor Call your dealer if the problem persists b The coupling is not adjusted properly keeping the shafts of the motor and pump from turning freely Re position the coupling so that both shafts turn freely c The shaft on the motor or oil pump will not turn freely If you can t turn the shafts replace the faulty part s Fan motor runs all the time 1 Fan motor circuit is wired inc...

Page 92: ...Operator sManual ModelCB 1400 10 8 ...

Page 93: ...ounting Ceiling Hung Bench Tank Kit Non combustible Platform Electrical Requirements 110 120 Volts 60 Hz Circuit Breaker for Unit Heater 20 Amps Circuit Breaker for Furnace with Optional Accessories Refer to specifications included with optional accessories Wall Thermostat 24 Volt Oil Pump Suntec A2RA 7710 CB 32327 Pump Motor Bison gear motor CB 33291 Pump Motor Rotation CCW shaft end Canister Fil...

Page 94: ...mer 14 000 Volts Nozzle Delavan 9 5 Burner Motor 1 10 HP 3200 RPM with centrifugal switch Burner Motor Rotation CCW shaft end Compressed Air Requirements 2 0 CFM 50 PSI Oil Primary Control Carlin Oil Primary Heater Element in Preheater Block 400 Watts Air Pressure Switch MPL 808 Setting for Preheater Thermostat 140 o F ...

Page 95: ...I88839 TOP VIEW SHOWING MOUNTING LUGS FRONT VIEW BURNER SIDE BACK VIEW FURNACE BREECH SIDE SIDE VIEW FAN SIDE 20 7 8 33 3 4 16 7 8 29 33 3 4 29 3 4 29 40 WITH FAN INSTALLED SIDE VIEW LOUVER SIDE 16 1 4 WITH BURNER INSTALLED 23 1 8 6 7 8 21 1 4 DIA 47 3 4 ...

Page 96: ...1 CB 525 S2 Burner Component Detail 13 2 1 1 1 2 1 7 6 8 1 9 0 1 2 3 4 5 6 7 8 9 10 11 0 12 13 14 15 psi 60 30 20 50 psi 40 0 10 5 4 14 4 19 20 22 SEE ILLUSTRATION I88543 FOR PART NUMBERS 3 5 6 18 21 23 25 15 10 13 11 12 16 24 27 I88234 B CB 525 S2 BURNER 9 1 2 7 8 17 26 ...

Page 97: ...ELBOW 3 16 T x 1 8 NPT 10 32179 1 AIR GAUGE 0 60 PSI 11 32253 1 FEMALE ELBOW 1 8 TP x 1 8 NPT 12 33297 1 HOUR METER 60 Hz 13 33169 1 GREEN LIGHT POWER 14 33168 1 AMBER LIGHT PUMP 15 31113 1 FAN SQUIRREL CAGE 16 26044 1 MOTOR MOUNT PLATE 17 33175 1 BLOWER MOTOR 18 26053 1 RIGHTSIDECOVER 19 11335 1 HOUSING INCLUDESITEM23 20 13148 1 HEATER BLOCK ASSEMBLY 21 11265 1 COVER HINGED 22 SEENOTEONDRAWING NO...

Page 98: ...omponent Detail Burner Components continued 28 0 9 1 8 4 5 6 7 1 2 3 1 1 12 3 1 15 17 60 34 41 42 43 39 40 36 38 45 35 33 44 46 47 29 17 20 37 3 48 49 50 51 52 53 54 55 56 57 58 9 8 7 10 6 I88543 4 2 27 13 14 25 26 24 30 29 59 32 31 8 8 11 12 2 1 5 4 22 23 21 2 2 16 18 19 ...

Page 99: ...ATTS 25 33041 1 PROVING SWITCH NORMALLY OPEN 26 32325 1 MALE ELBOW 1 8 x 1 8 NPT FOR AIR GAUGE LINE 27 54020 1 3 16 COPPER TUBING OIL GAUGE LINE 28 33011 1 HEATER BLOCK THERMOSTAT NORMALLY CLOSED 29 32359 2 REGULATOR SURFACE MOUNT 30 14090 1 REGULATOR LOCK PLATE 31 34148 8 REGULATOR MOUNTING SCREW 32 34114 8 LOCK WASHER 8 Z 33 34147 2 REGULATOR THREADED STEM 34 34022 2 HEX NU T 10 32 Z 35 32306 2 ...

Page 100: ...M SIDE TO SIDE OR FROM TOP TO BOTTOM USE PROVIDED SCREWDRIVER AS WEDGE TO HOLD THE SPINNER RETENTION HEAD IN POSITION THEN TIGHTEN THE THREE SCREWS TO LOCK THE HEAD IN POSITION 3 16 GAP BETWEEN ELECTRODES NOZZLE CRITICAL DIMENSION NOZZLE MUST BE 1 8 AHEAD OF THE DISK NOZZLE MUST NOT BE BEHIND THE DISK 1 8 SPARK GAP SIDE VIEW A A SIDE VIEW B B I88377 Burner Components continued Figure A3 Burner Ele...

Page 101: ...mage or deform the nozzle orifice DO NOT use a torch tip cleaner or other inappropriate device to clean the orifice If the blockage is a tarry material or a hard black material call your Clean Burn dealer for service 3 Flush all components with WD 40 to remove oil residues 4 Reassemble the nozzle components When tightening the stem just barely snug it down DO NOT overtighten 5 Check the O ring on ...

Page 102: ...nerstopsrunning Thefancontinuestorun Oncethefanlimitcontrolsenses170degreesF the limitswitchautomaticallyresetsandrestartsthe burner NOTE Itisveryimportanttoavoidcycling theburneronhilimitasdescribedabove If thehilimitactivates immediatelycheckand re adjustburnersettings ATTENTION DONOTchangethefanlimit settingsfromthespecifiedsettings orsevere damagetothefurnacecabinetmayoccur To Set Pointers on ...

Page 103: ...ram L1 L2 3 4 L2 WHITE WHITE BLACK WHITE OIL PUMP BLACK BLACK L1 L2 CIRC FAN MOTOR BLACK GREEN GROUND SCREW RED ORANGE BLACK RED GREEN GREEN WHITE RED BLACK I88546 FAN LIMIT SWITCH COVER REMOVED PURPLE WHITE WHITE L1 120 VOLTS 60 Hz SINGLE PHASE FAN OPTIONAL DRAFT INDUCER BLACK WHITE ORANGE ...

Page 104: ...ESSOR BLOCK HEATER 400 WATTS BLACK BLACK RED BLACK WALL THERMO STAT NOTE WHEN RELEASING OR INSTALLING WIRES ON THE TERMINAL STRIP USE THE SMALL SCREWDRIVER SUPPLIED WITH THE BURNER TO RELEASE THE TERMINAL JAWS TO LOCATE THE SCREWDRIVER OPEN THE HINGED ACCESS PLATE ON THE TOP OF THE BURNER THE SCREWDRIVER TO RELEASE OR INSTALL A WIRE CAREFULLY PUSH THE BLADE OF THE SCREWDRIVER INTO THE RELEASE SLOT...

Page 105: ...ERMOSTAT MANUAL DISCONNECT OPTIONAL SWITCH SERVICE NEUTRAL HOT E C A N R U CUSTOMER POWER CONNECTION TO R E N R U B F BK RD GRN WHT OIL PUMP MOTOR SEE OPERATOR S FAN LIMIT CONTROL FAN HI LIMIT 2 M 1 M CIRC FAN MOTOR ACTUATED BY BURNER MOTOR N C HELD OPEN CENTRIFUGAL SWITCH GRN RD WHT BK 140 400 WATTS BLOCK HEATER AIR SOL IGNITION TRANSF AIR COMPRESSOR OPTIONAL OIL SOL HOUR METER SPARK GAP PUMP ON ...

Page 106: ...Operator sManual ModelCB 1400 B 4 Wiring Diagrams continued FigureB4 MeteringPumpWiringSchematic H44040 ...

Page 107: ...e Installed Date ___________ By name phone __________________________________ Furnace Inspected Date __________ By name phone __________________________________ Draft Readings Service Record date reading date initials of serviceman Burner Stack Canister Chamber Stack Oil Tank A P M Filter Flues A P M Annual Preventative Maintenance of Burner Burner Tune up ...

Page 108: ...Operator sManual ModelCB 1400 C 2 ...

Reviews: