

10 WATT
Wireless Charging
Alarm Clock
ITEM 24714
PLEASE READ ALL INSTRUCTIONS CAREFULLY AND RETAIN
FOR FUTURE USE
GETTING STARTED
• Remove the product from the box.
• Please retain all packaging until you have checked and counted
all the parts and the contents against the parts list.
PACKAGING CONTENTS
• Digital Clock with Wireless Charger
• Back-up Battery - button cell CR2032 (pre-installed)
• USB Cable
• Instruction Manual
FEATURES
• Digital Clock 10 Watt Wireless Charger
• Wirelessly charges compatible devices
• Displays in elegant white LEDs
• Displays Time, Date, Temperature
• Adjustable Temperature Units (C
°
/ F
°
)
• Sets up to 3 alarms at a time
• Ideal for use at home, office & travel
• Power Saving Mode (Sound Controlled)
• Back-Up CR2032. Button Cell battery included for memory
setting
• Powered by 3 AAA batteries (not included) or Type C -USB
(included)
IMPORTANT SAFETY INFORMATION
• Read all instructions before using this product.
• Keep the unit away from heat sources, direct sunlight, humidity,
water and any other liquids.
• Do not operate the unit if it has been exposed to water, moisture
or any other liquids to prevent against electric shock, explosion
and/or injury to yourself and damage to the unit.
• Do not use the unit if it has been dropped or damaged in any
way.
• Repairs to electrical equipment should only be performed by a
qualified electrician.
• Improper repairs may place the user at serious risk.
• Do not use the unit with wet hands.
• Do not put objects into any of the openings. Keep the unit free
from dust, lint, etc.
• Do not use this unit for anything other than its intended use.
• Keep the unit out of reach of children.
• This product is not a toy.
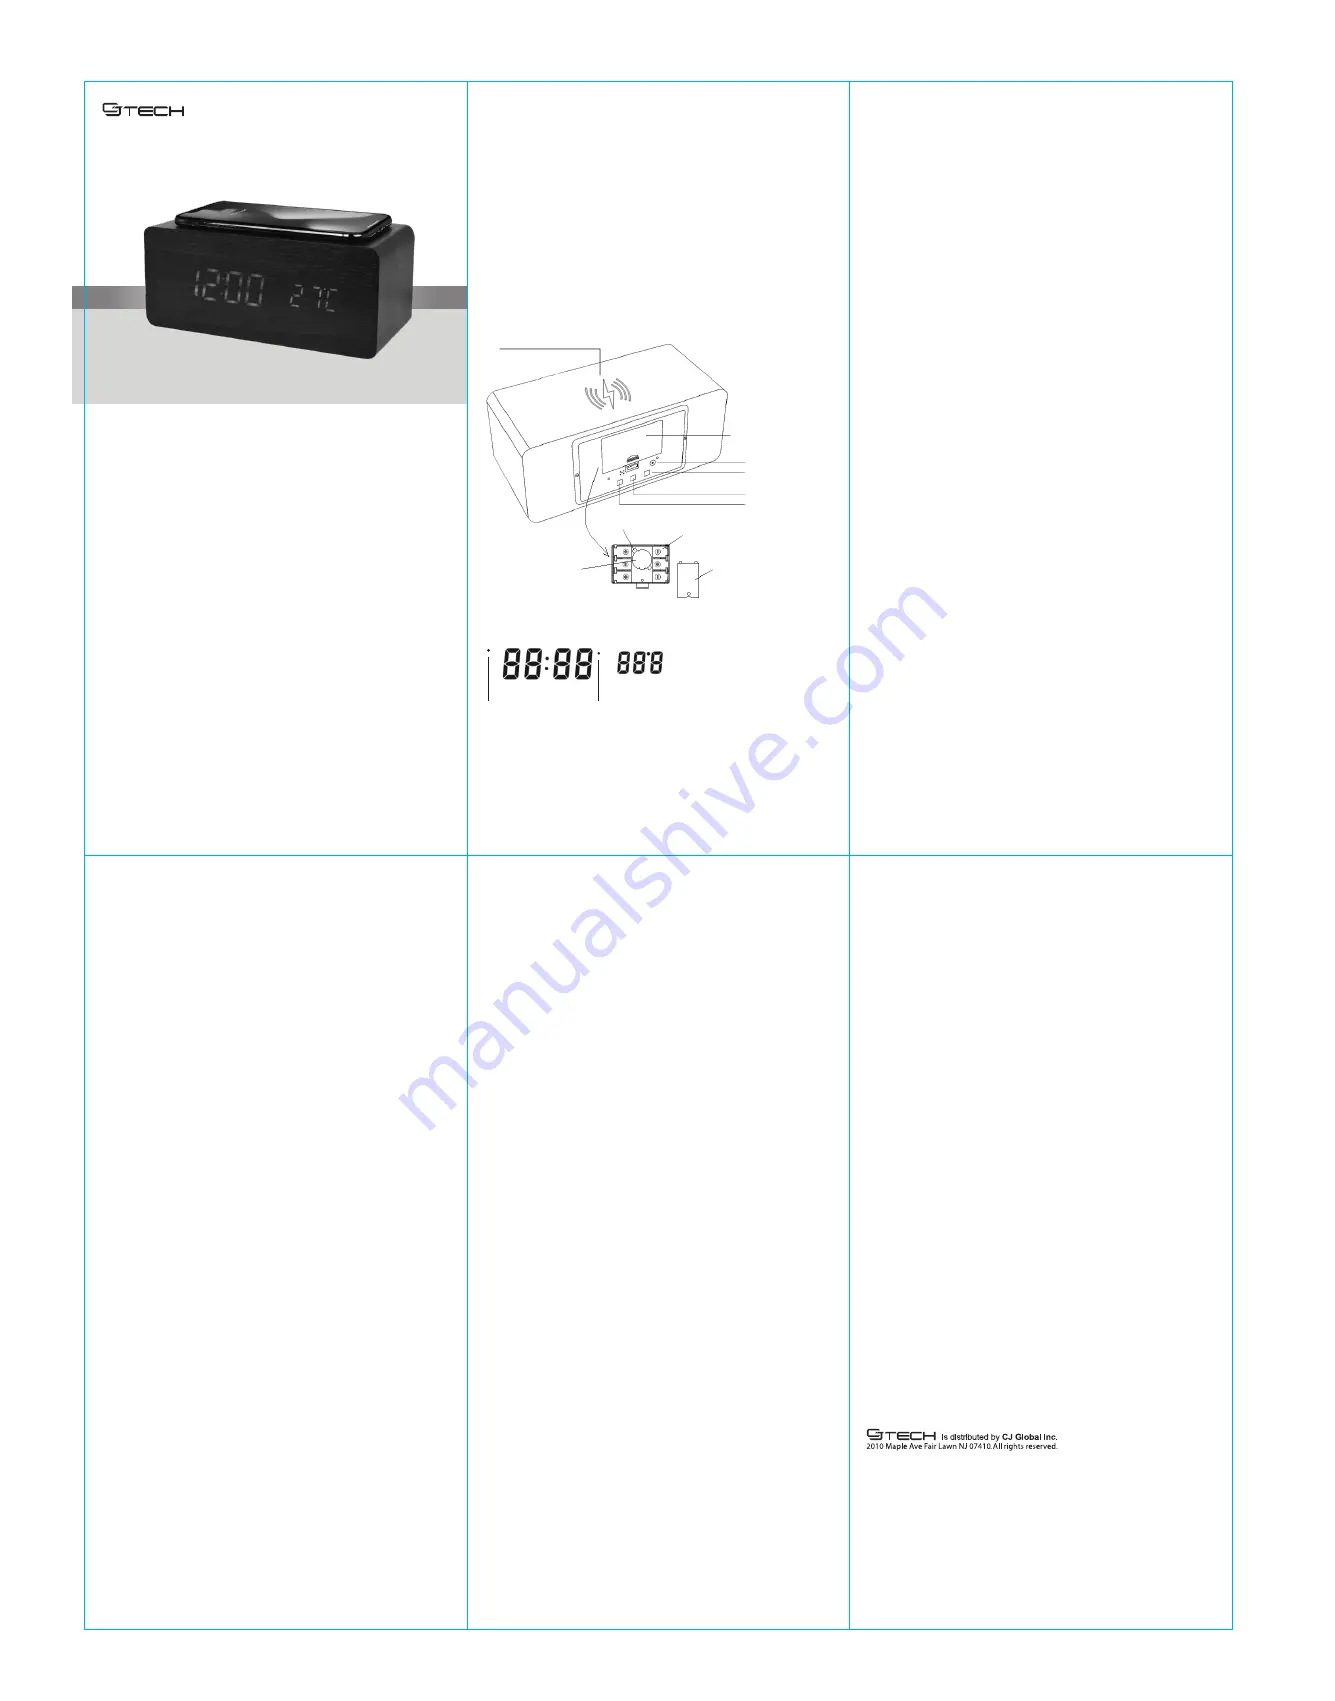
DESCRIPTION OF PARTS
LED Display
AL
indicator is ON when any Alarm 1/2/3 is on.
PM
indicator is ON when time is in PM time.
INSTRUCTIONS FOR USE
This unit can be powered by 3xAAA alkaline batteries (not
included), or USB 5V through the Type C USB cable (included)
from any suitable USB 5V power source.
Turning the Alarm Off
• When the alarm goes off it will last for 1 minute or you can stop
the alarm by pressing either SET, UP or DOWN button once.
Setting Display Modes: There’re 3 Display Modes to choose from
• Display 1 = dP-1, Display 2 = dP-2, Display 3 = dP-3.
• dP-1 is the default display mode.
• Under normal time display condition press the UP button once
to activate dP-1 mode. Press the second time to activate dP-2
display mode and the third time to activate dP-3 display mode.
• In dP-1 mode: LED display alternates between time and date
(with temperature).
• In dP-2 mode: LED displays your last setting (example alarm
you’ve set etc).
• In dP-3 mode: LED displays your last setting (example alarm
you’ve set etc) for 15 seconds and then return to the actual time
display.
Setting Temperature Unit: You can choose between °C and °F
• The default temperature display unit is °C.
• In order to switch the unit: While you’re in normal time display
mode long press the DOWN button for 2 seconds to switch the
display unit to °F. You can also change it back to °C by long
pressing the DOWN button for 2 seconds one more time.
Power Saving Mode (Sound control):
In order to save power you
can activate “Power Saving mode”. When this mode is activated
your display automatically turns off after 30 seconds. And it
comes back every time it detects a considerable ambient sound
(example clap of your hands, etc). The display comes on for 30
seconds before turning off again.
In order to active Power Saving model, while you’re in normal
time display mode, press the DOWN button once. Display will
show oNSd.
Cancelling Power Saving Mode
Press the DOWN button one more time to turn off the power
saving mode. LED display with show - -Sd.
Wireless charger
After powering on the unit place your Qi integrated mobile phone
on the wireless charging area located on the top of the unit.
Wireless charging of the phone will start immediately.
• If you connect the Alarm Clock to regular 5V USB power source
the internal wireless charger will charge your phone at the regular
5W charging speed. (5V USB Power Source not included).
• If you connect the Alarm Clock to QC 3.0 Quick Charger, the
internal wireless charger will charge your phone at a 10W fast
charging speed. (QC 3.0 quick charger not included).
Voice Activation / Touch Feature
The Voice Activation feature will turn on the LED time and
temperature reading when you make a noise (like a clap) or
by
touching the unit. Note this is a power saving mode that can be
turned off if you want the display to show all the time.
Important Information
Ensure your device is compatible. If a non-QI compatible device is
used the charger may overheat. When the phone is not placed on
the charging surface correctly your phone may not charge
properly. Wireless charging may not work properly if you have a
thick case on your phone. If needed remove it before placing your
phone on the wireless charger. If a headset is connected to your
phone when placed on the surface it may not charge.
Specifications
Input:
5V 2A, 9V 1.5A
Output:
5V 1A, 9V 1A
Stand by Power:
<0 2W
Charging Distance:
5-7 0 MM
Charging Effect:
75%
Charging Power:
10 W
Power Supply USB 5V/ 3*AAA battery case (battery not included)/
button battery included for clock
Care and Maintenance
Clean the unit with a soft, damp cloth. Never use chemicals or
hard abrasives. Keep this unit away from wet or damp surroundings.
IC Statement
This device contains licence
‐
exempt transmitter(s)/receiver(s)
that comply with Innovation, Science and Economic Development
Canada's licence-exempt.RSS(s). Operation is subject to the
following two conditions:
(1) This device may not cause interference; and
(2) This device must accept any interference, including interfer-
ence that may cause undesired operation of the device.
This equipment complies with IC radiation exposure limits set
forth for an uncontrolled environment.
This equipment should be installed and operated with minimum
distance 20cm between the radiator & your body.
Powering the unit
A) Activating Back Up Battery
• Back Up battery (button cell) is located in a smaller compart-
ment within the main battery compartment.
• Lift and remove the battery cover at the rear of the unit.
• Inside the battery compartment there’s another smaller battery
compartment (with button cell). This is a back-up battery.
Unscrew or remove the battery cover of this back-up battery
compartment.
• Remove the insulation tab, replace and secure the battery cover
of back-up battery by the screw.
Replacing the Back-Up battery, when battery is drained.
• Lift and remove the battery cover at the rear of the unit.
• Inside the battery compartment there’s another smaller battery
compartment (with button cell). This is a back-up battery.
Unscrew and remove the battery cover of this back-up battery
compartment.
• Replace the old Button Cell Back-Up battery (CR2032 button cell
type) with a new one. Replace and secure the cover of back-up
battery with a screw.
B) Main Power: There are 2 ways of powering this product
(Battery or USB).
1.
Battery: Install 3xAAA alkaline batteries in the battery compart-
ment as per the polarity indicated and then place the battery
cover back, securely.
2.
USB: Or insert the Type C plug of the supplied USB cable to
Type C Power Port located at the rear of the unit. Plug the USB
side of the USB cable to a suitable USB 5V power source.
NOTE:
• Do not mix old and new batteries.
• Do not mix different battery types; alkaline, standard (Carbon -
Zinc), or rechargeable (Nickel - Cadmium) batteries.
• Do not expose battery to excessive physical shock, vibration, or
liquids. Do not disassemble, attempt to repair or deform the
battery.
• Do not dispose batteries in fire.
• Do not peel or damage the battery label. Risk of explosion and
damage to product if batteries are replaced incorrectly. Follow
safety information on battery.
• Remove batteries from the unit, if it is not intended to be used
for an extended period of time.
• Batteries shall not be exposed to excessive heat such as
sunshine or fire.
• Dispose of the used batteries according to the requirements of
the local regional needs.
OPERATING INSTRUCTIONS
Setting the Time
• Press SET button for 3 seconds to enter Setting mode: Select
either 12 or 24 hour format by short pressing UP & DOWN
buttons. Press SET button to confirm your selection. Under
12-hour format, PM indicator will light up on left of displayed
time.
• After you’ve made your hour format selection you automatically
enter into Hour adjustment mode. Hour digit flashes and it can be
adjusted by pressing UP & DOWN buttons. Long press the button
for moving numbers in a fast forward/ backward way. Press SET
button to confirm your selection. This will lead into Minute
adjustment mode. Minute digit flashes, and it can be adjusted by
pressing UP & DOWN buttons. Long press the button for moving
numbers in fast forward/backward way. Press SET button to
confirm your selection and complete time setting.
Setting the Date
• When you’re in Time/ Temperature short press SET button to
enter Date setting mode, then long press the SET button for 2
seconds to enter into Year adjustment mode. Year value flashes
and it can be adjusted by pressing UP & DOWN buttons. Long
press the button for moving numbers in a fast forward/backward
way. Press SET button to confirm your selection and enter in
Month adjustment mode. Month digit flashes and it can be
adjusted by pressing UP & DOWN buttons. Long press the button
for moving numbers in a fast forward/backward way. Press SET
button to confirm your selection and enter into Date adjustment.
Date flashes, and it can be adjusted by pressing UP & DOWN
buttons. Long press the button for moving numbers in a fast
forward/backward way. Press SET button to confirm your
selection and complete date setting.
Setting the Alarm(s): You can set up to 3 alarms at a time
• When you’re in Time/Temperature mode press SET button twice
to enter Alarm 1, then press SET button once to enter Alarm 2, or
short press SET button one more time to enter Alarm 3.
• When you’re in Alarm Mode (display shows - -A1, or - -A2, or -
-A3) press UP button once to set the alarm on. This will turn the
alarm indicator on and LED display will show oNA1 (oNA2 or
oNA3). Press the SET button for 2 seconds to enter into alarm
time setting. Hour digit flashes with alarm AL indicator on. Adjust
it by pressing UP & DOWN buttons. Long press the button for
moving numbers in a fast forward/backward way. Then press
SET button to confirm the hour and enter into Minute adjustment.
Minute digit flashes and it can be adjusted by short pressing UP
& DOWN button. Long press the button for moving numbers in a
fast forward/backward way. Then press SET button to confirm
your setting and exit.
Cancelling Alarms
Note: When Alarm Mode displays A1 (A2 or A3) press UP button
the second time to cancel the alarm. LED display will show - -A1,
or - -A2, or - -A3.
WIRELESS CHARGING
BATTERY COVER
DC
DOWN
UP
SET
INSULATION TAB
BATTERY
COMPARTMENT
BATTERY COVER
OF BACK-UP
BATTERY
CR2032
BUTTON CELL
(INCLUDED INSIDE)
PM
AL
FRONT - Open: 27 cm x 36,39 cm / Closed: 9 cm x 18,19 cm


