Citiwell Orbitor OR6000 Series, Instructions And Owner'S Manual
The Citiwell Orbitor OR6000 Series is a cutting-edge home automation device that brings convenience and control to your fingertips. With its sleek design and advanced features, this product offers seamless integration into your smart home ecosystem. Ensure proper installation and maximize its potential by downloading the Instructions and Owner's Manual for free from our website.
Share
Download


Reviews:
No comments
Related manuals for Orbitor OR6000 Series
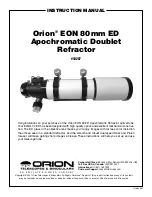
EON 10287
Brand: Orion Pages: 4

DOB-150
Brand: Bresser Pages: 8

70/900 EL
Brand: Bresser Junior Pages: 172

78-7360
Brand: Bushnell Pages: 2

TAL-1
Brand: NPZ Pages: 26

UM053
Brand: Mustech Pages: 25

C-JRS
Brand: cassini Pages: 4

Tycho
Brand: Zhumell Pages: 28

119467C
Brand: Bushnell Pages: 1

2.5-10x 44mm
Brand: Bushnell Pages: 12

65-2134M
Brand: Bushnell Pages: 56

VITOM II
Brand: Storz Pages: 20

SENDX2680A
Brand: ENGAGE Pages: 4


