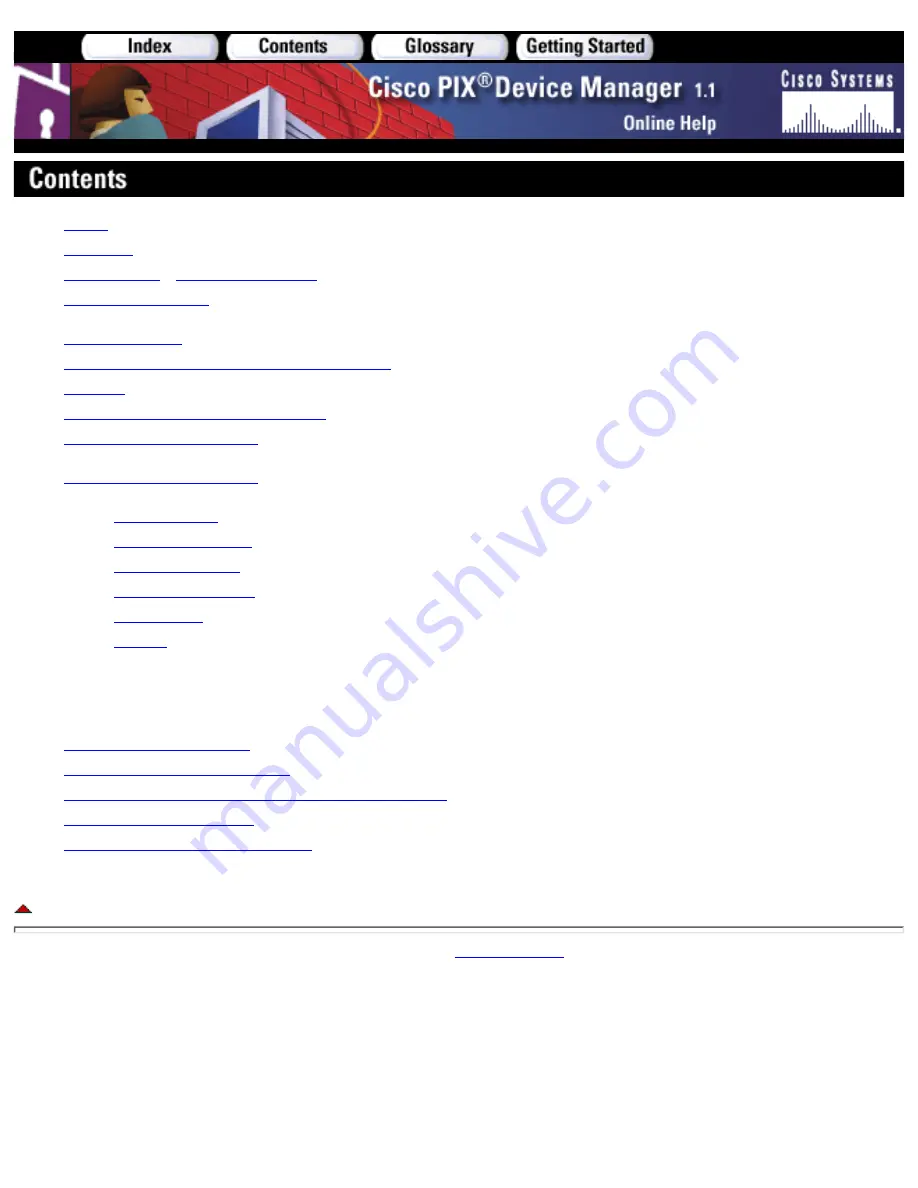
background image

Index
Glossary
About PDM

 - 

New for PDM 1.1

PDM Icon Legend

Getting Started
Applying Configuration Changes in PDM
Refresh
More about Internet Protocol (IP)
Unsupported Commands

Help Topics by Location

Access Rules
Translation Rules
Hosts/Networks
System Properties
Monitoring
Menus

Additional Resources

Top Security Resources
PIX Firewall Documentation
Cisco Technical Assistance Center>PIX Firewall
PIX Firewall Top Issues
PIX Firewall Product Literature


Copyright © 2001 

Cisco Systems, Inc.


Summary of Contents for PIX 520 - PIX Firewall 520

Page 1: ...otocol IP Unsupported Commands Help Topics by Location Access Rules Translation Rules Hosts Networks System Properties Monitoring Menus Additional Resources Top Security Resources PIX Firewall Documentation Cisco Technical Assistance Center PIX Firewall PIX Firewall Top Issues PIX Firewall Product Literature Copyright 2001 Cisco Systems Inc ...

Page 2: ... using the PIX Firewall CLI or Cisco Secure Policy Manager Cisco Secure PM Monitors and configures one PIX Firewall unit at a time but you can point your browser to more than one PIX Firewall unit and administer several PIX Firewall units from a single workstation Runs on platforms that support Java and does not require a separate plug in The PDM applet uploads to your workstation when you point y...

Page 3: ...activation key sent to you by completing the form at the following website http www cisco com kobayashi sw center internet pix 56bit license request shtml Verify that your PIX Firewall meets all PIX Firewall software version 6 0 requirements listed in the Release Notes for the Cisco Secure PIX Firewall Version 6 0 1 or higher You must have version 6 0 installed on the PIX Firewall unit before usin...

Page 4: ...lorer 5 0 Service Pack 1 or higher 5 5 recommended Netscape Communicator 4 51 or higher 4 76 recommended We recommend Internet Explorer on Windows as PDM may load faster into this browser on this operating system Any Pentium or Pentium compatible processor running at 350 MHz or higher At least 128 MB of random access memory RAM We recommend 192 MB or more An 800 x 600 pixel display with at least 2...

Page 5: ...x Red Hat Linux 7 0 running the GNOME or KDE 2 0 desktop environment Supported browser Netscape Communicator 4 75 or later version At least 64 MB of random access memory RAM An 800 x 600 pixel display with at least 256 colors We recommend a 1024 x 768 pixel display and at least 16 bit colors Copyright 2001 Cisco Systems Inc ...

Page 6: ...ts IP address ASA Adaptive Security Algorithm Allows one way inside to outside connections without an explicit configuration for each internal system and application Cache A temporary repository of information accumulated from previous task executions that can be reused decreasing the time required to perform the tasks CLI Command Line Interface The primary interface for entering configuration and...

Page 7: ...ation Protocol Provides a mechanism for allocating IP addresses to hosts dynamically so that addresses can be reused when hosts no longer need them DMZ See Interface DNS Domain Name System or Service An Internet service that translates domain names which are alphabetic into IP addresses which are composed of numbers Dynamic PAT NAT See NAT PAT Address Translation E H ECHO See Ping ICMP See also Fi...

Page 8: ... to IP packet processing Implicit Rule An Access Rule automatically created by the PIX Firewall based on default rules or as a result of user defined rules Inside See Interface Interface Interface Name The physical connection between a particular network and a PIX Firewall The inside interface default name is inside and the outside interface default name is outside Any perimeter interface default ...

Page 9: ...nto network subnet and host parts The netmask has ones in the bit positions in the 32 bit address which are to be used for the network and subnet parts and zeros for the host part The mask should contain at least the standard network portion as determined by the address s class and the subnet field should be contiguous with the network portion See also IP Address TCP IP host host network NAT Netwo...

Page 10: ... IP addresses in the global pool See also Q T RADIUS Remote Authentication Dial In User Service See also AAA TACACS Refresh RPC remote procedure call RPCs are procedure calls that are built or specified by clients and executed on servers with the results returned over the network to the clients See also client server computing Caution RPC is not a very secure protocol and should be used with cauti...

Page 11: ...console To use SSH your PIX Firewall must have a Data Encryption Standard DES or 3DES Triple DES activation key Standby Standby Unit Secondary Unit The backup PIX Firewall unit when two are operating in Failover mode State Stateful Stateful Inspection Network protocols maintain certain data called state information at each end of a network connection between two hosts State information is necessar...

Page 12: ...simple protocol used to transfer files It runs on UDP and is explained in depth in Request For Comments RFC 1350 See also Fixup Translate Translation Address Translation See Xlate U Z UDP User Datagram Protocol Connectionless transport layer protocol in the TCP IP protocol that belongs to the Internet protocol family URL Universal Resource Locator A standardized addressing scheme for accessing hyp...

Page 13: ...tworks HTTP FixUp HTTPS PDM Monitoring Connection Graphs HTTPS M P Mail Server Wizard SMTP FixUp Mask Netmask Menu Miscellaneous Help Monitor Monitoring Monitoring Graphs NAT Wizard Navigation Contents Getting Started Glossary About PDM Netmask Options Preferences Unparsed Commands Password Admin PAT Translation Rules PAT Wizard PDM About PDM PDM Icon Legend PDM Logging View PDM Log Monitor PDM Us...

Page 14: ... FixUP SSH Secure Shell Administration Monitor Secure Shell Sessions Start Getting Started Static Routes Wizard Syslog Logging System Properties Tabs TCP Telnet Admin Telnet Console Sessions TFTP Server Admin Write TFTP Server Timeout System Properties Topics Help Topics by Location Translation Rules Edit Translation Rules U Z UDP Unparsed Configuration Commands Unsupported Configuration Commands ...

Page 15: ...lation Rules Hosts Networks Interfaces PDM Log Edit Edit Rule Edit Failover View PDM Log Print Manage Pools Add 1 Routing SSHl Sessions Search Field Print Add 2 RIP Telnet Sessions NAT Dynamic Add 3 Static Route PDM Users NAT Static Add 3 NAT Proxy ARPs DHCP Client Search Field Add 3 Map Pools DHCP Server Graphs Introduction Edit NAT PIX Admin New Graph Edit Routing Authentication System Graphs Se...

Page 16: ... Syslog Interface Graphs Others AAA AAA Server Groups AAA Servers Auth Prompt URL Filtering Intrusion Detection IDS Policy IDS Signatures Advanced FixUp FTP H 323 HTTP RSH RTSP SIP Skinny SMTP SQL Net Anti Spoofing Fragment TCP Options Timeout History Metrics Wizard Help Files Interfaces Default Route ...

Page 17: ...outes Address Translation NAT PAT Mailserver Check Boxes Web Server End Miscellaneous Print PDM Icon Legend Applying Changes Refresh More about Internet Protocol IP Unsupported Copyright 2001 Cisco Systems Inc ...

Page 18: ...nfiguration on PIX If you have already set up a TFTP server in System Properties PIX Administration TFTP Server this box will be selected by default Interface Name The interface on which your TFTP server resides This information reflects what is configured in System Properties PIX Administration TFTP Server If Click here to use the existing TFTP server Configuration on PIX is not selected the defa...

Page 19: ...teps Enter the IP address of the TFTP server you wish to write the configuration file to 3 Enter the TFTP server Path filename beginning with forward slash and ending in the file name to which the running configuration file will be written Note The path must begin with a forward slash Example TFTP server path tftpboot pixfirewall config3 4 Click Apply to PIX 5 Copyright 2001 Cisco Systems Inc ...

Page 20: ... panel uses the configure net command to specify the IP address of the TFTP server and the tftp server command to specify the interface and the path filename on the server where the running configuration file will be written Once this information is applied to the running configuration PDM File Write Configuration to TFTP Server uses the write net command execute the file transfer PIX Firewall sup...

Page 21: ...nel to the information displayed when it was opened or the last time Refresh was clicked while open For more information on PIX Firewall and TFTP refer to the PIX Firewall Configuration Guide for your respective software version Applying Changes to the PIX Firewall Changes to the table made by Add Edit or Delete are not immediately applied to the running PIX configuration You must click on one of ...

Page 22: ...ite Configuration to Flash Writes a copy of the running configuration to Flash memory in the PIX Firewall unit Use File Write Configuration to Flash or Write Configuration to TFTP Server TFTP server file s Configuration file copies stored on a TFTP server by File Write to TFTP Server For more information refer to System Properties PIX Administration TFTP Server ...

Page 23: ...t A copy of the running configuration file on the primary unit becomes the running configuration of a failover standby unit by File Write Configuration to Standby Unit For more information refer to System Properties Failover Copyright 2001 Cisco Systems Inc ...

Page 24: ...fresh Refresh PDM with current configuration from PIX by selecting or File Refresh PDM with Current Configuration from PIX Refer to Notes on Applying Configuration Changes Copyright 2001 Cisco Systems Inc ...

Page 25: ...uration File Terminology How and When Changes to Configuration Files are Applied CLI console sessions Multiple PDM and CLI Console Sessions Cisco Secure Policy Manager CSPM and PDM When deployed for operation in your network there are multiple copies of a PIX Firewall running configuration file Internal Running configuration Flash memory External TFTP server Failover standby unit PIX Firewall Conf...

Page 26: ...tware is connected directly to the console port or by a network Refer to CLI console sessions 7 Multiple PDM Sessions The PIX Firewall can support multiple PDM sessions at the same time If other PDM sessions make changes to the running configuration you will not see them in your PDM session until you click Refresh You may see if there are other PDM sessions active by using Monitoring PDM Users 8 H...

Page 27: ...PDM with Current Configuration from PIX You may view active PDM and CLI console sessions in the Monitoring panel Monitoring PDM Users Monitoring Secure Shell Sessions Monitoring Telnet Console Sessions If any other PDM sessions are in operation when you make changes using your PDM CLI tool your changes will affect all the other PDM sessions when they click Refresh Refer also to Serial Telnet PDM H...

Page 28: ...ck box allows the Failover Interface and IP Addresses displayed in the table to be selected and then edited by clicking on the Edit button This lets you assign IP addresses for the standby unit To change the IP address for the primary unit change speed or other interface settings use the System Properties Interfaces dialog box Interface Displays the name of the interface on the active PIX Firewall...

Page 29: ...es or to the last time you clicked Apply to PIX Edit Edit Opens the Edit dialog box The Failover IP Addresses Edit dialog box allows you to edit the IP address of the interface that you selected from the Failover dialog box Enabling Failover Follow these steps to enable failover Note Before enabling failover make sure that the configuration in the standby unit is the same as the primary unit using...

Page 30: ...efault is 15 seconds The minimum is 3 seconds and the maximum is 15 seconds Enabling Stateful Failover Follow these steps to enable Stateful Failover Select the checkbox for Enable Stateful Failover 1 Select an interface where a fast LAN link is available from the drop down menu 2 Copyright 2001 Cisco Systems Inc ...

Page 31: ...ames this panel displays and allows you to edit additional configuration information required for each interface Your configuration edits are captured by PDM but not sent to the PIX Firewall unit until Apply to PIX is clicked You can monitor interfaces using Monitoring Interface Graphs Using Tools CLI the show interface command provides additional useful information about interface configurations ...

Page 32: ...late collisions 0 deferred 0 lost carrier 0 no carrier input queue curr max blocks hardware 128 128 software 0 0 output queue curr max blocks hardware 0 2 software 0 1 Field Descriptions The Interfaces panel provides the following following information Hardware ID Displays the hardware name of the interface located on your PIX Firewall unit Speed The physical level interface speed such as 10BaseT ...

Page 33: ...o return to the previous panel click OK Accepts changes and returns to the previous panel Cancel Discards changes and returns to the previous panel Help Provides more information 5 After returning to the Interfaces panel changes will not be applied unless you clic Apply to PIX or Reset Applying Changes to the PIX Firewall Changes to the table made by Add Edit or Delete are not immediately applied ...

Page 34: ...ailable for each enabled interface Packet Rates Displays the number of packets per second pps input and output on the interface The Packet Rates displayed in the Real time and Last 10 minute views are calculated based on a 10 second time period The rates displayed for the other history views are calculated based on an average of the 10 second periods between each data point on the graph Bit Rates ...

Page 35: ...ce since the interface counters were last cleared or the PIX Firewall was rebooted Miscellaneous Displays the total number of received broadcasts in packets on the interface since the interface counters were last cleared or the PIX Firewall was rebooted Collision Counts Displays the total number of output errors collisions and late collisions in packets on the interface since the interface counter...

Page 36: ... a single window following these basic steps Select a Graph Category from the tree list to the left Select a Graph Type under the Category Select an individual Graph from the Available Graphs list Add it to the Selected Graph s list Name the Graph Window Graph It Graph It opens new Graph Window and displays the graphs which were added to the Selected Graphs list The graphs displayed in the new Gra...

Page 37: ...st and added to the Graph Window Add Adds to the Selected Graph s list all graphs you have selected from the Available Graphs for list Remove Removes graphs you have currently selected in Selected Graph s list Graph It Opens a Graph Window which displays the graphs in the Selected Graph s list Building a New Graph Window Follow these steps to build a new Graph Window Select one of the following Gr...

Page 38: ... also select additional Graph Category Types from the graph tree and add them to the Selected Graph s list 5 Optionally you can name the Graph Window in Graph Window box or select previous Graph Windows by clicking on the drop down 6 Displaying a Graph Window Click to open a new Graph Window and display the graph s which can be bookmarked printed and exported Copyright 2001 Cisco Systems Inc ...

Page 39: ...raphs Exporting Data Important Notes IDS statistics are tracked by the PIX Firewall thus available for graphing only when one or more IDS Policies are enabled using the System Properties Intrusion IDS Policy and System Properties Intrusion IDS Signatures panels IDS Graph Types The IDS graphs represent the complete collection of IDS signatures supported by the PIX Firewall categorized into subsets ...

Page 40: ...tacks TCP Attacks UDP Attacks DNS Attacks FTP Attacks RPC Requests to Target Hosts YP Daemon Portmap Requests Miscellaneous Portmap Requests Miscellaneous RPC Calls RPC Attacks Copyright 2001 Cisco Systems Inc ...

Page 41: ...the Graph Window Real time starting when the graph is displayed with a new data point every 10 seconds Last 10 minutes with a data point every 10 seconds Last 60 minutes with a data point every 1 minute Last 12 hours with a data point every 12 minutes Last 5 days with a data point every 2 hours Note Time horizons other than Real time are available for viewing only when the History Metrics feature ...

Page 42: ... Bookmarked Graph Windows To recall a previously bookmarked Graph Window select the bookmark in your browser If the Graph Window already exists it will be brought to the front PDM does not have to be running when you select the bookmark you previously created for a Graph Window If PDM is not running the browser will launch PDM from the PIX Firewall from which the bookmark was created and then disp...

Page 43: ...Data To export Graph or Table data in a comma separated value format use the following steps From the Graph Window select Export 1 Similar to printing if there is more than one Graph in the Graph window the Export Graph Data dialog will appear Select one or more of the graphs listed by checking the box next to the Graph name More than one selection will be stored in a single file 2 Click Export at...

Page 44: ...int privileges Click Grant to grant the applet printing privileges When using Internet Explorer permission to print is already granted when you originally accepted the signed applet 1 Print Dialog will then appear which varies depending on your operating system 2 In the Print Dialog select the appropriate settings including 3 Destination printer Quality layout or other printer specific settings Pa...

Page 45: ...Copyright 2001 Cisco Systems Inc ...

Page 46: ...utbound auditing For a complete list of supported Cisco Secure IDS signatures their wording and whether they are attack or informational messages refer to System Log Messages for the Cisco Secure PIX Firewall for the your PIX Firewall software version The following sections are included in this Help topic Field Descriptions Add Edit Delete Selecting IP Attack and IP Informational Actions Resetting...

Page 47: ...g box appears 1 Define the new policy s name type and action s and click OK 2 In the IDS Policy panel click Apply to PIX 3 Editing IDS Policy Settings Follow these steps to modify an existing IDS policy In the IDS Policy panel select the rule you want to change and click Edit The Edit IDS Policy dialog box appears 1 Change the policy settings as desired and click OK 2 In the IDS Policy pane click ...

Page 48: ...etting to Last Applied Settings Reset Discards changes and reverts the panel to the information displayed when it was opened or the last time Refresh was clicked while open Copyright 2001 Cisco Systems Inc ...

Page 49: ...gured action does not drop the packet then the same packet can trigger other signatures PIX Firewall supports both inbound and outbound auditing For a complete list of supported Cisco Secure IDS signatures their wording and whether they are attack or informational messages refer to System Log Messages for the Cisco Secure PIX Firewall Version x x Field Descriptions The IDS Signatures panel display...

Page 50: ...he Enabled or Disabled column and click the appropriate button to move them to the other column 1 Click Apply to PIX 2 Resetting to Last Applied Settings Reset Discards changes and reverts the panel to the information displayed when it was opened or the last time Refresh was clicked while open Copyright 2001 Cisco Systems Inc ...

Page 51: ...y be changed using the perfmon interval command via the Tools Command Line Interface panel Xlates Xlate Utilization Displays the number of xlates per second during the last interval An xlate also referred to as a translation entry represents a mapping of one IP address to another or a mapping of one IP address port pair to another Perfmon AAA Perfmon Displays the number of Authentication Authoriza...

Page 52: ...connections and TCP Intercepts per second processed by the PIX Firewall during the last interval Copyright 2001 Cisco Systems Inc ...

Page 53: ...se The command and result text is retained in Response for a history of the session until erased by Clear In Multiple Line Commands multiple lines of commands may also be entered or pasted in from other sources then sent as a list of commands using Send CLI Console Sessions and PDM In addition to PDM PIX Firewall administrators may use the PDM CLI tool which is one type of CLI console session Chan...

Page 54: ...log box has these buttons Send Sends commands to the PIX Firewall then returns to the main CLI panel where Response displays the results Cancel Returns to the CLI main panel without sending commands Help Provides more information about using multiple line commands Entering Command Lines Follow these steps to enter and view results of single line commands Type a command in the Command box 1 To tran...

Page 55: ...ommand summary of all CLI commands Follow these steps to get help on the syntax of a single command In Command or Multiple Line Command enter the command name followed by a question mark or help followed by a command 1 Click Send to view a description and the syntax of the command in Response Example Result of PIX command help name USAGE no name ip_address name DESCRIPTION name Associate a name wi...

Page 56: ... name dynamic map Specify a dynamic crypto map template eeprom show or reprogram the 525 onboard i82559 devices enable Modify enable password established Allow inbound connections based on established connections failover Enable disable PIX failover feature to a standby PIX filter Enable disable or view URL Java and ActiveX filtering fixup Add or delete PIX service and feature defaults flashfs Sho...

Page 57: ...nfigure PIX shun Manages the filtering of packets from undesired hosts snmp server Provide SNMP and event information sysopt Set system functional option static Map a higher security level host address to global address telnet Add telnet access to PIX console and set idle timeout ssh Add SSH access to PIX console set idle timeout display list of active SSH sessions terminate a SSH session terminal...

Page 58: ...ble Blocks graphs Blocks Used Displays the number of used blocks for each preallocated PIX Firewall block size Blocks Free Displays the number of available blocks for each preallocated PIX Firewall block size CPU graph CPU Utilization Displays the PIX Firewall CPU utilization percent Each data point represents an instantaneous snapshot of the PIX Firewall CPU utilization at that moment in time Fai...

Page 59: ...ue depth and total number of packets queued since failover was enabled or the PIX Firewall rebooted Receive Queue Displays the current depth in packets of the failover update queue used by the PIX Firewall to receive state update packets from its failover partner Also displays the maximum queue depth and total number of packets queued since failover was enabled or the PIX Firewall rebooted Note If...

Page 60: ...s IP Address The destination IP address for the ICMP echo request packets Note Hosts may be assigned a name by administrators in Hosts Networks Basic Information Host Name and used here in place of the IP address Interface Optional The PIX Firewall interface which will transmit the echo request packets may be specified If it is not specified the PIX Firewall checks the routing table to find the de...

Page 61: ...l administrators can use the PDM Ping tool as an interactive diagnostic aid in several ways for example Loopback testing of two interfaces A ping may be initiated from one interface to another on the same PIX Firewall unit as an external loopback test to verify basic up status and operation of each interface Pinging to a PIX Firewall interface An interface on another PIX Firewall unit may be pinge...

Page 62: ...turning echoes via the intermediate communications path Verify receipt of the ping from the PIX Firewall interface by the known good device If it is not received there may be a problem with the transmit hardware or configuration of the interface If the PIX Firewall interface is configured properly and it does not receive an echo from the known good device there may be problems with the interface h...

Page 63: ... cannot be detected by other devices or software applications However friendly hosts such as a PC running PDM or neighboring router may need to ping the PIX Firewall This feature is also referred to as configurable proxy pinging The rule table configures an access list command statement that permits or denies ICMP traffic terminating at the PIX Firewall unit A permit or deny action is specified fo...

Page 64: ...t to which the permit or deny action will be applied 0 echo reply 3 unreachable 4 source quench 5 redirect 6 alternate address 8 echo 9 router advertisement 10 router solicitation 11 time exceeded 12 parameter problem 13 timestamp reply 14 timestamp request 15 information request 16 information reply 17 mask request 18 mask reply 31 conversion error 32 mobile redirect Add Opens the Add dialog box ...

Page 65: ...el Help Provides more information 8 Editing the table Follow these steps to edit the rule table Click Edit the Edit dialog box 1 Select the ICMP Type 2 Select an Interface 3 Enter or edit the IP address which will be permitted or denied ICMP access through this interface 4 If the IP address is a host not a network then select Host 5 Select or enter a Mask for the IP address 6 Select permit or deny...

Page 66: ...ds changes made in PDM to the PIX Firewall unit and applies them to the running configuration Use the File menu to write a copy the running configuration to Flash a TFTP server or a failover standby PIX Firewall unit See Notes on Applying Configuration Changes 1 Reset Discards changes and reverts the panel to the information displayed when it was opened or the last time Refresh was clicked while o...

Page 67: ...unique number that identifies each PDM user session IP Address Displays the IP address of the client connected to the PIX Firewall via PDM If PDM knows the client host name associated with the IP address the host name will appear in this field Refresh Refreshes the current display by retrieving the PDM Users currently connected to the PIX Disconnect Disconnects the PDM User session currently selec...

Page 68: ...Copyright 2001 Cisco Systems Inc ...

Page 69: ... a PIX Firewall interface which will permit Telnet connections an interface on which is located a PC or workstation running PDM IP Address Displays the IP address of each host or network permitted to connect to this PIX Firewall through the specified interface Note This is not the IP address of the PIX Firewall interface Netmask Displays the netmask for the IP address of each host or network permi...

Page 70: ...p Provides more information Editing Telnet Rules Follow these steps to edit a rule in the Telnet rule table Click on Edit to open the Telnet Edit dialog box 1 Click on Interface to select a PIX Firewall interface from the rule table 2 In the IP Address box enter the IP address of the host running PDM which will be permitted Telnet access through this PIX Firewall interface Note This is not the IP ...

Page 71: ...ds changes made in PDM to the PIX Firewall unit and applies them to the running configuration Use the File menu to write a copy the running configuration to Flash a TFTP server or a failover standby PIX Firewall unit See Notes on Applying Configuration Changes 1 Reset Discards changes and reverts the panel to the information displayed when it was opened or the last time Refresh was clicked while o...

Page 72: ...e PIX Firewall This option allows up to three tries to access the PIX Firewall console If this number is exceeded an access denied message appears Sever Group Provides a drop down menu from which you can choose a server group to force AAA authentication Require AAA Authorization for console connections to the PIX for the following types of connections HTTPS PDM Requires AAA authentication when you...

Page 73: ...DIUS or a different server group you have named and configured using the AAA Server Groups dialog box 2 Click Apply to PIX 3 Enabling AAA Authentication for Specific Connections Follow these steps to enable administrative AAA authentication for specific connections Select one or more check boxes to require an authentication prompt whenever an HTTP Serial SSH or Telnet connection is made to the PIX...

Page 74: ...Copyright 2001 Cisco Systems Inc ...

Page 75: ...hell SSH protocol 4 RADIUS or TACACS servers may be defined to authenticate any of these connection types See PIX Administrative AAA Authentication for more information The enable password is set to authenticate administrators using the Command Line Interface for PIX management to enter the privilege mode required to view and modify the PIX configuration The same password is also used by PDM to au...

Page 76: ... PIX passwords may be entered in encrypted form For more information see the PIX Firewall Configuration Guide 8 Field Descriptions The Password panel provides the following fields Enable and PDM Password region Old Password Enter previous 16 character case sensitive password New Password Enter a new 16 character case sensitive password See Important Notes About PIX Passwords Confirm New Password R...

Page 77: ...asswords In the Old Password box enter in a 16 character case sensitive password See Important Notes About PIX Passwords 1 In the New Password box enter in a 16 character case sensitive password 2 In the Confirm New Password box reenter your new password 3 Applying Changes to the PIX Firewall If you do not wish to apply your recent change to the PIX Firewall configuration click Reset Discards chan...

Page 78: ...ng the Secure Sockets Layer SSL protocol You can monitor PDM HTTPS sessions using Monitoring PDM Users Refer to Multiple PDM and CLI Console Sessions Field Descriptions The PDM HTTPS panel displays the following fields in a rule table Interface Displays the name of a PIX interface which will permit PDM HTTPS connections an interface on which is located a PC or workstation running PDM IP Address Di...

Page 79: ... returns to the previous panel Cancel Discards changes and returns to the previous panel Help Provides more information 5 Editing PDM HTTPS Rules Follow these steps to edit a rule to the PDM HTTPS rule table Click on Edit to open the PDM HTTPS Edit dialog box 1 Click on interface to add or change a PIX interface to the rule table 2 Enter the IP address of the host running PDM which will be permitt...

Page 80: ...to the PIX Firewall unit and applies them to the running configuration Use the File menu to write a copy the running configuration to Flash a TFTP server or a failover standby PIX Firewall unit See Notes on Applying Configuration Changes 1 Reset Discards changes and reverts the panel to the information displayed when it was opened or the last time Refresh was clicked while open 2 System Properties...

Page 81: ...isplays the name of a PIX interface which will permit SSH connections an interface on which is located a PC or workstation running PDM IP Address Displays the IP address of each host or network permitted to connect to this PIX through the specified interface Note This is not the IP address of the PIX interface Netmask Displays the netmask for the IP address of each host or network permitted to con...

Page 82: ...panel Cancel Discards changes and returns to the previous panel Help Provides more information 5 Editing Secure Shell Rules Follow these steps to edit a rule in the Secure Shell rule table Click on the Edit button to open the Edit dialog box 1 Select a PIX interface from the rule table 2 Enter the IP address of the host running PDM which will be permitted SSH access through this PIX interface Note...

Page 83: ...ds changes made in PDM to the PIX Firewall unit and applies them to the running configuration Use the File menu to write a copy the running configuration to Flash a TFTP server or a failover standby PIX Firewall unit See Notes on Applying Configuration Changes 1 Reset Discards changes and reverts the panel to the information displayed when it was opened or the last time Refresh was clicked while o...

Page 84: ...SH If PDM knows the client hostname associated with the IP address the host name will appear under IP Address in the table Ver Displays the version of SSH being used by the client Type Displays the type of encryption the SSH client is using for example DES 3DES State Displays the progress the client is making in its SSH connection to the PIX Firewall State values are as follows 0 SSH_CLOSED 1 SSH_...

Page 85: ... panel Disconnecting Secure Shell Sessions Follow these steps to disconnect an existing SSH session Select an SSH session from the table 1 Click Disconnect 2 Click Refresh to verify that the SSH session has been disconnected 3 Copyright 2001 Cisco Systems Inc ...

Page 86: ...he host name will also appear in the display Show Sessions for this IP Address Allows you to enter a client IP address of the connected Telnet session s you want to show Refresh Refreshes the panel with current information from the PIX Firewall If an IP address is specified only the information about the Telnet session using that IP address is refreshed If no IP address is specified information is...

Page 87: ...Copyright 2001 Cisco Systems Inc ...

Page 88: ...display the following fields Action Determines the action type of the new rule The choices are different for Access Rules AAA Rules and Filter Rules Access Rules Permit Deny AAA Rules Authenticate Do not authenticate Authorize Do not authorize Account Do not account Filter Rules Filter ActiveX Filter Java Applet Filter URL Do not filter URL Each dialog box has an associated configuration panel whi...

Page 89: ...u selected from the Select an action list Protocol and Service This area is associated with the action types of permit and deny The Protocol and Service area lets you specify the protocol and service to use within the new or modified rule in addition to the source and destination ports if applicable The following are the protocol and service options Each protocol and service option brings up assoc...

Page 90: ...ets you select the ICMP service ICMP Type Lets you specify the ICMP message type by either typing this information in the ICMP Type box or selecting it from the service list Click on the options button denoted by three dots to select the ICMP message type IP Lets you select the IP service IP Protocol Lets you specify the IP protocol type by either typing this information in the IP protocol box or ...

Page 91: ... the following 3 Click Name In the Name box enter the name of the destination host or network or Click Interface From the Interface list select an interface name In the IP address box type the IP address of the destination host or network In the Mask box type the netmask of the destination host or network or select a netmask from the list Browse lets you select an existing host or network from the...

Page 92: ...Copyright 2001 Cisco Systems Inc ...

Page 93: ... and the search results text from the panel Hits When a search is complete a line of text will appear on the panel showing how many rules were matched for each type For example Search Results Access rules 999 AAA 888 Filter 777 would be displayed in the upper right corner of the Access Rules tab If you perform a new search the previous search selections will be cleared They will not further filter...

Page 94: ... translated Translated Interface The address where the translation occurs Translated Address The address to which the original address is translated Name The name of the host or network Search Clicking this button initiates the search function Results will be highlighted in yellow on PDM Close Clicking this button clears any changes you may have made and closes this panel Help Provides more inform...

Page 95: ...h criteria will be highlighted in yellow on PDM Follow these steps to search for access rules containing a pattern Click Browse The associated dialog box opens displaying options to search 1 Click Search to initiate the search 2 Click OK 3 Search for a Translation by Field Complete the following steps to search for a translation Select the method by which you wish to search such as Type or Origina...

Page 96: ...ice Manager generates a rule similar to the following static inside outside 192 168 7 130 192 168 1 3 netmask 255 255 255 255 0 0 Description When the PIX Firewall unit receives a session request where the source address matches the IP address of the internal file server it changes the source address to the external IP address before placing the packet onto the network of which the external addres...

Page 97: ...rity by hiding your network s internal structure from external users and enables you to logically group your users according to security domains Permits an almost unlimited number of users for one Class C network address because valid external addresses are required only when a user is connected to the Internet When you attach your existing IP networks to the Internet you do not need to replace th...

Page 98: ...ort address that is identifiable by the routers that exist within the network of your Internet service provider as well as those routers that compose the Internet backbone If the IP addresses are not unique these routers cannot route network packets Those users who have duplicate IP addresses cannot be reached and cannot establish application sessions Network Address Translation solves these probl...

Page 99: ...uses the port in addition to the IP address By using the port up to 65 535 local hosts can concurrently share a single IP address Because PAT automatically maps multiple sessions to the same registered IP address you do not need as many registered IP addresses This feature also ensures that you can dynamically grow your network Note Because PAT requires port information only TCP UDP and ICMP echo ...

Page 100: ...ands access to all PDM functions is granted for normal operation mode If PDM loads an existing running configuration and finds unsupported commands it will enter the Monitor Only mode Multiple PDM and CLI sessions may be in operation at the same time as your PDM session During normal operation if unsupported commands are entered via other CLI console sessions or your CLI tool PDM will enter Monito...

Page 101: ...ace outside Using an ACL name for multiple purposes such as in an access group command statement and in an aaa command statement For example the following commands would not be parsed by PDM access list acl_out permit tcp 10 16 1 0 255 255 255 0 209 165 201 0 255 255 255 224 access group acl_out in interface outside aaa authentication match acl_out outside AuthIn In this example the access list co...

Page 102: ...cess list eng deny ip any any A list of outbound command statements without an associated apply command statement Supported Partially Commands No PDM Changes The following table lists commands which PDM supports in the configuration but which cannot be changed in PDM PDM parses these commands in the PIX Firewall configuration and handles them transparently Table A 2 Commands That PDM Supports But ...

Page 103: ...ed with PDM and they appear in the list of unparseable commands Table A 1 Commands that PDM Parses and Allows in Configuration COMMAND DESCRIPTION aaa command include option Enable disable or view TACACS or RADIUS user authentication authorization and accounting for the server previously designated with the aaa server command aaa command match acl_name option Apply authentication authorization or ...

Page 104: ...ast RPF IP spoofing protection logging Enable or disable syslog and SNMP logging name Associate a name with an IP address nameif Specify name and security level for an interface nat Associate a network with a pool of global IP addresses outbound Create an access list to control outbound connections Exceptions Using the outbound command with the except option Combining the access list command with ...

Page 105: ... the Websense server url server Designate a server running Websense for use with the filter url command For more information about currently unsupported command combinations see the Cisco PIX Device Manager Installation Guide for your respective version Before configuring your PIX Firewall from the PDM CLI tool Cisco recommends that you review the Command Reference in the Configuration Guide for t...

Page 106: ...ble to be parsed The Unparsed Commands panel displays the following explanation PIX Device Manager did not understand the following commands while parsing your current Firewall configuration PDM does not support the complete PIX command set PDM will ignore the commands s which appear below They will NOT be removed from or changed in the PIX Configuration This is followed by a list of the commands ...

Page 107: ...The panel has these buttons OK Exits the panel Help Provides more information Copyright 2001 Cisco Systems Inc ...

Page 108: ......

Page 109: ...e search for host 10 130 44 11 will cause the 1 and 2 rules to be highlighted because the first rule contains the host 10 130 44 11 as the destination The second rule operates on the network 10 130 44 0 24 which is where host 10 130 44 11 is located Any rules that apply to 10 130 44 0 24 also apply to 10 130 44 11 The matching access rules will be highlighted in yellow Clicking Search Clear Search...

Page 110: ...which you wish to search in the Hosts Networks tab Search Initiates the search for the selected host or network Help Provides more information Close Closes the Search Search by host network dialog box Searching by Host Network Follow these steps to search for an access rule by host or network Click an Interface in the Interface list 1 In the Network tree browse to select the host or network you wi...

Page 111: ... PIX Nat 0 Access List settings Last exported filename of graph or table see Section 3 2 5 on Export Graphs Note If cookies are disabled on the browser the user settings will be lost when you exit PDM Field Descriptions This dialog contains the following fields Preview Commands Before Sending to PIX Enables viewing of CLI commands generated by PDM 1 NAT 0 Access List Settings 2 Display prompt when...

Page 112: ... cookies are disabled as this setting can be controlled by the browser s preferences Cookies are stored on your local hard drive client side so running PDM on another PC means your stored settings on the other PC will not be used Cookies are stored on a per site basis This means the preferences made for one PIX firewall do not carry over to another PIX There is no way to make a global change for a...

Page 113: ...rity interfaces The Adaptive Security Algorithm is a very stateful approach to security Every inbound packet is checked against the Adaptive Security Algorithm and against connection state information in memory This stateful approach to security is regarded in the industry as being far more secure than a stateless packet screening approach For more information refer to the section Adaptive Securit...

Page 114: ...ss rules are categorized into two modes Access Control List mode which is the default and Conduit and Outbound List mode If your PIX Firewall currently has a working configuration using either conduit commands outbound commands or access lists PDM will continue to use your current model If the PIX Firewall is currently using conduit commands to control traffic PDM will add more conduit commands to...

Page 115: ...n which hosts will be subjected to authentication authorization or accounting Filter Rules Govern which connections between which hosts will be subjected to content or URL filtering Show Detail and Show Summary Show Detail Shows which hosts are capable of communication with other hosts using protocols and services Example Show Summary Shows rules in a format similar to CLI which is similar to the ...

Page 116: ...cess list command for access control The keyword inbound enclosed in parentheses without any interface name which means the rule is applied to traffic the PIX Firewall receives from multiple interfaces as long as the traffic direction is from a lower security interface to a higher security interface For example this rule may be applied for traffic from outside to inside and from dmz to inside This...

Page 117: ... applet filter URL and do not filter URL Source Name Address Displays the IP addresses and names of hosts that will have filtering operations performed when connecting to hosts listed in the Destination Name Address column Destination Name Address Displays the IP addresses and names of hosts that will be subject to filtering operations performed when connecting to hosts listed in the Source Name A...

Page 118: ...ring starts over because these rules are part of a new ACL and are evaluated by the PIX Firewall separately from the ACL that is applied to the inside interface There is an implicit rule in all ACLs at the end of the ACL denying all other traffic received on the inside interface from the network rule denying all other traffic This is irrelevant for users configuring a new PIX Firewall or with a PI...

Page 119: ...aces If a PIX Firewall had previous configuration with an outbound rule applied to more than one interface PDM will not interpret the rule Organization of AAA Rules AAA Rules are ordered by the interface on which they are configured and enforced Within each group rules are shown by type with authentication rules first authorization rules second and accounting rules third AAA rules are further orde...

Page 120: ...are any of the following Inbound rules without a static translation Outbound rules without NAT No hosts or networks defined for either source or destination Perform one of the following tasks to make the host visible Add a NAT rule making the hosts visible on the appropriate interfaces to allow traffic to pass between the two hosts Make sure the host is defined in PDM This is configured in Hosts N...

Page 121: ... will open the Paste Rule dialog box containing the copied cut rule when you attempt to paste a rule This is provided to let you make changes before pasting the rule Because rules are grouped by interface PDM does not let you add a rule to a group on an interface while the rule is applied to a different interface Pasting a rule before or after a rule created from an outbound rule is not permitted ...

Page 122: ...This is because PDM sorts outbound rules into the order that PIX Firewall will apply them to traffic Follow these steps to insert a rule Select the rule you want to Insert Before or Insert After 1 Click Insert Before or Insert After on the Rules menu Optionally you can click Insert Before or Insert After on the PDM toolbar or right click over the rule and click Insert Before or Insert After 2 The ...

Page 123: ...n about organizing rules Deleting a Rule Follow these steps to delete an existing rule Select the rule you want to delete 1 Click Delete on the Rules menu Optionally you can click Delete on the PDM toolbar or right click over the rule and click Delete 2 Click Apply to PIX 3 Resetting to Last Applied Settings Reset Discards changes and reverts the panel to the information displayed when it was open...

Page 124: ...dress that is used for PAT can either be one global address or the IP address of a given interface The following sections are included in this Help topic Important Notes Field Descriptions Printing Creating Changing Translation Rules Adding a New Translation Rule Editing a New Translation Rule Move using Cut and Paste Commands Adding Translation Rules Using Copy and Paste Commands Deleting Transla...

Page 125: ...eted Field Descriptions The Translation Rules tab displays the following fields Manage Pools lets you manage the Global address NAT pools which are used for dynamic NAT configuration These are the IP addresses the PIX Firewall will present to the outside or less secure interface for which they are configured See Managing Pools for more information Rule Type Displays the translation rule type appli...

Page 126: ...also double click the rule to edit it 2 In the Edit Address Translation Rule dialog box edit the translation rule and click OK to return to the Translation Rules table 3 Click Apply to PIX 4 It is not possible to change the type of rule static or dynamic in the Edit dialog box To change a static rule to a dynamic rule or a dynamic rule to a static rule cut the rule and paste it back into the Trans...

Page 127: ...ed and click OK to return to the Translation Rules tab 5 Click Apply to PIX 6 Inserting Translation Rules Follow these steps to insert a translation rule before or after a static translation See the above note that explains why these rules can only be inserted before or after static rules Select a static rule 1 On the Rules menu click Insert Before or Insert After 2 Create the rule that you would ...

Page 128: ...are presented as 209 165 200 225 using PAT Example of a Static NAT Rule In this example of a Static translation the address on the inside interface is routable on the Internet but because the PIX Firewall requires an entry for NAT it is translated as itself Rule Original Translated Type Interface Address Interface Address inside 209 165 201 1 outside 209 165 201 1 inside Company_LAN 209 165 201 0 ...

Page 129: ...cal the rules are called redundant to each other for example static in out 1 1 1 0 1 1 1 0 1 static in out 1 1 1 1 1 1 1 1 2 For address 1 1 1 1 both rules will translate it to 1 1 1 1 However translation may not be exactly identical for example static in out 1 1 1 0 1 1 1 0 0 0 1 static in out 1 1 1 1 1 1 1 1 100 100 norandomseq 2 Overlap If there exists two or more NAT rules in a configuration t...

Page 130: ...tmask 255 255 255 0 static inside outside 1 1 1 1 1 1 1 1 netmask 255 255 255 255 PIX warn PDM warn A 2 3 overlap child first static inside outside 2 2 3 3 1 1 1 1 netmask 255 255 255 255 or static inside outside 3 3 1 1 1 1 1 1 netmask 255 255 255 255 static inside outside 2 2 0 0 1 1 0 0 netmask 255 255 0 0 PIX warn PDM warn A 2 4 overlap parent first static inside outside 2 2 0 0 1 1 0 0 netmas...

Page 131: ...p 1 1 1 1 80 1 1 1 1 8080 netmask 255 255 255 255 static inside outside tcp 2 2 2 1 80 1 1 1 1 8080 netmask 255 255 255 255 PIX reject PDM reject B 2 redundant overlap between children and parent B 2 1 redundant child first static inside outside tcp 1 1 1 1 80 1 1 1 1 8080 netmask 255 255 255 255 static inside outside tcp 1 1 1 0 80 1 1 1 0 8080 netmask 255 255 255 0 PIX accept PDM warn B 2 2 redu...

Page 132: ...mentioned in A and B Overlapping between static NAT and PAT is bad It creates unpredictable address translation on PIX Listed are some possible misconfigurations you may encounter C 1 static and PAT for single address C 1 1 static first static inside outside 1 1 1 1 1 1 1 1 netmask 255 255 255 255 static inside outside tcp 1 1 1 1 80 1 1 1 1 8080 netmask 255 255 255 255 PIX reject PDM reject C 1 2...

Page 133: ... overlap with nat 0 nat inside 0 0 0 static inside outside tcp 2 2 2 1 80 1 1 1 1 8080 netmask 255 255 255 255 or static inside outside tcp 1 1 1 1 80 1 1 1 1 8080 netmask 255 255 255 255 PIX accept PDM warn D 2 overlap with dynamic nat nat inside 1 0 0 global outside 1 2 2 2 1 2 2 2 100 static inside outside tcp 2 2 2 101 80 1 1 1 1 8080 netmask 255 255 255 255 PIX accept PDM warn E Between diffe...

Page 134: ... translation rules on the Translation Rules tab These different configuration options accomplish the same results The Hosts Networks tab provides another view to modify these settings on a per host network basis The following sections are included in this Help topic Important Notes Field Descriptions Deleting a Host or Network Important Notes Consider the following information before defining the ...

Page 135: ... Hosts Network tab select the name of the interface from which you want to delete a host or network in the Interface box 1 In the tree select the host or network you want to delete If necessary expand the tree to view the children of a specific node You cannot delete an interface Note When you delete a host or network PIX Device Manager deletes all access and translation rules and static routes de...

Page 136: ...he address pool used for dynamic address translation Pool ID Identifies the ID number of the address pool IP Address es Identifies the type and value of the address es for the pool It can identify one of the following types A range of addresses A PAT address A PAT address associated with an interface Add Opens the Add Global Pool Item dialog box from which you can define the settings for a new glo...

Page 137: ...the network on which translated IP addresses are members b Port Address Translation PAT Click this option to specify that an IP address be used for Port Address Translation PAT If you select this option specify the following value Enter the IP address used for PAT in the IP Address box This value is the specific translated IP address to which you want to translate the original addresses of the tra...

Page 138: ... or network to which you would like to apply a rule Mask Select the network mask netmask for the address Browse Lets you select the correct IP address and mask from the Hosts Networks tree from a predefined host or network Translate address on less secured interface Selects the PIX Firewall interface to which you want to provide access For example if you are configuring a translation of an inside ...

Page 139: ... either a predefined pool of IP addresses or perform PAT on a global IP address or the less secure interface for multiple hosts on the more secure interface This is set up through Manage Pools For example if your inside network has multiple hosts you can permit outbound access through a pool or a PAT address by using Dynamic NAT to dynamically assign an global IP address for each host requesting a...

Page 140: ... Rule on the PDM toolbar 2 Using the right mouse button right click click Add 3 1 Under Original Host Network set the Interface to Inside the IP Address to 0 0 0 0 and the Mask to 0 0 0 0 This permits all outbound connections to be translated 2 In the Translate address on less secured interface box select Outside This specifies connections that start on the inside interface that go through the out...

Page 141: ...ging using the System Properties Logging Logging Setup panel In addition you must enable PDM logging using the System Properties Logging PDM Logging panel Field Descriptions The PDM Log panel displays the following fields Logging Level Allows you to choose the level of syslog messages to view The available logging levels are determined by the PDM Logging Level configured using the System Propertie...

Page 142: ... or network you want to modify Mask address mask Identifies the bits of the IP address to treat as wildcard When you define a host this value must be 255 255 255 255 For example to define a Class B network with an address space between 192 168 0 0 and 192 168 255 255 you would specify an IP address value of 192 168 0 0 and a mask value of 255 255 0 0 To define the host 192 168 1 1 on this network ...

Page 143: ... interface does not correspond to the interface from which the host or network is directly reachable click the correct interface name in the Interface list By default this value is the interface selected on the Hosts Networks tab 4 To modify the name used when referencing this host or network within access or translation rules enter the name in the Name Recommended box While this value is optional...

Page 144: ... 1 Alert Immediate action needed 2 Critical Critical condition 3 Error Error condition 4 Warning Warning condition 5 Notification Normal but significant condition 6 Informational Informational message only 7 Debugging Appears during debugging only Time Displays the PIX date and time when the syslog message was generated Message ID Description Displays the unique syslog message ID and message descr...

Page 145: ...rt the syslog messages in the display Click one of the table column headings Severity Time or Message ID Description The table will be sorted in ascending or descending order each time you click on the column heading 1 Copyright 2001 Cisco Systems Inc ...

Page 146: ...to add Mask address mask Identifies the bits of the IP address to treat as wildcard When you define a host this value must be 255 255 255 255 For example to define a Class B network with an address space between 192 168 0 0 and 192 168 255 255 you would specify an IP address value of 192 168 0 0 and a mask value of 255 255 0 0 To define the host 192 168 1 1 on this network you would specify an IP ...

Page 147: ...e 3 If the selected interface does not correspond to the interface from which the host or network is directly reachable click the correct interface name in the Interface list By default this value is the interface selected on the Hosts Networks tab 4 To specify the name used when referencing this host or network within access or translation rules enter the name in the Name Recommended box While th...

Page 148: ...hat are discovered for this host or network by specifying a static route with a lower metric than the discovered dynamic routes To create a static route for a host or network you must define the IP address and metric for the hop gateway to which the PIX Firewall will forward packets destined to the selected host or network You can also define multiple static routes for a host or network To do so c...

Page 149: ...host network NAT Network Address Translation dialog box Cancel Clears any changes you may have made and returns to the Hosts Networks tab Help Provides more information Defining Static Routes Follow these steps to define a static route for the selected host or network To specify that you want to define a static route select the Define Static Route check box 1 To identify the default or hop gateway...

Page 150: ... RIP Version 2 Notes Ensure that the key and key ID are the same as those used by any other device in your network that makes RIP version 2 updates 1 In passive mode PIX Firewall version 5 3 and higher will accept RIP version 2 multicast updates with an IP destination of 224 0 0 9 2 In the RIP version 2 default mode the PIX Firewall will transmit default route updates using an IP destination of 22...

Page 151: ...interface that you want to add from the interface list of interfaces enabled in System Properties Interfaces 2 Click the action option you want RIP to use broadcast multicast default route or passive RIP 3 Under version cick the RIP version you want to use 1 or 2 If you select version 2 see RIP Version 2 Notes 4 If you selected RIP version 2 you may enable authentication by selecting the Enable Au...

Page 152: ...ons Follow these steps to delete RIP configurations from interfaces Select an interface from the RIP Table by selecting the interface in the Interface list 1 Click Delete 2 Applying Changes to the PIX Firewall Changes to the table made by Add Edit or Delete are not immediately applied to the running PIX Firewall configuration You must click on one of the following buttons to apply or discard chang...

Page 153: ...ower security interface In this case hosts with static address translations on either interface can initiate connections assuming the appropriate access rules are defined to enable the connections For more information on static NAT and its uses refer to Understanding Static NAT Dynamic Dynamic NAT rules map between external exposed IP address es and an internal network or host address They hide sp...

Page 154: ... topic Important Notes Field Descriptions Defining Dynamic NAT Rules Defining Static NAT Rules Important Notes Consider the following notes and usage guidelines before defining a NAT rule for the selected host or network Only those enabled interfaces with lower security level values than the interface for which you are defining this host or network appear in this Create host network NAT Network Ad...

Page 155: ... when the host initiates a connection passing through the interface When this option is selected the Addresses Pool ID list and the Manage Pools buttons appear Address Pool ID Identifies the type of dynamic NAT rule to define for the selected host or network You can select one of the following values in this list No NAT Specifies that no dynamic NAT rule be used for the selected host or network If...

Page 156: ... new host or networks click Apply to PIX 5 Defining Static NAT Rules Follow these steps to define a static NAT rule Select the Static option in the row that corresponds to the interface for which you want to define a static NAT rule The IP address box and the Advanced button appear to the right of the Static option 1 To specify the IP address translated address that is exposed to the interface fro...

Page 157: ...all allows for an exchange of data between the given client and server The default value is 0 which means unlimited embryonic connections are permitted To change the default value enter the maximum number of embryonic connections in the Embryonic Limit box Randomize Sequence Number Instructs the PIX Firewall to randomize TCP sequence numbers to minimize the risk of initial sequence number predicti...

Page 158: ...r than the Maximum Connection value Verify that the Randomize Sequence Number check box is selected This option randomizes the sequence numbers generated for TCP IP packets and reduces the risk of initial sequence number prediction attacks on the PIX Firewall unit You should only clear this check box if you are using another inline firewall that randomizes TCP sequence numbers 4 To retain your cha...

Page 159: ...the gateway router Screen Element Descriptions The Static Table panel provides the following fields Interface Name Lists the internal or external network interface name enabled in System Properties Interfaces IP Address Lists the internal or external network IP address Use 0 0 0 0 to specify a default route The 0 0 0 0 IP address can be abbreviated as 0 Netmask Lists the network mask address that ...

Page 160: ... when you click Apply to PIX 7 Editing Static Routes Follow these steps to edit static routes Select an static route from the Static Route table 1 Click Edit to open Edit Static Route 2 Choose the interface name 3 Choose the mast IP address associated with the interface name you have chosen 4 Enter the IP address of the gateway router in Gateway IP 5 Enter in the number of hops to the gateway IP a...

Page 161: ...ds changes made in PDM to the PIX Firewall unit and applies them to the running configuration Use the File menu to write a copy the running configuration to Flash a TFTP server or a failover standby PIX Firewall unit See Notes on Applying Configuration Changes 1 Reset Discards changes and reverts the panel to the information displayed when it was opened or the last time Refresh was clicked while o...

Page 162: ...l has network connectivity The CLI show arp command lists the entries in the ARP table Usually administrators do not need to manually manipulate ARP entries on the PIX Firewall This is done only when troubleshooting or solving network connectivity problems The arp command is used to add an entry for new hosts on a network or when an existing host is exchanged for another Alternatively you can wait...

Page 163: ...click on one of the following buttons to apply or discard changes Apply to PIX Sends changes made in PDM to the PIX Firewall unit and applies them to the running configuration Use the File menu to write a copy the running configuration to Flash a TFTP server or a failover standby PIX Firewall unit See Notes on Applying Configuration Changes 1 Reset Discards changes and reverts the panel to the inf...

Page 164: ...g sections are included in this Help topic Important Notes Field Descriptions Important Notes DHCP Client monitoring is available only when the outside interface of the PIX Firewall is configured for DHCP addressing via the System Properties Interfaces panel Field Descriptions The DHCP Client Lease Information panel displays the following fields DHCP Client Lease Information Displays the parameter...

Page 165: ...use its allocated IP address before the lease expires The default value is 3600 seconds 1 hour Ping Timeout milliseconds Enter the number of milliseconds the PIX Firewall should wait before declaring timeout on a ping To verify the status of its DHCP leases the PIX Firewall uses Ping to dynamically determine if an IP address is still in use by a client Enable autoconfiguration Instructs the DHCP s...

Page 166: ...server automatically configure the DNS domain name DNS servers and WINS servers 5 Optional Enter the DNS domain name in the Domain Name box 6 Optional Enter the IP address es of the DNS server s the client will use in the Server 1 and Server 2 boxes under DNS You can specify up to two DNS servers 7 Optional Enter the IP address es of the WINS server s the client will use in the Server 1 and Server...

Page 167: ...face In this case hosts with static address translations on either interface can initiate connections assuming the appropriate access rules are defined to enable the connections For more information on static NAT and its uses refer to Understanding Static NAT Dynamic Dynamic NAT rules map between external exposed IP address es and an internal network or host address They hide specific networks and...

Page 168: ... internal IP address and a valid IP address on the lower security interface This rule allows hosts from the lower security interface to gain access to the selected host or network and vice versa When this option is selected the Static box and the Advanced button appear address_value Identifies the IP address translated address that is exposed to the interface from which the network or host s addre...

Page 169: ...iting a Dynamic NAT Rule Follow these steps to modify a dynamic NAT rule Select the host or network you want to modify and click Edit on the Hosts Networks tab The Edit host network dialog box appears 1 Click the NAT tab 2 Select the Dynamic option in the row that corresponds to the interface for which you want to modify a dynamic NAT rule The Addresses Pool ID list and the Manage Global Address P...

Page 170: ...repeat Steps 3 and 4 Alternatively you can modify dynamic NAT rules for an interface 5 To retain your changes and close the Edit host network dialog box click OK 6 Click Apply to PIX to activate your changes on the PIX Firewall 7 Copyright 2001 Cisco Systems Inc ...

Page 171: ...oute for this host or network Gateway IP Address Identifies the IP addresses of the default gateway or the next hop gateway that forwards any network packets destined to this network or host Metric Identifies the priority for using a specific route When routing network packets a PIX Firewall unit uses the rule with the most specific network within the rule s definition Only in cases where two rout...

Page 172: ...Define Static Route check box 1 To modify the default or hop gateway used to reach the selected host or network from this interface enter or click that address in the Gateway IP Address list 2 To modify the priority for using this route enter the number in the Metric box Only in cases where two routing rules have the same network is the metric used to break the tie In the case of a tie the lowest ...

Page 173: ...ve messages about events such as hardware failures which require attention Agent In the context of SNMP the management station is a client and an SNMP agent running on the PIX Firewall is a server OID The SNMP standard assigns a system object ID OID so that a management station can uniquely identify network devices with SNMP agents and indicate to users the source of information monitored and disp...

Page 174: ...rprises cisco ciscoProducts ciscoPIXFirewall520 same as 1 3 6 1 4 1 9 1 391 525 iso org dod internet private enterprises cisco ciscoProducts ciscoPIXFirewall525 same as 1 3 6 1 4 1 9 1 392 535 iso org dod internet private enterprises cisco ciscoProducts ciscoPIXFirewall535 same as 1 3 6 1 4 1 9 1 393 For other PIX Firewall platforms iso org dod internet private enterprises cisco ciscoProducts cisc...

Page 175: ...ssages via SNMP will not be sent not a message level 0 Emergencies Syslog messages that identify very serious system instabilities 1 Alerts System integrity issues which require immediate action 2 Critical Critical operational conditions 3 Errors Important operational error messages 4 Warnings Warning messages such as configuration errors or limit conditions 5 Notifications Normal events during op...

Page 176: ...rns to the previous panel Cancel Discards changes and returns to the previous panel Help Provides more information 5 Editing SNMP Management Stations Follow these steps to edit SNMP Management Stations Select a list item from the SNMP management station table on the SNMP panel 1 Click Edit to open the SNMP SNMP Host Access Entry dialog box 2 From Interface Name select which interface the SNMP mana...

Page 177: ...ds changes made in PDM to the PIX Firewall unit and applies them to the running configuration Use the File menu to write a copy the running configuration to Flash a TFTP server or a failover standby PIX Firewall unit See Notes on Applying Configuration Changes 1 Reset Discards changes and reverts the panel to the information displayed when it was opened or the last time Refresh was clicked while o...

Page 178: ...f available IDs of Suppressed Messages Lists the messages being suppressed from the log Suppress Entering a message ID and clicking this button will add the message to the IDs of Suppressed Messages list Restore Clicking this button will remove the selected message IDs from the IDs of Suppressed Messages list Apply to PIX Sends changes made in PDM to the PIX Firewall unit and applies them to the r...

Page 179: ...teps to suppress or restore a message type in the system log To suppress a message enter its ID in the box to the right of the Suppress button and click Suppress 1 To remove a message from the IDs of Suppressed Messages list select it and click Restore 2 Click Apply to PIX 3 Resetting to Last Applied Settings Reset Discards changes and reverts the panel to the information displayed when it was ope...

Page 180: ... conditions The Disabled choice disables message logging Logging Buffer Defines the number of logging messages that will be retained If more messages are received the oldest existing messages will be purged from the log Apply to PIX Sends changes made in PDM to the PIX Firewall unit and applies them to the running configuration Reset Discards changes and reverts the panel to the information displa...

Page 181: ... Enter the desired size of the buffer into the Logging Buffer box 1 Click Apply to PIX 2 Resetting to Last Applied Settings Reset Discards changes and reverts the panel to the information displayed when it was opened or the last time Refresh was clicked while open Copyright 2001 Cisco Systems Inc ...

Page 182: ...og server Add Clicking this button will open the Add Syslog Server dialog box where you can define the properties of a new syslog server Edit Select a server from the table and click this button to open the Edit Syslog Server dialog box where you can edit the properties of the selected server Delete Clicking this button deletes the highlighted syslog server definition Facility Select a syslog faci...

Page 183: ...w these steps to add a new syslog server In the Syslog panel click Add The Add Syslog Server dialog box appears 1 Configure the new server settings as desired and click Ok 2 In the Syslog panel click Apply to PIX 3 Editing a Syslog Server Follow these steps to change the settings of an existing syslog server In the Syslog panel select the server definition you want to change and click Edit The Edi...

Page 184: ......

Page 185: ...needed Critical level 2 critical condition Error level 3 error condition Warning level 4 warning condition Notification level 5 normal but significant condition Informational level 6 informational message only Debugging level 7 appears during debugging only Send to Telnet Select a logging level from this list to send syslog messages to all the Telnet sessions connected to the PIX Firewall Logging ...

Page 186: ...og messages of that level or lower to the PIX Firewall console all Telnet sessions and or an internal buffer as desired 2 Click Apply to PIX 3 Resetting to Last Applied Settings Reset Discards changes and reverts the panel to the information displayed when it was opened or the last time Refresh was clicked while open Copyright 2001 Cisco Systems Inc ...

Page 187: ...Server Group Deleting a Server Group Resetting to Last Applied Settings Important Notes Use the AAA Servers panel in the System Properties tab to add AAA servers to the server groups you define with this panel Field Descriptions The AAA Server Groups panel displays the following fields AAA Server Groups table Server Group Displays default and user defined AAA server groups Authentication Protocol ...

Page 188: ...oup name in the Server Group box and click TACACS or RADIUS 2 Click OK to create the server group 3 Click Apply to PIX 4 Deleting a Server Group Follow these steps to delete a server group In the AAA Server Groups panel select the server group you want to delete in the AAA Server Group table 1 Click Delete The group is deleted 2 Click Apply to PIX 3 Resetting to Last Applied Settings Reset Discard...

Page 189: ...ver panel displays the following fields AAA Server s table Server Group Displays the server group to which the AAA server belongs Interface Name Displays the interface on which the AAA server resides Server IP Address Displays the IP address of each AAA server Key Displays the encryption key for each AAA server The key is a case sensitive alphanumeric keyword of up to 127 characters that is the sa...

Page 190: ...2 Click OK to add the server 3 Click Apply to PIX 4 Editing an AAA Server Follow these steps to edit an AAA Server In the AAA Servers panel select the server you want to edit from the AAA Servers table 1 Click Edit The Edit AAA Server dialog box appears 2 Make the desired changes to the selected server 3 Click OK to modify the server 4 Click Apply to PIX 5 Deleting an AAA Server Follow these steps...

Page 191: ...prompts if the authentication attempt is accepted or rejected by the authentication server The following sections are included in this Help topic Important Notes Field Descriptions Enabling an Authorization Prompt when User is Accepted Enabling an Authorization Prompt when User is Rejected Resetting to Last Applied Settings Important Notes Challenge text can be a string of up to 235 alphanumeric c...

Page 192: ...box a second time to clear it 2 Click Apply to PIX 3 Enabling an Authorization Prompt when a User is Rejected Follow these steps to enter an authorization prompt when a user is rejected Select the user rejected check box and type a text string in the box below it 1 To clear this text select the user rejected check box a second time to clear it 2 Click Apply to PIX 3 Resetting to Last Applied Setti...

Page 193: ...rty application available from http www websense com If you change policy settings within the Websense server application disable then re enable the Websense cache to ensure the cached information does not conflict with any new policy settings Field Descriptions The URL Filtering panel displays the following fields WebSense URL Server table Interface Displays the name of the network interface on w...

Page 194: ...e selected URL server URL Cache Note Access to the URL cache does not update the Websense accounting logs Before using this feature let Websense run to accumulate logs to let you view Websense accounting information After you get a usage profile that meets your security needs enable this feature to increase throughput Enable caching Select this check box to improve throughput by caching responses ...

Page 195: ...e Websense URL Server table 1 Click Delete 2 Click Apply to PIX 3 Enabling Caching Follow these steps to enable caching In the URL Filtering pane select the Enable caching check box 1 To designate destination addresses as the cache source click Destination Address To designate source addresses as the cache source click Source Address 2 Click Apply to PIX 3 Resetting to Last Applied Settings Reset ...

Page 196: ...is Help topic Important Notes Field Descriptions Important Notes The PIX Firewall enables FixUps based on the following default values FTP ftp port 21 H 323 h323 port 1720 HTTP http port 80 RSH rsh port 514 RTSP rtsp port 554 SIP sip port 5060 Skinny skinny port 2000 SMTP smtp port 25 SQL Net sqlnet port 1521 For more information about the protocols used in the FixUp panels refer to the Configurat...

Page 197: ...Copyright 2001 Cisco Systems Inc ...

Page 198: ...e FTP FixUp internal users can FTP to external servers only in passive mode For more information about the protocols used in the FixUp panels refer to the Configuration Guide for the Cisco Secure PIX Firewall Version x x Field Descriptions The FTP panel displays the following fields FTP table Low Port Displays the port number or lower port number range for the FTP Fixup High Port Displays the uppe...

Page 199: ...teps to re enable FTP FixUp after it has been disabled Enter 21 or a lower port number range in the Low port box 1 Enter an upper port number range if applicable in the High port box 2 Click Add 3 Repeat Steps 1 through 3 if necessary 4 Click Apply to PIX 5 Changing the FTP FixUp Port Numbers Follow these steps to change the FTP FixUp ports Select the port or port range you want to change in the F...

Page 200: ......

Page 201: ...The H 323 FixUp feature provides support for Intel InternetPhone CU SeeMe CU SeeMe Pro MeetingPoint and MS NetMeeting For more information about the protocols used in the FixUp panels refer to the Configuration Guide for the Cisco Secure PIX Firewall Version x x Field Descriptions The H 323 panel displays the following fields H 323 table Low Port Displays the port number or lower port number range...

Page 202: ...e Low Port box 1 Enter an upper port number range if applicable in the High Port box 2 Click Add 3 Repeat steps 1 through 3 if necessary 4 Click Apply to PIX 5 Changing the H 323 FixUp Port Numbers Follow these steps to change the H 323 FixUp ports Select the port or port range you want to change in the H 323 table 1 Click Delete 2 Enter a port number or a lower port number range in the Low Port b...

Page 203: ...re PIX Firewall Version x x Field Descriptions The HTTP panel displays the following fields HTTP table Low Port Displays the port number or lower port number range for the HTTP fixups High Port Displays the upper port number range if applicable for the HTTP fixups Add Copies the new entry into the HTTP table Low port Allows you to enter a port number or lower port number range for addition to the ...

Page 204: ...at steps 1 through 3 if necessary 4 Click Apply to PIX 5 Changing the HTTP FixUp Port Numbers Follow these steps to change the HTTP FixUp ports Select the port or port range you want to change in the HTTP table 1 Click Delete 2 Enter a port number or a lower port number range into the Low box 3 Enter an upper port number range if applicable into the High box 4 Click Add The port or port range appe...

Page 205: ...ortant Notes Field Descriptions Disabling RSH FixUp Enabling RSH FixUp Resetting to Last Applied Settings Important Notes For more information about the protocols used in the FixUp panels refer to the Configuration Guide for the Cisco Secure PIX Firewall Version x x Field Descriptions The RSH panel displays the following fields Enable Enables RSH FixUp for a PIX Firewall unit Clearing this check b...

Page 206: ... Enabling RSH FixUp Follow these steps to re enable RSH FixUp after it has been disabled In the RSH panel click the Enable check box 1 Click Apply to PIX 2 Resetting to Last Applied Settings Reset Discards changes and reverts the panel to the information displayed when it was opened or the last time Refresh was clicked while open Copyright 2001 Cisco Systems Inc ...

Page 207: ...ing to Last Applied Settings Important Notes RTSP is used by RealAudio RealNetworks Apple QuickTime 4 RealPlayer and Cisco IP TV connections PIX Firewall does not support multicast RTSP For more information about the protocols used in the FixUp panels refer to the Configuration Guide for the Cisco Secure PIX Firewall Version x x Field Descriptions The RTSP panel displays the following fields RTSP ...

Page 208: ...s in the RTSP table 2 Repeat Steps 1 and 2 if necessary 3 Click Apply to PIX 4 Changing the RTSP Fixup Port Numbers Follow these steps to change the RTSP fixup ports Select the port number you want to change in the RTSP table 1 Click Delete 2 Enter a port number in the Port box 3 Click Add The port appears in the RTSP table 4 Click Apply to PIX 5 Resetting to Last Applied Settings Reset Discards c...

Page 209: ...ses SIP to support Voice over IP VoIP gateways and VoIP proxy servers For more information about the protocols used in the FixUp panels refer to the Configuration Guide for the Cisco Secure PIX Firewall Version x x Field Descriptions The SIP panel displays the following fields Enable Enables SIP FixUp for a PIX Firewall Selecting this check box disables SIP FixUp Port Specifies port 5060 as the po...

Page 210: ...Enabling SIP FixUp Follow these steps to re enable SIP FixUp after it has been disabled In the SIP panel select the SIP check box 1 Click Apply to PIX 2 Resetting to Last Applied Settings Reset Discards changes and reverts the panel to the information displayed when it was opened or the last time Refresh was clicked while open Copyright 2001 Cisco Systems Inc ...

Page 211: ...nfiguration Guide for the Cisco Secure PIX Firewall Version x x Field Descriptions The Skinny panel displays the following fields Skinny table Low Port Displays the port number or lower port number range for the Skinny FixUp The default is 2000 High Port Displays the upper port number range if applicable for the Skinny FixUp Add Copies the Low and High port values into the Skinny table Low port Al...

Page 212: ...t Steps 1 through 3 if necessary 4 Click Apply to PIX 5 Changing the SKINNY FixUp Port Numbers Follow these steps to change the Skinny FixUp ports Select the port or port range you want to change in the Skinny table 1 Click Delete 2 Enter a port number or a lower port number range in the Low port box 3 Enter an upper port number range if applicable in the High port box 4 Click Add The port or port...

Page 213: ... For more information about the protocols used in the FixUp panels refer to the Configuration Guide for the Cisco Secure PIX Firewall Version x x Field Descriptions The SMTP panel displays the following fields SMTP table Low Port Displays the port number or lower port number range for the SMTP FixUp The default is 25 High Port Displays the upper port number range if applicable for the SMTP FixUp A...

Page 214: ... Repeat Steps 1 through 3 if necessary 4 Click Apply to PIX 5 Changing the SMTP FixUp Port Numbers Follow these steps to change the SMTP FixUp ports Select the port or port range you want to change in the SMTP table 1 Click Delete 2 Enter a port number or a lower port number range into the Low port box 3 Enter an upper port number range if applicable into the High port box 4 Click Add The port or ...

Page 215: ...ut the protocols used in the FixUp panels refer to the Configuration Guide for the Cisco Secure PIX Firewall Version x x Field Descriptions The SQL Net panel displays the following fields SQL Net table Low Port Displays the port number or lower port number range for the SQL Net FixUp High Port Displays the upper port number range if applicable for the SQL Net FixUp Add Copies the new entry into th...

Page 216: ...t Steps 1 through 3 if necessary 4 Click Apply to PIX 5 Changing the SQL Net FixUp Port Numbers Follow these steps to change the SQL Net fixup ports Select the port or port range you want to change in the SQL Net table 1 Click Delete 2 Enter a port number or a lower port number range in the Low port box 3 Enter an upper port number range if applicable in the High port box 4 Click Add The port or p...

Page 217: ...ing this feature add static routes for every network that can be accessed on the interfaces you wish to protect Only enable this feature if routing is fully specified Otherwise the PIX Firewall will stop traffic on the interface you specify if routing is not in place Field Descriptions The Anti Spoofing panel displays the following fields Interface check boxes Select this check box to enable anti ...

Page 218: ... spoofing on the interface Click Apply to PIX 2 Resetting to Last Applied Settings Reset Discards changes and reverts the panel to the information displayed when it was opened or the last time Refresh was clicked while open Copyright 2001 Cisco Systems Inc ...

Page 219: ...seconds allowed to assemble a fragment set Default is 5 seconds Edit Opens the Edit dialog box Apply to PIX Sends changes made in PDM to the PIX Firewall unit and applies them to the running configuration Reset Discards changes and reverts the panel to the information displayed when it was opened or the last time Refresh was clicked while open Show Fragment Displays the current fragment database s...

Page 220: ...etting to Last Applied Settings Reset Discards changes and reverts the panel to the information displayed when it was opened or the last time Refresh was clicked while open Copyright 2001 Cisco Systems Inc ...

Page 221: ...e the MSS within the TCP packet to the minumum specified The absolute smallest allowed segment size is 48 bytes Force TCP connection to linger in TIME_WAIT state Selecting this check box will force the PIX to retain its TCP connection information state for at least 15 seconds after the normal TCP close down sequence is seen This option helps to ensure that both sides of the TCP session receive the...

Page 222: ...ed Modifies the idle time until a TCP half closed connection closes The minimum is 5 minutes The default is 10 minutes Enter 0 0 0 to disable timeout for a half closed connection H 323 Modifies the idle time until an H 323 service connection closes This duration must be at least 5 minutes The default is 5 minutes RPC Modifies the idle time until an RPC slot is freed This duration must be at least ...

Page 223: ... to Flash a TFTP server or a failover standby PIX Firewall unit See Notes on Applying Configuration Changes Reset Discards changes and reverts the panel to the information displayed when it was opened or the last time Refresh was clicked while open Specifying the Timeout Duration for a Connection Translation or Protocol Slot Verify with Customer Service that an idle timer value should change 1 Ver...

Page 224: ...e Overrun Underruns Collisions Late Collisions Resets Deferred Lost Carrier per interface IDS counters Failover statistics Xmit Queue Rcv Queue TCP rcv TCP xmit UDP rcv UDP xmit Xlate rcv Xlate xmit Xlates current and max The following sections are included in this Help topic Field Descriptions Disabling PDM History Metrics Enabling PDM History Metrics Resetting to Last Applied Settings Field Desc...

Page 225: ...M history metrics 1 Click Apply to PIX 2 Enabling PDM History Metrics Follow these steps to re enable PDM history metrics after it has been disabled Select the PDM History Metrics check box 1 Click Apply to PIX 2 Resetting to Last Applied Settings Reset Discards changes and reverts the panel to the information displayed when it was opened or the last time Refresh was clicked while open Copyright 2...

Page 226: ...pply as slot 0 which is the lowest security level external interface to slot 1 where the internal network interface must be to slot 2 which is the next lowest security level and so on Speed Provides a box where you specify the speed of each network interface Do not specify a speed for a FDDI interface We recommend that you do not use the auto speed Name Allows you to define a name for a network in...

Page 227: ...ying them The PIX Device Manager Startup Wizard will prompt you with the Exit Wizard dialog box when Cancel is clicked Clicking Exit will close the PIX Device Manager Startup Wizard and clicking Continue will return you to the PIX Device Manager Startup Wizard panel Remember at any time in the PIX Device Manager Startup Wizard you can click Back to return to the previous panel Help Provides more i...

Page 228: ... following fields Internet Address of Router Enter the IP address of the interface on your router that is connected to your outside interface Back Returns you to the previous panel Next Advances you to the next panel Finish Submits your configuration to the PIX Firewall based upon choices in the previous panels Cancel Discards any changes without applying them The PIX Device Manager Startup Wizard...

Page 229: ... any changes without applying them The PIX Device Manager Startup Wizard will prompt you with the Exit Wizard dialog box when Cancel is clicked Clicking Exit will close the PIX Device Manager Startup Wizard and clicking Continue will return you to the PIX Device Manager Startup Wizard panel Remember at any time in the PIX Device Manager Startup Wizard you can click Back to return to the previous p...

Page 230: ...plied Settings Important Notes If you only have one subnet on one internal interface you can skip this step You can define static routes later if necessary in the System Properties tab Field Descriptions The Static Route Configuration panel displays the following fields Network Address Specify the IP address of the remote network or host Network Mask Specify the subnet mask of the remote network o...

Page 231: ...teps to do this procedure In the Network Address box type the IP address of the remote network 1 In the Network Mask box click the Network Mask arrow to select from Class A B C or host subnet masks or you can type the subnet mask of the remote network 2 In the Router s Address box type the IP address of the router that has a route to the remote network 3 In the Hop Count box select the number of h...

Page 232: ...Copyright 2001 Cisco Systems Inc ...

Page 233: ... panel Back Returns you to the previous panel Next Advances you to the next panel Finish Submits your configuration to the PIX Firewall based upon choices made in the previous panels This button is dimmed until all necessary steps have been completed in the PIX Device Manager Startup Wizard Cancel Discards any changes without applying them The PIX Device Manager Startup Wizard will prompt you with...

Page 234: ...riptions The Network Address Translation panel displays the following fields Starting Address Enter the first address in the range of IP addresses that will be presented on the outside interface Ending Address Enter the first address in the range of IP addresses that will be presented on the outside interface Network Mask Enter subnet mask of addresses used for global translation in this list Back...

Page 235: ...tartup Wizard will prompt you with the Exit Wizard dialog box when Cancel is clicked Clicking Exit will close the PIX Device Manager Startup Wizard and clicking Continue will return you to the PIX Device Manager Startup Wizard panel Remember at any time in the PIX Device Manager Startup Wizard you can click Back to return to the previous panel Copyright 2001 Cisco Systems Inc ...

Page 236: ...ns Configuring a PAT Address Resetting to Last Applied Settings Important Notes The following are limitations when using the PAT address configuration Does not work with H 323 applications and caching name servers Do not use when multimedia applications need to be run through the PIX Firewall Multimedia applications can conflict with port mappings provided by PAT Does not work with the established...

Page 237: ...Startup Wizard panel Remember at any time in the PIX Device Manager Startup Wizard you can click Back to return to the previous panel Configuring a PAT Address If you want to set up your PIX Firewall to use a global address select the Use Port Address Translation check box and enter that IP address in the PAT Address check box If you want to use the IP address of the outside interface select theUs...

Page 238: ...astion host system Iit is acceptable to use the same IP address on the inside interface that is routable on the outside interface Field Descriptions The PIX Device Manager Startup Wizard Mail Server Configuration panel displays the following fields Server s name Enter the name of the internal server that will provide mail services on your network Interface on which the server resides Select the in...

Page 239: ... and clicking Continue will return you to the PIX Device Manager Startup Wizard panel Remember at any time in the PIX Device Manager Startup Wizard you can click Back to return to the previous panel Adding a Mail Server Follow these steps to add a mail server Enter a name for the server in the Name box 1 Select which interface the mail server resides on in the Interface on which the server resides...

Page 240: ... the Exit Wizard dialog box when Cancel is clicked Clicking Exit will close the PIX Device Manager Startup Wizard and clicking Continue will return you to the PIX Device Manager Startup Wizard panel Remember at any time in the PIX Device Manager Startup Wizard you can click Back to return to the previous panel Copyright 2001 Cisco Systems Inc ...

Page 241: ... mail server on a protected network Web Server Configure rules allowing outside access to your web server This option will allow you to create the rules to allow people on the outside interface to access a mail server on a protected network Static Routes Configure static routes This option will allow you to create the rules necessary to route packets Note that this is different from creating a def...

Page 242: ...tartup Wizard will prompt you with the Exit Wizard dialog box when Cancel is clicked Clicking Exit will close the PIX Device Manager Startup Wizard and clicking Continue will return you to the PIX Device Manager Startup Wizard panel Remember at any time in the PIX Device Manager Startup Wizard you can click Back to return to the previous panel Copyright 2001 Cisco Systems Inc ...

Page 243: ...Embryonic Connections The number of embryonic connections allowed to form before the PIX Firewall begins to deny these connections Set this limit to prevent attack by a flood of embryonic connections An embryonic connection is one that has has been started but has not yet established such as a three way TCP handshake state Valid values are 0 through 65 535 If this value is set to zero the number o...

Page 244: ...er s Address box 3 Type the external IP address of the web server in the External Address box This is the IP address that people on the outside of your network will use to access your web server 4 Optionally you can set an embryonic limit to deter unlimited embryonic connections to your mail server If the Unlimited is selected you cannot type a limit in the Embryonic Connections box Unlimited is t...

Page 245: ...its your configuration to the PIX Firewall based upon choices in the previous panels Cancel Discards any changes without applying them The PIX Device Manager Startup Wizard will prompt you with the Exit Wizard dialog box when Cancel is clicked Clicking Exit will close the PIX Device Manager Startup Wizard and clicking Continue will return you to the PIX Device Manager Startup Wizard panel Remember...

Page 246: ...Copyright 2001 Cisco Systems Inc ...

Page 247: ...tocol FTP Moves files between devices Simple Network Management Protocol SNMP Primarily reports anomalous network conditions and sets network threshold values Telnet Serves as a terminal emulation protocol X Windows Serves as a distributed windowing and graphics system used for communication between X terminals and UNIX workstations Network File System NFS External Data Representation XDR and Remo...

Page 248: ...ength IHL Indicates the datagram header length in 32 bit words 2 Type of Service Specifies how an upper layer protocol would like a current datagram to be handled and assigns datagrams various levels of importance 3 Total Length Specifies the length in bytes of the entire IP packet including the data and header 4 ...

Page 249: ...layer protocol receives incoming packets after IP processing is complete 9 Header Checksum Helps ensure IP header integrity 10 Source Address Specifies the sending node 11 Destination Address Specifies the receiving node 12 Options Allows IP to support various options such as security 13 Data Contains upper layer information 14 IP Address IP version 4 addresses are 32 bits or 4 bytes in length Thi...

Page 250: ...traffic a broadcast will not cross a router Subnets are under local administration As such the outside world sees an organization as a single network and has no detailed knowledge of the organization s internal structure A given network address can be broken up into many subnetworks For example 172 16 1 0 172 16 2 0 172 16 3 0 and 172 16 4 0 are all subnets within network 171 16 0 0 All 0s in the ...

Page 251: ...e logical AND operation are discussed in the following section Logical AND Operation Three basic rules govern logically ANDing two binary numbers First 1 ANDed with 1 yields 1 Second 1 ANDed with 0 yields 0 Finally 0 ANDed with 0 yields 0 Two simple guidelines exist for remembering logical AND operations Logically ANDing a 1 with a 1 yields the original value and logically ANDing a 0 with any numb...

Page 252: ...t packets are not transmitted or retransmitted during session establishment or after session termination Each host randomly chooses a sequence number used to track bytes within the stream it is sending and receiving Then the three way handshake proceeds in the following manner The first host Host A initiates a connection by sending a packet with the initial sequence number X and SYN bit set to ind...

Page 253: ...ing byte 6 next In the same packet the receiver would indicate that its window size is 5 The sender then would move the sliding window five bytes to the right and transmit bytes 6 to 10 The receiver would respond with an ACK 11 indicating that it is expecting sequenced byte 11 next In this packet the receiver might indicate that its window size is 0 because for example its internal buffers are ful...

Page 254: ...asically an interface between IP nd upper layer processes UDP protocol ports distinguish multiple applications running on a single device from one another Unlike the TCP UDP adds no reliability flow control or error recovery functions to IP Because of UDP s simplicity UDP headers contain fewer bytes and consume less network overhead than TCP UDP is useful in situations where the reliability mechan...

Page 255: ...anslation Rules and PDM graphs can be printed Preferences Save Preferences may be saved between PDM sessions Bookmarks Graphs can now be bookmarked in your browser Selecting the bookmark will open PDM and display the graph Export Graphs can be exported as a comma delimited file for import into other applications such as Microsoft Excel Password Validation The old password is now required before al...

Page 256: ...vice Pack 1 Windows NT 4 0 Service Pack 6a Windows 98 original or 2nd addition Windows ME Microsoft Internet Explorer 5 01 Service Pack 1 or higher 5 5 recommended Netscape Communicator 4 51 or higher 4 76 recommended Sun Solaris 2 6 or 2 8 running CDE or OpenWindows window manager MS Internet Explorer 5 0 or higher 5 5 recommended Netscape Communicator 4 51 or higher 4 76 recommended Redhat Linux...

Reviews: