Cisco ASA 5512-X, Hardware Installation Manual
The Cisco ASA 5512-X user manual provides comprehensive Installation Instructions, empowering users to easily set up and configure their network security device. This invaluable manual can be conveniently downloaded for free from our website manualshive.com, ensuring users have access to the necessary resources for seamless installation and optimal functionality.
Share
Download


Reviews:
No comments
Related manuals for ASA 5512-X

FastIron SX
Brand: Brocade Communications Systems Pages: 182

2nd Gen H5 Fanless
Brand: HDPlex Pages: 24
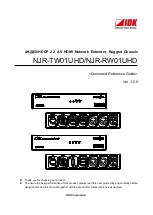
NJR-RW01UHD
Brand: IDK Pages: 44

Network Convergence System 6000 Fabric Card Chassis
Brand: Cisco Pages: 202

Nexus 3000 series
Brand: Cisco Pages: 356

Nexus 7018
Brand: Cisco Pages: 34

Nexus 7010
Brand: Cisco Pages: 402

Nexus 7004
Brand: Cisco Pages: 508

Nexus 7004
Brand: Cisco Pages: 12

NCS 4000 Series
Brand: Cisco Pages: 82

NCS 4009
Brand: Cisco Pages: 85

CoreBuilder 9000
Brand: 3Com Pages: 32

PXIe-1092
Brand: National Instruments Pages: 7

PXI Express PXIe-1082
Brand: NI Pages: 67

R14
Brand: E-LINK Pages: 2

VelocityKVM T-4200 Series
Brand: Thinklogical Pages: 23

SC513B Series
Brand: Supermicro Pages: 63

SC213X Series
Brand: Supermicro Pages: 62


