

Phoenix Quad-T Quick Start
1
020-000879-02 Rev. 1 (08-2017)
Phoenix Quad-T Quick Start
What you will need
One CAT 5E or CAT-6 Ethernet cable
A device with a web browser
Up to 4 HDMI cables
Phoenix system
Managed network configured to support multicast streaming
Power
Optionally for reachback control, up to 4 mini USB to USB-A cables
1.
Set up the unit.
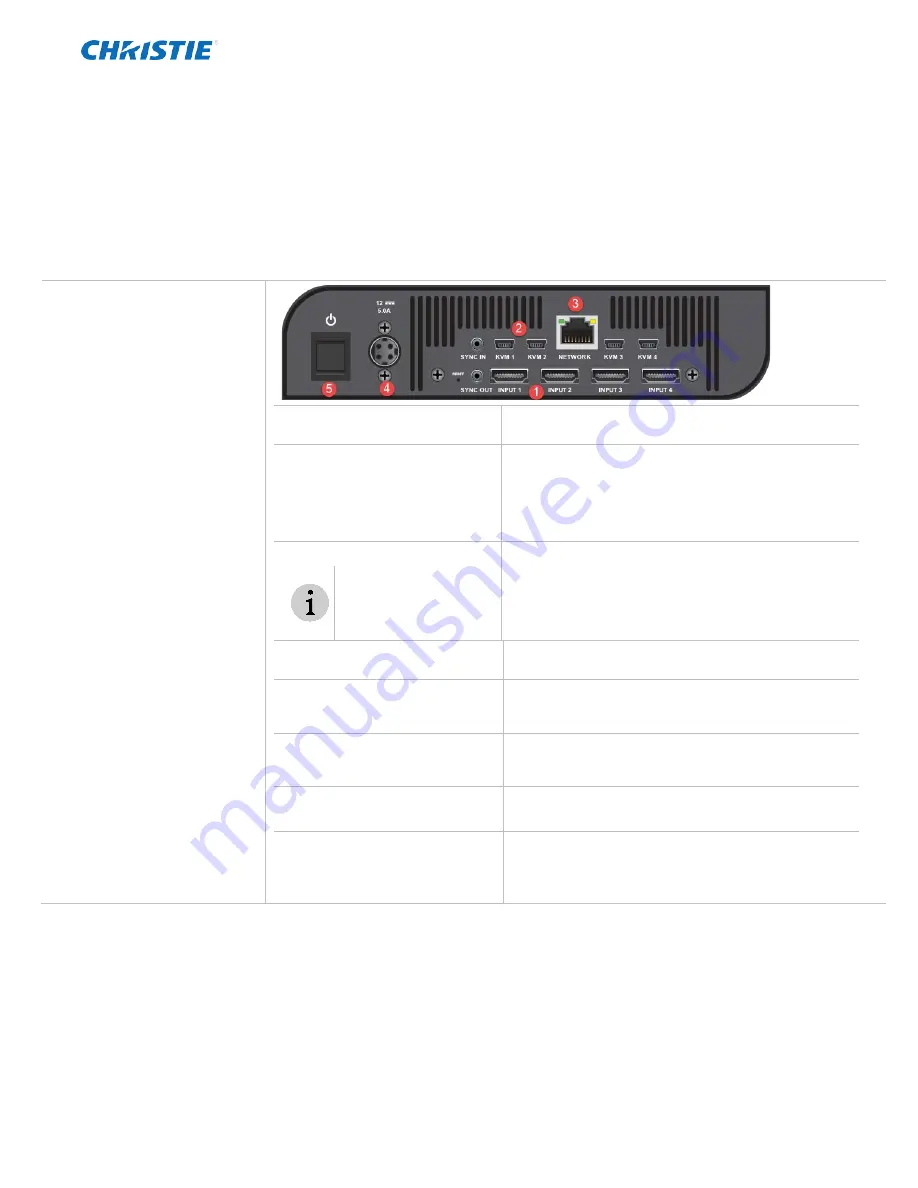
1.
Connect video sources to Input
1-4.
Connect one end of the HDMI cable to the device and
the other end to the source.
2.
Optionally, set up the
connectors for reachback
control (KVM1 is used for the
source connected to Input 1,
KMV2 for the source connected
to Input 2, etc.).
•
Connect a mini USB connector to the KVM port on
the Quad-T.
•
Connect the USB-A end to the source.
3.
Connect the unit to a network.
Confirm the network has a
managed network switch
and that it has been
configured to support
multicast streaming
.
Connect one end of a Ethernet cable to the Network
connector on the unit and connect the other end to the
managed network.
4.
Connect the power cable.
Connect the 4-pin power cable to the back of the unit.
Connect the other end to a power source.
5.
Power on the unit.
Press the power switch. When the unit is ready for use,
the IP address of the unit is displayed on the front
panel.
6.
Connect a browser-enabled
device (for example, laptop) to
the same network as the unit.
Contact your system administrator if needed.
7.
Connect to the Phoenix Quad-T
Web Manager.
Open a browser and browse to the IP address displayed
on the front panel. The login page for the web manager
is displayed.
8.
Log in.
Default user name: service
Default password: service
Change the default settings using the System Settings
page.


