

LIT GUID START Brio Team+ 020-101702-02 Rev. 1 (7-2015)
Page 1
I
N
A
LINE
NETWORK 1
NETWORK 2
O
UT
I
NPUT A
I
NPUT B
I
N
B
1
2
3
4
COM
OUTPUT A/B
ANT
KVM A KVM B
Brio Team+
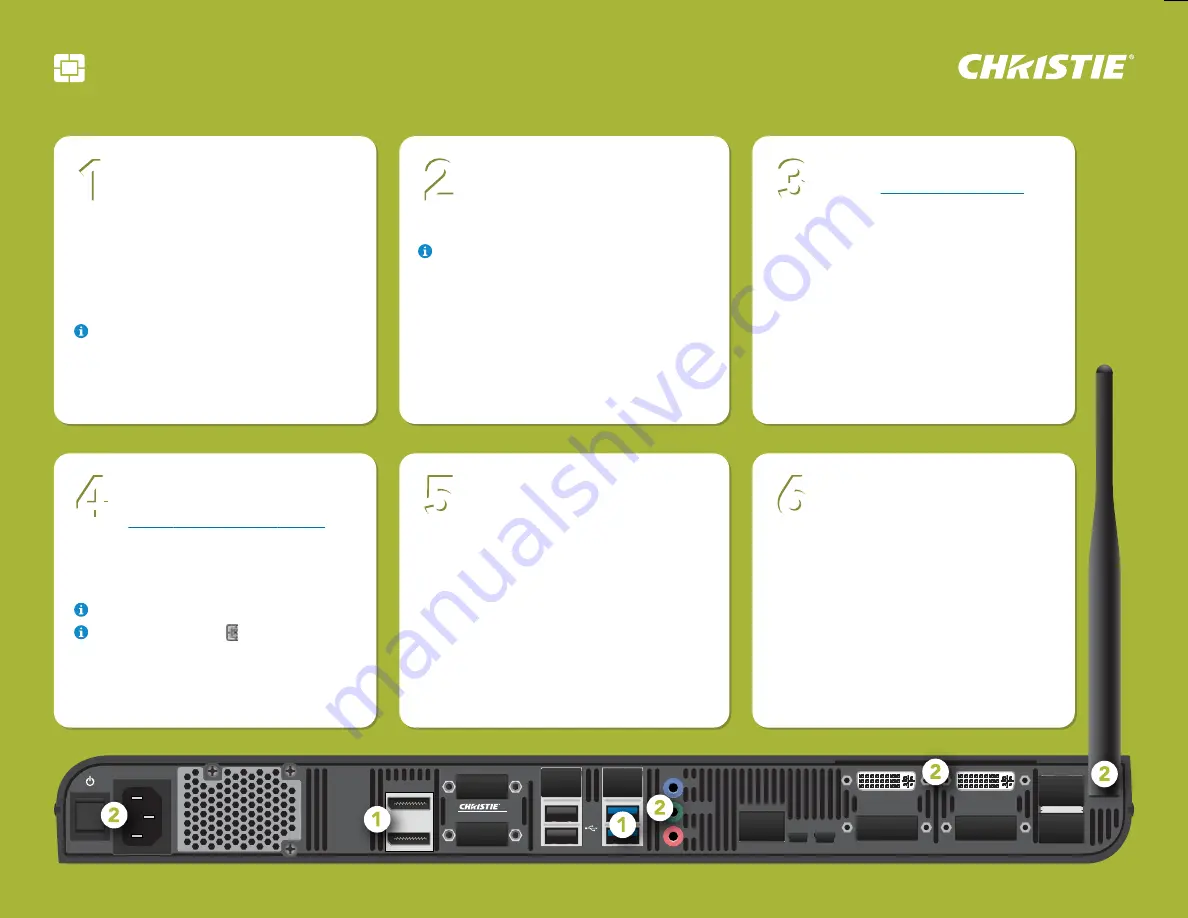
Connect displays
With Brio powered off, connect
a touch display to
Output A
(DisplayPort connector) and connect
the USB cable from the display to a blue
USB port. Optionally, connect a second
display to
Output B
(DisplayPort) and to a
blue USB port. Set the second display to
the right of the first display.
A multi-touch display is required for the
touch interface, whiteboarding, and annotating.
Finish connections and
power on Brio
•
Attach the antenna.
•
Connect the speakers to
Line Out
.
Optionally, audio for a DisplayPort may be
selected in System Settings.
•
Optionally, connect DVI sources to
Input
A
and
Input B
.
•
For audio, connect
In A
for the DVI device
connected to
Input A
and connect
In B
for
the DVI device connected to
Input B
.
•
Plug in the power cord and press the
power
button.
Activate your Brio
Go to
www.updatebrio.com
and
complete the activation form.
Download the current software and
documents to a USB drive. Insert the USB
drive into a USB port on Brio. Connect
your device to the Brio WAP (Brio’s Wi-Fi)
using the information displayed on the
Splash Screen (on the Brio outputs).
Connect devices
To connect personal devices
to Brio and start sharing content,
follow the instructions on the Splash
Screen, and then browse to the Brio IP
address or DNS name (for example
http://10.10.30.143
or
http://Brio72
)
for additional information.
The specific method for connecting a
device to Brio depends on the operating
system for that device.
Select connection option
Using the information on the
Splash Screen, reconnect to the
Brio WAP after restart.
Access the admin page (see step 4) to set
up a wireless network for Brio. From the
Network tab in System Settings, choose
the desired wireless network. Connect to
the wireless network using the updated
information on the Splash Screen.
Optionally, use the Brio WAP to connect
devices to Brio.
Access the admin page
Open a web browser and enter
http://Brio IP address/admin
(password: admin). From the
Software tab in System Settings, use the
Update from USB on Brio
button to
update your Brio.
This may take several minutes to complete.
If your touch control is not responding,
select the
Toggle touch mapping
button on
the General tab in System Settings.
6
5
4
3
2
1
Brio Team+ Quick Start Guide


